Table of Contents
Advertisement
Advertisement
Table of Contents

Related Manuals for Clarion FX688A


Summary of Contents for Clarion FX688A
- Page 1 Display Audio System OWNER’S MANUAL...
-
Page 2: Table Of Contents
Contents 1. PRECAUTIONS ....................4 Hot plugging function ..................13 2. CAUTIONS ON HANDLING ................4 Connecting a USB memory/MTP device .............14 3. OPERATION PANEL ..................6 Watching/Listening to a track with USB memory device ......14 Functions of Buttons ................... 6 Unplug the USB memory/MTP device ............14 4. - Page 3 Contents Switch to Previous/Next Track ................20 User Manual ......................30 Fast Forward/Backward ...................20 Bluetooth Settings .....................30 Quick Connect ....................20 Bluetooth Function ....................30 14. Bluetooth® TELEPHONE OPERATIONS ..........21 Phonebook auto download Function .............30 Introduction to Bluetooth® Technology ............21 Bluetooth device manager ................31 Select Phone Mode ...................21 Pairing with a phone ..................31 Voice Dialer ......................21...
-
Page 4: Precautions
1. PRECAUTIONS 2. CAUTIONS ON HANDLING CAUTION Operation Panel Please observe the following cautions. The units touch screen panel is designed to op- As the driver, you are responsible for your safety If the unit requires to be removed or reinstalled, erate properly in the temperature range of 0˚... - Page 5 Do not use benzene, thinner, car cleaner, etc., as and LGPL version 2.1. For full details, please visit these substances may damage the unit or cause https://opensource.clarion.com.my/. the paint to peel. Full details for all open source licensed programs Leaving rubber or plastic based products in con-...
-
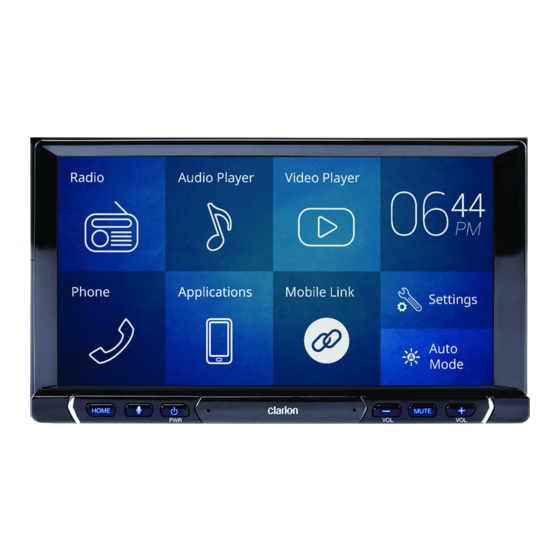
Page 6: Operation Panel
3. OPERATION PANEL 6.75” Resistive touchscreen TFT Microphone [MUTE] [HOME] [Volume -] [Volume +] Functions of Buttons [ HOME ] USB ports (rear)* [ MUTE ] Press the button when the unit is turned on to USB mass storage device/MTP/iPod/iPhone/An- Mute/ unmute audio. -
Page 7: Functions Of Steering Wheel Remote Control Buttons
4. Functions of Steering Wheel Remote Control Buttons Radio USB1/ USB2 Phone Mode /iPod/ iPhone/ Keypad Phonebook History Incoming Call Outgoing Call Call In Pro- BT Audio Dialled/ gress Button Missed/ Recent SOURCE Change valid Audio Source Mode No function (Radio Audio USB1 Audio USB2... -
Page 8: Basic Operations
5. BASIC OPERATIONS Turning on/off the power 4) Clock display. 2. Press the [ ], [HOME] or [VOICE] button for the display to return to previous display. 5) Day / Night / Auto mode button Note: • Be careful about using this unit for a long time without 6) Settings button. -
Page 9: Parking Brake Safety
6. RADIO MODE OPERATIONS Parking Brake Safety The video at the unit can only be displayed when the parking brake is enabled (when the car is parked). Listening to the Radio 14) AM Radio tab The audio portion of the video can still be played, 1. -
Page 10: Rds Text
RDS Text Storing preset memory 1. Press the button to display RDS text for cur- Preset memory function can store up to 20 stations: rent station. 20 stations for FM and AM. 2. Press the [Cancel] button to close the RDS text Notes: message box. -
Page 11: Rds Operations
7. RDS OPERATIONS (If equipped) • TP : Traffic Programme 2. During TA standby mode, press the “Traffic An- noucement (TA)”. The “TA” indicator in the dis- * RDS interrupt does not function during AM radio play goes off and TA standby mode is cancelled. reception. -
Page 12: Volume Setting Of Ta, Emergency Broadcast, And Pty
• Turning on PTY PTY Item Jazz Music Jazz 1. Press the button to select the RDS Tab. The ENGLISH CONTENTS Country Country tab controls will change accordingly. 2. Press the “Programme Type (PTY)”, PTY stand- News News National Music National music by mode is turned on. -
Page 13: Af (Alternate Frequency) Function
8. USB MODE OPERATION AF (Alternate Frequency) Function The AF function switches to a different frequency on the same network in order to maintain optimum • This unit does not support connections to a com- reception. This system can play audio files (MP3/WMA/AAC/ puter. In addition, connections made through a 1. -
Page 14: Connecting A Usb Memory/Mtp Device
Connecting a USB memory/MTP device CAUTION • For safety driving purpose, avoid inserting the USB mem- ory/MTP device directly into the USB port. • Always backup and save important data on your com- puter. Unplug the USB memory/MTP device 1. Remove the USB memory/MTP device from the USB slot during playback or reading. -
Page 15: Usb Video Operations
9. USB VIDEO OPERATIONS Showing video mode screen Play/Pause Playback 1. Press the button to pause during playback. 2. Press the button again to resume playback. Switch to Next/Previous Video 1. Press the button during playback to play previous/next video. Fast Forward/Fast Backward Operation 1. -
Page 16: Usb/Mtp Audio Operations
10. USB/MTP AUDIO OPERATIONS Playing Audio Files in USB memory/ • All Repeat MTP device The tracks in current playlist will be played repeat- edly. Play/Pause Playback 1. Press the button to pause during playback. • Repeat Off Disengage the unit from repeat play. 2. -
Page 17: Selecting A Track On The Album View
Selecting a Track on the album view 4. Select the album from the album list to switch to Selecting a Track on the songs view This function allows you to select tracks from album Song list view. view. 5. Select a song from the songs list and play. 1. -
Page 18: Ipod/Iphone Operations
11. iPod/iPhone OPERATIONS This section describes operations when connected Select iPod Mode • Track Repeat to an Apple iPod/iPhone via the USB slot. When iPod is already connected Has the same behaviour as the ONE TRACK RE- 1. Press the button on the Audio Source Selec- PEAT status of iPod. -
Page 19: Selecting A Song From Ipod Menu
Artists * The supported devices above were tested with the re- spective versions listed in the table. Other versions of the Albums same devices may not work properly. Songs * For further details on device compatibility, please visit: Genres http://clarion.com.my/iop-compatibility... -
Page 20: Bluetooth® Audio Player Operations
13. Bluetooth® AUDIO PLAYER OPERATIONS Some Bluetooth mobile phones have audio features, Controlling the Bluetooth Audio Player Quick Connect and some portable audio players support the Blue- Note: tooth feature. These devices will be called as “Blue- • Occasionally, depending on the environment, playback tooth audio players”... -
Page 21: Bluetooth® Telephone Operations
14. Bluetooth® TELEPHONE OPERATIONS Introduction to Bluetooth® Technology Keypad screen Bluetooth® wireless technology is a radio technol- ogy that connects devices, such as mobile phones and headsets, without wires or cords over a short distance of approximately 10 meters (approximately 33 feet). -
Page 22: Phonebook
Phonebook Call log tab You can use the Phonebook data obtained from the The system will memorize the Dialed/Received/ device to make a call from this unit. Missed calls record data in the memory. The data can be used to make a call from this unit. • Making a Call Using the Phonebook 1) Contacts List 2) Alphabetical Search Button... -
Page 23: Sync Tab
Sync tab 2. When the call is finished, press the button to 1. Press the button to answer the incoming call. 1. Press the tab to manually sync the phone- hang up. 2. Press the button to reject the incoming call. book or call log. -
Page 24: Joined Call Conversation With 2 Different Numbers
15. AUX OPERATIONS Joined call conversation with 2 different num- End call during multiple call conversations bers • The following Telephone interrupt screen is dis- • The following Telephone interrupt screen is dis- played during end call selection played during merged 2 conversation call This system has AUX input at the front panel where you can listen to sounds and music from external 1) Select your desired call to be ended, system will... -
Page 25: Applications
16. APPLICATIONS Initializing Applications 3. Re-enable the car navigation application. Notes: • The compatible applications need to be installed on the Go to Applications at the Home Screen. • smartphone device before connecting to the unit. Notes: • For safety purposes, please do not operate the smart- • Please refer to Quick Start Guide for supported applica- Press the car navigation application to open the •... -
Page 26: Android Auto
17. ANDROID AUTO™ Initializing Android Auto Accessing Android Auto 2. On the Home Screen, press to go to the “An- (by physical buttons) 1. Press the [VOICE] button to go to Google voice droid Auto telephony” screen. Notes: command display. Press the [VOICE] button • To automatically connect to Android Auto, go to: again to exit Google voice command display and Home >... -
Page 27: Settings Operations
18. SETTINGS OPERATIONS Select Settings Balance/Fader Adjustment • Adjusting the Fader 1. Press the button on the Home Screen. 1. The adjustment range for Fader is R12 to F12. The display will change accordingly. Press the button in the tab menu to select the 2. -
Page 28: Custom Equalizer
2. The ascending order of the available preset tones • This operation is not available while driving. Clock Adjustment • A series of 13 frequency bands are available for custom- ization. The default gain for each band is 0. Each band has Flat Rock Classic Jazz an adjustable range of -12 to 12. Custom 1 Custom 2 Flat... -
Page 29: Date Settings
1. Press “Set Time” button to enter to clock settings 4. Slide upwards or downwards at the Year column General Settings display to select the Year 2. Slide upwards or downwards at the Hours col- 5. Press button to save current date settings. umn to select the hour. -
Page 30: About
• Wallpaper • Touch Panel Calibration Bluetooth Settings 1. Press “Wallpaper” to change the wallpaper. 1. Press the tab in the settings menu to select 2. Slide to the left or right to select the desired wall- Bluetooth Settings. The display will change ac- paper. -
Page 31: Bluetooth Device Manager
Bluetooth Device Manager 5. Once pairing is successful, the phone will be con- nected automatically. Some phones may require 1. Press the button in the tab menu to select manual connection from the phone. Handsfree. The display will change accordingly. 6. -
Page 32: Troubleshooting
19. TROUBLESHOOTING • General Problem Cause Measure Power does not turn on. (No sound is produced.) Fuse is blown. Replace with a fuse of the same amperage. If the fuse blows again, consult your store of purchase. Incorrect wiring. Consult your nearest service centre. Nothing happens when buttons are pressed. - Page 33 The connection is not stable. The paring process is still in progress. Make sure Handsfree (HFP) and Audio (A2DP) are connected by checking the Bluetooth Settings (refer to “Bluetooth Settings”). Please refer to the IOP list: http://clarion.com.my/iop-compatibility...
- Page 34 Launch the application on the smartphone, and make sure the application is actively running on the smartphone. The response of multi finger operation Slow response time from the smartphone. Please refer to the IOP list: (Eg: Pinch-to-zoom gesture) is not good. http://clarion.com.my/iop-compatibility...
-
Page 35: Error Display
20. ERROR DISPLAY Error Display Cause Measure DEVICE ERROR The connected USB device is not supported. If the USB device is frozen, disconnect it, and reconnect it again. Connect a proper USB device. An error occurred when controlling the USB device. Disconnect the USB device, and reconnect it again. -
Page 36: Specifications
Touch 6th Gen Supported Android OS versions Android OS 5 and above For further details on smartphone compatibility, please visit: http://clarion.com.my/iop-compatibility Declaration of conformity We declare that this model PE-3995A-A is following the provision of Directive 1999/5/EC&2011/65/EU with the essential requirements and the other relevant regula-...
Need help?
Do you have a question about the FX688A and is the answer not in the manual?
Questions and answers