
Related Manuals for Compool Lx220


Summary of Contents for Compool Lx220
- Page 1 Compool Lx220 SOLAR CONTROL SYSTEM Installation & Operating Instructions 03/22/00 941-0809...
-
Page 3: Table Of Contents
Compool Lx220 Table of Contents Table of Contents ............1 Safety Notice. -
Page 4: Safety Notice
Compool Lx220 Safety Notice Important Safety Instructions When installing and using this electrical equipment, basic safety precautions should always be followed, including the following: READ AND FOLLOW ALL INSTRUCTIONS. WARNING - To reduce the risk of injury, do not permit children to use this product unless they are closely supervised at all times. -
Page 5: Introduction
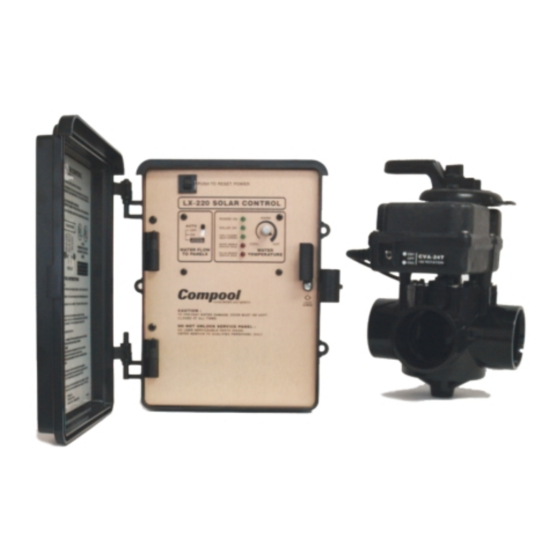
LX-220 Solar Control CVA-24T Valve Actuator PTV-2TS 3-Port Valve TS-5T Temperature Sensor (2 qty.) Note: The System is also available without Valve and Valve Actuator. Order LX220/B Solar Booster Pump System. Tools Required: 5/16” Drill for Water Sensor. Cable for Solar Sensor. -
Page 6: Plumbing Requirements
Compool Lx220 Plumbing Requirements Plumb system in accordance with recommended hydraulic schematic. 2” dia. plumbing is advised to ensure maximum flow of water through the solar panels. A solar booster pump should be added if panels are installed at a very high elevation. -
Page 7: Installation Instructions
Compool Lx220 Installation Instructions Solar Control Select a convenient location to mount the Control, making sure that the location is greater than 5 feet from the Pool or Spa and no further than 15 feet from the Solar Valve. Wall-mount the Control, using appropriate screws through the three external mounting points located on the side of the enclosure. -
Page 8: Water Sensor
Compool Lx220 Water Sensor Select a convenient location to mount the Water Sensor in the plumbing system between the filter pump and filter. Drill a 5/16” dia. hole in one side of pipe, and install one of the Temperature Sensors (included) in accordance with instructions provided. Run 22 gauge 2- conductor cable (included) between the Sensor and low voltage compartment of the Solar Control. -
Page 9: Pool Cleaner Protection
Compool Lx220 Pool Cleaner Protection Recommended for use in pool systems which utilize a “booster pump” pool cleaner. This feature automatically turns off the pool cleaner pump for a few minutes whenever solar is initiated. This will protect the pump from damage caused by air in the solar panels at system start-up. -
Page 10: Second Valve Actuator
Compool Lx220 Second Valve Actuator It is possible to control a maximum of two Valve Actuators. Plug the second Valve Actuator into VLV2 socket. System Start-up Apply power to the system. Place the WATER FLOW TO PANELS Switch in the “OFF” position. The POWER ON and POOL CLEANER DELAY EXPIRED Lights should come on. -
Page 11: Operating Instructions
Compool Lx220 Operating Instructions Water Flow To Panels Switch AUTO: Automatically turns system on whenever solar energy is available. Switch should be left in this position during normal use. OFF: Manually turns solar system off. ON: Manually turns solar system on, regardless of solar availability. This position should be used only to test system operation. -
Page 12: Water/Solar Sensor Service Required Lights
SENSOR SERVICE REQUIRED Light will come on. This indicates that the Sensor and its wiring connections should be inspected by your Pool Serviceperson. Replace defective Sensor with 10K Thermistor Sensor (Compool model TS-5T). Push To Reset Power Button An internal circuit breaker protects the Solar Valve and control circuitry from electrical overload situations. -
Page 13: Problem Solving
Compool Lx220 Problem Solving Power On Light Does Not Illuminate Verify the circuit breaker at sub-panel is not tripped. If the 3-amp Circuit Breaker on the LX- 220 is tripped, it is most often due to a defective Circuit Board or Valve Actuator. Try disconnecting each one separately to determine which one is at fault. - Page 14 Compool Lx220 Table 1: DEG. F OHMS 34574 30008 26109 22771 19906 17440 15314 13477 11884 10502 9299 8250 7333 6531 5827 5208 4663 4183 3758 3382 3048 2752...
-
Page 15: Warranty
Compool, Inc.; or which have been damaged because of a defect in a component or part which is not part of the Compool Control System; or upon which the serial number or manufacture date has been altered, effaced or removed. -
Page 16: Index
Compool Lx220 Index Checking The Temperature Sensors 11 High Voltage Wiring 6 Important Safety Instructions 2 Index 14 Installation Instructions 5 Introduction 3 Operating Instructions 9 Package Contents 3 Plumbing Requirements 4 Pool Cleaner Delay Expired Light 9 Pool Cleaner Protection 7...
Need help?
Do you have a question about the Lx220 and is the answer not in the manual?
Questions and answers
where can I buy water sensor