Table of Contents
Advertisement
Advertisement
Table of Contents

Related Manuals for Essentials CFSGSV17


Summary of Contents for Essentials CFSGSV17
- Page 1 INSTRUCTION MANUAL SINgLe OveN CFSgSv17/CFSgWH17...
-
Page 2: Table Of Contents
Contents Safety Warnings ..........................4 Unpacking ............................. 7 Product Overview ......................... 8 Front View ...................................8 Top View ..................................8 Control Panel ................................9 Gas Burners .................................9 Before Using Your Cooker ......................9 Using the Hob Burners ....................... 10 Flame Failure Device ............................10 If the Burner Does Not Light .......................... - Page 3 Removing the Oven Door ......................20 Removing the Oven Glass ......................21 Replacing the Oven Lamp ......................22 Installation ..........................23 Ventilation Requirements ......................24 Adjusting the Feet ........................24 Moving the Cooker ........................25 Stability Device ........................... 25 Gas Connection ........................... 26 Installation for Using Natural Gas ........................
-
Page 4: Safety Warnings
Safety Warnings IMPORTANT SAFETY INSTRUCTIONS READ CAREFULLY AND KEEP FOR FUTURE REFERENCE • This appliance must be installed by a qualified Gas Safe registered engineer (in the UK). The manufacturer is not responsible for any damage caused by incorrect installation. • Check whether there is any damage to the appliance after you have unpacked it. - Page 5 the hazards involved. Children shall not play with the appliance. Cleaning and user maintenance shall not be made by children without supervision. Cleaning and user maintenance shall not be made by children without supervision. • During use the appliance becomes hot. Care should be taken to avoid touching the parts inside the oven or the hob burners/pan stands.
- Page 6 • This appliance is not designed to be used with hob guards. Use of inappropriate hob guards can cause accidents. • Do not install your appliance behind a decorative door it may over heat. • The cooker must not to be used with an extension lead. • To prevent the appliance tipping, the stabilizing bracket must be installed.
-
Page 7: Unpacking
Unpacking Remove all packaging from the unit. Retain the packaging. If you dispose of it please do so according to local regulations. The following items are included: Shelf x 2 Grill Pan x 1 To be used in the Grill Rack x 1 oven or grill Grill Pan Handle x 1 Gas Connector x 1... -
Page 8: Product Overview
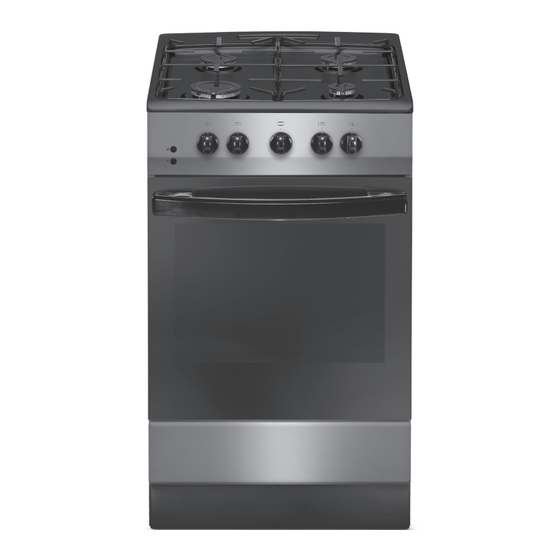
Product Overview Front View Gas Hob Adjustable Feet Control Panel Front Flap Oven Shelves Oven Door Door Seal (attached at each corner) Top View Standard Burners Small Burner (Simmer) Large Burner (Fast) * All images are for indication only; please refer to your individual unit for actual item. -
Page 9: Control Panel
Control Panel Ignition Switch Oven Control Oven Light Switch Rear Right Burner (Standard) Control Front Left Burner (Large) Control Front Right Burner (Small) Control Rear Left Burner (Standard) Control Gas Burners The relevant controls adjust the flow of gas through each of the burners. •... -
Page 10: Using The Hob Burners
Using the Hob Burners Choose the control for the burner you want to use. Press the ignition switch and at the same time press and hold the burner control in and then turn it counter-clockwise to the maximum position. Release the Ignition switch only, once the burner is lit. -
Page 11: If The Burner Does Not Light
If the Burner Does Not Light If the burner does not light, check that: • The cooker is switched on at the mains supply to enable the ignition circuit to work. • The gas is turned on. • You have held in the control for at least 5 to 10 seconds. • The ignitors are sparking. -
Page 12: Using The Oven
Using the Oven First Time Use of the Oven Ensure that nothing has been left in the oven and that the room is well ventilated. Remove any insert cards or plastic bags. Before connecting the power, use a damp cloth to carefully wipe the inner cavity wall and housing. -
Page 13: Shelf Positions
Shelf Positions On the wall of the inner cavity there are 5 different shelf guide slots. You can place the shelf at different heights to achieve the best cooking performance depending on the temperature setting and the size of food. Position 5 is the highest grill position. Always monitor the food during operation to Grill position ensure that you are not overcooking it. -
Page 14: Adjusting The Temperature
Adjusting the Temperature After you ignite the oven burner as explained before, you can adjust the temperature inside the oven as you require, using the numbers on the control: Larger numbers mean higher temperatures, while smaller numbers mean lower temperatures. Refer to the temperature table on the “Cooking” section for the approximate temperature references of those numbers. -
Page 15: Cooking With The Grill
Cooking with the Grill First Time Use Before using the grill for the first time, heat the grill on maximum for 15 ~ 20 minutes. Ensure that the room is well ventilated as there may be a little smoke and odour upon initial start up (for about 10 mins). This is normal. It is due to the protective substance on the element which protects the cooker from the effects of corrosion during shipping from the factory. -
Page 16: Attaching The Grill Pan Handle
Attaching the Grill Pan Handle The grill pan handle must be used when you slide the grill pan in and out of the oven. Locate the recess on either side of the grill pan. Tilt the pan handle up and slid over the recess. Let the pan handle fold down until its horizontal with the grill pan. -
Page 17: Cleaning Instructions
Cleaning Instructions Before you start cleaning your cooker, please: • Read the cleaning instructions and the ‘Safety Warnings’ sections. • Turn the cooker off at the mains socket and disconnect the plug from the socket. • Allow the cooker to completely cool down before cleaning. • Do not use a steam cleaner. -
Page 18: Cleaning The Inside Of Your Oven
Cleaning the Inside of Your Oven • Do not use abrasive cleaners, cloths or pads to clean the enamel. • Clean the enamel on the inside of the oven when it has cooled down, using household detergents or an ammonia-based cleaner. You may use an ‘off the shelf’ oven cleaner, if you carefully follow the manufacturers’... -
Page 19: Replacing The Hob Burner Parts
Replacing the Hob Burner Parts Check that: • The ignitor is always clean to ensure trouble-free sparking. • The probe is always clean to ensure correct operation of the safety valves. Both the ignitor and probe must be very carefully cleaned using a toothbrush. -
Page 20: Removing The Oven Door
Removing the Oven Door • Ensure the door has cooled down. • Take care when handling glass. The oven door can easily be removed as follows: Open the top oven door completely. The swivel retainers of the right hand and left hand hinges are hooked onto the metal bar above them. -
Page 21: Removing The Oven Glass
Removing the Oven Glass To remove the glass the door must be removed from the oven. Using a flat head screwdriver and gently prise the plastic vent off the door. You will need to do this on both sides. Once the plastic vent is removed the two glass panels will slide out. -
Page 22: Replacing The Oven Lamp
Replacing the Oven Lamp Ensure that the cooker is switched off at the mains before replacing the lamp to avoid the possibility of an electric shock. Let the oven cavity cool down. Oven Lamp Remove the protective cover. Unscrew and replace the bulb with a new one suitable for high temperatures (300°C). -
Page 23: Installation
Installation This appliance must be installed and serviced only by a suitably qualified and Gas Safe Registered engineer, and in accordance with the current editions of the following standards and regulations or other locally applicable regulations: • Gas Safety (Installation and Use) Regulations • Building Regulations • British Standards (BS 5440, BS 6172 and BS 6891) • Regulations for Electrical Installation (BS 7671, (Latest Edition)) -
Page 24: Ventilation Requirements
Ventilation Requirements This appliance is not connected to a combustion products evacuation device. It should be installed and connected in accordance with current installation regulations. Particular attention should be given to the relevant requirements regarding ventilation. The appliance should be installed in a room or space with an air supply in accordance with the latest edition of BS5440-2. -
Page 25: Moving The Cooker
Moving the Cooker • Two people must always raise the cooker, as shown, to prevent damaging the adjustable feet. • Do not lift the cooker by the door handles. • DO NOT DRAG the cooker. Lift the feet clear of the floor. The product must NOT be moved by dragging. -
Page 26: Gas Connection
Gas Connection • Only a suitably qualified and Gas Safe Registered Engineer may convert the appliance to a different gas type. • This cooker uses and is ready to use NATURAL GAS only and cannot be used with any other gas without modification. -
Page 27: Replacement Of Burner Injectors
Replacement of Burner Injectors Only a suitably qualified and Gas Safe Registered Engineer may change the Hob Injectors. It is illegal to attempt to change the Hob Injectors yourself. Select the injectors to be replaced according to the “Injector Size Table”. To Replace the Hob Injectors Spanner • Turn off and isolate the gas and electric supplies to the cooker. -
Page 28: Injector Size Table
Injector Size Table Natural Gas Burner Injector Values According To The Gas Type. G 30/31 G 20 Destination: GB Gas Category II 2H3+ 28-30/37 mBar 20 mBar Injector 0.83 1.17 Large Burner (Fast) Gas Flow (15°C and 1013mbar) 203 gr/h 266 lt/h Power 2.800... -
Page 29: Electrical Connection
Electrical Connection This cooker is fitted with a BS1363 moulded plug. The mains plug must remain accessible when the cooker is in its place of use. If the installation requires any alterations to the domestic electric system, this must be performed by a qualified electrician. -
Page 30: Product Fiche And Specifications
Product Fiche and Specifications Brand Essentials Model CFSGSV17/CFSGWH17 Product Type Gas Cooker Mass of the appliance 35 Kg Main Oven Energy Efficiency Index - Conventional 106.2 Energy Class 5.85 MJ/cycle Energy Consumption (gas) - Conventional 1.63 kWh/cycle Number of Cavities... -
Page 31: Energy Labels
Natural Gas Burner in Values Energy G 30/31 G 20-20 According to the Gas Type Efficiency 28-30/37 mBar mBar Large Burner (Fast) Power 2.8 kW 2.8 kW 54.5% Standard Burner Power 1.8 kW 1.8 kW 54.5% Small Burner (Small) Power 1.0 kW 1.0 kW 54.5%... - Page 32 For general information about this appliance and handy hints and tips, please visit www.knowhow.com/knowledgebank or call 0344 5611234. Visit Partmaster.co.uk today for the easiest way to buy electrical spares and accessories. With over 1 million spares and accessories available we can deliver direct to your door the very next day. Visit www.partmaster.co.uk or call 0344 800 3456 (UK customers only).
Need help?
Do you have a question about the CFSGSV17 and is the answer not in the manual?
Questions and answers