
Related Manuals for EcoloxTech 240


Summary of Contents for EcoloxTech 240
- Page 1 INSTALLATION MANUAL EcoloxTech 240 System EcoloxTech 102 NW 22 Miami, FL 33125 service@ecoloxtech.com...
-
Page 2: Table Of Contents
Table of Contents Standard Installation …………………………………………………………………………... Page 3 Parts and Accessories …………………………………………………………………………... Page 4 Optional Parts …………………………………………………………………………... Page 7 Tools Needed …………………………………………………………………………... Page 8 Installation Add-ons Holding Tank + Pump …………………………………………………………………………... Page 9 Remote Switch …………………………………………………………………………... Page 12 Operational Mode …………………………………………………………………………... -
Page 3: Standard Installation
(SKU: P-1030) (SKU: E-1100) Mounting Screws (Step 19) - Quantity: 3 (SKU: P-1102) EcoloxTech 240 Mounting Bracket (SKU: E-1071) Mounting Screws – Quantity: 4 (SKU: P-1103) Mounting Kit for Filter Housing (Step 8) (SKU: E-3195) Teflon Thread Seal Tape (SKU: P-1042) -
Page 4: Parts And Accessories
Parts and Accessories (for replacement parts, visit: store.ecoloxtech.com) Image Part Name / SKU Quantity Water Source Connection 3/8” Comp x 1/2” FPT Connector (SKU: P-1035) 1/2” Comp x 1/2” FPT Connector (SKU: P-1021) Fittings 3/8” OD Push Fit Check Valve (SKU: P-1118) 3/8"... - Page 5 Image Part Name / SKU Quantity Filter Housing, Filter, & Mounting Kit for Filter Housing Filter Housing 3/4” FPT (SKU: F-1015) 10" Polypropylene Filter Cartridge (SKU: F-1020) Filter Housing Mounting Bracket (SKU: P-1124) Sheet metal screws, Phillips pan head, Stainless steel 18- 8, #14 x 1-1/4”...
- Page 6 Image Part Name / SKU Quantity EcoloxTech 240 System Mounting Bracket EcoloxTech 240 Mounting Bracket (SKU: E-1071) Sheet metal screws, Phillips pan head, Stainless steel 18- 8, #14 x 1-1/4” (SKU: P-1103) Conical anchor, plastic, ribbed, #14-#16 x 1-1/4” (SKU: P-3191)
-
Page 7: Optional Parts
Optional Parts (for replacement parts, visit: store.ecoloxtech.com) Image Part Name / SKU Quantity Couplings for 3/8” Tubing 3/8” Push Fit Coupling (SKU: P-1032) 3/8” Push Fit Elbow (SKU: P-1033) Tees for Connecting Water Source 3/8” Push Fit Tee (SKU: P-1054) 3/8”... -
Page 8: Tools Needed
Tools Needed Image Name Function Cutting Polyethylene Tubing Ratcheting PVC Pipe Cutter and Cutting PVC Pipe Tongue and Groove Pliers Tightening Fittings Phillips Screwdriver Mounting Brackets Electric Drill / Driver and Phillips Mounting Brackets Screwdriver Bit... -
Page 9: Holding Tank + Pump
40 Gallon Holding Tank + Pump (SKU: E-4217) Step 1: Connecting EcoloxTech 240 System Outflow to Holding Tank EcoloxTech 240 System 3/4" MPT x 1/2" FPT Hex Bushing (SKU: E-240S) (SKU: P-1030) 1/2" OD LLDPE Red Polyethylene Tubing 40 Gallon Holding Tank with Pre-Installed Float Sensor... - Page 10 Step 2: Connecting Holding Tank to Constant Pressure Pump 40 Gallon Holding Tank with Pre-Installed Float Sensor 1” FPT X MPT PVC 90 Degree Elbow (SKU: E-1190) (SKU: P-4208) 1” MPT x Socket PVC 90 Degree Elbow Grundfos Scala2 Composite Pump - 110/120V (SKU: P-1196) (SKU: G-1011) 1”...
- Page 11 Step 3: Connecting Float Sensor to EcoloxTech 240 System 40 Gallon Holding Tank with Pre-Installed Float Sensor EcoloxTech 240 System (SKU: E-1190) (SKU: E-240S) Sensor-to-System Quick Connect Cable (SKU: E-3192) Operational Mode After connecting the float switch sensor, the system must be set to “Level Mode”. See page 13 for instructions on changing the operational mode.
-
Page 12: Remote Switch
Remote Switch (SKU: E-1187) EcoloxTech 240 System Remote Switch (SKU: E-240S) (SKU: E-1187) Sensor-to-System Quick Connect Cable (SKU: E-3192) Operational Mode After connecting the remote switch sensor, the system must be set to “Level Mode”. See page 13 for instructions on changing the operational mode. -
Page 13: Operational Mode
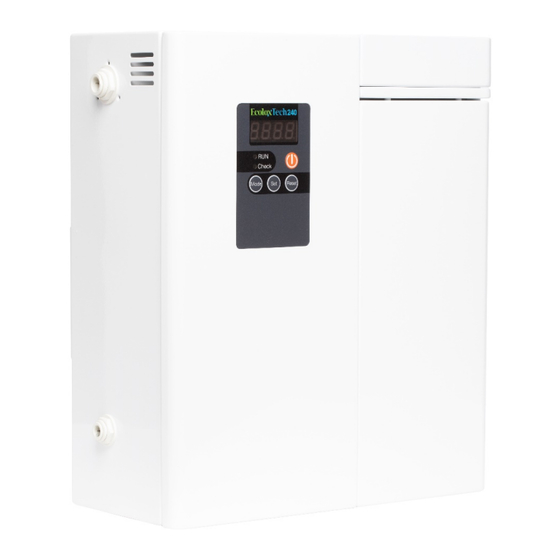
Operational Mode Description LED display System is running Check error code in LED display System RUN On/Off Mode button (see uses below) Set button (see uses below) Reset alarm to resume running Operational Modes Standard Mode Setting to standard mode: 1.
Need help?
Do you have a question about the 240 and is the answer not in the manual?
Questions and answers