Table of Contents
Advertisement
Advertisement
Table of Contents

Subscribe to Our Youtube Channel
Related Manuals for snug SnugStat


Summary of Contents for snug SnugStat
- Page 1 SnugStat Instruction Manual...
- Page 3 WELCOME SnugStat makes smart, high performance heating, easier than ever. This guide tells you everything you need to know.
-
Page 4: Table Of Contents
CONTENTS Mode Selection Pairing with SnugStat App LCD Display Operation of Main Display Icons Mode 1-Thermostat Hold Mode Holiday Mode Away Mode Operation of Feature Settings Language and Time Zone Selection Clock Setting Backlight Setting... - Page 5 Standby Screen Screen Lock Temperature Format Temperature Limit Away Defrost Sensor Selection Floor Temperature Limit Daylight Saving Time Mode 2-Time Clock Setting the Time Clock Boost Mode System Information Reset to Factory Settings Installation Technical Specification Wiring Diagrams Recalibration...
- Page 7 INTRODUCTION...
- Page 8 INTRODUCTION What is a Programmable Thermostat? A programmable room thermostat is a device that combines the functions of both a room thermostat and timed heating controller into a single unit. The programmable thermostat is used to switch the heating system in your home on and off as needed.
- Page 9 All types of thermostats need a free flow of air to sense the best temperature, so they must not be placed in a cupboard or covered by curtains or blocked by furniture. Radiant heat created by the sun, shining directly onto the thermostat through a window and heat from nearby electric fires, wall or lamps may prevent the thermostat from reading the correct temperature in the room.
-
Page 10: Mode Selection
Mode Selection SnugStat can either be used as a Thermostat or a Time-clock. Thermostat Mode (Fully Programmable Mode) – Allows Time and Temperature Settings to be made. This allows the thermostat to be programmed to a specific temperature during a specific time. - Page 11 Press the icon and enter Feature Settings. Use the icons to turn to page 4. Find ‘Work Mode’ Selection, press it and enter Selection Interface. Select ‘Heating Mode’ or ‘Timer Mode’, the thermostat will re-set and enter the desired Mode.
-
Page 12: Pairing With Snugstat App
GETTING STARTED Pairing the SnugStat Thermostat with the SnugStat App Download the free SnugStat App from the Apple Store or the Google Play Store by searching SnugStat. Open the SnugStat App and register your account. Login to your account. Press the Icon. - Page 13 Select room name or manually type in. Press ‘Next’. Enter the Wi-Fi password then press ‘Next’. On the SnugStat, press the icon and enter Feature Settings. Find ‘App Matching’ and press it. Wait for the devices to pair. (This may take several minutes to activate).
-
Page 14: Lcd Display
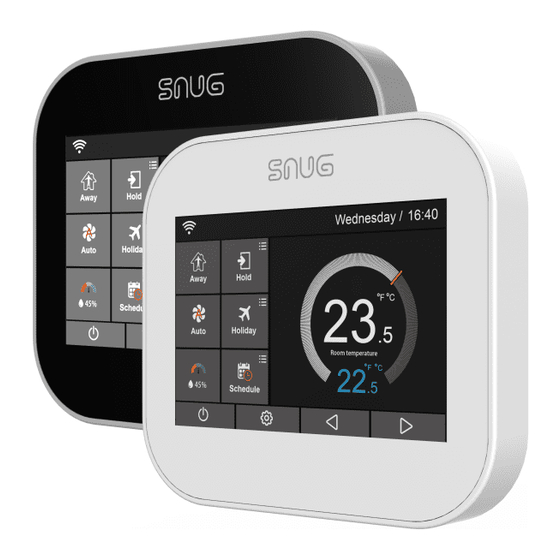
Setup button. Adjusting the optional settings. Adjusting the temperature setting. Day indicator and clock. or turning a page. ‘Away’: Means the SnugStat is Target temperature. maintaining a lower temperature Actual temperature display. to improve efficiency whilst away. Temperature reading is in 0C (Turn ON Status). - Page 15 02 03 09 10...
-
Page 17: Operation Of Main Display Icons
OPERATION OF MAIN DISPLAY ICONS... -
Page 18: Mode 1-Thermostat
Mode 1-Thermostat Programing the SnugStat Thermostat The SnugStat arrives preset to the weekday / weekend (5/2 day) setting. This is the default mode. If you would like to change this, turn to page 22. 01 Press the ‘Schedule’ icon on the main screen. - Page 19 Press the first column and use the icons to set the desired hour. Press the second column and use the icons to set the desired minute. For Example: The Setting Time is 04 (Hour):00 (Minute) Press the third column of ‘Temperature’, use the icons to set the desired temperature.
-
Page 20: Hold Mode
The time will count down for the set duration and then revert to the normal program setting. Holiday The SnugStat will maintain the defrost preset temperature for the duration of the holiday and will then automatically return to the programmed mode on your return. -
Page 21: Away Mode
01 Press the ‘Holiday’ icon on the main screen. 02 Select the holiday OFF/ON icon. 03 Press the column of Day/Month/Year, use the icons to set the Day/Month/Year values under Holiday Start. 04 Press the column of Day/Month/Year, use the icons to set the Day/Month/Year values under Holiday End. - Page 22 The following settings are optional and in most cases, need not be adjusted. Schedule: The SnugStat thermostat provides three programming modes and can also be set to a non-programmable mode: Weekday / Weekend (5 + 2) Programming - Allows you to edit the 4 time periods for the weekday and 4 time periods for the weekend.
- Page 23 7 day programming mode - can be programmed each day for 4 time periods. 24 hours mode - Every day can be edited for 4 time periods. Temperature Format: Selecting between 0C and 0F. Switching Differential: This function allows you to increase the switching differential of the thermostat.
- Page 24 Sensor Selection: You can select which sensor should be used. You can select between air temperature only, floor temperature, or both. When you enable both sensors, the floor sensor is used as a floor limiting sensor and is designed to prevent the floor from overheating. Floor Temp Limit: The function is available when the floor sensor is enabled.
- Page 25 If this function is enabled, the internal light sensor will detect when to dim the thermostat display as the ambient light levels drop. If you turn the room lights off, the display will dim so the SnugStat does not light up the room.
-
Page 27: Operation Of Feature Settings
OPERATION OF FEATURE SETTINGS... -
Page 28: Language And Time Zone Selection
OPERATION OF FEATURE SETTINGS Language 01 Press the icon and enter Feature Settings. 02 Press ‘Language’ to enter the setting interface. 03 Select your desired language. 04 Press the icon to save and return to the main screen. Time Zone Selection 01 Press the icon and enter Feature Settings. -
Page 29: Clock Setting
Clock Setting To set the clock, follow these steps. 01 Press the icon and enter Feature Settings. 02 Press ‘Clock’ Setting. 03 Press the column of Year/Month/Day, use the icons to set the Year/Month/Day values. 04 Press the column of ‘Time’, use the icons to set Hours/ Minutes. -
Page 30: Standby Screen
When Ambient Light Dimming is in mode, you can manually adjust the backlight brightness. 05 Use the icons to adjust to the desired brightness. 06 Press the icon to save and return to the main screen. Standby Screen 01 Press the icon and enter Feature Settings. -
Page 31: Screen Lock
Screen Lock 01 Touch the icon and enter Feature Settings. 02 Press ‘Screen Lock’ and enter setting interface. Lock Pin ON/OFF Icon / options 03 For example, setting the Lock Pin is 5209. 04 Press the icon to save and return to the main screen. 05 The screen will only lock once it goes into standby mode. -
Page 32: Temperature Limit
04 Press the icon in the front of 0C or 0F. 05 Press the icon to save and return to the main screen. Temperature Limit Press the icon and enter Feature Settings. 02 Find ‘Temperature Limit’, press it and enter setting interface. 03 Press the first column, use the icons to adjust Minimum Temperature to 5-340C. -
Page 33: Defrost
01 Press the icon and enter Feature Settings. 02 Find ‘Away’ option and press it. 03 Use the icons to adjust the temperature. 04 Press the icon twice to save and return to the main screen. Defrost The ‘Defrost’ function will be activated when the thermostat is turned off. The thermostat will automatically enter the ‘Defrost’... -
Page 34: Sensor Selection
Sensor Selection 01 Press the icon and enter Feature Settings. 02 Find ‘Sensor Selection’, and press it. 03 Press the circle for the sensor that you require. 04 Press the icon twice to save and return to the main screen. Floor Temperature Limit Press the icon and enter Feature Settings. -
Page 35: Daylight Saving Time
Daylight Saving Time Press the icon and enter Feature Settings. 02 Find and press ‘Daylight Saving Time’ 03 Set Auto DST ON/OFF using the icons. 04 Press the circle in front of either EU / US & CAN / AUS & NZ. 05 Press the icon twice to save and return to the main screen. -
Page 36: Mode 2-Time Clock
MODE 2-TIME CLOCK Setting the Time Clock To program the time clock times, when in time clock only mode, follow these steps. 01 Press ‘Schedule’ on the main screen. 02 Press Weekday and enter setting interface. Four time periods can be selected to program. (Each period has ON/OFF Icon Options) 03 Press the ‘Hour’... -
Page 37: Boost Mode
05 Press the ‘Hour’ of the OFF time and use the icons to adjust to the desired hour. 06 Press the ‘Minute’ of the OFF time and use the icons to adjust to the desired minutes. Repeat these steps to set all periods. Boost The Boost function allows you to override the thermostat outside of the programmed times and manually turn on for your desired time period. -
Page 38: System Information
06 The ‘Boost’ time remaining, will be displayed at the top of the screen. 07 To cancel ‘Boost’ press ‘Boost’ main icon and press cancel. System Information 01 Press the icon and enter Feature Settings. 02 Press ‘System Information’ and enter system interface. 03 Press the icon to exit. -
Page 39: Installation
05 The SnugStat will now restart, this may take a few moments. Once this is complete the SnugStat has reset to factory setting. Installation This controller must be installed by a qualified electrician and must comply with local installation regulations. -
Page 40: Technical Specification
TECHNICAL SPECIFICATION Power supply: 110-260VAC, 50/60 Hz Setting temp range: 5-350C Working temp range: -100C to +450C Power consumption: Floor Temperature Limit: 20-450C Max Switch Current: 16A - 3500W LCD screen size: 3.5 Inch Touch: Capacitive touch Hole Pitch: 60mm... - Page 41 Grade of protection: IP 40 Sensor type: NTC10k Installation type: Flush Dimension: 96 * 86 * 42.5 (W*H*D) mm...
-
Page 42: Wiring Diagrams
WIRING DIAGRAM Electric underfloor heating wiring MAINS SUPPLY 230V REMOTE AIR PROBE ELECTIC UFH REMOTE FLOOR PROBE... - Page 43 Wet underfloor heating wiring for single zone MAINS BOILER SUPPLY 230V SL PL RT2 RT1 REMOTE AIR PROBE REMOTE FLOOR UFH 2 port valve PROBE...
- Page 44 Hot water / timer mode wiring MAINS BOILER SUPPLY 230V SL PL RT2 RT1 H/W Cylinder Thermostat H/W 2 port valve...
-
Page 45: Recalibration
Recalibration Your thermostat has been fully calibrated and tested. Should this need to be changed, please follow the below. 01 Press the icon to enter the Feature Settings. 02 Press the icons to turn to page 3 and press Sensor Selection. 03 Press on the name of the sensor you wish to recalibrate. - Page 47 CAN WE HELP? Your SnugStat comes with a 2 year warranty from date of purchase. If you have any problems installing or programming your SnugStat, call our dedicated technical support team on 01772 761333, who will be more than happy to help.
- Page 48 Can We Help? Your SnugStat comes with a 2 year warranty from date of purchase. If you have any problems installing or programming your SnugStat, call our dedicated technical support team on 01772 761333, who will be more than happy to help.
Need help?
Do you have a question about the SnugStat and is the answer not in the manual?
Questions and answers