Table of Contents
Advertisement
Quick Links
Advertisement
Table of Contents

Related Manuals for Tuttnauer ELARA9-D


Summary of Contents for Tuttnauer ELARA9-D
- Page 1 OPERATI ON & MAI NTENANCE MANUAL Pre-vacuum Steam Sterilizer with Generator Models ELARA9-D, ELARA11-D Cat. No. MAN205-0497001ENRev A Tuttnauer Europe b.v., Hoeksteen 11, 4815 PR, Breda, P.O. Box 7191, 4800 GD Breda, Netherlands. +31/76-5423510, Fax: +31/76-5423540...
-
Page 3: Table Of Contents
TABLE OF CONTENTS PARAGRAPH PAGE NO. GENERAL...........................3 1.1........................... 3 NTRODUCTION 1.2......................... 3 NCOMING NSPECTION 1.3......................4 ARRANTY ESCRIPTION 1.4....................... 4 ARRANTY TATEMENT 1.5............................4 AFETY 1.6........................... 5 PECIFICATIONS 1.7......................9 ENERATOR TEAM 1.8....................... - Page 4 8.3......................29 RAINING THE ESERVOIR 8.4..................30 LEANING THE WATER OUTLET STRAINER 8.5. HEPA A ....................30 EPLACING THE ILTER TROUBLESHOOTING........................ 31 SPARE PARTS LIST ........................34 ACCESSORIES........................... 34 Page 2...
-
Page 5: General
(temperature, time and pressure). The ELARA9-D/ELARA11-D features built in memory to record up to 100 sterilization cycles. These can be reprinted on the printer or exported to a USB device to be transferred to a PC. -
Page 6: Warranty Description
Tuttnauer. Tuttnauer’s obligation is limited to the repair or replacement of parts for the autoclave. This warranty will be void if the unit is not purchased from an authorized Tuttnauer dealer. No other warranties or obligations are expressed or implied. -
Page 7: Specifications
On closing the device door, make sure it is properly locked before activating. Verify • that DOOR OPEN symbol is replaced by the message "System Ready". Verify once again that you have chosen the appropriate sterilization program. • Open the door slowly to allow steam to escape and wait 1 minute before you remove •... - Page 8 Overall Dimensions: ELARA 11-D Page 6...
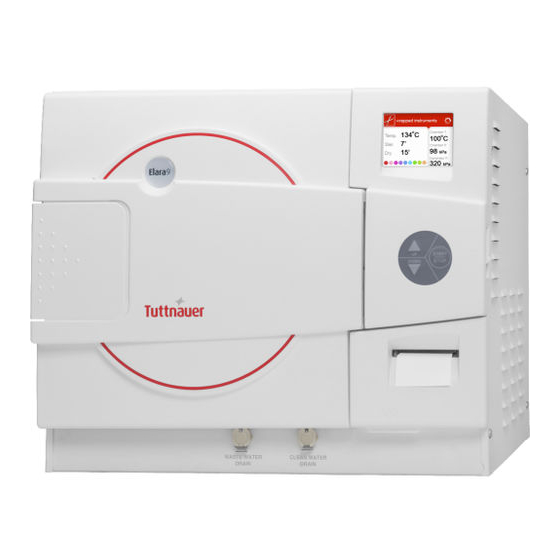
- Page 9 Front View Description Description Door switches Ventilation grill Autoclave door On/ off switch / circuit breaker Autoclave cover Keypad Mineral-free water reservoir cover Printer cover Chamber and steam generator safety valves Autoclave Leg Waste water reservoir cover USB connection Display Printer Page 7...
- Page 10 Rear View Description Description Mineral-free water reservoir cover Automatic water filling inlet (optional) Waste water reservoir cover RJ45 network connector Ventilation grills Chamber cut-off Air filter service cover 10 Chamber cut-off Opening for calibration 11 Main power electric cable socket Overflow outlet to drain Page 8...
-
Page 11: Generator Steam Data
Property ELARA9-D ELARA11-D Chamber Diameter 230 mm 280 mm Chamber Depth 504 mm 504 mm Chamber volume 19 lit 28 lit. (7.4 gal) Max. Allowable Working Pressure (MAWP) 2.8 bar Maximum load per item 0.3kg 0.3kg Maximum load per tray 1.5kg... -
Page 12: Environmental Emission Information
Cautions! In order to avoid any injury by electrical hazard, it is recommended that a ground fault protection device (GFCI) be installed in the electrical panel feeding the autoclave (local codes may make this mandatory). The electrical network must comply with local rules or regulations. Verify that there is an easy access to the main power switch and to the current leakage safety relay (GFCI). -
Page 13: Directives And Standards
Rest of metals except iron, cadmium, lead ≤0.1 mg/kg Chloride (Cl) ≤0.1 mg/kg Phosphate (P 2 O 5 ) ≤0.1 mg/kg ≤3 μ s/cm Conductivity (at 20°C) pH value (degree of acidity) 5 to 7 Appearance Colourless clean without sediment Hardness (Σ... -
Page 14: Control Panel
CONTROL PANEL Description Display On/off switch and circuit breaker Keypad USB Port Printer Page 12... -
Page 15: Keypad
The display which is an LCD panel used to display the current status of the autoclave and any Operational Messages or Error Messages. Program description: • Program icon and name • Sterilization temperature • • Sterilization time Chamber temperature • Drying Time Chamber pressure •... -
Page 16: Printer
2.2. Printer The printer prints the detailed history of each cycle performed by the autoclave. The printing is on thermal paper with 24 characters per line. It records the sterilization cycle information for subsequent consideration. The printing is on thermal paper with 24 characters per line and contains the following information: •Date: •Cycle:... - Page 17 Fig. 2 Place the paper roll making sure it unrolls in the proper direction as shown (see Fig. 3/2). The paper should roll off the top of the roll Hold the loose end of the paper with one hand and re-close the cover with the other hand as shown (see Fig.
-
Page 18: Displayed Error Messages / Symbols
2.4. Displayed Error Messages / Symbols The failures are divided into two categories: Failures that occur before completing the sterilization stage, which in this case will • leave the load unsterilized Failures that occur after completing the sterilization stage, which in this case will •... -
Page 19: Sterilization Programs
STERILIZATION PROGRAMS Sterilizatio Program Icon Name Temp n time Dry time (minutes) (minutes) Unwrapped 1 (default) 134°C (270°F ) Instruments Range: 1-99 Wrapped 20 (default) 134°C (270°F ) Instruments, Range: 30-99 Unwrapped 1 (default) Delicate 121°C (250°F ) Range: 1-99 Instruments Wrapped 20 (default) -
Page 20: Vacuum Test Process Description
Heating stage: steam is inserted into the chamber until the sterilization temperature is • reached Sterilization temperature is maintained constant during the sterilization time. • Fast exhaust, steam is exhausted out of the chamber at a fast rate until pressure •... -
Page 21: Installation Preparations
4.2. Installation Preparations Check and verify that the counter carrying the autoclave is a rigid and leveled surface and can carry a load of 102kg. Attention: The ELARA11-D is not designed for use on any standard slide out shelf. If it is necessary to use a slide out shelf, it must be tested and/or rated for 102kg or more. -
Page 22: Preparation Before Sterilization. Loading
Clean instruments immediately after use to remove any residue. It is recommended • that all instruments be ultrasonically cleaned using Tuttnauer’s Clean & Simple enzymatic cleaning tablets or other suitable solution. After cleaning, rinse instruments under tap water for 30 seconds and pat or air dry to •... - Page 23 When using a paper / plastic bag, the plastic side should always be down. Do not stack pouches. It is recommended that a pouch rack such as the Tuttnauer™ Pouch Rack be used to ensure proper steam penetration and adequate drying.
- Page 24 Cassettes in ELARA9-D should be sterilized in a horizontal position (see the figure • below). Cassettes in an ELARA11-D should be sterilized in a vertical position (see the figure • below). Place a sterilization indicator on each tray and/or inside each wrapped cassette.
-
Page 25: Operating Instructions
be an indication that the autoclave needs to be cleaned or that the instruments were not adequately cleaned or dried prior to sterilization. If removal of the spot reveals pitting then the spot is most likely rust. Rust spots on an instrument are not uncommon on inexpensive instruments. -
Page 26: Turning On The Autoclave
cooling coil. Doing so will reduce the effectiveness of cooling the hot steam during the exhaust phase of the cycle. Cautions! Under no circumstance should water be filled above the safety valve holder. In case more water is accidentally filled above the blue area, decrease the water level by draining the reservoir before starting a cycle (see 8.3). -
Page 27: Starting A Cycle
When System Ready is displayed on the screen, open the door as follows: Place your thumb on the plastic door cover (1) and the other fingers in the handle (3). Pull the handle (2) until the latch of the door is released. Open the door. -
Page 28: Stopping The Process Manually
Warnings! The sterility of the instruments processed in unwrapped cycles cannot be maintained if exposed to non-sterile environment. Don’t touch the strainer’s cover, mounted on the exhaust line, during and shortly after operation. It will get very hot. Touching the hot strainer’s cover may cause severe injuries. 6.8. -
Page 29: Entering The Main Menu
The time shown on the screen will be added to the current value and you will return to the cycle main screen. For example, if the dry time was 2 min., and you chose 10 minutes on the Add Dry Time screen, the dry time for the current cycle will be 12 minutes. -
Page 30: Maintenance Instructions
Should the need arise, technical assistance or a service technician can be requested by either calling your dealer or Tuttnauer Europe. Daily by the Operator Turn the unit on momentarily to allow the door to be opened. Open the door, then turn the unit off to stop the chamber from preheating and proceed with cleaning. -
Page 31: Draining The Reservoir
Caution! Make sure the autoclave is not hot before cleaning it Replace the air filter, every 6 months or after 1000 cycles (whichever comes first) according to 12.3. Every 3 months check the door gasket for any signs of physical damage and ask the technician to replace it if required. -
Page 32: Cleaning The Water Outlet Strainer
8.4. Cleaning the water outlet strainer Cautions! Before proceeding, Make sure that the electric cord is disconnected and there is no pressure or water in the chamber. Warnings! 1. The strainer’s cover is HOT Do not touch the strainer’s cap, mounted on the exhaust line, during and shortly after operation. -
Page 33: Troubleshooting
Note: It is recommended to replace the HEPA filter, every 6 months or after 1000 cycles (whichever is the shorter period). TROUBLESHOOTING This troubleshooting chart enables the user to solve minor malfunctions, prior to contracting our service department. Only technical personnel having proper qualifications and holding technical documentation (including a technician manual) and adequate information are authorized to service the apparatus. - Page 34 Problem/ Message / Symbol Description Corrective Action Error Message This message is displayed if I/O card is "I/O card is not disconnected (both while cycle is running Call for service connected" or not). This message is displayed if the Perform a new cycle. temperature drops for more than 1 second "Low Temp"...
- Page 35 Problem/ Message / Symbol Description Corrective Action Error Message cycle)" Wait until "cycle failed – canceled by user" or "cycle This message is displayed after the "Canceled By end – canceled by user" is START/STOP key is pressed and cycle User"...
-
Page 36: Spare Parts List
SPARE PARTS LIST DESCRIPTION PART NUMBER Filter, Air, 0.2 Micron FIL175-0066 Printer Paper 10 pack THE002-0003 ACCESSORIES DESCRIPTION PART NUMBER Handle, Tray CMT240-0097 Printer, PLUSII-S2B-0004 THE002-0052 Holder, Tray TRH234-0002 Tray TRY240-0002 Power cable 16A WIR040-0002/ WIR040-0060 Page 34...
Need help?
Do you have a question about the ELARA9-D and is the answer not in the manual?
Questions and answers