Table of Contents
Advertisement
Advertisement
Table of Contents

Related Manuals for Razer RC30-014802


Summary of Contents for Razer RC30-014802
- Page 1 DTD: 15/2/2017 User manual for Model: RC30-014801 and RC30-014802...
-
Page 2: Package Contents / System Requirements
PACKAGE CONTENTS / SYSTEM REQUIREMENTS PACKAGE CONTENTS Wireless Gaming headset ( Model: RC30-014802) Headset stand Audio hub( Model: RC30-014801) Optical cable 2x USB to Micro-USB cable Important Product Information Guide SYSTEM REQUIREMENTS PRODUCT REQUIREMENTS PC or Xbox One ™ F O R GA M E R S . B Y G AM E R S . -
Page 3: Registration / Technical Support
To learn more about Razer Synapse and all its features, visit razerzone.com/synapse. If you are already a Razer Synapse user, register your product by clicking on your email address at the Razer Synapse application and selecting Warranty Status from the dropdown list. -
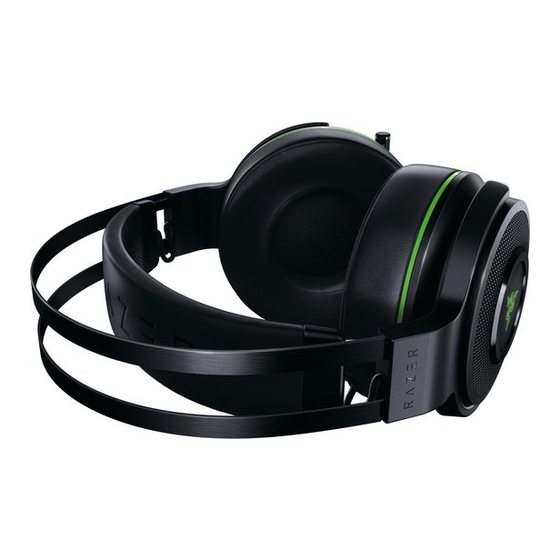
Page 4: Device Layout
Retractable microphone Game/chat balance control / microphone mute button Microphone LED Audio volume control / audio mute Razer logo backlighting button LED indicator ™ F O R GA M E R S . B Y G AM E R S . - Page 5 Headset stand Audio hub Optical output port Optical input port Xbox / PC toggle Micro-USB power port USB headset charging port Dolby Headphone button Audio hub power button USB to Micro-USB cables Optical cable ™ F O R GA M E R S . B Y G AM E R S .
- Page 6 SETTING UP YOUR RAZER THRESHER ULTIMATE FOR XBOX ONE PREPARING YOUR RAZER THRESHER ULTIMATE FOR XBOX ONE 1. Attach the headset holder to the base. 2. Attach the audio hub to the base. ™ F O R GA M E R S . B Y G AM E R S .
- Page 7 3. Place the headset onto the headset stand. 4. Plug a USB to Micro-USB cable from the audio hub to the headset. ™ F O R G A M E R S . B Y G A M E R S .
- Page 8 CONNECTING YOUR RAZER THRESHER ULTIMATE FOR XBOX ONE TO YOUR XBOX Note: Make sure to power on your Xbox One and log into your Xbox Live account before connecting your Razer Thresher Ultimate For Xbox One. 1. Set the Xbox / PC toggle to XBOX.
- Page 9 5. Go to Display & Sound > Optical Audio, and then select Bitstream Out . 6. From the Display & Sound screen, go to Bitstream Format and select Dolby Digital . ™ F O R GA M E R S . B Y G AM E R S .
- Page 10 CONNECTING YOUR RAZER THRESHER ULTIMATE FOR XBOX ONE TO YOUR PC 1. Set the Xbox / PC toggle to PC. 2. Plug a USB to Micro-USB cable from the audio hub to your PC. 3. Open your Sound settings from Control Panel > Hardware and Sound > Manage audio devices.
- Page 11 4. In the Playback tab, select your Razer headset from the list, and then click the Set Default button. ™ F O R GA M E R S . B Y G AM E R S .
-
Page 12: Charging Your Headset
CHARGING YOUR HEADSET When you first connect to either PC or console, the headset will automatically begin to charge. For best results, please fully charge the headset before using it for the first time. A depleted unit will fully charge in about 8 hours. UNDERSTANDING THE CHARGING NOTIFICATIONS The LED indicator on the headset will send out notifications depending on its current charging status, as shown here:... -
Page 13: Power Off
USING YOUR RAZER THRESHER ULTIMATE FOR XBOX ONE POWER ON Press and hold the audio hub power button until the LED indicator starts blinking. Press and hold the headset power button until you hear the ON tone or until the Razer logo starts blinking. POWER OFF Press and hold the headset power button until you hear the OFF tone or until the Razer logo turns off. - Page 14 NOTIFICATION HEADSET/AUDIO HUB STATUS Slow blinking green Searching for a device Fast blinking green Pairing mode Static green Connected / Paired USING THE DOLBY HEADPHONE TECHNOLOGY Press and hold the Dolby Headphone button for at least 2 seconds to activate/deactivate the virtual surround sound environment.
- Page 15 USING THE AUDIO VOLUME CONTROL Rotate the audio volume control to increase or decrease the volume. You will hear a short beep when you reach the minimum or maximum volume. Press the audio mute button to mute or unmute the in-game audio. ™...
- Page 16 USING THE RETRACTABLE MICROPHONE Pull the tip of the microphone until it is fully extended. Bend the microphone until it is in front of your mouth, then adjust the length as preferred. USING THE GAME/CHAT BALANCE Rotate the game/chat balance to increase the in-game volume and decrease the voice chat volume or vice versa.
- Page 17 3. From a power off status, press and hold the headset power button for at least 3 seconds. Note: The audio hub’s LED indicator and the headset’s Razer logo will blink rapidly to show that both devices are in pairing mode.
- Page 18 FCC Statement This equipment has been tested and found to comply with the limits for a Class B digital device, pursuant to part 15 of the FCC Rules. These limits are designed to provide reasonable protection against harmful interference in a residential installation. This equipment generates uses and can radiate radio frequency energy and, if not installed and used in accordance with the instructions, may cause harmful interference to radio communications.
- Page 19 Le présent appareil est conforme aux CNR d’Industrie Canada applicables aux appareils radio exempts de licence. L’exploitation est autorisée aux deux conditions suivantes : (1) l’appareil ne doit pas produire de brouillage; (2) l’utilisateur de l’appareil doit accepter tout brouillage radioélectrique subi, même si le brouillage est susceptible d’en compromettre le fonctionnement.
Need help?
Do you have a question about the RC30-014802 and is the answer not in the manual?
Questions and answers