
Related Manuals for Samsung HW-D7000


Summary of Contents for Samsung HW-D7000
- Page 1 HW-D7000 Blu-ray™ AV Receiver System user manual imagine the possibilities Thank you for purchasing this Samsung product. To receive more complete service, please register your product at www.samsung.com/register...
-
Page 2: Safety Information
FCC NOTE (for U.S.A) This equipment has been tested and found to comply with the limits for a Class B digital device, pursuant to Part 15 of the FCC Rules. These limits are designed to provide reasonable protection against harmful interference in a residential installation. -
Page 3: Important Safety Instructions
A grounding type plug has two blades and a third grounding prong. The wide blade or the third prong are provided for your safety. If the provided plug does not fi t into your outlet, consult an electrician for replacement of the obsolete outlet. -
Page 4: Precautions
3D TV, remove the 3D Active Glasses, and rest. • Watching 3D images for an extended period of time may cause eye strain. If you feel eye strain, stop viewing 3D TV, remove your 3D Active Glasses, and rest. -
Page 5: Cautions On Handling And Storing Discs
Do not load cracked or scratched discs. Handling and Storing Discs If you get fingerprints or dirt on the disc, clean it with a mild detergent diluted in water and wipe with a soft cloth. • When cleaning, wipe gently from the inside to the outside of the disc ✎... -
Page 6: Table Of Contents
Accessories Description Front Panel Rear Panel Remote Control Speaker Positioning Attaching the Toroidal Ferrite Core to the Power Cord of the Main Unit Connecting the Speakers Connecting the Bi-AMP Speaker Connecting External Devices/your TV via HDMI Connecting to your TV... - Page 7 SETUP BASIC FUNCTIONS NETWORK SERVICES OTHER INFORMATION • Figures and illustrations in this User Manual are provided for reference only and may differ from actual product appearance. Network Network Settings Network Status BD-LIVE Internet Connection System Initial Settings Anynet+ (HDMI-CEC)
-
Page 8: Getting Started
This product can play 3D contents through an HDMI cable. To implement the 3D effect, connect a 3D TV to the product using an HDMI cable, and play the 3D content while wearing 3D vision glasses. Smart Hub You can download various for pay or free-of charge applications through a network connection. - Page 9 Adds a surround back channel for more spacious sound compared to regular 5.1 channel Dolby Digital. Dolby Pro Logic llx Dolby Pro Logic IIx is a new technology that provides discrete 7.1 channels out of 2 channel or multi channel sources.It also provides Music,Movie and Game modes.
-
Page 10: Icons That Will Be Used In Manual
Getting Started Make sure you understand the following terms before reading the rest of the user manual. Term Logo Icon BD-ROM BD-RE/-R DVD-VIDEO DVD-RW(V) DVD-R DVD+RW DVD+R Audio CD JPEG DivX DivX USB storage device CAUTION ✎ NOTE Shortcut Key •... -
Page 11: Disc Types And Characteristics
If a DVD-R/-RW disc has not been recorded properly in DVD video format, it will not play on this product. Logos of Discs that can be played Blu-ray Disc 3D Blu-ray Disc... -
Page 12: Region Code
Area DVD discs (DVD-VIDEO discs) with movies. • When switching from the fi rst layer to the second layer of a dual-layered DVD-VIDEO disc, there may be momentary distortion in the image and sound. This is not a malfunction of the product. - Page 13 This format is used for recording data on DVD-RW or DVD-R discs. This product can play DVD-RW or DVD-R discs if they have been fi nalized. • If a disc that has been recorded in Video Mode by a different maker’s recorder but has not been fi nalized, it cannot be played by this product. Supported File Formats...
- Page 14 • If the index table is corrupt, the Seek (Jump) function will not be supported. • If you play a video via the network, it may not play properly depending on the network status. Video decoder • Up to H.264 Level 4.1 supported.
-
Page 15: Accessories
USB card reader The product does not support folder or fi le names longer than 125 characters. A subtitle fi le bigger than 300 KB may not be properly displayed. Some USB/digital camera devices may not be compatible with the product. -
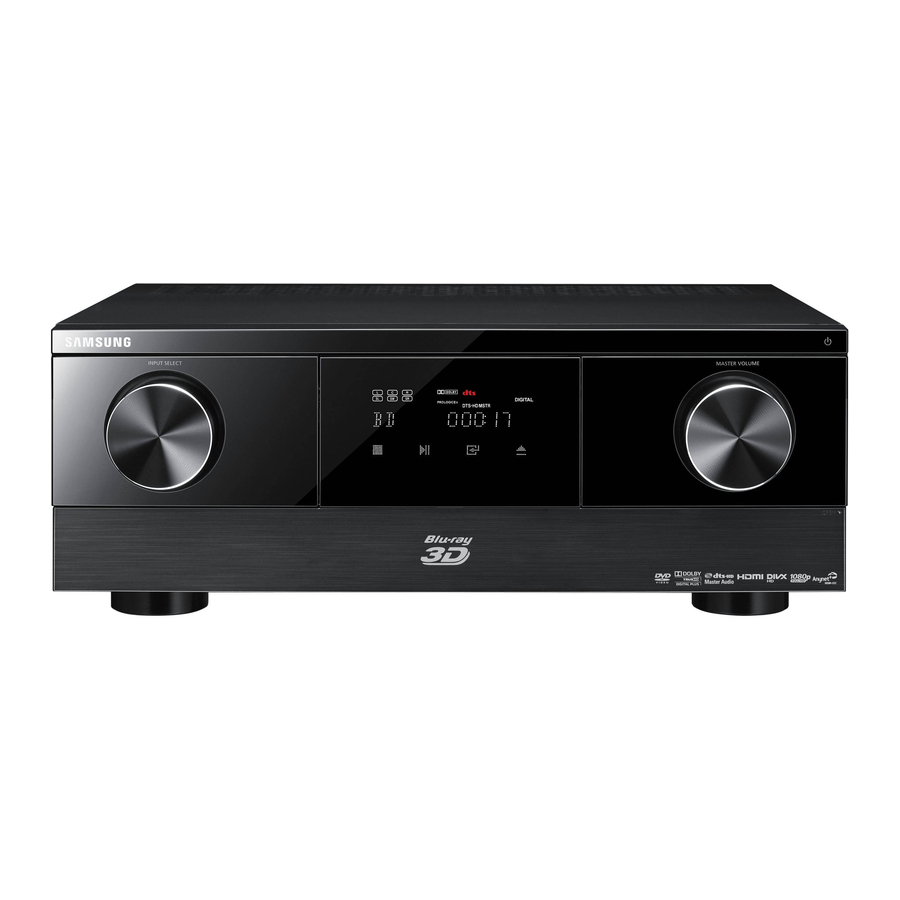
Page 16: Description
Smart HUB S.Direct vTuner AV SYNC CONTROL MODE 11 12 13 14 15 INPUT SELECT REMOTE CONTROL SENSOR Detects signals from the remote control. DISC SLOT STOP BUTTON PLAY/PAUSE BUTTON ENTER BUTTON OPEN/CLOSE BUTTON DISPLAY MASTER VOLUME POWER BUTTON (... - Page 17 When the product displays the Blu-ray disc menu, you cannot start the movie by pressing the PLAY button on the product or the remote. To play the movie, you must select Play Movie or Start in the disc menu, and then press the ENTER button.
-
Page 18: Rear Panel
Receives digital video and audio signals simultaneously using an HDMI cable. Connect the FM antenna. Receives the audio signal from a video player (SAT, GAME, TV, CD). Receives the component video signal. Outputs the component video signal. Receives the digital optical audio signal. -
Page 19: Remote Control
Press numeric buttons to operate options. After pressing the SHIFT button, Press to select S.DIRECT mode. Press to see the full screen on a TV. Press to skip backwards or forwards. Press to stop/play a disc. Cut off the sound temporarily. -
Page 20: Installing Batteries In The Remote Control
TV. • If there is more than one code listed for your TV in the table, enter one at a time to determine which code works. • Example : For a Samsung TV While holding down the POWER button, use the number buttons to enter 00. -
Page 21: Connections
Place the speakers so that their tweeters will be at the same height as your ears. Align the front face of the front speakers with the front face of the center speaker or place them slightly in front of the center speaker. -
Page 22: Attaching The Toroidal Ferrite Core To The Power Cord Of
No matter how many speakers you use, a powered subwoofer is recommended for powerful and solid bass. If you place a speaker near your TV set, screen color may be distorted because of the magnetic fi eld generated by the speaker. If this occurs, place the speaker away from your TV set. -
Page 23: Connecting The Speakers
We recommend more than 120W of permited input and connection with speaker that more than 4ohm impedance. If you use lower level products than our recommend, it can be cause of Speaker Unit or Amplifer's trouble so be cations about it. -
Page 24: Connecting The Bi-Amp Speaker
NOTE To enable the Bi-Amp feature, you must set Surround Back Setup to Bi-AMP in Settings menu. See page 41. With the Bi-AMP feature, you can use up to 5.1 channels for speaker output in the main unit. -
Page 25: Connecting External Devices/Your Tv Via Hdmi
Audio from SACD discs will not be heard with this connection. To play a DVD disc whose copyright is protected by CPPM, use a product supporting CPPM. The quality of the audio output through the HDMI jack (sampling frequency and bit rate) may be limited by the performance of the connected device. ... -
Page 26: Connecting To Your Tv
If your television is equipped with Component Video inputs, connect a Component video cable(not supplied) from the Component Video Output (PR, PB and Y) jacks on the back of your Receiver to the Component Video Input jacks on your TV. -
Page 27: Connecting A Cable, Satellite Or Set-Top Box
Connect a Component video cable(not supplied) from the COMPONENT IN (SAT) (PR, PB and Y) jacks on the back of your Receiver to the Component Video Output jacks on your SAT. Connect a Video cable from the VIDEO IN (SAT) jack on the back of your Receiver to the Video Output jack on your SAT. -
Page 28: Connecting A Game Console
Connect a Component video cable(not supplied) from the COMPONENT IN (Game) (PR, PB and Y) jacks on the back of your Receiver to the Component Video Output jacks on your Game Console. Connect a Video cable from the VIDEO IN (Game) jack on the back of your Receiver to the Video Output jack on your Game Console. -
Page 29: Connecting A Cd Player
If the CD player has only one audio output jack, connect it to either the right or left audio input jack of the main unit. Connect the audio cable's red plug to the red jack and white cable to the white jack. -
Page 30: Video Conversion Flow According To The Connected Port
Video Conversion Flow According to the Connected Port As shown in the illustration, if the unit’s HDMI Out is connected to a TV or monitor, the analog video source (composite or component) from the video device is processed for up-conversion automatically for HDMI output. -
Page 31: Connecting The Fm Antenna
Connect the FM antenna supplied to the FM ANTENNA terminal as a temporary measure. Slowly move the antenna wire around until you fi nd a location where reception is good, then fasten it to a wall or other rigid surface. -
Page 32: Connecting To A Network
✎ NOTE Internet access to Samsung’s software update server may not be allowed, depending on the router you use or the ISP’s policy. For more information, contact your ISP (Internet Service Provider). DSL users, please use a router to make a network connection. -
Page 33: Wireless Network
Select a channel for the wireless IP sharer that is not currently being used. If the channel set for the wireless IP sharer is currently being used by another device nearby, this will result in interference and communication failure. -
Page 34: Setup
Setup Initial Settings Turn on your TV after connecting the product. When you connect and turn on the product to a TV for the fi rst time, the Initial Settings screen appears. Initial Settings | On-Screen Language Select a language for the on-screen displays. -
Page 35: Accessing The Settings Menu
INFO RETURN EXIT TUNER TUNER MENU Button : Press to move to the Home menu. RETURN Button : Return to the previous menu. ENTER / DIRECTION Button : Move the cursor or select an item. Activate the currently selected item. -
Page 36: Display
TV cannot support 3D contents. • Auto : Automatically detect the 3D capability of the connected TV and play a 3D Blu-ray disc in 3D or 2D accordingly. 3D 3D : 3D Blu-ray Discs are played in 3D •... -
Page 37: Tv Aspect (Picture Size And Format)
• 16:9 Full : Select when you connect the product to a 16:9 TV screen. All content will fi ll the full screen. Content formatted in 4:3 will be stretched. • 4:3 Letter Box : Select when you connect the product to a 4:3 TV screen. - Page 38 Would you like to make a selection?” appears. If you select Yes, the TV’s screen will go blank for 15 seconds, and then the resolution will revert to the previous resolution automatically.
-
Page 39: Hdmi Color Format
24 frames per second for improved picture quality. You can enjoy the Movie Frame (24Fs) feature only on a TV supporting this frame rate. You can select Movie Frame only when the product is in the HDMI 1080i or 1080p output resolution modes. -
Page 40: Audio
You can adjust the balance and level for each speaker. Adjusting Front/Center/Surround/Surround Back/Subwoofer Speaker Level • You can adjust the volume level in steps from -10dB ~ +10dB. • The sound gets louder as you move closer to +10dB and quieter as you get closer to -10dB. -
Page 41: Test Tone
With this setting, you can enable the Dolby Pro Logic IIx mode. • PL IIz : Select this if you want to install the surround back speaker in the top front corner. With this setting, you can enable the Dolby Pro Logic IIz mode. -
Page 42: Musical Room Calibration
Running the Musical Room Calibration function takes about 3 minutes. Make sure there is no disc in the product when you run the Musical Room Calibration function. If the ASC microphone is disconnected during the Musical Room Calibration setup, the setup will be canceled. -
Page 43: Surround
SW : subwoofer Output Channel SUBW Signal Format – Digital + Dolby Digital Digital +Dolby Digital EX L, C, R, SL, SR ,SBL, SBR, SW Digital + Dolby Digital + ProLogic IIx Digital + Dolby Digital O (Height) + ProLogic Iiz... -
Page 44: Crossover Frequency
Dolby Digital or DTS source is input, and does not work with L.PCM and Dolby Digital 2 channel sources. • Auto : If the unit receives an audio signal that it can recognize, it will select an optimal decoder for playback in 6.1/7.1 channels. -
Page 45: Dual Mono
When you use this function, select audio channels CH1, CH2 or both Channel. • Ch 1 : Channel 1 is heard only. • Ch 2 : Channel 2 is heard only. • Both Channels : Both channels are heard from front speakers. - Page 46 Defi nition for Blu-ray Disc * If the Source Stream is 2ch, “Re-encoded Dolby D” Setting are not applied. Ouput will be LPCM 2ch. Blu-ray Discs may include three audio streams : - Main Feature Audio : The audio soundtrack of the main feature.
-
Page 47: Dynamic Range Control
240 msec. Set it to the optimal status. Network Before you begin, contact your ISP to fi nd out if your IP address is static or dynamic. If it is dynamic, and you are using a wired or wireless connection, we recommend using the Auto procedures. -
Page 48: Setup 47 Network
Press the ENTER button to select IP Mode. Press the ▲▼ buttons to select Manual, and then press the ENTER button. Press the ▼ button to go to the fi rst entry fi eld (IP Address). Use the number buttons on your remote to enter numbers. - Page 49 Previous m Move " Enter ' Return ✎ NOTE You should be able to fi nd the Pass Phrase on one of the set up screens you used to set up your router or modem. When done, press the ▲▼◄► buttons to move the cursor to Done, and then press the ENTER button.
-
Page 50: Network Status
Subnet Mask Network KT_WLAN Gateway DNS Server System Internet is connected successfully. Language If you have a problem using any Internet services, contact your Internet service provider. Security General Support Network Settings IP Settings Retry < Move " Enter ' Return... -
Page 51: System
Total Size : Total memory size of the device. • Available Size : Available memory in the device. • Delete BD Data : Delete all BD data in the storage. • Select Device : Change location of desired memory to store BD data. -
Page 52: Divx® Video On Demand
After you have set your password, select an age rating you want to set for the BD Parental Rating and a rating level you want to set for the DVD Parental Rating. The product will only play Blu-ray discs rated at or below the age rating and DVD discs rated below the numeric rating unless the password is entered. -
Page 53: Network Remote Control
The application should fi nd your product and display it on a list. Select the product. If this is the fi rst time you are using the function, it will ask you to allow or deny remote control of the product. Select Allow. - Page 54 fi le. Copy the folder to a USB fl ash drive. Make sure the disc tray is empty, and then insert the USB fl ash drive into the USB port of the product. In the product’s menu, go to Settings >...
-
Page 55: Contact Samsung
Standby Mode, and then press the ENTER button. Select On or Off. • Off : If you select Off, the product will notify you with a pop up message when new upgrade software is available. • On : If you select On, the product will... -
Page 56: Basic Functions
Basic Functions Playing a Disc Playback Insert a disc into the disc slot with the disc's label facing up. Press the PLAY (►) button. Playback related buttons ► PLAY ( Starts playback. Stops playback. • If you press the button once : The stop position is ... -
Page 57: Playing The Title List
Title List, then press the ENTER button. Using the Search and Skip Functions During playback, you can search quickly through a chapter or track, and use the skip function to TITLE MENU jump to the next selection. POPUP Searching for a Desired Scene hzZyx •... -
Page 58: Slow Motion Play/Step Motion Play
Step Motion Play hzZyx In pause mode, press the PAUSE ( ) button. • Each time the PAUSE ( ) button is pressed, a new frame will be appear. • To return to normal speed playback, press the PLAY ( ►... -
Page 59: Using The Tools Button
Blu- ray Disc has a BONUSVIEW section. This function changes both the primary and secondary subtitles at the same time. The total number of subtitles is the sum of the primary and secondary subtitles. English... -
Page 60: Changing The Camera Angle
• To use the caption function, save the caption fi le (*.smi) with the same fi le name as that of the DivX media fi le (*.avi) within the same folder. Example. Root Samsung_007CD1.avi Samsung_007CD1.smi •... -
Page 61: Listening To Music
ENTER button : Plays the selected track. ► button : During playback, moves to the next page in the Music List or moves to the next track in the Playlist. ◄ button : During playback, moves to the previous page in the Music List or moves to the previous track in the Playlist. - Page 62 Playing an Audio CD (CD-DA)/MP3 Insert an Audio CD (CD-DA) or an MP3 Disc into the disc slot. • For an Audio CD (CD-DA), the fi rst track will be played automatically. • For an MP3 disc, press the ◄► buttons to select Music, then press the ENTER button.
-
Page 63: Dolby Pro Logic Ii Mode
To exit Edit Mode, press the YELLOW (C) button. ✎ NOTE You can create a playlist with up to 99 tracks on Audio CD (CD-DA). 1/2 Page SFE (Sound Field Effect) MODE You can set the SFE mode best suited... - Page 64 ✎ NOTE Before you can play the video fi les in the iPod player, you must connect the Audio/Video terminals of the TV to the home theater using the Composite (A/V) cable. English ...
-
Page 65: Viewing Photo Files
AUDIO ASSIGN Viewing Photo Files Connect a USB memory that contains JPEG fi les or insert a disc that contains JPEG fi les. Press the ◄► buttons to select My Contents, and then press the ▲▼ buttons to select Photos, and then press the ENTER button. -
Page 66: Playing Back A Usb Storage Device
fi le should exist in the same storage media with the music fi le. However, the sound quality can be affected by the bit rate of the MP3 fi le, the size of the photo and the encoding method. Playing back a USB Storage Device You can use the USB connection to play multimedia fi... -
Page 67: Listening To Radio
Press the INPUT SELECT on the remote control to select FM. Tune in to the desired station. • Preset Tuning 1 : You must fi rst add a desired frequency as a preset. Press the STOP () button to select PRESET and then press the TUNING/CH ( ) button to select the preset station. -
Page 68: Connecting An Ipod/Iphone Using The Usb Cable
/buttons. (See page 19.) ✎ NOTE If you want to return to the iPod menus while the iPod player is connected using the USB cable, press INPUT SELECT on the remote control or using the INPUT SELECT dial on the front panel and select R-IPOD. -
Page 69: Ipod/Iphone Models You Can Use With This Product
Video menu. If you want to return to the iPod menus while the iPod player is connected using the dock, press INPUT SELECT on the remote control or press INPUT SELECT on the front panel of the system and select R-IPOD. -
Page 70: Network Services
You can also start this function by pressing the SMART HUB button on the remote control. Starting Smart Hub the First Time To start Smart Hub for the fi rst time, follow these steps : Go to the Home menu. My Contents... - Page 71 Login b Sort by c Edit Mode d Settings Commercial : Displays the Smart Hub Guide, an introduction to the product, and new application introductions. Your Video : Provides recommendations for videos based on your tastes.
- Page 72 Press the button rapidly to enter a letter that is not the fi rst letter listed on the On-Screen keypad button. For example, if you want to enter the letter b, press the 2 button on your remote rapidly twice.
- Page 73 You do not need an account to use Smart Hub. Account Log In To log in to your Smart TV Account, follow these steps: With the Smart Hub main screen displayed on your TV, press the RED (A) button on your remote.
- Page 74 Enter your current password. The next screen appears. On the next screen, enter a new password on the fi rst line. Enter it again on the second line to confi rm. The Changing Password Complete message screen appears. Press the ENTER button or wait for the screen to close - about 5 seconds.
- Page 75 ✎ NOTE If you forgot your password, press the STOP ( I ) button on the front panel of the product for more than 5 seconds with no disc inserted. Properties The Properties menu item lists three functions that display information about Smart Hub :...
- Page 76 Network Services Move to Folder The Move to Folder function lets you move a widget to a folder. To use the Move to Folder function, follow these steps: Press the YELLOW (C) button on your remote. Select a widget, and then press the ENTER button.
-
Page 77: Samsung Apps
Smart Hub main screen, and then press the ENTER button. The Samsung Apps screen appears. ✎ NOTE If this is the fi rst time you are accessing this screen, the terms of service window appears. Select Agree, and then press the ENTER button. English... - Page 78 Samsung Apps appear in My Applications. Sort By Tabs You can access the Sort By tabs on the top of the screen using the ▲▼◄► buttons. Each tab displays the services or applications in the category you chose, sorted by the criteria on the tab (Recommended, Most Downloaded, Most Recent, Name).
-
Page 79: Using Vtuner Function
• GREEN (B) (Thumbnail/List View) : To toggle applications between Thumbnail and List view. • BLUE (D) (Sort By) : To sort the applications in a category by Recommended, Most Downloaded, Most Recent, or Name. • Return : To return to the previous menu. -
Page 80: Other Information
• Are the left/right speaker or left/right input/output cables connected properly? • Check the left/right channel and connect it/them correctly. • Is there "Dolby Digital 7.1 CH" mark on the disc? Dolby Digital 7.1 CH Surround Sound is produced only if the disc is recorded with 7.1 channel sound. - Page 81 • Only S.DIRECT, TONE, SLEEP and AUDIO ASSIGN buttons will operate, after pressing the SHIFT button. • With no disc in the product, press and hold the product's STOP ( I ) button for longer than 5 seconds. INIT appears on the display and all settings will return to the default values.
- Page 82 fi les that do not correspond to these categories may not be displayed. • Check if the network is stable. • Check if the network cable is properly connected and if the network is not overloaded. • Wireless connection between the server and the product is unstable.
- Page 83 ✎ NOTE When the factory default settings are restored, all the user data stored in the BD data will be deleted. Repairs If you contact us to repair your player, an administration fee may be charged if either: An engineer is called out to your home at your request and there is no defect in the product.
-
Page 84: Specifi Cations
S/N Ratio Channel separation Input sensitivity - Samsung Electronics Co., Ltd reserves the right to change the specifi cations without notice. - Weight and dimensions are approximate. - Design and specifi cations are subject to change without prior notice. English Specifi... - Page 85 (*90 days Parts and Labor for Commercial Use) This limited warranty begins on the original date of purchase, and is valid only on products purchased and used in the United States. To receive warranty service, the purchaser must contact SAMSUNG for problem determination and service procedures. Warranty service can only be performed by a SAMSUNG authorized service center.
- Page 86 Contact SAMSUNG WORLD WIDE If you have any questions or comments relating to Samsung products, please contact the SAMSUNG customer care center. Contact Center Area ` North America Canada 1-800-SAMSUNG (726-7864) Mexico 01-800-SAMSUNG (726-7864) U.S.A 1-800-SAMSUNG (726-7864) ` Latin America...
- Page 87 QUESTIONS OR COMMENTS? COUNTRY CALL OR VISIT US ONLINE AT WRITE Samsung Electronics America, Inc. 1-800-SAMSUNG 85 Challenger Road Ridgefi eld Park, IN THE US www.samsung.com/us (7267864) NJ 07660-0511 Code No. AH68-02334S...