Table of Contents
Advertisement
Advertisement
Table of Contents

Related Manuals for PSA Products Panacom PAN820SKHD


Summary of Contents for PSA Products Panacom PAN820SKHD
- Page 1 COLOUR HD VIDEO INTERCOM PAN820SKHD...
- Page 3 Monitoring Call transfer to other extension Internal communication among indoor units Warranty & liability...
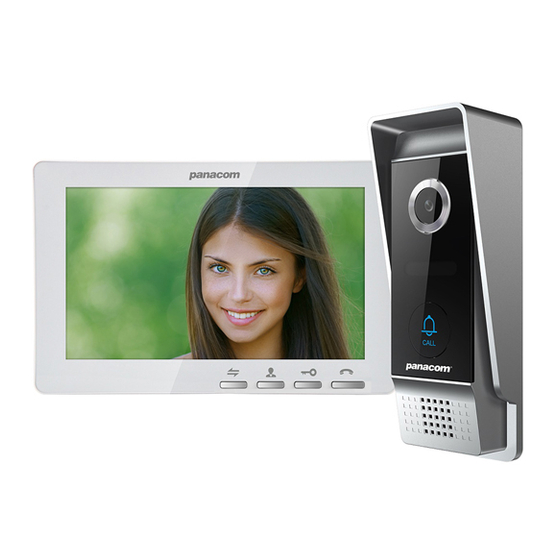
- Page 4 7" TFT LCD screen plastic housing Support 4 monitors, 2 door stations with extra 2 CCTV Cameras and 2 PIR sensors Missed call feature: when doorbell is not answered, a notification icon will be shown.(note:Date/Clock feature must be activated) Different ringtones for Door A & Door B Support 32G TF card for pictures or video recording Picture memory when SD card fitted (SD card not supplied) IP 65 surface outdoor camera...
- Page 5 Door Speaker Volume Adjustment To adjust the speaker volume of the door camera, remove the weather seal at the back of the door camera and adjust the regulator with a screwdriver.(refer to outdoor camera specification for regulator location) NOTE: Default setting of door volume is already set as HIGH. Do not overturn the volume regulator as it can easily be damaged.
- Page 6 SD card slot For the models with SD card, Insert the SD card for recording...
- Page 7 (1024 x 600) CCTV camera input AHD & CVBS only External switching power supply (DC 12V) Digital Photo Frame Yes (Read date from SD card) Custom Melody Yes (Read date from SD card) Missed Call Missed call indicator. Clock function needs to be activated. Motion Detection Motion picture recording when SD card installed (SD card not supplied)
- Page 10 First monitor must be set as MASTER. All other monitors must be set as SLAVE. This can be done in the SETTINGS menu. MONITOR ID SETTING Master=01, Slave=02 to 04 Note: HD Monitor can accept AHD or CVBS analog signals. If using HD monitor with CVBS analog door station, you must reboot the monitor from the menu system after connecting the camera.
- Page 11 Note: CCTV cameras to be AHD or CVBS only...
- Page 15 keep pressing transfer call button to activate the function of call transfer to the extension which you choose Select a extension which you want The called slave monitor will get ring tone...
-
Page 16: Standby Mode
1.0 STANDBY MODE There are 2 mode options during standby mode: Clock and date mode or digital photo frame mode. 1.1 Clock and date Mode 00:23 Tuesday 13-02-2018 1.2 Digital Photo Frame Mode When digital photo frame is activated, motion detection feature will be deactivated. The system will automatically detect pictures from SD card. - Page 17 2.0 MAIN MENU In standby mode, scroll the button to access the main menu interface, shows the main interface as shown below. On menus, scroll button upward or downward to move the cursor to the option you want, and then press back to previous step.
- Page 18 3.2 Time In the system menu, move the cursor to “Clock” and scroll to enter the “clock” menu. The clock switch controls whether the clock is displayed in the standby mode, the on is the open display, and the off is closed. Mobile cursor to “clock”, scroll to turn off the clock, and then will not display the clock when standby mode is closed.
- Page 19 [Format SD card]: Move the cursor to Format SD and select “ ”. Scroll ,the pop-up window will remind if format SD card is needed. Select “Yes” to forward and “No” to cancel. If the format card is finished, there will be notification of “format SD card successfully”...
- Page 20 [Door2]: The default ring tone and defined ring tone are set in the outdoor unit 2. Press button to move cursor to the first row. scroll to confirm default ring tone of Door 1. When the font color is changed, press to select the desired default ringtone, and scroll to confirm that the settings are...
- Page 21 4.0 DIGITAL PHOTO “On main menu, move the cursor to the option “Digital Photo” , then scroll to enter the “Digital Photo” menu. (for the models with SD card ) Note: If open digital photo, can’t use motion detection. [Photo Frame]: Turn on or off photo frame feature.
- Page 22 [Record mode]: Options include: Video and Snapshot. Video means when the visitor presses the call button of outdoor unit, the indoor monitor with the SD card will automatically start the video until the end of the call or the user’s manual stop. The snapshot means that when the visitor press the call button of outdoor unit, the indoor monitor with SD card automatically snapshot the next photo of the doorway camera, and the user can scroll...
- Page 23 [CAM1 Sensor type]: CAM1 channel corresponds to an I/O status (see the following status explanations), which means that when an alarm is triggered, it will activate the corresponding channel to start alarm recording or capture a snapshot. [CAM2 Sensor type]: CAM2 channel corresponds to an I/O status (see the following status explanations), which means that when an alarm is triggered, it will activate the corresponding channel to start alarm recording or...
- Page 24 7.1 Music ( for the models with SD card ) In the media menu, scroll to move the cursor to the “music” option, scroll into the playlist, automatically play the first music into the music list, pressing move the cursor down, scroll move the cursor moving upward, keep pressing the is move forward, keep scroll...
- Page 25 Note: Movie folder contains only video files in SD cards There need to be separated file named as “User” for SD card . The video can only be found and shown when they are saved in the file named “User”. There is a folder called “USER”...
- Page 26 7.4 File ( for the models with SD card ) In the Media menu, press to move the cursor down to the “file management” option, press to enter the file management list, and press to enter SD card again. The SD card contains the DCIM foldre, the ring folder, the user folder, and the program file.
- Page 27 8.1 Video ( for the models with SD card ) On “Record” menu scroll the button upward or downward to move the cursor to the option “Video files”, scroll the button to enter the “Video files list”. scroll the button upward or downward to move the cursor to select file to playback, a black list indicates that the list has been selected, press the button to playback.
- Page 28 9. Deletion of the file On “Media” menu scroll the button upward or downward to move the cursor to the option “File”, scroll the button to enter the “File”. For the file in the SD card, scroll to find the one need to be deleted. Keep pressing the button , it will pop-up a window, choose “Yes”...
Need help?
Do you have a question about the Panacom PAN820SKHD and is the answer not in the manual?
Questions and answers