Advertisement
Available languages
Available languages
Quick Links
Assembly Instructions
Cam Locks
Klix Cam
7 Pcs
7 Pcs
5 Pcs + 2 extra Pcs
+ 2 extra Pcs
+ 2 extra Pcs
STEP 1
This instruction is for the return to be
positioned on your right side while
sitting at the desk. If you wish for the
return to be positioned on the left, you
will need to reverse the position of the
items accordingly.
STEP 3
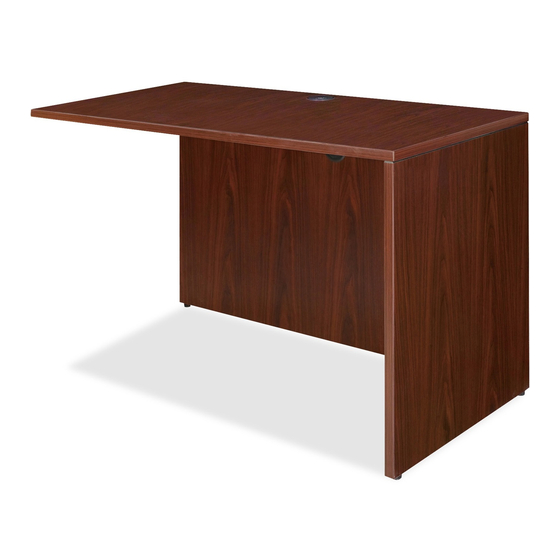
COMPLETED ASSEMBLY
IMPORTANT NOTE:
• Place all laminated parts on a clean and smooth surface such as a rug or carpet to avoid the parts
from being scratched.
• Check to make sure that you have all parts and hardware.
• Remove all wrapping materials, including staples and packaging straps before your start to assemble.
• Do not tighten all screws/bolts until pieces are completely assembled.
• Keep all hardware parts out of children's reach.
• It is recommended for 2 persons to complete this assembly.
69387/69421/69979, 69388/69422/69980, 69389/69423/34400
Dowel
Repeat 4 X
Insert three additional cam
locks and cams in the
additional positions
provided. (Two in the
underside of the
worksurface and back
panel and one additional in
the side and back panels)
Screw #4 x
/
"
5
8
12 Pcs + 2 extra Pcs
STEP 2
Insert the four adjustable
glides in the back panel
and side leg panel as shown
Insert 4 screws in each of the
two L-Brackets as shown
It is suggested to install two flat
brackets(H) to the assembled desk
unit first rather than the return
unit. This allows for easier
installation of the return unit. After
securing the return unit to the
desk unit top, install the additional
third flat back to the back panel of
the return unit and desk leg.
Secure all brackets with four
screws in each.
Once the return unit has been properly
installed, cover all exposed Klix Cams
with the Stickers provided.
Reversible Return Shell
69554/69555
Cam Cover
I-Bracket
Screw M6 x 20mm
7 Pcs
2 Pcs
12 Pcs
+ 2 extra Pcs
IMPORTANT:
If attaching pedestal(s)
LLR69398/69432/69987
/69562,remove L brackets
from leg panel.
K
Cam Covers
5 Pcs
Advertisement

Related Manuals for Lorell 69387


Summary of Contents for Lorell 69387
- Page 1 Reversible Return Shell 69387/69421/69979, 69388/69422/69980, 69389/69423/34400 69554/69555 Assembly Instructions Cam Locks Klix Cam Cam Cover I-Bracket Screw M6 x 20mm Cam Covers Dowel Screw #4 x " 7 Pcs 7 Pcs 7 Pcs 2 Pcs 12 Pcs 5 Pcs 5 Pcs + 2 extra Pcs...
- Page 2 Coquille de retour réversible 69387/69421/69979, 69388/69422/69980, 69389/69423/34400 69554/69555 Instructions d’assemblage Support en L Passe-fil noir Roue montée Vis M6 x 20mm Verrou à came Came Klix Cheville Vis #4 x " Support en I Roue montée 7mcx + 2 mcx...
- Page 3 Armazón Lateral Reversible 69387/69421/69979, 69388/69422/69980, 69389/69423/34400 69554/69555 Instrucciones de ensamble Seguro de ajuste Leva Taquete Arandela de cabo Rueda montada Tornillos M6 x 20mm Soporte de escuadra Tornillos #4 x " Rueda Soporte I 7 pza 7 pza 5 pza...