
Subscribe to Our Youtube Channel
Related Manuals for Lorell LLR60067


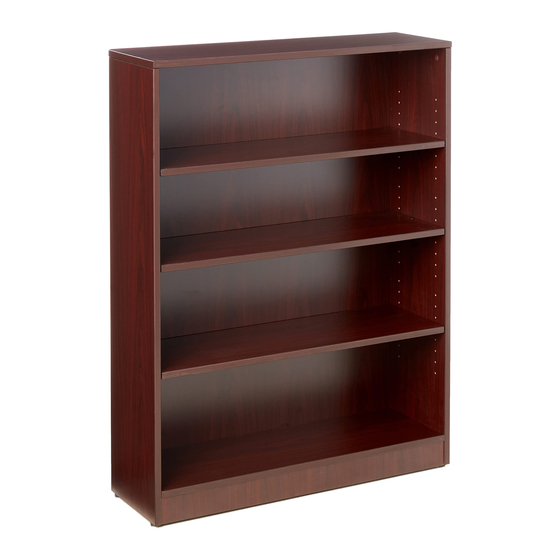
Summary of Contents for Lorell LLR60067
- Page 1 Bookcase Bibliothèque/Librero LLR60067(4-Shelf)/60068(5-Shelf)/60069(6-Shelf) LLR60067 (4-Shelf) LLR60068 (5-Shelf) LLR60069 (6-Shelf)
-
Page 2: Before You Begin
Instructions: IF YOU ARE MISSING PARTS OR OTHER CONCERNS PLEASE CALL OUR TOLL FREE NUMBER: 1-888-295-5839. Email: Alex.True@sprich.com MONDAY - FRIDAY 9:00 AM TO 4:00 PM - EASTERN STANDARD TIME Please provide the following information: 1. Full Name 2. Physical Address - do not include P.O. Box as our carriers cannot deliver to a P.O. Boxes 3. -
Page 3: Panel Identification
PANEL IDENTIFICATION Left & Right Side Panel 1pc Top Panel 1pc Fixed Shelf 2pcs Adjustable Shelf* Kickplate 1pc (Unfinished edges) Trim Panel 1pc Back Panel 2pcs (With finished bottom edge) The panels shown here are not replaceable. *NOTE: 60" High (60067) – 2 each Adjustable Shelf (D) If missing or damaged, please return the 70"... - Page 4 ASSEMBLY INSTRUCTIONS Step 1 Place the Trim Panel (G) down on a non- abrasive surface. Insert 4 each Dowels (K) into the hole positions as shown on the drawing. Trim Panel Place the Top Panel (B) on a non-abrasive surface with the holes facing up. Using a Phillips Screwdriver insert 4 each Cam Screws (H) in each of the holes provided.
- Page 5 Step 3 Place the 2 each Fixed Shelf (C) into the position shown on the Left Side Panel (A) on the drawing ensuring that the Cam Screws (H) engage with the Cam Locks (I). Make sure that the finish edge of the Fixed Shelf is facing the front of the bookcase.
- Page 6 Step 5 Lay bookcase down with front of bookcase facing the floor. Attach the Back Panel (F) using the Nail (M). Be careful Back Panel Top Panel Trim Panel that you apply the nails vertically and not at an angle that will cause the nail to break through the side panels.
-
Page 7: Avant De Commencer
Instructions: APPELEZ À NOTRE NUMÉRO SANS FRAIS S’IL VOUS MANQUE DES PIÈCES OU SI VOUS ÉPROUVEZ D’AUTRES INQUIÉTUDES: 1-888-295-5839. Email: Alex.True@sprich.com LUNDI - VENDREDI, 9:00 AM À 4:00 PM - HEURE NORMALE DE L’EST Prière de fournir l’information suivante: 1. Nom complet 2. - Page 8 IDENTIFICATION DES PANNEAUX Panneau de gauche & de droite 1mc Panneau supérieur 1mc Tablette fixe 2mcx Tablette ajustable* Garde-pieds 1mc (Extrémités non apprêtées) Panneau enjoliveur 1mc Panneau arrière 2mcx (Avec extrémité inférieure apprêtée) Les panneaux montrés ici ne peuvent pas être remplacés.
-
Page 9: Instructions D'assemblage
INSTRUCTIONS D’ASSEMBLAGE Étape 1 Placez le panneau de décoration (G) à plat sur une surface non-abrasive. Insérez 4 goujons (K) dans les positions des trous comme montré sur le dessin. Déposez le panneau supérieur (B) sur une surface non-abrasive avec les trous dirigés Panneau vers le haut. - Page 10 Étape 3 Placez les 2 tablettes fixes (C) dans les positions montrées sur le panneau de gauche (A) sur le dessin en vous assurant que les vis de cames (H) s’engagent dans les verrous à came (I). Assurez-vous que l’extrémité finie de la tablette fixe est dirigée vers l’avant de la bibliothèque.
- Page 11 Étape 5 Couchez la bibliothèque sur le sol avec la partie avant dirigée vers le sol. Fixez le panneau arrière (F) en utilisant les clous (M). Assurez-vous d’insérez les clous Panneau arrière Panneau Panneau verticalement et non pas à angle car cela enjoliveur supérieur causerait que les clous traverseraient à...
-
Page 12: Antes De Iniciar
Instrucciones: SI LE FALTAN PARTES O TIENE ALGUNA DUDA, LLAME A NUESTRA LÍNEA GRATUITA AL NÚMERO: 1-888-295-5839. Email: Alex.True@sprich.com LUNES A VIERNES DE 9:00 A 16:00 - HORA ESTÁNDAR DEL ESTE Sírvase proporcionar la siguiente información: 1. Nombre completo 2. Domicilio. No incluye apartado postal debido a que nuestros distribuidores no pueden hacer entregas a un apartado postal. - Page 13 IDENTIFICACIÓN DE TABLEROS Tablero izquierdo e derecho 1pza Tablero superior 1pza Repisa fija 2pza Repisa ajustable* Moldura 1pza (Bordes sin acabado) Tablero con borde 1pza Tablero posterior 2pza (El borde inferior cuenta con acabado) Los tableros que aquí se muestran no son reemplazables.
-
Page 14: Instrucciones De Ensamble
INSTRUCCIONES DE ENSAMBLE Paso 1 Coloque el Contramarco (G) boca abajo sobre una superficie no abrasiva. Inserte 4 Taquetes (K) en los orificios como se muestra en el dibujo. Coloque el Tablero superior (B) en una Tablero con borde superficie no abrasiva con los orificios hacia arriba. - Page 15 Paso 3 Coloque las 2 Repisas fijas (C) en el Tablero izquierdo (A) en la posición mostrada en el dibujo asegurándose de que los Tornillos de sujeción (H) embonen con los Seguros de ajuste (I). Asegúrese de que el borde acabado de la Repisa fija vea hacia el frente del librero.
- Page 16 Paso 5 Coloque el librero hacia abajo con el frente hacia el piso. Una el Tablero posterior (F) usando los Clavos (M). Tablero posterior Tenga cuidado de colocar los clavos Tablero Tablero verticalmente y no en un ángulo que superior con borde puede causar que el clavo rompa los tableros laterales.
Need help?
Do you have a question about the LLR60067 and is the answer not in the manual?
Questions and answers