Table of Contents
Advertisement
Quick Links
INSTALLATION MANUAL ¥ MANUALE DÕINSTALLAZIONE
MANUEL DÕINSTALLATION ¥ AUFSTELLUNGS-HANDBUCH
MANUAL DE INSTALACION ¥
CA 250 X5TA*
CA 360 X5TA*
CA 480 X5TA*
Split system air conditioner ¥ Condizionatore d'aria split system
Acondicionador de aire de consola partida sistema split ¥ DIAIRO
Climatiseurs split system ¥ Split-klimagerŠt
37.4140.218.0
EGXEIRIDIO TOPOQETHSHS
Y MENES MONADES KLIMATISMO Y
SPA 250 X5TA*
SPA 360 X5TA*
SPA 480 X5TA*
GENNAIO 2000
EG
I
F
Advertisement
Table of Contents

Related Manuals for Technibel CA 250 X5TA Series


Summary of Contents for Technibel CA 250 X5TA Series
- Page 1 INSTALLATION MANUAL ¥ MANUALE DÕINSTALLAZIONE MANUEL DÕINSTALLATION ¥ AUFSTELLUNGS-HANDBUCH EGXEIRIDIO TOPOQETHSHS MANUAL DE INSTALACION ¥ CA 250 X5TA* SPA 250 X5TA* CA 360 X5TA* SPA 360 X5TA* CA 480 X5TA* SPA 480 X5TA* Split system air conditioner ¥ Condizionatore d'aria split system Climatiseurs split system ¥...
-
Page 2: Table Of Contents
Dear User Thank you for selecting this product and we welcome you to the growing family of satisfied products owners. Like all products, it has been designed carefully and manufactured under strict quality control. We firmly believe that our products will give full satisfaction to users through proper operation and maintenance. -
Page 3: Important
HOW TO INSTALL THE REMOTE CONTROLLER ..........page 6-1. -
Page 4: General
When Transporting ¥ This symbol refers to WARNING a hazard or unsafe Be careful when pocking up and moving the indoor and outdoor practice which can units. Get a partner to help, and bend your knees when lifting resuklt severe to reduce strain on your back. -
Page 5: 1-4. Additional Materials Required For Installation
1-4. Additional Materials Required for ¥ Check local electrical CAUTION Installation codes and regulations before obtainig wire. Refrigeration (armored) tape Also, check Insulated staples or clamps for connecting wire specified instructions (See your local codes.) or limitations. Putty Refrigeration tubing lubricant Clamps or saddles to secure refrigerant tubing Table 1-1. -
Page 6: Tubing Lenght
Table 1-3 Accessories for the Wireless Remote Control Unit Installation Example 1 1-5. Tubing Length INDOOR Tubing length (L) ¥ Refrigerant tubing between the indoor and outdoor UNIT units shall be kept as short as possible ¥ The length of the refrigerant tubes between the indoor and outdoor units are limited by the elevation difference between the two units. -
Page 7: Installation Site Selection
2. INSTALLATION SITE SELECTION ¥ location where nearby heat sources may affect performance INDOOR UNIT of the unit. ¥ locations where nearby external air may enter the room directly. This may cause ÒsweatingÓ in the air discharge AVOID: ports, causing them to spray or drip. ¥... -
Page 8: Outdoor Unit
Table 2-1 Dimension OUTDOOR UNIT Model Min. (cm) AVOID: 250 type 360, 480 type ¥ heat source, exhaust fans, etc. (Fig. 2-1). ¥ damp, humid or uneven locations. Obstacle above Min. Min. 1 cm 1 cm ¥ choose a place as cool as possible. Min. -
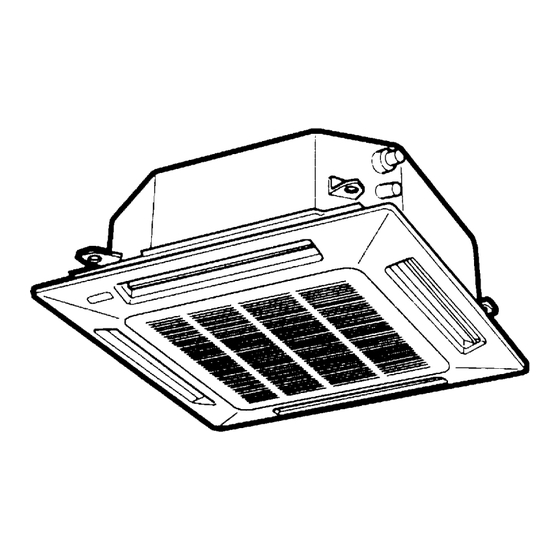
Page 9: How To Install The Indoor Unit
3. HOW TO INSTALL THE INDOOR UNIT 4-WAY AIR DISCHARGE SEMI-CONCEALED TYPE Determine the pitch of the suspension bolts using the 3-1. Suspending the Indoor Unit provided full-scale installation diagram. The diagram This unit uses a drain pump. Use a carpenterÕs level to chack and table (Fig. -
Page 10: Installing The Drain Piping
3-4. Installing the Drain Piping Transparent part for checking drainage Hose band (supplied) Prepare a standard hard (PVC) pipe (O.D. 32 mm) for the drain and use the accessory drain hose and hose band to prevent water leaks. The PVC pipe must be purchase separately. The transparent part allows you to check drainage. -
Page 11: Checking The Drainage
3-5. Checking the Drainage After wiring and piping are completed, use the following procedure to check that the water will drain smoothly. For this, prepare a bucket and wiping cloth to catch and wipe up spilled water. Connect power to the power terminal board (L, N terminal) inside the electrical component box. Remove the tube cover and through the opening, slowly pour about 1,200 cc of water into the drain pan to check drainage. - Page 12 Screw in the suspensions bolts, allowing them to Pul out the Air- protrude from the ceiling as shown in Fig. 3-16. The Intake grille pushing claws distance od each exposed bolt must be of equal length of the hinges Hinge within 50 mm.
-
Page 13: Duct For Fresh Air
PVC pipe (localy purchased) INSIDE OUTSIDE Wall Outdoor side Indoor side PVC pipe Slight angle Cut at slight angle Fig. 3-25 Fig. 3-26 3-7. Duct for Fresh Air Duct connection port (Knock-out hole) There is a duct connection port (knock-out hole) at the right- rear on the Panle Top of the indoor unit for drawing in fresh air. -
Page 14: How To Install The Outdoor Unit
4. HOW TO INSTALL THE OUTDOOR UNIT 4-1. Removing the Protective Spacer for Compressor Transportation Remove the packing skid from the botton of unit and then remove the plastic spacer used to secure the compressor during transportation (Fig. 4-1). Place the unit on a level concrete pad, block or equal and anchor. -
Page 15: Electrical Wiring
5. ELECTRICAL WIRING 5-1. General Precautions on Wiring If the respective phases of the 3-phase power Before wiring, confirm the rated voltage of the unit as shown on its nameplate, then carry out the wiring wiring are not connected correctly, a reverse phase closely following the wiring diagram. -
Page 16: Wiring System Diagrams
5-3. Wiring System Diagrams Outdoor unit: one-phase 50 Hz, 220-240V Outdoor unit: three-phase 50 Hz, 380-415V CAUTION 5-4. Examples of Incorrect Wiring The following are examples of improper wiring that result in system misoperation. You should confirm that you have wired the units correctly before beginning the test run described on page 26. - Page 17 ¥ Loose wiring may cau- CAUTION se the terminal to overheat or result in unit malfunction. A fi- re hazard may also exist. Therefore, be sure all wiring is to- ghtly connected. Fig. 5-1 When connecting each power wire to corresponding terminal, follow instructions ÒHow to connect wiring to the terminalÓ...
- Page 18 6. HOW TO INSTALL THE REMOTE CONTROLLER 6-1. Wireless Remote Control Unit The remote control unit can be operated from either a non- fixed position or a wall-mounted position. To ensure that the air conditioner operates correctly, do not install the remote control unit in the following places: ¥...
- Page 19 7. HOW TO PROCESS TUBING 7-1. Connecting Tubing Sides After Before Use of the Flaring Method Many of the conventional split system air conditioners employ the flaring method to connect refrigerant tubes which run between indoor and outdoor units. In this method, the copper tubes are flared at each end and connected with flare nuts.
- Page 20 7-3. Insulation of Refrigerant Tubing Insulation ¥ Always insulate tubes CAUTION after draining water Thickness: and completing leak Thickness: Min. 8 mm Min. 8 mm tests on all connection points. Narrow tube Wide tube IMPORTANT To avoid condensation and water leaks, both the wide tube and Refrigerant tubing narrow tube must be insulated with the insulation materials (field supply).
- Page 21 8. AIR PURGING Air and moisture remaining in the refrigerant system have undesirable effects as indicated below. Therefore, they must be purged completely. ¥ pressure in the system rises ¥ operating current rises ¥ cooling (or heating) efficiency drops ¥ moisture in the air may freeze and block capillary tubing ¥...
- Page 22 With the vacuum pump still running, close the ÒLoÓ knob of the manifold valve. Then stop the vacuum pump. With the accessory hex wrench, turn the valve stem on the narrow tube service valve counter-clockwise by 90 degrees (1 / 4 turn) for 10 seconds, and then turn the stem clockwise to close it again.
- Page 23 9-1. Before Installing the Ceiling Panel Remove the air intake grille and air filter from the ceiling panel. Air filter (Figs. 9-1 and 9-2) (a) Remove the 2 screws by the latch from the air intake grille. (Fig. 9-1) (b) Press on the 2 latches of the air intake grille with your thumb in the direction of the arrow to open the Safety string grille.
- Page 24 10. TEST RUN 10-1. Preparing for Test Run ¥ Before attempting to start the air conditioner, check the following: All loose matter is removed from the cabinet especially metal filings, bits of wire, and clips. The control wiring is correctly connected and all electrical connections are tight.
- Page 25 11. PUMP DOWN Pump down means collecting refrigerant gas in the system back into the outdoor unit without losing any of the gas. Pump down is used when the unit is to be moved or before servicing the refrigerant circuit. ¥...
- Page 26 DECLARATION OF CONFORMITY This product is marked as it satisfies Directives: Ð Low voltage no. 73/23 EEC and 93/68 EEC. Ð Electromagnetic compatibility no. 89/336 ECC, 92/31 EEC and 93/68 EEC. This declaration will become void in case of misuse and/or non observance though partial of manufacturer's installation and/or operating instructions.
Need help?
Do you have a question about the CA 250 X5TA Series and is the answer not in the manual?
Questions and answers