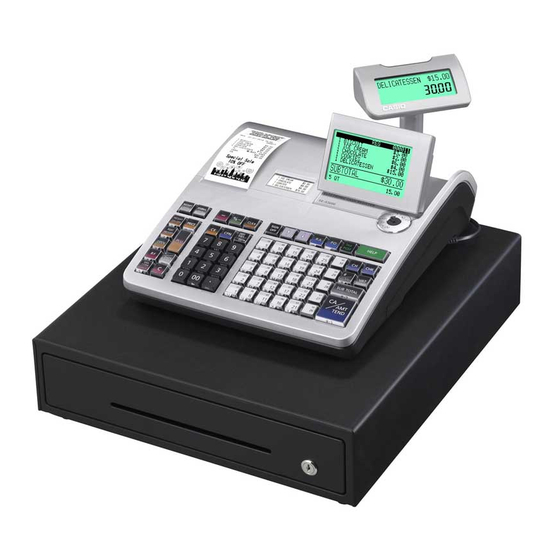
Casio SES-3000 Operation Manual
Hide thumbs
Also See for SES-3000:
- User manual (112 pages) ,
- Dealer's manual (74 pages) ,
- Quick start manual (2 pages)
Advertisement
CASIO SES-3000
OPERATION MANUAL
*Please note: this model has a journal printer in
addition to the receipt printer. For questions
regarding the journal printer please contact
TotalPOS Solutions on 03 3661090 or
enquiries@totalpos.co.nz
***IMPORTANT***
If you see a * appear in the top right hand
corner of the display, it means the
Electronic journal is full. To avoid error
messages when it is full, you need to clear
the EJ as soon as possible after finishing
the transaction. (see 14, page 7)
Advertisement
Table of Contents

Summary of Contents for Casio SES-3000
- Page 1 CASIO SES-3000 OPERATION MANUAL *Please note: this model has a journal printer in addition to the receipt printer. For questions regarding the journal printer please contact TotalPOS Solutions on 03 3661090 or enquiries@totalpos.co.nz ***IMPORTANT*** If you see a * appear in the top right hand corner of the display, it means the Electronic journal is full.
- Page 2 BASIC FUNCTIONS INDEX Making a Sale Multiple Tender Multiple Sales of Same Product Corrections Refunds Multiple Refunds Percentage Discount Dollar Discount Whole Transaction Discount 10. Receipts 11. EFTPOS Cash Out 12. PLU’s 13. Clerks 14. To Clear the Electronic Journal 15.
-
Page 3: Making A Sale
Ensure register is turned to REG mode 1. Making a Sale 1. Enter the price of the item 2. Press the department the item belongs to 3. Repeat steps 1 and 2 until all purchased items are processed 4. Press SUBTOTAL for the total amount due 5. -
Page 4: Multiple Sales Of Same Product
3. Making Multiple Sales Of Same Product 1. Enter the number of items you are selling (eg 4) 2. Press the X key 3. Press the dollar amount of each item (eg 150) 4. Press the department of the item you are selling (eg pie) 5. -
Page 5: Refunds
5. Refunds 1. Press the RF key then the amount to be refunded and corresponding department 2. If the prices are programmed in for specific items then RF then the corresponding department key will be pressed, instead of the price and the department key 6. - Page 6 3. Press the – key. This will display the dollar amount that has been discounted 4. Press the SUBTOTAL key and this will display the total amount 9. To Give A $ Or % Discount For A Whole Transaction 1. Enter all items in normally the press the SUBTOTAL key 2.
- Page 7 Interfaced Eftpos - Cash Out with a Purchase 1. Enter items 2. Press SUBTOTAL 3. Enter Amount of Cash Required 4. Press EFTPOS - Cash Out (no purchase) 1. Enter the amount of Cash Required 2. Press EFTPOS 12. PLU’s 1.
-
Page 8: Assigning A Clerk
3. To assign another clerk enter the number of the new clerk and press the OPEN CLERK key 4. Process the sale as normal Clerk control features must first be originally set up by your Casio dealer before assigning a clerk will work. 14. To Clear the Electronic Journal 1. -
Page 9: Dollar Discount
15. Explanation Of Correction Keys ERROR CORRECT Used to take off last item before CASH key has been pressed. Only takes off last sale item. REFUND Used to clear any item before CASH key has been pressed. Press refund key then press preset price department, or press REFUND key, enter amount to be refunded then department. - Page 10 Reports Programming Notes: The new Casio range of cash registers are the most advanced ECR system on the market, it incorporates easy programmability with complex functions, to form a system that can suit any retail requirements. While basic programming changes can be performed by the end user (price changes and descriptions), it is advised that more advanced features should be programmed by an authorised CASIO dealer.
-
Page 11: Changing Prices
1. Changing Prices TURN Turn key to the PGM position Press the down arrow until you see “system ENTER “settings” “System settings” should now be highlighted DISPLAY PRESS Cash and now it should show PO1. ENTER New price (without using decimal point) PRESS The button that you wish to change REPEAT... -
Page 12: Name Changes
2. Name Changes TURN Turn key to the PGM position Press the down arrow until you see “system ENTER “settings” “System settings” should now be highlighted DISPLAY PRESS Cash and now it should show PO1. PRESS 2 and then Subtotal. Should now show PO2 PRESS The item button you wish to change TYPE... - Page 13 3. Clerk Name Changing TURN Turn key to the PROGRAM position Press the down arrow until you see “system ENTER “settings” “System settings” should now be highlighted DISPLAY PRESS Cash and now it should show PO1. PRESS 2 and then Subtotal. Should now show PO2 ENTER XX07 Where XX stands for the memory number of each clerk.
-
Page 14: Date And Time Programming
4. Date and Time Programming TURN Turn key to the PGM position Press the down arrow until you see “system ENTER “settings” “System settings” should now be highlighted DISPLAY PRESS Cash and now it should show PO1. ENTER Date in the following format:- (for days 1 to 9, be sure to enter them as 01 to 09. -
Page 15: Plu's
5. Reports **Important** The reset operation issues a report and also clears all sales data from the cash register’s memory. Be sure to perform the reset operations at the end of each business day. Otherwise, you will not be able to distinguish between the sales data for different dates.


Need help?
Do you have a question about the SES-3000 and is the answer not in the manual?
Questions and answers