
Related Manuals for horsch AutoForce


Summary of Contents for horsch AutoForce
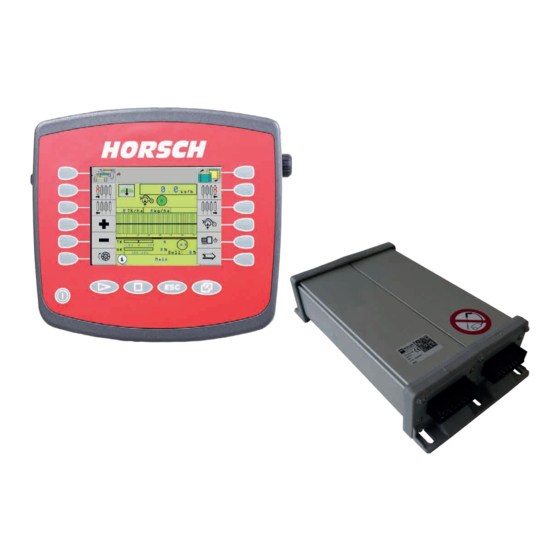
- Page 1 OPERATING INSTRUCTIONS AutoForce TRANSLATION OF THE ORIGINAL OPERATING INSTRUCTIONS READ CAREFULLY PRIOR TO STARTING UP! KEEP OPERATING INSTRUCTIONS IN A SAFE PLACE! ART.: 8072 0217 ISSUE: 12/2017...
- Page 3 HORSCH: ..............Confirmation of receipt of machinery Warranty claims become only effective when the first use of the machine is reported to HORSCH Maschinen GmbH within a week. www.horsch.com under SERVICE PARTNERBEREICH an interactive PDF form is available for down- load for this purpose (not available in all languages).
-
Page 4: Table Of Contents
Checks before starting work ......4 Coulter unit ..........4 Cams ............4 Functional principle ........5 Forces on the drill unit ........5 Operation ............7 AutoForce screen ...........7 Manual mode ..........7 Maestro RC manual mode......8 Automatic mode..........8 Automatic mode work screen ......9 Manual mode work screen ......10 Configuration ..........10... -
Page 6: Autoforce
¾ respective machine. Introduction Cams AutoForce is a system for the automatic coulter pressure adjustment on the Maestro. A cam with a sensor is attached to the axle of the depth guide wheel. The sensor determines the force acting from the ground on the depth guide wheel. -
Page 7: Functional Principle
Functional principle Forces on the drill unit Forces on the drill unit hydraulic coulter pressure force of the drill unit’s weight force between soil and depth guide wheel (target value) Force between soil and coulter discs The target value for the control of the coulter pressure is the force between the soil and the depth guide wheel (C). - Page 8 For greater clarity, the presentation of the weight force and the force between soil and depth guide wheel is omitted on the following illustrations. Maestro without AutoForce Sowing on soft, moist or light soil Sowing on hard soil, clod-type soil or rocky soil Placement depth H is maintained.
-
Page 9: Operation
The standard sections are shown in black, maize the sections in the tracks in grey. Working screen - Button to access the AutoForce screen 2. The target values for the standard sections Softkey for accessing the AutoForce (black) and the sections in the tracks (grey) screen. -
Page 10: Maestro Rc Manual Mode
Detail view calculation of residual quantity Maestro RC configuration AutoForce screen - Automatic mode For the Maestro RC solo with 3-point attach- Softkey for switching the automatic ment the maximum coulter pressure is limited mode on and off. -
Page 11: Automatic Mode Work Screen
Colour Meaning green Coulter pressure okay. yellow Coulter pressure too high. Coulter pressure too low. Depending on the terminal, the symbol can be selected by rotary wheel or touch. Tool key to access the AutoForce screen. -
Page 12: Manual Mode Work Screen
Configuration options Coulter pressure adjustment Set the configuration option Coulter pressure ¾ adjustment to Hyd auto (Hydac valve block) or Bu auto (Bucher valve block) to activate AutoForce. Always activate this setting if AutoForce is ¾ installed, regardless whether the system is used. -
Page 13: Settings
Settings Sensor row allocation Softkey for accessing the page for Softkey for accessing the AutoForce sensor allocation. settings. Section selection CONFIGURATION Sensor Sensor Current Sections Sensor Track section sct4 Sensor Sensor Sensor Sensor Sensor Sensor - row allocation Select the number of the row with the corre- ¾... -
Page 14: Section To Row Allocation
Section to row allocation AF-S AF-S sct1 13 : sct2 sct1 14 : sct4 sct1 15 : sct4 sct1 16 : sct2 sct1 17 : sct2 sct1 18 : sct3 sct1 19 : sct3 sct2 20 : sct3 sct2 21 : sct3 10 : sct4... -
Page 15: Calibrating (Teach) The Sensors
Calibrating (Teach) the sensors NOTE Calibrate the sensor after installation, replace- ¾ Pop-up messages are displayed when the soft- ment or a software update. key Teach is pressed while grey. They indicate which prerequisites have not yet been met. Softkey for accessing the Calibration page. -
Page 16: Diagnostics
Diagnostics Maestro CC / RC - 12/18 SW Maestro 16/18 SW (row spacing > 60 cm) DIAGNOSTICS Maestro 24/36/47/48 SW with 3.98 sct 1 E-Manager software 10.07 3.76 sct 1 4.11 sct 2 3.52 sct 4 DIAGNOSTICS PWM : sct 1 3.88 sct 1 14 :... -
Page 17: Delta Step Coulter Pressure
Delta Step point. Tr. sect.reduct. When adjusting the coulter pressure incremen- tally on the working screen or the AutoForce screen, the values of the standard section and the values of the section in the track are always changed at the same time. -
Page 18: Water Hole Mode
The PWM value is to 0 while the water hole mode is active. In manual mode, the display in the start screen and the AutoForce detail screen is set to 0 kg and shown as blue output value. All softkeys for Manual changing the target value are shown in grey. - Page 19 AutoForce calculation of residual quantity Water hole mode, AutoForce detail screen...
-
Page 20: Error Codes
Error codes Wire break (ErrorCode 87) Ground contact lost (ErrorCode 127) AutoForce km/h 180Tg / ha 0kg / ha 500 kg Nom. : Working screen - ErrorCode 87 Working screen - ErrorCode 127 A Number of faulty sensor A Number of faulty sensor... - Page 21 Sensor plastically deformed (ErrorCode 128) km/h Tg/ha kg/ha Working screen - ErrorCode 128 A Number of faulty sensor B Row number of faulty sensor The sensor was plastically deformed. The origi- nal calibrated sensor value in unloaded condition is not achieved again when lifting out. Check the sensor and replace it, if necessary.
-
Page 22: Troubleshooting
Troubleshooting Display / error Meaning Bar graph Contact force of the depth guide wheels on the ground too high. Coulter pressure always in the yellow range Check the detail screen / Machine data 3 screen Bar graph The contact force of the depth guide wheels on the ground is too high. - Page 23 The hydraulic coulter pressure is too low. Increase the speed of fertiliser and Seed On Demand Feed pressure fan = coulter pressure fan (pneumatic bypass, consultation with HORSCH ¾ Check the pressure gauge on the fertiliser hopper. required). Springs required for pretension of the drill units.
- Page 24 Meaning Sensor failure The system continues working as long as one sensor still functions. Check if the use of AutoForce is still practical. Check the coulter pressure Check the selection of the coulter pressure valve. Uneven placement depth Placement depth differs from row to row.
- Page 25 Possible causes Solution options Short-circuit (measured value > 25 mA); the input to the Turn the machine off and on again. The job computer is job computer was disabled. reset if the fault was rectified. Wiring between sensor and slave computer is defective. Replace the affected component.
-
Page 26: Index
Index Additional key 15 Allocation 12 AutoForce screen 7 Automatic mode 8 Basic setting 4 Calibration 13 Checks 4 Configuration 9 Delta Step 15 Diagnostics 14 Error codes 18 Functional principle 5 Manual mode 7 Teach 13 Troubleshooting 21 Work screen 7... - Page 28 All details on technical specifications and pictograms are approximate and for information only. Subject to technical product revisions. HORSCH Maschinen GmbH Tel.: +49 94 31 7143-0 Sitzenhof 1 Fax: +49 94 31 7143-9200 92421 Schwandorf E-Mail: info@horsch.com www.horsch.com...
Need help?
Do you have a question about the AutoForce and is the answer not in the manual?
Questions and answers