Table of Contents
Advertisement
Quick Links
Advertisement
Table of Contents

Subscribe to Our Youtube Channel
Related Manuals for abem Terraloc Pro 2


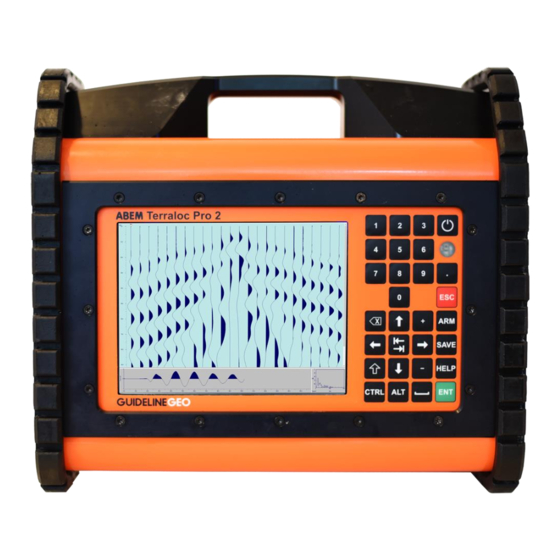
Summary of Contents for abem Terraloc Pro 2
- Page 1 User Manual Terraloc Pro 2 ABEM 20181009, based on release 3.0.4 of SeisTW...
- Page 2 ABEM Terraloc Pro 2 Thank you for choosing ABEM Terraloc Pro 2 General information Information in this manual is subject to change without notice and constitutes no commitment by Guideline Geo AB. Guideline Geo AB takes no responsibility for errors in this manual or problems that may arise from the use of this material.
-
Page 3: Table Of Contents
Get ready - Unpacking your new Terraloc Pro 2 ..........5 Welcome To Refraction, Reflection And Tomography ......... 5 Features of the ABEM Terraloc Pro 2 ............5 The Delivered Instrument ................6 Inspection ....................... 7 Shipping Damage Claims ................7 Shipping/Repacking instructions .............. - Page 4 ABEM Terraloc Pro 2 Triggering Methods ................... 79 Make/Break Switch Input ................79 Using the Trigger Coil ................. 79 Radio Triggering ..................79 Measurement ...................... 80 Basic Operations ..................80 Data Transfer ....................81 Optimizing ....................82 Troubleshotting and Diagnostics ..............84 General SeisTW Program Problems ............
-
Page 5: About This Manual
ABEM Terraloc Pro 2 About This Manual The conventions and formats of this manual are described in the following paragraphs: • Typographical conventions used in this manual: Italic Names of objects, figure descriptions Bold In-line minor headers, emphasis Blue Italic URL links •... - Page 6 ABEM Terraloc Pro 2...
-
Page 7: Get Ready - Unpacking Your New Terraloc Pro 2
(office power supply unit). The inbuilt battery charger charges the internal battery pack when an external power source is connected. The Terraloc Pro 2 has a hard disk with a size of at least 100 GB. It also has 3 USB 2.0 ports and an Ethernet port. -
Page 8: The Delivered Instrument
ABEM Terraloc Pro 2 The Delivered Instrument Your Terraloc Pro 2 arrives in a hard case transport box. Open it and unpack all items carefully. Check the contents of the box or crate against the packing list. If you ordered optional equipment, check the invoice/packing list for details and compare with your original order. -
Page 9: Inspection
Guideline Geo within 14 days of your receipt of shipment. Shipping/Repacking instructions The Guideline Geo packing kit is specially designed for the Terraloc Pro 2. The packing kit should be used whenever shipping is necessary. If original packing materials are unavailable, pack the instrument in a wooden box that is large enough to allow some 80 mm of shock absorbing material to be placed all around the instrument. -
Page 10: Registration
Guideline Geo products. So please send occasional reports on field usage as well as your ideas on how the Terraloc Pro 2 and its technical documentation can be improved to help you do an even better job of seismic surveying. -
Page 11: Overview Of The Instrument
The Connector Panel All connectors except for the external power are situated on the right side panel of the Terraloc Pro 2 (Figure 2). Some of the connectors are described in more detail in chapter 10 Appendix B. Connectors. Note! - Page 12 USB 1 USB 2 USB 3 TTL Trig/Arm: To connect two or more Terraloc Pro 2 as Master and Slave(s), for radio shot, and vibrator hand-shaking. Mating connector: see 10.2 TTL Arm/Trig Connector Trigger input: for a trigger geophone shot instant contacts, a wire loop around the explosive charge, or trigger output from a mechanical energy source.
-
Page 13: The Power Panel
ABEM Terraloc Pro 2 The Power Panel The power panel of the Terraloc Pro 2 is shown in Figure 3. The Power Input connector is described in more detail in chapter 10 Appendix B. Connectors. Figure 3 The Power panel... -
Page 14: The Built-In Gps Receiver
ABEM Terraloc Pro 2 The Built-in GPS Receiver Terraloc Pro 2 has a built-in GPS receiver (Figure 4). In order to function well the built- in antenna in the handle of the instrument must be able to receive signals from a sufficient number of satellites. -
Page 15: The Power Supply
The yellow LED indicates if sampling is on or off The Power Supply The Terraloc Pro 2 can use an external power source as well as internal batteries as power supply. The external source can be a battery or a PSU (Power Supply Unit). If possible use the supplied cable set for the external power source. -
Page 16: Interconnecting Two Or More Instruments
Should more channels be needed than can be supplied by the use of a single instrument, it is possible to connect (virtually) any number of Terraloc Pro 2 instruments. The Arm, Disarm, and Trigger events can be synchronized with interconnected instruments. The TTL Arm/Trig connector is used to connect the instruments, see chapter 10.2. -
Page 17: Quick Start
In this section we will make a measurement of noise. It will give you an insight to how easy it is to set your Terraloc Pro 2 up for operation. You will need no more equipment than the instrument itself and the power supply. However, before starting any fieldwork it is wise to invest time to go through and familiarize yourself with the various menus, dialogs and options that exist. - Page 18 ABEM Terraloc Pro 2 • Change number of channels if needed • Enter what type of measurement is to be performed. • Enter the required record length • Press <ENT> to select NEXT Figure 8 Wizard Mode second dialog • Enter geophone spacing •...
- Page 19 ABEM Terraloc Pro 2 • Press <ENT> to accept the first stacking • Trigging once more by pressing <CTRL> + <ARM> will replace the traces on the screen with a new set that looks a little bit different. What you see now is the average of the two measurements made so far •...
-
Page 20: The User Interface
ABEM Terraloc Pro 2 The User Interface The user interacts with the instrument through the User Interface Panel and possibly connected USB input devices. This chapter explains the basics of this interaction. The Display SeisTW will normally be shown on the display. Figure 9 shows the main window, which is shown if the Wizard mode or if a record is closed. - Page 21 ABEM Terraloc Pro 2 Figure 5) but an external USB keyboard can also be used and as well an external USB mouse. 4.2.1 The Built-in Keyboard Table 1 lists the names of the buttons as referenced in this document. <1>...
- Page 22 Ctrl Space Enter Table 2 Mapping between built-in keyboard and external keyboard 4.2.3 An External Mouse A standard USB mouse can be connected to one of the USB ports of the Terraloc Pro 2 and used as a normal mouse.
-
Page 23: Using Seistw
ABEM Terraloc Pro 2 Using SeisTW SeisTW is a normal computer program and using the program with external keyboard and mouse is like using any other program for Windows or Linux. However using the built-in keyboard naturally brings with it some limitations. Some measures have been taken within SeisTW to remedy this and the rest of this chapter explains some of the more general of these measures. - Page 24 ABEM Terraloc Pro 2 Figure 11 SeisTW with the horizontal separator moved upwards Figure 12 SeisTW with the vertical separator moved to the right • Hiding the Trace and Frequency Views. The Record View will enlarge to cover the hidden area...
- Page 25 ABEM Terraloc Pro 2 • Showing or hiding the Logging Window. ― Press <SHIFT> + <SPACE> to alternately hide and show the Logging Window Figure 13 The Logging Window on the left side • Opening and stepping through Menu Bar items ―...
- Page 26 ABEM Terraloc Pro 2 • Changing settings on dialogs. The way to change a setting depends on the type of input field. See Figure 14 for examples of input field types ― Drop-down list (see Trig input mode): Press <SPACE> to open the list Press <UP>...
-
Page 27: Seistw Layout Parts
ABEM Terraloc Pro 2 SeisTW Layout Parts Figure 15 The SeisTW layout The purpose and specific functions of each layout part will be described below. 4.4.1 Menu Bar The Menu Bar presents the main menu items to the user. 4.4.2 Tool Bar The Tool Bar presents the user with the most commonly used view options, and source location coordinates. - Page 28 ABEM Terraloc Pro 2 • Moving the Trace Marker between traces ― Press <LEFT> to move the marker to the previous trace or from the first to the last trace (wrap around) ― Press <RIGHT> to move the marker to the next trace or from the last to the first trace (wrap around) ―...
- Page 29 ABEM Terraloc Pro 2 Figure 21 Source indicator; Source located at geophone 4 Figure 22 Source indicator; Source located after last geophone • Scrolling the view ― Press <UP> to scroll the view upwards ― Press <DOWN> to scroll the view downwards A timeline can be moved across the view.
- Page 30 ABEM Terraloc Pro 2 Figure 23 The red timeline Note! Keeping the key pressed will accelerate the movement of the timeline • Positioning a first break marker (Figure 24) ― Press <.> to position a first break marker. The marker will be positioned on the current trace.
- Page 31 ABEM Terraloc Pro 2 • Positioning a first break marker on trace 2 (Figure 25) ― Press <RIGHT> to select trace 2 ― Press <.> to position a first break marker Figure 25 First break marker on trace 2 • Removing an existing first break marker ―...
- Page 32 ABEM Terraloc Pro 2 Figure 26 The red timeline Note! Keeping the key pressed will accelerate the movement of the timeline A reference time marker can be positioned at the location of the time line. If the time line is moved when the reference time marker is active, the status bar will display, in addition to the normal information, the relative time and the corresponding frequency (i.e.
- Page 33 ABEM Terraloc Pro 2 Figure 28 A reference time marker with timeline • Removing an existing reference time marker ― Press <-> until the timeline is invisible ― Press <0> to remove the reference time marker • Positioning a first break marker (Figure 29) ―...
- Page 34 ABEM Terraloc Pro 2 ― Press <SHIFT> + <-> to move the frequency line to the left with a large step Figure 30 The Frequency View with the frequency line Note! Please be aware that the values displayed, mostly are...
- Page 35 ABEM Terraloc Pro 2 The Record View Position of the timeline (ms) Measured value at timeline. Unit is available as raw A/D-value, mV, mm/s or cm/s. This is selectable in the view options dialog The Trace View Position of the timeline (ms) ...
- Page 36 ABEM Terraloc Pro 2 Information dialog (chapter 4.6.1) shows more information on each board. Possible alerts: - = No error or warning B = Broken channel E = Warning for early trig (see the Warn for early trig setting in chapter 4.6.5.2) N= Warning for noisy trig (see the Warn for noisy trig setting in chapter 4.6.5.2)
- Page 37 ABEM Terraloc Pro 2 There is no data in memory and the instrument is ready to be No data armed. In this state all acquisition parameters can be changed <<< ARMED >>> The instrument is armed and ready for a trigger. In this state...
-
Page 38: Menus
ABEM Terraloc Pro 2 Menus SeisTW has a normal computer main menu. Since this is easier to use with external mouse and keyboard than with the built-in keyboard there are also two complementing menu choices added, the Quick Menu and the Context Menu. These duplicates selected items from the Main Menu. - Page 39 ABEM Terraloc Pro 2 - Setup wizard: Opens the wizard mode for setting up new records - Page Setup: Opens the standard Page Setup-dialog where page orientation, margins etc can be set. - Print: Opens the standard Print-dialog where printer can be chosen.
- Page 40 ABEM Terraloc Pro 2 Action - Arm: Arms the instrument - Geophone test: Starts a geophone test (4.6.7) - Force trig: Forces a trigger - Disarm: Disarms the instrument - Quick backup: Copies the working directory to USB memory stick...
- Page 41 ABEM Terraloc Pro 2 4.5.3 The Context Menu The Context Menu exists in two similar versions, a compact and a data version. The compact version is shown when no data exists in the current record (Figure 35). The data version is shown when a previously saved record is opened (Figure 36).
- Page 42 ABEM Terraloc Pro 2 Clear Traces Menu Note! The menu items of the are not Main Menu. available from the Clear Traces Menu Note! will only be shown when data has been recorded • Opening the Clear Traces Menu ― Press <ESC> to open the Clear Traces Menu ―...
-
Page 43: Dialogs
ABEM Terraloc Pro 2 Dialogs 4.6.1 System Information dialog The System Information dialogue displays information about the serial number, software versions, number of boards, number of measurement channels, the health of the boards etc (Figure 38). • Opening the System Information dialog ―... - Page 44 ABEM Terraloc Pro 2 • Opening the Preferences dialog ― Press <CTRL> + <9> to open the Preferences dialog - The next record number is normally incremented automatically but the next number to use can be set here - The next project number relates to Common offset projects.
- Page 45 ABEM Terraloc Pro 2 4.6.4 The Select Acquisition Mode Dialog The Select Acquisition Mode dialog is used to change the acquisition mode and to change the number of traces to be used (Figure 40). • Opening the Select Acquisition Mode dialog ―...
- Page 46 ABEM Terraloc Pro 2 trace can be recorded at a time. When <SAVE> is pressed the next trace will be activated. There is no upper limit for how many traces can be recorded. Table 7 Acquisition Modes 4.6.5 The Acquisition Setup Dialog The Acquisition Setup dialog is a container for four different categories of settings for data acquisition: sampling, trig, noise and filters (Figure 41).
- Page 47 ABEM Terraloc Pro 2 • Opening the Sampling Settings (Acquisition Setup dialog with the Setup tab selected) ― Press <1> Figure 41 The Acquisition Setup Dialog; Setup tab selected The resultant record length will vary from short (5.1 ms) to long (80 minutes) depending on your choice of sampling interval and number of samples to be recorded.
- Page 48 ABEM Terraloc Pro 2 No of samples - Number of samples to acquire. Available choices are: 256, 512, 1024, 2048, 4096, 8192, 16384, 32768, 65536, 131072, 262144, 480000 Pretrig/delay - Selects the pre-trig or delay for the trig event. Pre-trig is set by...
- Page 49 ABEM Terraloc Pro 2 If a new shot is received before the <ENT> key is pressed the previous shot is lost. The last shot added to the stack cannot be removed by the “delete last shot” feature Single Same as Auto stack, but the instrument has to be...
- Page 50 ABEM Terraloc Pro 2 Figure 42 The Acquisition Setup Dialog; Trig tab selected Setting Description Trig input - Selects trig input source, and its mode mode The following modes are available: Name Description Analog When using the trigger input connector, the instrument is triggered when the signal exceeds the trig input level on the analog trig input.
- Page 51 Increasing the trigger input level increases the sensitivity, which means that a lower signal level is needed to trig the Terraloc Pro 2. Decreasing the trigger input level on the other hand decreases the sensitivity, which means that a higher signal level is needed to trig the Terraloc Pro 2.
- Page 52 ABEM Terraloc Pro 2 increased, the result is of course an earlier trig event, but increasing the sensitivity also means that the risk of triggering the system by a noise signal increases. If the sensitivity is too low, noise triggering will not occur, but instead a considerable and poorly defined delay is introduced.
- Page 53 Arm/Trig connector (Figure 73 chapter 10.2). There is no limit for how many Terraloc Pro 2s may be connected in this way. When external arm input is on the Terraloc Pro 2 monitors the input continuously and if a correct signal is received the Terraloc Pro 2 will arm.
- Page 54 ABEM Terraloc Pro 2 Ext. arm - When several instruments are interconnected, the external arm verify inputs and outputs can be connected in such a way that when one instrument is armed it in turn will arm the next instrument. If this choice is checked when the user presses <ARM>...
- Page 55 ABEM Terraloc Pro 2 Graph min - The minimum value of the noise monitor scale [dB] Graph max - The maximum value of the noise monitor scale [dB] Peak Hold - The noise monitor will show red markings to show noise peak time [s] values.
- Page 56 ABEM Terraloc Pro 2 the filter may also deteriorate original signals. The higher the cut-off frequency and filter damping, the worse possible distortions become. Using an analog filter is always a compromise. If the noise level is high, record it. Use the frequency view to analyze it, and to see the actual noise frequency.
- Page 57 ABEM Terraloc Pro 2 Remove - The measurements are calibrated for internal offset, but offset calculated DC during measurements may appear depending on attached sensors offset after and site conditions. This option will calculate and remove any measurement DC offset from the measured data.
- Page 58 ABEM Terraloc Pro 2 Figure 48 Increased graph min value • Adjusting the graph max (Figure 48) ― Press <CTRL> + <+> to increase the graph max in 10 dB step ― Press <CTRL> + <-> to decrease the graph max in 10 dB step Figure 49 Increased graph max value •...
- Page 59 ABEM Terraloc Pro 2 Figure 50 Threshold adjustments 4.6.7 The Geophone Test Result Dialog This geophone test records the response from the geophones to an impulse signal. A DC-current is sent to the geophones dislocating the seismic mass of the geophone.
- Page 60 ABEM Terraloc Pro 2 Figure 51 The Geophone Test Result Dialog 4.6.8 The Receiver Spread Dialog The Receiver Spread dialog is used to set up the traces, including input channel mapping and polarity (Figure 52). • Opening the Receiver Spread dialog ―...
- Page 61 ABEM Terraloc Pro 2 Channel Specifies the channel mapped to each trace. It is possible to map any channel to any trace, and one channel can be mapped to any number of traces. If the reference channel is enabled, it will be mapped to the trace as specified by the corresponding channel.
- Page 62 ABEM Terraloc Pro 2 Stack Enables or disables stacking for the specified trace. If the stack for a trace is disabled (non-checked), data cannot be added (or subtracted) from that stack. • Changing stack state for one trace ― Press <ARROWS> to select the wanted trace in the stack column ―...
- Page 63 ABEM Terraloc Pro 2 ― Press <SHIFT> + <1> to set all traces to a checked value ― Press <SHIFT> + <0> to set all traces to a non-checked value 4.6.9 The Layout Geometry Dialog The Layout Geometry dialog is divided into five different sections (Figure 53). Each section is described separately below.
- Page 64 ABEM Terraloc Pro 2 • Changing a value ― Press <ARROWS> to select the X, Y or Z value to be changed ― Press <NUMBERS> and possibly <-> and <.> to construct a valid value ― Press <ENT> to set the value and move down to the next value When the first and second value has been given then the following values can be entered quicker given that the distances are the same.
- Page 65 ABEM Terraloc Pro 2 The settings used to control roll-along measurements (see chapter 4.6.4 for more on roll-along). Note that it is assumed that the lowest numbered trace is on the left side and the highest numbered is on the right side. Note that roll-along options are only available if roll-along measure mode has been selected.
- Page 66 ABEM Terraloc Pro 2 Figure 54 The Layout Helper Dialog It is possible to enter values in any two of the entries layout start, layout end, and receiver separation. The third entry is calculated automatically. • Setting an entry to be calculated automatically ―...
- Page 67 ABEM Terraloc Pro 2 • Opening the Header Info dialog ― Press <7> to open the Header Info dialog Figure 56 The Header Info Dialog Note! Remember that an external USB-keyboard is needed to be able to write letters. Therefore it can be practical...
- Page 68 ABEM Terraloc Pro 2 Figure 57 The View Options Dialog Setting Description View mode - The view mode determines how data is scaled for the display. The following modes are available: Name Description Enhanced The data is not scaled, but the amplitudes are used directly.
- Page 69 ABEM Terraloc Pro 2 Scale factor - A general factor by which every sample is multiplied. Range: 1, 2, 3, 4, 5, 10, 15, 20 Trace clip - How many traces the plotted curve may overlap before it is clipped.
- Page 70 ABEM Terraloc Pro 2 Linearity - This value sets the amplitude level that is within the linear part of the range [dB] scaling function. Both scaling functions are linear in the beginning (for small amplitudes), while compressing larger amplitudes. Only available when View Mode is set to Hyperbolic...
- Page 71 ABEM Terraloc Pro 2 Figure 59 The Velocity Analyzer; Dialog and Velocity Marker When the Velocity Analyzer starts, it checks the receiver locations and calculates the receiver separation. If the receiver separation seems to be erroneous, or the receiver locations are not specified, a valid separation value can be entered in the dialog (Figure 60).
- Page 72 ABEM Terraloc Pro 2 ― Press <CTRL> + <LEFT> to move the free end to the left ― Press <CTRL> + <DOWN> to move the free end down ― Press <CTRL> + <UP> to move the free end up Start position...
- Page 73 ABEM Terraloc Pro 2 Free end to the left Free end to the right Free end up Free end down Free end left...
- Page 74 ABEM Terraloc Pro 2 Free end up Moved to the right...
-
Page 75: Data Processing
ABEM Terraloc Pro 2 Data Processing The data processing discussed below works on data in memory, not to a previously saved file. Save Note! If a command is done then previously stored data Save As will be overwritten and lost. Use... -
Page 76: Fir Filter
ABEM Terraloc Pro 2 FIR Filter The FIR filters (Finite Impulse Response) are used to reduce noise from the recorded data. Note! The abbreviation FIR in this filter context is not the same as FIR used in the first breaks context The FIR filter dialog (Figure 62) is accessed from the data Context Menu (Figure 36). -
Page 77: Cross Correlate
ABEM Terraloc Pro 2 Cross Correlate Chapter 12.6 Vibroseis discusses the use of cross correlation. Selecting the Cross correlate menu item from the data Context Menu (Figure 36) opens the Reference trace selection dialog (Figure 63). Figure 63 The Reference trace selection dialog... - Page 78 ABEM Terraloc Pro 2 Figure 65 Opened record – before processing Figure 66 The same record – now cross-correlated...
-
Page 79: Moving Average
ABEM Terraloc Pro 2 Moving Average Moving average is used to analyze a set of data points by creating a series of averages of different subsets of the full data set. It can be used to smooth out short-term fluctuations and highlight longer-term trends. - Page 80 ABEM Terraloc Pro 2 Figure 68 Opened record – before processing Figure 69 The same record – after moving average filter...
-
Page 81: Triggering Methods
50 µs if fired with a high power-blasting machine. Radio Triggering In case you need to trigger the Terraloc Pro 2 in places where you cannot use a trigger cable, you can use a simple radio equipment to transmit the trigger pulse. -
Page 82: Measurement
ABEM Terraloc Pro 2 Measurement Basic Operations See chapter 3 Quick Start for an introduction to the most basic operations on the Terraloc Pro 2. • Initiating ― Press <ARM> ― Press <CTRL> + <SPACE> to open the Quick Menu ―... -
Page 83: Data Transfer
Terraloc Pro 2 hardware or measurement programs developed by Guideline Geo. File transfers from your Terraloc Pro 2 to a PC can be done using a network cable. You will also need an external USB-keyboard and USB-mouse for the Terraloc Pro 2. These parts are supplied with the Terraloc Pro 2 at delivery. -
Page 84: Optimizing
ABEM Terraloc Pro 2 Quick backup will create a backup of the entire SeisTWData folder to a destination folder that can be specified. If an USB memory stick is connected it will be selected as the default destination folder. Figure 70 The Quick Backup dialog... - Page 85 ABEM Terraloc Pro 2 7.3.2 For Security When you optimize for security, you set the instrument up to give you as much information about the data acquisition as possible. This means that, e.g. data and progress are displayed. ― Set Stack Mode to "Preview" or "Single" (chapter 4.6.5.1).
-
Page 86: Troubleshotting And Diagnostics
This is used when you interconnect two or more Terraloc Pro 2 instruments (chapter 2.6). If you use one Terraloc Pro 2 only, no external arm will arrive, hence the Terraloc Pro 2 never arms (unless you have some other external device that confirms the arm command). -
Page 87: Trigger Problems
This allows for remote diagnostics, remote control or software updates. For the remote access to work the Terraloc Pro 2 needs to be connected to a network that has an internet connection. It does not matter if connected to the internet by Ethernet cable or WiFi. - Page 88 ABEM Terraloc Pro 2 Note! The LAN router or firewall must not block outgoing traffic on port 5938, 443 or 80. If you are not familiar with the terminology in this section, and experience problems with the connection, please contact your local network administrator.
-
Page 89: In Case Of Malfunction
ABEM Terraloc Pro 2 • Disconnecting • To stop the remote access and disconnect all attached remote devices close the general TeamViewer window or the TeamViewer dialog in the lower right corner. In Case of Malfunction In case of malfunction please carry out applicable tests as described in this manual. If it is not possible to find the cause of the problem, follow the instructions in Section 8.4... -
Page 90: Appendix A. Technical Specification
ABEM Terraloc Pro 2 Appendix A. Technical Specification General Number of channels 12, 24 or 48 Additional channels Easily obtained by linking two or more units together Up-hole channel Yes, 2 additional independent 100 sps – 50 ksps (20 s – 10 ms) ... - Page 91 ABEM Terraloc Pro 2 Post recording features Digital filters Band-pass, low-pass, high-pass, band-reject and remove DC offset Spectrum analysis Any single trace, FFT analysis Velocity Analysis On-screen analysis of refractor velocity First-arrivals picking Automatic or manual. Times can be saved with record.
-
Page 92: 10 Appendix B. Connectors
Seismic Input Connectors 10.1.1 12 and 24 Channel Terraloc Pro 2 Connector type: Cannon NK-27-32P Panel connector (mating side) (fits to NK-27-21C-1/2 ” cable connector) Figure 71 Input Connector 12- and 24-channel Terraloc Pro 2 Connector 1-12 Connector 13-24 Channel Channel “... - Page 93 ABEM Terraloc Pro 2 Cannon KPT-02-A22-55P Panel connector (mating side) (fits to KPT-06 A22-55S cable connector) Figure 72 Input Connector 48-channel Terraloc Pro 2 Connector 1-24 Connector 25-48 Channel Channel “ “ “ “ “ “ “ “ “ “...
-
Page 94: Ttl Arm/Trig Connector
ABEM Terraloc Pro 2 TTL Arm/Trig Connector Connector type: KPT 02-E10-6P (fits to KPT 06-E10-6S cable connector.) (Mating side view) Figure 73 TTL Arm/Trig Connector Trigger Output Arm Input Trigger Input GND (Ground) No Connection Arm Output TTL stands for Transistor-Transistor-Logic. It is used in connection to digital signals. -
Page 95: Appendix C. The First Arrivals File Format (Pck)
ABEM Terraloc Pro 2 11 Appendix C. The First Arrivals File Format (PCK) General This is an ASCII text file format, containing first arrivals for a record. The file is formatted, so it can be printed on any printer that prints ASCII text. -
Page 96: 12 Appendix D. Seismic Methods
ABEM Terraloc Pro 2 12 Appendix D. Seismic Methods There are a variety of seismic methods used. The objective of the survey controls which specific method to use. This section will give you an overview of some commonly used methods. Please refer to the bibliography at the end of the manual. If a more detailed... -
Page 97: Optimum Offset
ABEM Terraloc Pro 2 The seismic reflection method has mainly been used for deep investigations (depth > 30 m) in oil prospecting. During recent years however, shallow reflection investigations have become common for engineering and environmental purposes. It is now an important complement to refraction investigations, and has even sometimes replaced refraction. -
Page 98: Vibroseis
ABEM Terraloc Pro 2 Vibroseis Vibroseis is a seismic method in which a vibrator is used as an energy source to generate a controlled wave train, instead of the usual impulsive sources (e.g. hammer, explosives, shot guns, etc.). This method requires recording of the source signal for reference. -
Page 99: 13 Appendix E. Bibliography
ABEM Terraloc Pro 2 13 Appendix E. Bibliography Butler, Dwain K., Editor. 2005. Near Surface Geophysics. Volume 13 in Series: Investigations in Geophysics. Society of Exploration Geophysicists. ISBN 1-56080-130-1. Cassel, Bruce. 1984. Vertical Seismic Profiling - an Introduction. First Break Vol. 2 No. 11. European Association of Exploration Geophysicists.
Need help?
Do you have a question about the Terraloc Pro 2 and is the answer not in the manual?
Questions and answers