
Related Manuals for ZOSI ZS V17.5


Summary of Contents for ZOSI ZS V17.5
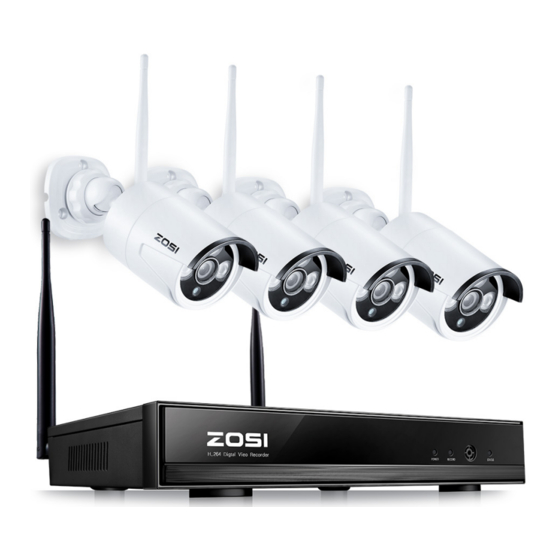
- Page 1 NVR Quick Start Guide ZS V17.5 For more information of your new system, please refer to www.zositech.com...
-
Page 2: Connecting Your System
Statement Thank you for purchasing this product. ZOSI is committed to providing its customers with a high quality, reliable security solution. ZOSI cannot assume responsibility for any consequences resulting from the use thereof. Before Installation This product may require cabling. It is strongly recommended that all products and components be tested prior to installation. - Page 3 2. Camera Mounting Spots 2.1 Mount the cameras anywhere within the Wi-Fi range, plug them to power with included power adapters (smaller ones are for cameras). 2.2 The cameras should start to stream videos to NVR within 1 minute. 2.3 If it does not display video on your monitor, the distance maybe too long or there are too many obstacles. Please move the cameras closer to the NVR.
- Page 4 Step 2: Download the App Search "IP PRO" or "EseeCloud" in App store or Google Play. Or Scan the QR Code to download the App. IP Pro App store Google play Step 3: Run the App A: Install the free App. B: Tap Register and enter your User name, Password,Email to create a new account.
-
Page 5: Network Video Recorder
1. Cloud ID: This Cloud ID can be found at the bottom right corner of your monitor. Network Video Recorder Cloud ID:662023312 ONLINE Or right click the mouse > go to System Setup > Network Setup > Scan the QR code. 2. - Page 6 3. Playback on mobiles In the IP pro/EseeCloud App,when viewing the cameras'live inmage, click Playback, you will enter the remote playback menu. The App automatically playback camera 1,you can switch channels by choosing the CH. Tips: Videos in playback are HD main streams, which require a very good transmission condition. Kindly suggest you playback in LAN.
- Page 7 4. View on PC Client Software Step 1: Download EseeCloud.exe software from CD and install it on your computer.Or go to https://support.zositech. to download the PC Client Software – EseeCloud.exe After opening the EseeCloud software, User login interface will be popped up.Enter username, password and then click "Login"...
- Page 8 Step2.2: Add device in local network 2.2.1 Please click on the button which located at right side of the "Device in same lan" then all the available devices within the LAN will be listed out. 2.2.2 Please click the "Add" button to add the device and the added device will be shown up at the device list which located at the right side.
- Page 9 5.View on PC via IE 1. When your PC is located on the same LAN as the NVR (normally means they are connected to the same router). Step1. Find the IP address and Web port # of your NVR (IP address can be found in System Setup > Network Setup). Step2.
- Page 10 2. When your PC is not located on the same LAN as the NVR (For example: view your home cameras from your office Step1. Open your Internet Explorer (IE) browser and visit: www.e-seenet.com Step2. Input Cloud ID, Username and Password to login. Cloud ID : The Cloud ID can be found at right bottom corner of your monitor.
- Page 11 6. Add camera by matching code 1. When you use Match Code 1.1 Add new add-on cameras to your system 1.2 Re-pair camera to NVR when they lose connection. You need to delete the Network Unreachable channel at first, then re-pair the camera to an unoccupied channel.
- Page 12 4. After matching code successfully ,the "status" will show "Connect success". Then you will see the camera is added to the NVR and display video on the screen 7. Record video The system may not includes Hard Drive(depending on the kit you selected). This system works with 3.5" SATA Hard Drive or 2.5"...
-
Page 13: Playback Video
8. Playback video Playback on screen/monitor Right click the mouse > Choose Video playback > Choose how many minutes you want to playback or Manual search > Choose the channel you want to playback and click Playback. 9. Video Detection Step1: Right click the mouse >... -
Page 14: Time Scheduled Record
Step2: Go to Channel Setup > Video detection > Choose Detection Motion > Set sensitivity > Tick Alarm, Buzzer, Email notice or App alarm >Click Copy to > Choose all > Click OK to save the setting. Note: the area being monitored for motion can be edited under Area Edit. 10. - Page 15 11. Backup videos to USB storage 1. Prepare a USB flash disk for backup 2. Right click the mouse > Choose Video backup > Choose the channel , Record mode and Search time > Search > Select the video you want to backup > Click Backup. 3.
- Page 16 12. Extend WiFi Range Wireless connection is easy and convenient, but it’s not an universal application. Because of the character of WiFi, the WiFi signal will be decreased when going through some obstacles. Some methods can be applied to bypass obstacles and extend WiFi range.
-
Page 17: Repeater Setup
13. Repeater Setup Repeater function can't strengthen WiFi signal for wireless NVR kit, but can extend the distance by repeaters -- WiFi cameras. Only when the repeater cameras and repeated cameras are positioned correctly, WiFi distance will be extended. Repeater function and 3 meters antenna extension cord are two methods to extend WiFi range. Users can choose one according to real situation. - Page 18 Step 3: Delete the repeater Move the mouse to the CHx (x is the channel number)which is required to be deleted, left click the mouse to delete, and then click "Apply" and "OK". Tips: 1. You can configure repeater only when the transmission distance needs to be increased 2.
- Page 19 Note: 1. Do not power off the NVR during the upgrade process, otherwise the upgrade will be failed. 2. During the upgrade process, if the upgrade is failed because of the improper operation. Starting the emergency recovery method can be used to restore the system, please restore the system according to the following steps: check the upgrade file and copy it to the root category of the USB flash disk.
- Page 20 All rights reserved. No part of this publication may be reproduced by any means without written permission from ZOSI. The information in this publication is believed to be accurate in all respects. ZOSI cannot assume responsibility for any consequences resulting from the use thereof.
Need help?
Do you have a question about the ZS V17.5 and is the answer not in the manual?
Questions and answers