Advertisement
Quick Links
MG-RTX3 V1.1
Instructions
Printed in Canada 06/2007
paradox.com
MGRTX3-EI02
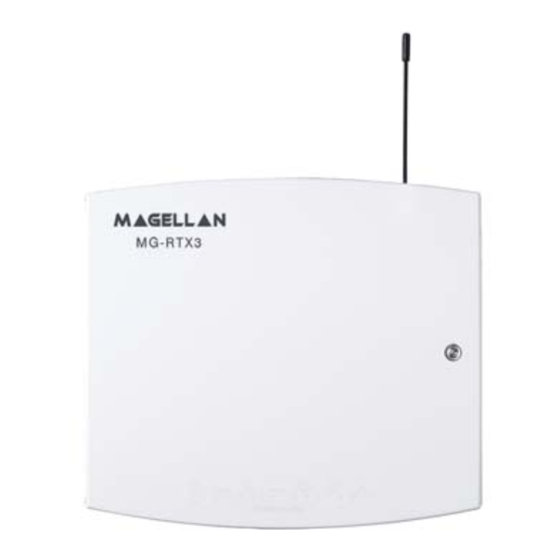
The MG-RTX3 is a 2-Way Wireless Expansion Module for use with any Digiplex
EVO, Spectra SP, and Esprit series control panel. It is also compatible with the
DGP-NE96 and DGP-848 control panels.
Compatibility Chart
EVO
Spectra SP
Esprit
Zones
32
32
-
Remotes
96/999
32
32
Wireless PGMs
8
16
-
Wireless keypads
-
8
-
2-Way Remote
-
Wireless Repeater
-
2
-
Technical Specifications
Compatibility
All Magellan wireless transmitters
Digiplex EVO (EVO48, EVO96 and EVO192)
Digiplex (DGP-848 and DGP-NE96)
Spectra SP (SP5500, SP6000 and SP7000)
Esprit (728ULT and 738ULT)
Frequency:
433MHz or 868MHz
Sensitivity:
-120 dBm
Current consumption:
50 mA
Dimensions (no antenna): 15cm x 16cm x 3cm (6in x 6.5in x 1.1in)
Operating temperature:
0°C to 49°C (32°F to 120°F)
PGM outputs:
PGM1 and PGM2 - 150mA PGM transistor outputs
PGM3 - form C relay output rated at 5A/28Vdc, N.O./
N.C. (PGM4 optional)
Range
Refer to the appropriate transmitter Instructions
Other:
Di-pole antenna; Error Correction Algorithm
Installation
In order to ensure the best possible signal reception, avoid mounting the MG-
RTX3 on metal, or in any location that could cause RF interference. Mount it as
high as possible and in locations not susceptible to drastic temperature changes.
Mount the MG-RTX3 in a location that allows at least 5cm (2") around the module
for adequate ventilation and heat dissipation.
If the environment is too noisy, the module's RF RX LED will turn on. When
performing the noise level test, make sure that there are no transmitters powered
up. Refer to the illustrations on the next page for additional information.
System Reset
Press and hold the Programming button for 5 seconds, the BUS RX LED will
flash. Release the button and press it again while the LED flashes to reset the
module to its default values. The system reset feature only functions during the
first 30 seconds after the MG-RTX3 is powered up.
Spectra SP Series Information
When connected to a Spectra SP series panel, the MG-RTX3 settings are
programmed into the panel. Refer to the panel's Programming Guide. Requires
version 2.0 or higher of the MG32LED or MG10LED keypads.
Digiplex EVO Programming
To enter programming mode with a Digiplex EVO panel, press and hold the [0] button. Enter the installer code and go to section
[4003]. Enter the MG-RTX3's 8-digit serial number. Enter the section number you wish to program.
WARNING: When used without an EVO641 or EVO641R keypad, enable option [1] in section [3029].
Group
Digiplex EVO
Option [1]: Low battery supervision (default: ON)
Option [2]: Check-in supervision (default: OFF)
Option [3]: Check-in supervision time interval
OFF
ON
Option [4]: RF Jamming supervision (default: ON)
Options
[001]
Option [5]: On-board module tamper supervision (default: OFF)
Option [6]: N/A
Option [7]: N/A
Option [8]: Ignore transmitter tamper signal
OFF
ON
View Serial
[030]
To see a transmitter's 6-digit serial number, press and hold a transmitter's anti-tamper switch.
Number
Assign up to 32 wireless transmitters to the MG-RTX3.
[101] = Zone Input 1; [132] = Zone Input 32
Zones
[101] to [132]
Enter 6-digit serial number or press and release the transmitter's tamper switch.
To delete an assigned transmitter, enter 000000 as a serial number.
Program 999 remotes with one MG-RTX3 using an EVO641/EVO641R keypad (refer to User Code
Remote
and Remote Control programming in the Digiplex EVO Programming Guide).
See text
Control
If you are not using an EVO641/EVO641R keypad, program 32 remotes per MG-RTX3 using sections
[201] to [432] detailed in Table 3 on the back page.
Stand-Alone
Transmitter Signal Strength
-
[601] to [632]
[601] = Zone Input 1; [632] = Zone Input 32
3 or less = too weak (move transmitter); 4 to 10 = OK.
8
-
Current Battery Life
Transmitter
[701] to [732]
[701] = Zone Input 1; [732] = Zone Input 32
-
Info
View the number of weeks the batteries have been in the transmitter
-
Previous Battery Life
-
[801] to [832]
[801] = Zone Input 1; [832] = Zone Input 32
View number of weeks the previous batteries were in the transmitter.
Two-Way PGM Signal Strength
[671] to [678]
[671] = PGM 1; [678] = PGM 8
3 or less = too weak (move transmitter); 4 to 10 = OK.
Assign up to 8 Two-Way PGMs to the MG-RTX3
[901] = PGM 1; [908] = PGM 8
[901] to [908]
Enter 6-digit serial number or press and release the transmitter's tamper switch
Two-Way
To delete an assigned Two-Way PGM, enter 000000 as a serial number.
PGM
If a section between [901] to [904] is empty, the MG-RTX3 will use the on-board PGM.
Program the Two-Way PGM activation event, deactivation event and PGM Delay options. Refer to
[910] to [989]
Table 1 below.
[991]
View Two-Way PGM tamper trouble (PGM # in trouble will be displayed)
[992]
View Two-Way PGM supervision trouble (PGM # in trouble will be displayed)
Table 1: Digiplex EVO PGM Option Programming
PGM1
PGM2
PGM
Activation*
-
PGM8
PGM1
PGM2
PGM
Deactivation*
-
PGM8
*For a complete list of events, refer to the PGM programming section of your Digiplex or Digiplex EVO control panel's programming guide.
PGM1
PGM Delay
PGM2
(000 to 255)
Default: 005
-
PGM8
Digiplex EVO Programming
= 24 hours (default)
= 80 minutes
= MG-RTX3 ignores tamper signal (default)
= MG-RTX3 reports tamper signal
Event Group
Feature Group
Start #
[910]
[911]
[912]
[920]
[921]
[922]
+10 per PGM
+10 per PGM
+10 per PGM
[980]
[981]
[982]
[914]
[915]
[916]
[924]
[925]
[926]
+10 per PGM
+10 per PGM
+10 per PGM
[984]
[985]
[986]
PGM Delay
Options
[918]
[919]
Option [1]: ON = PGM delay
OFF = Latch (default)
[928]
[929]
+10 per PGM
+10 per PGM
Option [2]: ON = Minutes
[988]
[989]
OFF = Seconds (default)
Esprit Programming
To enter programming mode with Esprit, connect an Esprit 636 or 646 to the "Program" connector.
Press the "Esprit Mode Programming" button. Press [enter] on your Esprit keypad and enter the
installer code (default: 757575). Enter the desired section number.
Group
Esprit
[000]
Enter Installer Code (4 or 6 digits, default: 757575)
Assign a valid user code from the Esprit Panel into the MG-RTX3.
Codes
[301] to [332]
[301] = user 01; [332] = user 32.
To delete a user code, press [2ND] and then [Enter]
Assign a remote control to the MG-RTX3.
[201] = remote control 01; [232] = remote control 32
[201] to [232]
Press enter and after the confirmation beep, press [Enter] again. Press
and hold any button on the remote until you hear two beeps.
To delete a remote control, press [2ND] followed by [Enter].
Program remote control button options.
Remote
[401] = remote control 01; [432] = remote control 32
Control
Options [1] to [3]: See Table 2 below
Option [4]: Enable button
[401] to [432]
Option [5]: Enable button
Option [6]: Enable button
Option [7]: Enable button
Option [8]: Enable button
Program which buttons will also activate a PGM output.
[011] = Remote Button
[012] = Remote Button
[013] = Remote Button
[014] = Remote Button
[011] to [014]
Option [1]: Activate PGM 1 output
Option [2]: Activate PGM 2 output
Option [3]: Activate PGM 3 output
Option [4]: Activate PGM 4 output
Refer to section [401] to [432]
PGM
Set PGM as latched or with a PGM delay
[021] = PGM1; [024] = PGM 4
Option [0]: Latched
Option [1]: 1 second
Option [2]: 5 seconds (default)
[021] to [024]
Option [3]: 10 seconds
Option [4]: 20 seconds
Option [5]: 40 seconds
Option [6]: 60 seconds
Option [7]: 2 minutes
Option [8]: 4 minutes
Option [1]: ON
Options
[001]
Option [2]: ON
Option [0]: No PGM output on panic alarm
Option [1]: Toggle PGM 1 on panic alarm
[002]
Option [2]: Toggle PGM 2 on panic alarm
Option [3]: Toggle PGM 3 on panic alarm (default)
Option [4]: Toggle PGM 4 on panic alarm
Panic
Alarm
Option [0]: No RF signal lockout on panic alarm (default)
Option [1]: 30-second RF signal lockout on panic alarm
End #
[003]
Option [2]: 60-second RF signal lockout on panic alarm
[913]
Option [3]: 90-second RF signal lockout on panic alarm
[923]
Option [4]: 120-second RF signal lockout on panic alarm
+10 per PGM
Table 2: Remote Control Arming Options [401] to [432], Options [1] to [3]
[983]
Option [1]
Option [2]
Off
Off
[917]
[927]
On
Off
+10 per PGM
Off
On
[987]
On
On
Off
Off
On
Off
Off
On
On
On
* Buttons used to arm are also used to disarm the system
Esprit Programming
for PGM activation (see section [011])
for PGM activation (see section [012])
for PGM activation (see section [013])
for PGM activation (see section [014])
+
for Panic Alarm
= 6-digit access code length (default)
OFF
= 4-digit access code length
= Panic Alarm toggles PGM and generates a panic.
OFF
= Panic Alarm toggles the PGM
(default: ON)
Option [3]
Definition
Off
No Arm or Disarm
Off
Button
= Regular Arm* (Default)
Off
Button
= Regular Arm*
Button
= Regular Arm*
Off
Button
= Regular Arm*
On
Button
= Force Arm*
Button
= Force Arm*
On
Button
= Stay Arm*
Button
= Regular Arm*
On
Button
= Stay Arm*
On
Button
= Stay Arm*
Advertisement

Subscribe to Our Youtube Channel
Related Manuals for Paradox MG-RTX3


Summary of Contents for Paradox MG-RTX3
- Page 1 Options [001] Option [2]: ON = Panic Alarm toggles PGM and generates a panic. If a section between [901] to [904] is empty, the MG-RTX3 will use the on-board PGM. Sensitivity: -120 dBm = Panic Alarm toggles the PGM Program the Two-Way PGM activation event, deactivation event and PGM Delay options. Refer to...
- Page 2 LED flashes to reset the module to its default values. This is only possible in the first 30 seconds after the MG-RTX3 is powered up. Connect the Esprit 636/646 LED keypad to the “Program” connector.
Need help?
Do you have a question about the MG-RTX3 and is the answer not in the manual?
Questions and answers