Edic Endeavor 9000I-HSH Owner's/Operator's Manual
Multi-purpose extractor
Hide thumbs
Also See for Endeavor 9000I-HSH:
- Quick manuals (15 pages) ,
- Owner's/operator's manual (25 pages)
Table of Contents
Advertisement
Quick Links
Download this manual
See also:
Quick Manual
Advertisement
Table of Contents

Related Manuals for Edic Endeavor 9000I-HSH


Summary of Contents for Edic Endeavor 9000I-HSH
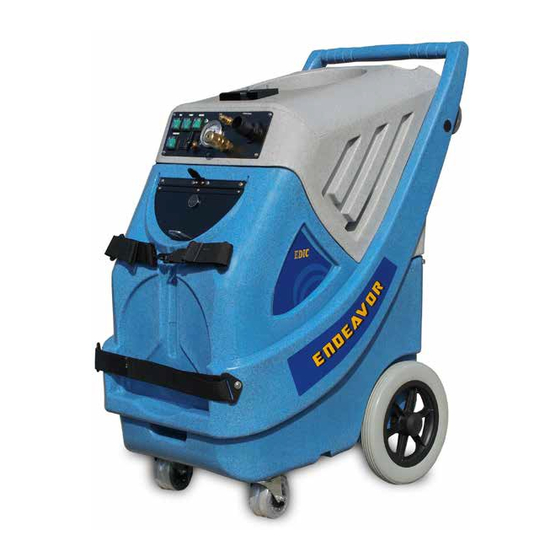
- Page 1 ENDEAVOR 9000I-HSH MULTI-PURPOSE EXTRACTOR OWNER’ S/ OPERATOR’ S MANUAL PROUDLY DESIGNED AND MANUFACTURED BY Revision 1 6-5-17 For commercial useonly...
-
Page 2: Table Of Contents
TABLE OF CONTENTS RECEIVINGYOUREQUIPMENT................... WARNINGSAND SAFETY....................3, 4 ELECTRICAL INFORMATION..................MAINTENANCE........................ MACHINE LAYOUT......................CONTROL PANEL OVERVIEW..................POWER CORD AND CIRCUIT LOCATOR OPERATION........CONNECTING VACUUM AND SOLUTION HOS E..........RECOVERYTANK FILTERS................... AUTO-FILL/ AUTO-DUMP ....................PRIMING THE PUMP ....................... ADJUS TING PUMP PRESS URE..................OPERATING INSTRUCTIONSFOR HEATER............. -
Page 3: Receivingyourequipment
EDIC’sliability ceaseswhen thecarrier picksup the • All servicing of EDIC equipment should be performed shipment. However, our customer servicestaff will be only by EDIC authorized servicecenters. happy to furnish any information needed in connection •... -
Page 4: Electrical Information
If theGFCI tripsdueto a tempo- email info@ edic-usa.com rary incident, you may restorefunction by pressing the button on theGFCI box marked Reset “RES ET” button Do not attempt repairsyourself. EDIC will assist you in on theGFCI box. locating an indepedent servicecontractor. GROUNDING INSTRUCTIONS: Thispieceof equipment must begrounded. -
Page 5: Maintenance
Do not unplug by pulling cord. To unplug, grasp the ponents: plug, not thecord. • KIT B, VALVE S ET: PART #G13333-2 • Do not handleplug or appliancewith wet hands. • Thisequipment should bestored indoorsand not Contact EDIC for PUMP maintenanceinstructions. exposed to rain. -
Page 6: Machine Layout
ENDEAVOR OVERVIEW 1. Handle: Used to position and maneuver themachine. 8. Rear caster wheels: Allow themachineto beplaced 2. Recovery tank and accesspoint. Lid can beremoved on itsback when loaded onto a vehicle. for cleaning of recovery tank. 9. Wastedump valve. 3. -
Page 7: Control Panel Overview
CONTROL PANEL OVERVIEW PUMP HEATER PUMPOUT 1. Vacuum power switch. “l” ison. “O” isoff. 2. Pump Power switch. “l” ison. “O” isoff. 3. Heater power switch. “l” ison. “O” isoff. 4. Circuit locator confirmation light: Lightsup green when both power cordsareon two separatecircuits. 5. -
Page 8: Power Cord And Circuit Locator Operation
CONNECTING THE POWER CORDS: USING THE CIRCUIT LOCATOR: TheENDEAVOR hasa built in circuit locator. When TheENDEAVOR usesPOWERCON twist lock connec- theunit isplugged into two separatecircuits, thecircuit torson theend of theGFCI powercords. Thesemateto locator confirmation light will turn on. Theconfirmation thefemalereceptacleson thebody of theENDEAVOR. light ismarked “CT”... -
Page 9: Recoverytank Filters
RECOVERY TANK FILTERS: VACUUM INTAKE FILTER AND VACUUM S HUT OFF: Thevacuum intakefilter housesthefloat ball which isin VACUUM PRE-FILTER BAG: placeto shut off airflow to thevacuum motor when there TheintakePre-filter bag hasbeen designed to catch larger istoo much fluid in thewastetank. Thisfunction keeps debrisbeforeit enterstheopen areaof thewastetank. -
Page 10: Auto-Fill/ Auto-Dump
UTILIZING AUTO-FILL & AUTO-DUMP: PRIMING THE PUMP: Thismachineisequipped with theability to self-regulate THE ENDEAVOR HASA PIS TON PUMP WHICH thelevelsof fluid in thesolution tank and therecovery ISNOT S ELF-PRIMING. S HOULD AIR BE INTRO- tank. DUCED INTO THE S YS TEM, PRIMING WILL RE- MOVE IT AND RES TORE PRESS URE TO THE PUMP NOTE: Toprevent flooding, periodicallys toptomonitor S YSTEM. -
Page 11: Adjusting Pump Pressure
ADJUSTING PUMP PRESSURE: OPERATI NG THE HEATER FOR CARPET AND UPHOLSTERY CLEANING: Thismachineisequipped with a pressureregulator (see #6 on page7), that allowstheoperator to adjust thepres- The9000I-HS H isequipped with a 2000watt heater. The surebetween 100PS I and 1100PS I. Thepressurerequired heater will only operateunder thefollowing conditions: for different textilesand surfaceswill vary. -
Page 12: Cleaning Carpet
HOW TO SETUP THE ENDEAVOR FOR MOUNTING THE OPTIONAL 991RSAC- CLEANING CARPET OR UPHOLSTERY: CESSORY CHEMICAL INJECTOR SYSTEM 1. Plug in power cordsasper instructionson page8. (NOT INCLUDED): 2. Makesureyou areon 2 circuits. 3. Connect your solution and vacuum hosesto ma- If you havepurchased a 991RSChemical Injector S ystem chineand accessories. -
Page 13: S Etup Of 991Rss Ys Tem (Optional)
SET UP OF THE OPTIONAL 991RSACCES- S TEP 3. Theintakebottlecaps, and theclear hosesthat areat- SORY CHEMICAL INJECTOR SYSTEM tached to them, aredesigned to beremoved and inter- (NOT INCLUDED): changed by way of a quick releasesystem. When you first receiveyour new 991RS, you will need to install the S TEP 1. - Page 14 S TEP 4. S TEP 6. Separatetheclear hosefrom theintakebottlecap. Oncethetip hasbeen installed, push theclear hoseback into placeover thehosebarb. S TEP 7. S TEP 5. Placeyour chemical bottlesin thebottleholdersand Locatethebrassthreaded insert on theintakebottlecap install thethreaded intakecaps. barb and install a metering tip by threading it in a clock- wisemotion.
-
Page 15: Us Ing A 9000Ac S Prayer (Optional)
SELECTING CHEMICAL ON OPTIONAL USING OPTIONAL 9000AC SPRAYER 991RS(NOT INCLUDED): (NOT INCLUDED): Usethespray collar to select between low pressurechem- Usethechemical selector valveto changebetween the ical application or high pressure rinse. Pop “OUT” for left sideand right sidebottleholders. For accurateflow low pressureand “IN” for high pressure. rates, point theselector valvestraight at thebottleholder you wish to draw from. - Page 16 spray gun. 4. Fill themachinewith water. Seepage10 for auto fill instructions. 5. Primethepump asper instructionson page9. 6. Adjust thepressureto 500psi. Seeinstructionson page9. 7. Chemical will draw only in the“LOW” pressure setting of your pressuregun. To activatethe“LOW” pressuresetting, pop thecollar of thegun out. 8.
- Page 18 9000I-HSH ENDEAVOR SOLUTION TANK EXPLODED VIEW 5/ 5/ 2017 ITEM NO. PARTNUMBER DESCRIPTION QTY. A00118 BUSHING, 1/ 4 FP X 3/ 8 SAE A11949 3/ 8 MF 90 DEGREE ELBOW A13271 3/ 8 FP X 1/ 2 BARB, ELBOW A13445 3/ 8 MIP HEX NIPPLE A13606 3/ 8 X 1/ 4 FIP X MIP, ADP...
- Page 20 9000I-HSH ENDEAVOR RECOVERY TANK EXPLODED VIEW 5/ 5/ 2017 ITEM NO. PARTNUMBER DESCRIPTION QTY. SOLUTION HOSE, HIGH PRESSURE, 10" J00580 SOL. HOSE, 10" J00659 SWAGE FITTING, 1/ 4MP J00660 SWAGE FITTING, 1/ 4FP A00052 90 DEGREE ELBOW, .25" MP X .25" FP A00060 BARB, .375"...
- Page 21 9000I-HSH ENDEAVOR RECOVERY TANK EXPLODED VIEW 5/ 5/ 2017 ITEM NO. PARTNUMBER DESCRIPTION QTY. D13857 SPACER, ALUMINUM 2" D14140 U-CLAMP E11128 GASKET, DRAIN VALVE E13338 GASKET E13686-A GASKET, AIR INTAKE E13686-B GASKET, AIR INTAKE E13830 GASKET, RECOVERY LID F12118 HOLE COVER, SWITCH F13242 DECK PLATE F13294...
- Page 23 9000I-HSH ENDEAVOR BASE EXPLODED VIEW 5/ 5/ 2017 ITEM NO. PARTNUMBER QTY. DESCRIPTION SOL. HOSE, HIGH PRESSURE J00580 SOL. HOSE, 6' J00660 SWAGE FITTING, 1/ 4FP 720HR HEATER A12917 ELBOW, .25" F X .375" M, NPT A13078 PLUG, MALE, 3/ 8" A13257 SWIVEL, 3/ 4 FGH X 1/ 2 FP A13258...
- Page 24 9000I-HSH ENDEAVOR BASE EXPLODED VIEW 5/ 5/ 2017 ITEM NO. PARTNUMBER QTY. DESCRIPTION C13389 SCREW, 10-24 X 1 1/ 2, TRUSS C13391 SCHS 3/ 8-16 x 4 1/ 2 SS C13431 1/ 4-20 X 2 1/ 2 SHCS, ZINC PLATED C13432 1/ 4-20 X 1 1/ 2 SHCS, ZINC PLATED C13433...
Need help?
Do you have a question about the Endeavor 9000I-HSH and is the answer not in the manual?
Questions and answers