Table of Contents
Advertisement
INSTALLATION INSTRUCTIONS
FEATURING INDUSTRY STANDARD R-410A REFRIGERANT:
(-)H1P Standard Efficiency with Aluminum Coil
(-)H1T High Efficiency with Aluminum Coil
sWARNING
WARNING
These instructions are intended as an aid to qualified licensed
service personnel for proper installation, adjustment and
operation of this unit. Read these instructions thoroughly before
attempting installation or operation. Failure to follow these
instructions may result in improper installation, adjustment,
service or maintenance possibly resulting in fire, electrical
shock, property damage, personal injury or death.
AIR HANDLERS
92-20521-110-00
(BASED ON 92-20521-66-09)
Advertisement
Table of Contents

Related Manuals for Rheem RH1T2417STANAA


Summary of Contents for Rheem RH1T2417STANAA
- Page 1 INSTALLATION INSTRUCTIONS AIR HANDLERS FEATURING INDUSTRY STANDARD R-410A REFRIGERANT: (-)H1P Standard Efficiency with Aluminum Coil (-)H1T High Efficiency with Aluminum Coil sWARNING WARNING These instructions are intended as an aid to qualified licensed service personnel for proper installation, adjustment and operation of this unit.
- Page 2 TABLE OF CONTENTS !"#! $%&'()*+,&-./%(+-,* " """""""""""""""""""""""""""""""""""""""""""""""""""""""""""""""""""""""""""""*0* 1"#! 2','.%3*+,&-./%(+-,* " """"""""""""""""""""""""""""""""""""""""""""""""""""""""""""""""""""""""""*4* "#$! %&'()*+,*!%,-()&+*.(,!/0(1*!2--.3.4,35!6!%,7(()!/.)!81+9.*5! # ################!:! "#"! ;<43=.,>!?)(713*!@434.A47! # #####################################################################!B! "#C! D(749!E1&04)!E(&4,39+*1)4! # ################################################################!B! "#F! /A+.9+094!D(749G! # #####################################################################################!H! "#I! J.&4,G.(,G!6!K4.><*G! # ############################################################################!L! "#I#$! MNOP$?!##########################################################################################!L! "#I#"! MNOP$Q! # ########################################################################################!$R! "#:! %&'()*+,34!(-!?)('4)!%,7(()ST1*7(()!D+*3<NU'G!###############################!$$! "#B! %&'()*+,34!(-!+!81+9.*5!%,G*+99+*.(,!######################################################!$$! 5"#! +,$(%33%(+-,*""""""""""""""""""""""""""""""""""""""""""""""""""""""""""""""""""""""""""""""""""""""""*!1* C#$! Q((9G!6!@4-).>4)+,*!################################################################################!$"! C#$#$! Q((9G!@4V1.)47!-()!%,G*+99.,>!6!W4)A.3.,>!@NF$R/!D(749G!#########!$"!
- Page 3 TABLE OF CONTENTS (continued) C#$F#"! W4943*.,>!%,7(()!_9(Z4)!D(*()!W'447!######################################!C"! C#$F#"#$! MNOP$?!M?W;!D(*()O!##########################################################!C"! C#$F#"#"! MNOP$Q!M;(,G*+,*!Q()V14!2;D!D(*()O!#############################!C"! C#$F#C! /.)N^9(Z!?4)-()&+,34!J+*+!#######################################################!CC! C#$F#C#$! MNOP$?!M?W;!D(*()O!a!"FRY!##############################################!CC! C#$F#C#"! MNOP$?!M?W;!D(*()O!a!$$IS"RHSFHRY!###############################!CI! C#$F#C#C! MNOP$Q!M;(,G*+,*!Q()V14!2;D!D(*()O!#############################!CB! 0"#! $(%.(678* " """""""""""""""""""""""""""""""""""""""""""""""""""""""""""""""""""""""""""""""""""""""""""""""*0!* F#$! ?)4NW*+)*!;<43=9.G*! # #################################################################################!F$! F#"!W5G*4&!W*+)*NU'!+,7!T'4)+*.(,+9!;<43=NT1*! # ########################################!F$! F#C!W4V14,34!(-!T'4)+*.(,!##########################################################################!F$! F#C#$! ;((9.,>!D(74!############################################################################!F$! F#C#"! 2943*).3!P4+*!D(74! # ###################################################################!F$! F#C#C! P4+*!?1&'!P4+*.,>!D(74! # ########################################################!F"! F#C#F! W1''94&4,*+9!2943*).3!P4+*!J1).,>!J4-)(G*! # ##############################!F"! F#C#I! 2&4)>4,35!P4+*!MP4+*!?1&'O!###################################################!F"! F#C#:! Q<4)&(G*+*!^+,!W4**.,>!#############################################################!F"!
-
Page 4: Safety Information
1.0 SAFETY INFORMATION WARNING (SEE SECTION 4.0: Disconnect all power to unit ELECTRICAL WIRING) before installing or servicing. More than one disconnect switch WARNING Duct leaks can create an unbalanced system and draw pollutants such as dirt, may be required to de-energize dust, fumes and odors into the home causing property damage. - Page 5 WARNING WARNING (SEE SECTION 3.7: AIR FILTER) PROPOSITION 65: This appliance con- Do not operate the system without filters. A portion of the dust entrained in the tains fiberglass insulation. air may temporarily lodge in the duct runs and at the supply registers. Any cir- Respirable particles of fiberglass culated dust particles could be heated and charred by contact with the heating elements.
-
Page 6: General Information
NOTICE Use of this air-handler during construction is not recommended. If opera- tion during construction is absolutely required, the following temporary installation requirements must be followed: Installation must comply with all Installation Instructions in this manual including the following items: •... -
Page 7: Checking Product Received
it is important to have the proper balance between the air being supplied to each room and the air returning to the cooling and heating equipment. Proper balance and sealing of the duct system improves the efficiency of the heating and air conditioning system and improves the indoor air quality of the home by reducing the amount of airborne pollutants that enter homes from spaces where the ductwork and/or equipment is located. -
Page 8: Available Models
2.4 AVAILABLE MODELS AVAILABLE 115V MODELS (-)H1T2417STANAA (-)H1T2417SPBNAA (-)H1T3617STANAA (-)H1T3617SPBNAA (-)H1T3621MTANAA (-)H1T4821SPBNAA (-)H1T3621HTANAA (-)H1P1817STANAA (-)H1T4821STANAA (-)H1P2417STANAA (-)H1T4821MTANAA (-)H1P3017STANAA (-)H1T4824STANAA (-)H1P3617STANAA (-)H1T6021STANAA (-)H1P4221STANAA (-)H1T6024STANAA (-)H1P4821STANAA AVAILABLE 208/240V MODELS (-)H1T2417STANJA (-)H1P1817STANJA (-)H1T3617STANJA (-)H1P2417STANJA (-)H1T3621MTANJA (-)H1P3017STANJA (-)H1T3621HTANJA (-)H1P3617STANJA (-)H1T4821STANJA (-)H1P3621STANJA (-)H1T4821MTANJA (-)H1P4221STANJA (-)H1T4824STANJA (-)H1P4821STANJA (-)H1T6021STANJA (-)H1P4824STANJA... -
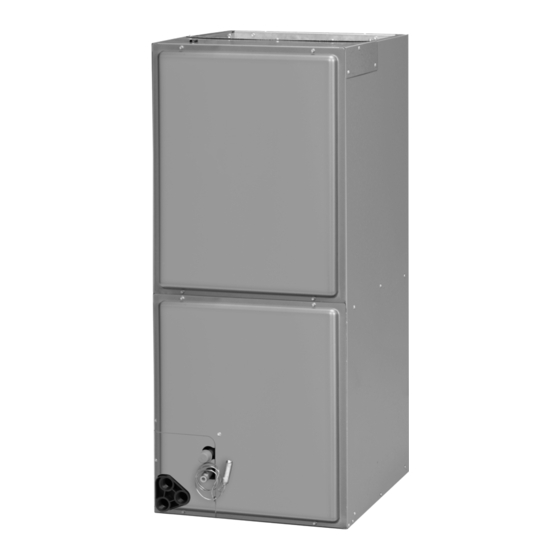
Page 9: Dimensional Data
2.5.1 DIMENSIONS & WEIGHTS: (-)H1P MODELS FIGURE 3A NOTE: 24" CLEARANCE REQUIRED IN FRONT OF UNIT FOR FILTER DIMENSIONS AND WEIGHTS AND COIL MAINTENANCE. SUPPLY AIR ELECTRICAL CONNECTIONS MAY EXIT TOP OR EITHER SIDE HIGH VOLTAGE CONNECTION 7/8", 1 3/32", 1 31/32" DIA. KNOCK OUTS. FLANGES ARE PROVIDED FOR FIELD INSTALLATION (SEE DUCT FLANGES,... - Page 10 2.5.2 DIMENSIONS & WEIGHTS: (-)H1T MODELS FIGURE 3B NOTE: 24" CLEARANCE REQUIRED SUPPLY AIR DIMENSIONS AND WEIGHTS IN FRONT OF UNIT FOR FILTER AND COIL MAINTENANCE. HIGH VOLTAGE CONNECTION 7/8", 1 3/32", 1 31/32" DIA. KNOCK OUTS. FLANGES ARE PROVIDED ELECTRICAL CONNECTIONS MAY FOR FIELD INSTALLATION EXIT TOP OR EITHER SIDE...
- Page 11 2.6 IMPORTANCE OF PROPER INDOOR/OUTDOOR MATCH-UPS To assure many years of reliable operation and optimum customer comfort and to assure the outdoor unit warranty remains valid, an air-handler model should be selected that is properly matched to the outdoor unit. This is especially critical for heat pump systems to assure proper refrigerant charge balance between the cooling and heating modes.
-
Page 12: Installation
3.0 INSTALLATION 3.1 TOOLS & REFRIGERANT 3.1.1 TOOLS REQUIRED FOR INSTALLING AND SERVICING R-410A MODELS Manifold Sets: • Up to 800 PSIG High-Side Ambient and Tube Thermometers • Up to 250 PSIG Low-Side Crescent Wrench • 550 PSIG Low-Side Retard Manifold Hoses: Allen Wrench •... - Page 13 3.2 APPLICATIONS AND ORIENTATION 3.2.1 VERTICAL UPFLOW & HORIZONTAL LEFT DISCHARGE • Vertical Upflow & Horizontal Left Discharge is the factory configuration for all models (see Figure 4). • The return air plenum must be large enough to supply unit and strong enough to sup- port unit weight.
- Page 14 FIGURE 5 ROTATING CIRCUIT BREAKER DRIP LOOP NOTE: When installing the unit in down or horizontal right discharge appli- cations, make sure the wires going to the blower motor form a proper drip loop to force any condensate that might form on the wires to drip off the lowest point of the wiring instead of entering the motor or motor control.
-
Page 15: Installation In An Unconditioned Space
FIGURE 6 VERTICAL DOWNFLOW & HORIZONTAL RIGHT APPLICATIONS FACTORY COIL RAIL LOCATION ADDITIONAL COIL RAILS DETAIL A ENSURE THE RETAINING CHANNEL IS FULLY ENGAGED WITH THE ADDITIONAL COIL RAIL. COIL RAILS FACTORY COIL RAIL LOCATION ST-A1213-02 FIGURE 7 INDOOR COIL AND DRAIN PAN DETAILS STRAPS HORIZONTAL DRIP PAN TOP AIR STOP... -
Page 16: Installation In Mobile/Manufactured Homes
• No perimeter supply flanges are provided. If a full perimeter supply duct is used, it is the responsibility of the installer to provide duct flanges as needed, to secure and seal the supply duct to prevent air leakage and the sweating that will result. •... -
Page 17: Duct Flanges
3.2.5 INSTALLATION IN CORROSIVE ENVIRONMENTS The metal parts of this unit may be subject to rust or deterioration if exposed to a corro- sive environment which can shorten its life. In addition to exposure to the exterior of the cabinet, chemical contaminants inside the building that can be drawn into the unit from the return air grille and attack structural metal parts, electrical components and the indoor coil, causing premature failure of the unit. -
Page 18: Return Air Filter
3.6 DUCTWORK Field ductwork must comply with the National Fire Protection Association NFPA 90A, NFPA 90B and any applicable local ordinance. Do not, under any circumstances, connect return ductwork to any other WARNING heat producing device such as fireplace insert, stove, etc. Unauthorized use of such devices may result in fire, carbon monoxide poisoning, explo- sion, personal injury or property damage. -
Page 19: Orifice Size
3.8 ORIFICE SIZE The piston model air handler comes standard with a flow check piston installed. The pis- ton may need to be changed to a different orifice size depending upon the outdoor unit. The following table lists the recommended orifice size for various outdoor units. *Piston size installed at factory. -
Page 20: Leak Testing
3.9.4 LEAK TESTING After all braze joints are completed, replace the valve core removed when purging with nitrogen and then leak test the system by pressurizing to 150 psig with dry nitrogen and allow the system to sit for at least 15 minutes (longer if possible) to assure the pressure does not drop. - Page 21 FIGURE 11 TXV BULB & FOAM GASKET LOCATION FOAM GASKET TXV BULB ST-A1278-01 FIGURE 12 CONDENSATE DRAIN TRAP ST-A1244-01-01 • Do not reduce drain line size less than connection size provided on condensate drain pan. • All drain lines must be pitched downward away from the unit a minimum of 1/8” per foot of line to ensure proper drainage.
-
Page 22: Electrical Wiring
3.12 THERMOSTAT See instructions for the condensing unit or heat pump for recommended room thermostats. • On units with one electric heat sequencer (TD ) (see wiring diagram for electric heater), heat anticipator setting should be .16. • On units with two electric heat sequencers (TD &... - Page 23 • Supply circuit power wiring must be 75°C minimum copper conductors only. See Electrical Data in Sections 3.13.5 and 3.13.6 for ampacity, wire size and circuit pro- tector requirement. Supply circuit protective devices may be either fuses or “HACR” type circuit breakers. •...
- Page 24 3.13.6.1 ELECTRICAL DATA – WITH ELECTRIC HEAT: (-)H1P Installation of the UL Listed original equipment manufacturer provided heater kits listed in the following table is recommended for all auxiliary heating requirements. HEATER TYPE SUPPLY AIR HANDLER HEATER MINIMUM MAXIMUM CIRCUIT HEATER MOTOR MODEL...
- Page 25 3.13.6.1 ELECTRICAL DATA – WITH ELECTRIC HEAT: (-)H1P - continued HEATER TYPE SUPPLY AIR HANDLER HEATER MINIMUM MAXIMUM CIRCUIT HEATER MOTOR MODEL MODEL PH/HZ ELEMENTS CIRCUIT OVERCURRENT (208/240V¿) SINGLE CIRCUIT AMPS AMPS (-)H1P - KW PER AMPACITY PROTECTION (480V) MULTIPLE CIRCUIT RXBH-1724?05J 3.6/4.8 1/60...
- Page 26 3.13.6.1 ELECTRICAL DATA – WITH ELECTRIC HEAT: (-)H1P - continued HEATER TYPE SUPPLY AIR HANDLER HEATER MINIMUM MAXIMUM CIRCUIT HEATER MOTOR MODEL MODEL PH/HZ ELEMENTS CIRCUIT OVERCURRENT (208/240V¿) SINGLE CIRCUIT AMPS AMPS (-)H1P - KW PER AMPACITY PROTECTION (480V) MULTIPLE CIRCUIT RXBH-1724A07C 5.4/7.2 3/60...
- Page 27 3.13.6.2 ELECTRICAL DATA – WITH ELECTRIC HEAT (-)H1T Installation of the UL Listed original equipment manufacturer provided heater kits listed in the following table is recommended for all auxiliary heating requirements. HEATER TYPE SUPPLY AIR HANDLER HEATER MINIMUM MAXIMUM CIRCUIT HEATER MOTOR MODEL...
- Page 28 3.13.6.2 ELECTRICAL DATA – WITH ELECTRIC HEAT: (-)H1T - continued HEATER TYPE SUPPLY AIR HANDLER HEATER MINIMUM MAXIMUM CIRCUIT HEATER MOTOR MODEL MODEL PH/HZ ELEMENTS CIRCUIT OVERCURRENT (208/240V) SINGLE CIRCUIT AMPS AMPS (-)H1T - KW PER AMPACITY PROTECTION (480V) MULTIPLE CIRCUIT RXBH-1724?05J 3.6/4.8 1/60...
- Page 29 3.13.6.2 ELECTRICAL DATA – WITH ELECTRIC HEAT: (-)H1T - continued HEATER TYPE SUPPLY AIR HANDLER HEATER MINIMUM MAXIMUM CIRCUIT HEATER MOTOR MODEL MODEL PH/HZ ELEMENTS CIRCUIT OVERCURRENT (208/240V) SINGLE CIRCUIT AMPS AMPS (-)H1T - KW PER AMPACITY PROTECTION (480V) MULTIPLE CIRCUIT 7.2/9.6 3/60 3-3.2...
- Page 30 3.13.7 ELECTRIC HEATER KIT SUPPLEMENTAL INFORMATION Contractor AIR CONDITIONING DIVISION should “mark (-)HLA-HM4821JA or check” the left column for MARK HEATER INSTALLED/ L’APPAREIL DE CHAUFFAGE DE MARQUE A INSTALLE the kit installed. If a heater kit is listed both These are the Single required maxi- and Multi-...
-
Page 31: Control Wiring
3.13.8 CONTROL WIRING IMPORTANT: Class 2 low voltage control wire should not be run in conduit with power wiring and must be separated from power wiring, unless class 1 wire of proper voltage rating is used. • Low voltage control wiring should be 18 Awg. color-coded. For lengths longer than 100 ft., 16 Awg. - Page 32 3.14.1 GENERAL AIRFLOW OPERATING LIMITS Cabinet Width 17/21 Cooling BTUH x 1,000 Cooling Tons Nominal Heat Pump or Air Conditioning Maximum Heat/Cool CFM [L/s] 1125 1350 1575 1800 1925 1800 1930* (37.5 CFM [18 L/s]/1,000 BTUH) [319] [425] [531] [637] [743] [850] [907]...
- Page 33 3.14.3.1 240V AIRFLOW PERFORMANCE DATA: (-)H1P (PSC MOTOR) PSC CFM[L/s] Air Delivery/RPM/Watts (Dry Coil – No Filter) Motor Manufacturer Blower Size/ Model Speed Recommended Motor HP Motor Number External Static Pressure-Inches W.C. From Air Flow Range Speed (-)H1P Factory (Min / Max) CFM # of Speeds 0.1 [.02] 0.2 [.05]...
- Page 34 3.14.3.1 240V AIRFLOW PERFORMANCE DATA: (-)H1P (PSC MOTOR) - continued PSC CFM[L/s] Air Delivery/RPM/Watts (Dry Coil – No Filter) Manufacturer Blower Size/ Motor Model Recommended Motor HP Motor Speed External Static Pressure-Inches W.C. Number From Air Flow Range Speed (-)H1P Factory (Min / Max) CFM # of Speeds...
- Page 35 3.14.3.2 115/208/480V AIRFLOW PERFORMANCE DATA: (-)H1P (PSC MOTOR) PSC CFM[L/s] Air Delivery/RPM/Watts (Dry Coil – No Filter) Motor Manufacturer Blower Size/ Model Speed Recommended Motor HP Motor Number External Static Pressure-Inches W.C. From Air Flow Range Speed (-)H1P Factory (Min / Max) CFM # of Speeds 0.1 [.02] 0.2 [.05]...
- Page 36 3.14.3.2 115/208/480V AIRFLOW PERFORMANCE DATA: (-)H1P (PSC MOTOR) - continued PSC CFM[L/s] Air Delivery/RPM/Watts (Dry Coil – No Filter) Manufacturer Blower Size/ Motor Model Recommended Motor H.P. Motor Speed Number External Static Pressure-Inches W.C. From Air Flow Range Speed (-)H1P Factory (Min / Max) CFM # of Speeds...
- Page 37 3.14.3.3 115/208/240/480V AIRFLOW PERFORMANCE DATA: (-)H1T (CONSTANT TORQUE MOTOR) CFM[L/s] Air Delivery/RPM/Watts (Dry Coil – No Filter) Motor Model Blower Size/ Tonnage Speed Motor External Static Pressure-Inches W.C. Motor H.P. Number Application From Speed (-)H1T # of Speeds Factory 0.10 [.02] 0.20 [.05] 0.30 [.07] 0.40 [.10]...
- Page 38 3.14.3.3 115/208/240/480V AIRFLOW PERFORMANCE DATA: (-)H1T (CONSTANT TORQUE MOTOR) - continued CFM[L/s] Air Delivery/RPM/Watts (Dry Coil – No Filter) Motor Model Blower Size/ Tonnage Motor Speed External Static Pressure-Inches W.C. Motor H.P. Number Application Speed From (-)H1T # of Speeds Factory 0.10 [.02] 0.20 [.05]...
- Page 39 3.14.3.3 115/208/240/480V AIRFLOW PERFORMANCE DATA: (-)H1T (CONSTANT TORQUE MOTOR) - continued CFM[L/s] Air Delivery/RPM/Watts (Dry Coil – No Filter) Motor Model Blower Size/ Tonnage Motor Speed External Static Pressure-Inches W.C. Number Motor H.P. Application Speed From (-)H1T # of Speeds Factory 0.10 [.02] 0.20 [.05]...
- Page 40 3.14.3.3 115/208/240/480V AIRFLOW PERFORMANCE DATA: (-)H1T (CONSTANT TORQUE MOTOR) - continued CFM wet Delivery/ lter/heaters/RPM/Watts (Dry Coil – No Filter) Nominal Motor Model Blower Size/ External Static Pressure-Inches W.C. Cooling Motor Speed Number Motor H.P. Capacity Speed From (-)H1T # of Speeds Tons Factory 0.10 [.02]...
- Page 41 4.0 START-UP PRE-START CHECKLIST 4.1 PRE-START CHECKLIST Is unit properly located, level, secure and service- able? Has auxiliary pan been provided under the unit with separate drain? (Units installed above a finished ceiling). Is condensate line properly sized, run, trapped, pitched and tested? Is ductwork correctly sized, run, taped and insu- lated?
- Page 42 terminal on the blower control board upon a call for a 2nd stage of heat which will in turn will energize the 2nd stage heater elements. The heater kit will cycle between the 1st and 2nd stages of heat at the direction of the thermostat. When the thermostat call for heat is satisfied or the thermostat is turned to the off posi- tion, the W1 terminal on the blower control board is de-energized which will de-energize the heating elements in a few seconds as the bimetallic disc in the sequencer cools.
-
Page 43: Checking Refrigerant Charge
4.6 CHECKING INDOOR AIR-FLOW 4.6.1 ESTIMATING CFM USING EXTERNAL STATIC PRESSURE A common method of checking indoor is to measure the external static pressure that the air-handler is working against and then referring to the air-flow data in Section 3.13.3. Measuring external static pressure to a high degree of precision in the field is challeng- ing, so keep in mind that the CFM determined by this method is an estimate, but is accu- rate enough for all practical purposes. -
Page 44: Blower Motor
5.0 COMPONENTS & C0NTROLS 5.1 BLOWER MOTOR All (-)H1P models have 2-speed single-phase permanent split capacitor (PSC) style motors. • The 208/240 volt models also have voltage taps that allow the motor to be configured to restore full air-flow performance in 208 volt applications. •... - Page 45 (-)H1T Blower Control • There are two 24V outputs on the blower control for controlling the motor, one for con- tinuous fan and one for cooling & heating operation. • Motor speed changes are made at the motor speed terminal block instead of on the blower control.
-
Page 46: Accessories & Kits
6.0 ACCESSORIES & KITS 6.1 ELECTRIC RESISTANCE HEATER KITS • All (-)H1P & (-)H1T models are shipped without electric resistance heat. • Electric heat kits ranging from 3kW to 30kW are available for field installation. • Refer to Sections 3.13.5, 3.13.6, & 3.13.7 for electric heat kit model numbers avail- able for specific air-handler models along with electrical ratings &... - Page 47 (See Figure 15) 6.4 EXTERNAL FILTER BASES Model Cabinet Size Filter Size Part Number Accommodate 1” or 2” 16 x 20 [406 x 508] RXHF-17 15.70 17.50 filter 20 x 20 [508 x 508] RXHF-21 19.20 21.00 25 x 20 [635 x 508] RXHF-24 22.70 25.50...
-
Page 48: Maintenance
7.0 MAINTENANCE For continuing high performance, and to minimize possible equipment failure, it is essential that periodic maintenance be performed on this equipment. Consult your local dealer as to the proper frequency of maintenance and the availability of a maintenance contract. -
Page 49: Motor Replacement
• Slide blower assembly to back of cabinet and make sure it is completely engaged. • Replace 4 screws holding blower assembly to front channel of cabinet. Take care not to strip screws. • Replace low voltage control wiring with wire nuts and make sure wiring is per the wiring diagram and all connections are tight and secure. -
Page 50: Replacement Parts
7.8 REPLACEMENT PARTS Any replacement part used to replace parts originally supplied on equipment must be the same as or an approved alternate to the original part supplied. The manufacturer will not be responsible for replacement parts not designed to physically fit or operate within the design parameters the original parts were selected for. -
Page 51: Wiring Diagrams
9.0 WIRING DIAGRAMS 9.1 WIRING DIAGRAM (-)H1P – 115V... - Page 52 9.2 WIRING DIAGRAM (-)H1P – 208/240V...
- Page 53 9.3 WIRING DIAGRAM (-)H1P – 480V...
- Page 54 9.4 WIRING DIAGRAM (-)H1T – 115V...
- Page 55 9.5 WIRING DIAGRAM (-)H1T – 208/240V...
- Page 56 9.6 WIRING DIAGRAM (-)H1T – 480V CM 0817...
Need help?
Do you have a question about the RH1T2417STANAA and is the answer not in the manual?
Questions and answers
Horizontal left dealer changing unit no air flow in master bedroom nor closet
To fix the issue of no air flow in the master bedroom and closet with the Rheem RH1T2417STANAA unit, follow these steps:
1. Check Air Filters – Ensure that the air filters are clean and not blocking airflow. The unit does not have an internal filter rack, so verify the external filter setup.
2. Inspect Ductwork – Look for any blockages, disconnected ducts, or leaks that may be restricting airflow to the affected areas.
3. Verify Blower Operation – Confirm that the blower motor is running properly. If the blower is not functioning, check power connections and the motor itself.
4. Examine Coil Installation – The unit is shipped with an indoor coil installed. Ensure the coil is correctly positioned and not obstructing airflow.
5. Check Power Supply – Since the unit supports both single-phase and three-phase 208/240V power, verify that power connections are correctly configured according to the manual’s guidance.
6. Inspect Airflow Settings – If applicable, adjust the unit’s airflow settings to ensure proper distribution.
7. Look for Obstructions – Ensure that vents and registers in the master bedroom and closet are open and not blocked by furniture or debris.
If the issue persists, consider contacting a qualified HVAC technician for further diagnosis.
This answer is automatically generated
The existing filter should be changed, I think. It’s recommended every 3 months correct? I’ve ordered three 17x21x 1 MERV (11) filters. The orientation of the filter should be with airflow going up - is this correct?