Genexis FiberTwist Quick Installation Manual
Network termination
Hide thumbs
Also See for FiberTwist:
- Installation manual (6 pages) ,
- Installation manual (7 pages) ,
- User manual
Table of Contents
Advertisement
Available languages
Available languages
Advertisement
Table of Contents

Related Manuals for Genexis FiberTwist


Summary of Contents for Genexis FiberTwist
- Page 1 FiberTwist Network Termination...
- Page 2 Quick Installation Guide ..............1 Schnellinstallationsanleitung ............13...
- Page 3 FiberTwist Network Termination Quick Installation Guide...
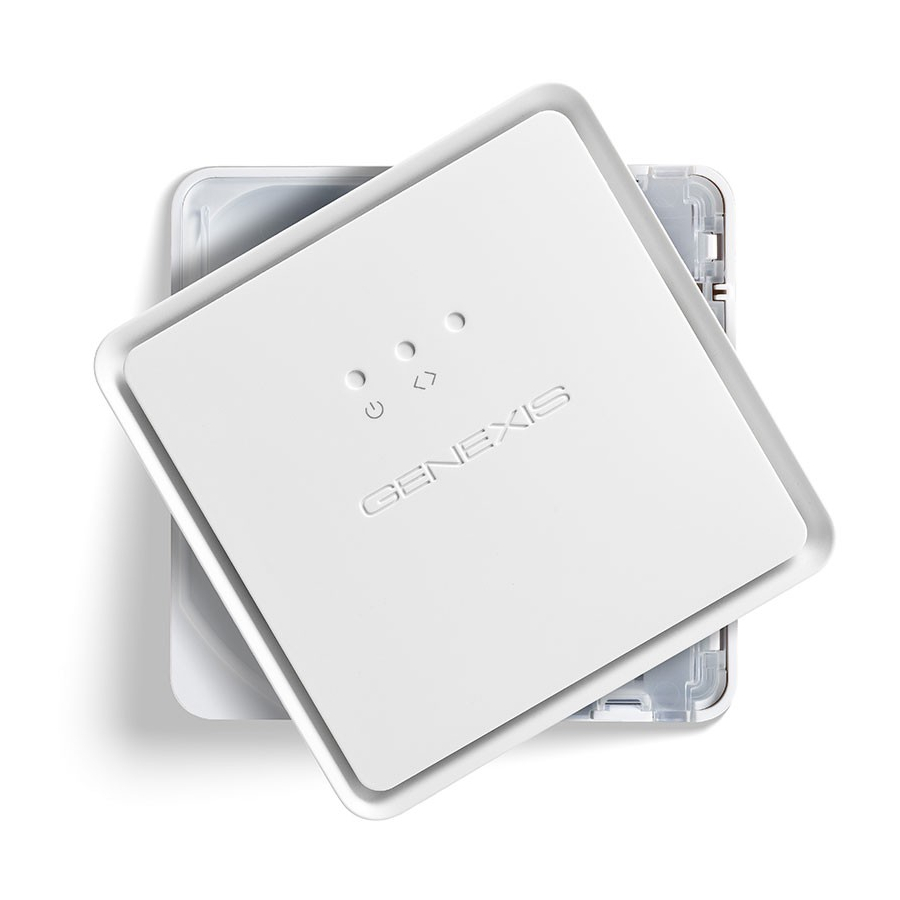
- Page 4 In the box FiberTwist Active device (exact appearance differs depending on the model) Label Model: Fibertwist-X0000 996160001 Z.000001001 CLASS 1 LASER PRODUCT Please retain for future reference. +12v 0.5A 2016-05 VER.1.0 Made in India GPON SN:GNXS01000001 Power Adaptor Use only the supplied power adaptor.
- Page 5 Models Supported Model G2110 G2120 P2110 P2410, P3410, G2410 P2420, P3420, G2420...
- Page 6 Overview (side) Unlock button: press and hold while twisting to the left to remove the FiberTwist or blind cover from the FTU (fiber termination unit). Reset button: * • press and release to reset (retain custom settings) • press and hold for more than 5 seconds to perform a factory reset (deletes all custom configuration) Dim button: dims the lights on the device as described below.
- Page 7 Overview (end) GPON series power switch LAN port power connector reset button Point to Point Series CATV * LAN ports power connector * not present on all models...
- Page 8 Ensure there is a power socket within 80cm of where the device is being installed. Open the FiberTwist box (but don’t yet remove the FiberTwist from the box) and place the box near where the FiberTwist is to be installed.
- Page 9 Remove the blind cover (if present) Press and hold the unlock button. Rotate the blind cover counter- clockwise (in the direction of the arrow). When it won’t rotate any further, the blind cover can be removed. Please store the blind cover in a safe place.
- Page 10 Remove dust cap Take the FiberTwist out of its box. The dust cap is the bright red tab located on the rear of the FiberTwist (pictured below). Remove the dust cap by holding the end of the red tab and pulling it gently in the direction of the arrow.
- Page 11 Twist! Place the FiberTwist on the FTU as shown and rotate clockwise (in the direction of the arrow) until it clicks into place. Make sure the FiberTwist is aligned squarely on the FTU - each edge must line up directly with the FTU below.
- Page 12 Connect a CATV and LAN cable as required. Connect the supplied power adaptor to the FiberTwist and then plug the adaptor into a power socket. If your FiberTwist has a power button (as shown on page 5) push the button in to turn the device on.
- Page 13 Status LEDs and Troubleshooting Symbol Meaning On (green) Device is powered on Device is off On (green) Uplink signal detected and provisioned Blinking Uplink signal detected and not provisioned (green) No uplink signal present On (red) Signal loss - no GPON link detected GPON link is up On (green) LAN connected.
- Page 14 Safety and Care • Do not operate the device in temperatures below 0° C or above 40° C • Never look directly into the end of a fibre optic cable. • Use only the supplied power adaptor. • Indoor use only. •...
- Page 15 FiberTwist Netzwerk-Abschluss Schnellinstallationsanleitung...
- Page 16 Im Lieferumfang FiberTwist Aktiv-Einheit (Ihr Modell kann je nach Typ etwas anders aussehen) Produktaufkleber Model: Fibertwist-X0000 996160001 Z.000001001 CLASS 1 LASER PRODUCT Bitte für zukünftige Zwecke +12v 0.5A 2016-05 VER.1.0 Made in India aufbewahren. GPON SN:GNXS01000001 Netzteil Bitte nur das mitgelieferte Netzteil...
- Page 17 Unterstützte Modelle Model G2110 G2120 P2110 P2410, P3410, G2410 P2420, P3420, G2420...
- Page 18 Überblick (Seitenansicht) Freigabe-Knopf: bitte während des Drehvorgangs nach links gedrückt halten, um das FiberTwist oder den Blinddeckel von der FTU (Faser-Abschlusseinheit) zu entfernen. Reset-Taster: * • wird der Reset-Taster kurz gedrückt und wieder losgelassen, wird der Geräte-Reset ausgelöst (benutzerdefinierte Einstellungen bleiben erhalten) •...
- Page 19 Überblick (Unterseite) GPON serie Netzschalter LAN-Anschluss Stromanschluss Reset-Taster Punkt-zu-Punkt Serie CATV * LAN-Anschlüsse Stromanschluss * nicht bei allen Modellen verfügbar...
- Page 20 Bitte stellen Sie sicher, dass sich eine Steckdose in der Nähe befindet (bis 80cm entfernt), wo das Gerät installiert werden soll. Öffnen Sie die FiberTwist-Verpackung (aber entnehmen Sie das FiberTwist noch nicht aus der Box) und platzieren Sie die Box nahe der Position, wo es das Gerät installiert werden soll.
- Page 21 Entfernen Sie den Blinddeckel (falls vorhanden) Halten Sie den Freigabe-Knopf gedrückt. Drehen Sie den Blinddeckel gegen den Uhrzeigersinn (in die Richtung des gezeigten Pfeils). Sobald sich der Blinddeckel nicht weiter drehen lässt, kann dieser entfernt werden. Bitte bewahren Sie den Blinddeckel an einem sauberen Platz auf.
- Page 22 Entfernen Sie bitte die Staubkappe Entnehmen Sie nun das FiberTwist der Box. Die Staubkappe ist die hell-rote Lasche auf der Rückseite des FiberTwists (Bild unten). Entfernen Sie jetzt die Staubkappe, indem Sie das Ende der roten Lasche festhalten und vorsichtig in Richtung des Pfeils ziehen.
- Page 23 Setzen Sie das FiberTwist wie angezeigt auf die FTU und drehen Sie es im Uhrzeigersinn (in Pfeil-Richtung), bis es einrastet. Stellen Sie sicher, dass das FiberTwist korrekt auf der FTU ausgerichtet ist - alle Kanten sind parallel zur unterhalb befindlichen FTU.
- Page 24 Anschluss des FiberTwist Verbinden Sie nun nach Bedarf CATV- und LAN-Kabel. Schließen Sie das mitgelieferte Netzteil an das FiberTwist an und stecken Sie das Netzteil in die Steckdose. Wenn Ihr FiberTwist einen Netzschalter hat, drücken Sie diesen nun ein (wie auf Seite 16 gezeigt), um das Gerät einzuschalten.
- Page 25 Status LEDs und Fehlerbehebung Symbol Beschreibung Ein (grün) Gerät ist eingeschaltet Gerät ist ausgeschaltet Ein (grün) Uplink-Signal detektiert und bereitgestellt Blinkend Uplink-Signal detektiert und nicht (grün) bereitgestellt Kein Uplink-Signal verfügbar Ein (rot) Signal Verlust – keine GPON Verbindung detektiert GPON Verbindung liegt an Ein (grün) LAN verbunden.
- Page 26 Sicherheit und Pflege • Betreiben Sie das Gerät nicht bei Temperaturen unter 0°C oder über 40°C. • Schauen Sie niemals direkt in das Ende eines Glasfaser-Kabels oder -Verbindung. • Verwenden Sie nur das mitgelieferte Netzteil. • Gerät ist nur für Innenräume ausgelegt. •...
- Page 27 Copyright © 2018 Genexis B.V. All rights reserved Genexis assumes no responsibility for any inaccuracies in this document. Genexis reserves the right to change, modify, transfer, or otherwise revise this publication without notice. Genexis BV Lodewijkstraat 1A, 5652 AC, Eindhoven, The Netherlands...
Need help?
Do you have a question about the FiberTwist and is the answer not in the manual?
Questions and answers