Table of Contents
Advertisement
Quick Links
Takara Bio USA, Inc.
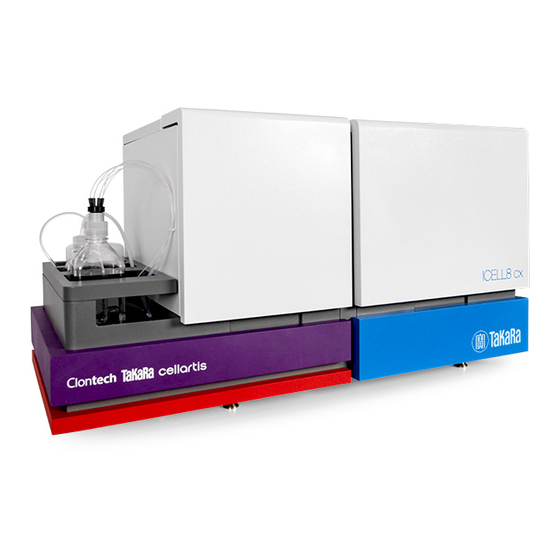
SMARTer™ ICELL8®
cx Single-Cell System
User Manual
Cat. Nos. 640188, 640189, 640187, 640002, 640198
(061918)
Takara Bio USA, Inc.
1290 Terra Bella Avenue, Mountain View, CA 94043, USA
U.S. Technical Support:
techUS@takarabio.com
United States/Canada
Asia Pacific
800.662.2566
+1.650.919.7300
Europe
Japan
+33.(0)1.3904.6880
+81.(0)77.565.6999
Page 1 of 35
Advertisement
Table of Contents

Subscribe to Our Youtube Channel
Related Manuals for Takara Bio SMARTer ICELL8 cx


Summary of Contents for Takara Bio SMARTer ICELL8 cx
- Page 1 Takara Bio USA, Inc. SMARTer™ ICELL8® cx Single-Cell System User Manual Cat. Nos. 640188, 640189, 640187, 640002, 640198 (061918) Takara Bio USA, Inc. 1290 Terra Bella Avenue, Mountain View, CA 94043, USA U.S. Technical Support: techUS@takarabio.com United States/Canada Asia Pacific...
-
Page 2: Table Of Contents
Protocol: Preparing the Source Plates ........................20 VIII. Protocol: Dispensing Samples into the Chip ......................20 A. Selecting the SMARTer ICELL8 cx Application ..................... 20 Placing the Chip in the ICELL8 cx Unit ........................21 Placing the Sample Source Plate in the ICELL8 cx Unit ..................21 D. - Page 3 Figure 34. Confirm removal of sealing film......................... 31 Figure 35. Live image of chip scanning..........................31 Figure 36. Enter chip ID............................... 32 Figure 37. Confirm that chip ID matches filter file name..................... 32 (061918) takarabio.com Page 3 of 35 Takara Bio USA, Inc.
- Page 4 Table IX. Problem: Low or partial dispenses........................34 Table X. Problem: Apparent low sample concentration....................... 35 Table XI. Problem: System stalls because the syringe does not move................. 35 (061918) takarabio.com Page 4 of 35 Takara Bio USA, Inc.
-
Page 5: Introduction
SMARTer™ ICELL8® cx Single-Cell System User Manual Introduction Thank You for Your Order! Congratulations on the purchase of your SMARTer ICELL8 cx Single-Cell System, referred to as ICELL8 cx in this manual. The ICELL8 cx is designed to load samples into chips and then perform imaging. -
Page 6: Icell8 Cx Safety Information
WARNING: The machine is powered by two cords. The instrument is off only when the power switch is off and the ethernet power cord is disconnected. See image below. (061918) takarabio.com Page 6 of 35 Takara Bio USA, Inc. - Page 7 (e.g., dust) are present in the operating environment, with the exception of occasional conductivity caused by condensation. Both the Installation Category (overvoltage category) and the Pollution Degree affect the dimensioning of electrical insulation within the instrument. (061918) takarabio.com Page 7 of 35 Takara Bio USA, Inc.
- Page 8 Warning labels on the instrument: Please note the warning label on the instrument. WARNING: This system contains moving parts. Keep hands away from the system while the instrument is in use. (061918) takarabio.com Page 8 of 35 Takara Bio USA, Inc.
-
Page 9: System Description: Component Overview
2 x 1X ICELL8 Fiducial Mix (25 µl) 2 x 100X Second Diluent (15 µl) *640189 is the SMARTer ICELL8 cx Single-Cell System for Japan. It does not include a Thermal Cycler, and therefore only includes 4 power cords. **This component is also sold separately. -
Page 10: System Description: Instrument Overview
Other items not shown include: Water Bottle, Humidifier Reservoir and Electronic Scale, Wash Container, Humidifier, Peristaltic pump, Desktop and Monitor, Fluidic Harness and Power Cord, Waste Container, SMARTer ICELL8 cx Software, User Manual (this document), Tool Set, Blotter, and Balance Plate. Water Container and Electronic Scale The Water Bottle contains deionized Milli-Q water (or equivalent) that occupies all fluid paths in the ICELL8 cx instrument. -
Page 11: Figure 2. Water Bottle Seated On The Electronic Scale
The Humidifier maintains the relative humidity at ≥45% in the Environmental Chamber to minimize reagent evaporation during the dispensing process. The Humidifier is behind the back cover of the ICELL8 cx unit (Figure 3). Figure 3. Humidifier unit. (061918) takarabio.com Page 11 of 35 Takara Bio USA, Inc. -
Page 12: Figure 4. Syringe Pumps Unit
A single interface cable facilitates mechanical control between the two modules. An environmental chamber surrounds the cx Stage Module to maintain optimal humidity levels during reagent dispensing. Figure 5. ICELL8 cx Stage Module. (061918) takarabio.com Page 12 of 35 Takara Bio USA, Inc. -
Page 13: Icell8 Cx Specifications And Lab Requirements
Category Specification Dispense volume 50 nl or 100 nl per nanowell Software SMARTer ICELL8 cx Software Laptop computer Windows 7, 2 GB memory, 120 GB storage, 1 GB network adapter, USB ports for memory sticks Power requirements 120 VAC/60 Hz mains: four 120 V, 15 or 20A circuits (for different 220–240 VAC/50 Hz mains: four 10A outlets... -
Page 14: Setup And Installation
They will use material from the ICELL8 cx Installation Kit to qualify the instrument after installation and will leave reusable and/or remaining materials at your site. Table III below lists the SMARTer ICELL8 cx Installation Kit components. Table III. ICELL8 cx Installation Kit components. -
Page 15: Required Materials From Tbusa
The ICELL8 cx unit transfers samples, controls, and reagents from the 384-well plate to the chip. After dispensing, the chip can be processed for cell analysis (Figure 6). Figure 6. ICELL8 cx workflow. (061918) takarabio.com Page 15 of 35 Takara Bio USA, Inc. -
Page 16: Protocol: Quick Reference Guide
4. Prepare the source plate with the RT mix (Page 20). 5. Dispense the RT mix into the chip (Page 28). 6. Run your PCR on the Thermal Cycler (Page 31). 7. Clean the ICELL8 cx system (Page 31). (061918) takarabio.com Page 16 of 35 Takara Bio USA, Inc. -
Page 17: Protocol: Preparing The Icell8 Cx System
USB cable. 1. Power up the system by flipping the switch at the back of the ICELL8 cx unit. 2. Start the SMARTer ICELL8 cx Software on the computer by double-clicking the “SMARTer ICELL8 cx” icon (see below) on the desktop. -
Page 18: Running The Daily Warmup
Failure to do so will result in poor dispensing. This procedure takes ~8 min. 1. Click the Startup tab (Figure 9) in the SMARTer ICELL8 cx Software. Figure 9. Startup tab. a. On this tab, click the Done button for “Check water container”, “Check humidifier water container”, “Check waste container”... -
Page 19: Running The Tip Clean Procedure
Running the Tip Clean Procedure The cleaning process takes ~2 min. 1. Click the Advanced tab in the SMARTer ICELL8 cx Software. 2. Click the [Tip Clean] button in the Manual Control section (Figure 11). Figure 11. The [Tip Clean] button in the Manual Control section. -
Page 20: Protocol: Preparing The Source Plates
2. After filling, seal the plate(s) with 384-Well Source Plate Seal(s). Do not centrifuge. VIII. Protocol: Dispensing Samples into the Chip Selecting the SMARTer ICELL8 cx Application 1. Click the 3’DE / TCR tab (Figure 13). Figure 13. Single Cell / TCR tab. -
Page 21: Placing The Chip In The Icell8 Cx Unit
1. Place the sample source plate on the Plate Nest with the A1 position in the top, back right corner (Figure 15). Figure 15. Empty plate nest for the sample source plate. (061918) takarabio.com Page 21 of 35 Takara Bio USA, Inc. -
Page 22: Dispensing The Sample Cells, Fiducial, And Controls Into The Chip
1. Select the 3’DE / TCR tab. Figure 17. Select the 3’DE / TCR tab. (061918) takarabio.com Page 22 of 35 Takara Bio USA, Inc. -
Page 23: Figure 18. Vacuum Status Confirmation
The dispense step lasts roughly 13 minutes. Figure 19. Confirm plate and chip loading. 6. Manually remove the sealing film. Click [Done] in the Remove seal window to confirm. Figure 20. Confirm seal removal. (061918) takarabio.com Page 23 of 35 Takara Bio USA, Inc. -
Page 24: Figure 21. Live Image Of Chip Scanning
Figure 22. Input chip ID. 9. When the dispense is complete, the vacuum should turn off automatically, and you can then release the chip. Figure 23. Vacuum status after dispense. (061918) takarabio.com Page 24 of 35 Takara Bio USA, Inc. -
Page 25: Imaging The Chip
1. When dispensing is complete, press [Scan chip] to initiate scanning. Figure 24. Initiate chip scanning. 2. The vacuum will turn on automatically. Remove the chip seal if necessary. Figure 25. Remove the chip seal. (061918) takarabio.com Page 25 of 35 Takara Bio USA, Inc. -
Page 26: Figure 26. Enter The Chip Id After Autofocus And Barcode Scanning Steps
Figure 26. Enter the chip ID after autofocus and barcode scanning steps. 4. Select the proper analysis setting and barcode gal files. Press [OK] to confirm. Figure 27. Select analysis setting and barcode gal files. (061918) takarabio.com Page 26 of 35 Takara Bio USA, Inc. -
Page 27: Figure 28. Select Path And File Name For Saving Data
Figure 29. Naming and saving results file. 9. The vacuum should turn off automatically when scanning is complete. You can remove the chip at this time. 10. Close the SMARTer ICELL8 cx CellSelect Software GUI and image viewer. (061918) takarabio.com Page 27 of 35 Takara Bio USA, Inc. -
Page 28: Blotting And Sealing The Chip
Counterbalance with a second chip. c. Centrifuge at 300g for 5 min at 20–25°C. NOTE: Small bubbles on the periphery of the chip will not cause problems, but bubbles on top of nanowells will. (061918) takarabio.com Page 28 of 35 Takara Bio USA, Inc. -
Page 29: Rt Dispense
Figure 31. RT-PCR mix Source Plate map. 3. Close the front door of ICELL8 cx unit. 4. To initiate RT dispense, click the [Dispense RT - PCR mix] button. Figure 32. Initiate RT dispense. (061918) takarabio.com Page 29 of 35 Takara Bio USA, Inc. -
Page 30: Figure 33. Loading Filter Files
7. If the chip is not secured, you can take out the chip and restart the process by pressing the [Dispense cells] button again. (061918) takarabio.com Page 30 of 35 Takara Bio USA, Inc. -
Page 31: Figure 34. Confirm Removal Of Sealing Film
Figure 34. Confirm removal of sealing film. 9. The system will perform autofocus and barcode reading steps. The live image of chip scanning will display for user reference. Figure 35. Live image of chip scanning. (061918) takarabio.com Page 31 of 35 Takara Bio USA, Inc. -
Page 32: Running Your Pcr On A Thermal Cycler
14. Seal the chip and then carefully remove it from the cooled chuck. Running your PCR on a Thermal Cycler If you are using the SMARTer ICELL8 cx Single-Cell System (Cat. No. 640188), use the thermal cycler (Cat. No. 640002) included with the system. See the thermal cycler’s user manual for complete instructions on thermal cycling the filled chip. -
Page 33: Maintenance
1. Visually inspect the Dispensing Platform for any debris and wipe down with 70% isopropanol. 2. Perform the Tip Clean procedure. See “Running the Tip Clean Procedure” in Section VI.D. 3. Exit the SMARTer ICELL8 cx Software by clicking the Close button ( ) at the top right of the window. -
Page 34: Troubleshooting
Plugged tip Back-flush the tips by clicking the [Tip Clean] button in the SMARTer ICELL8 cx Software. If the tip is plugged with a soluble material, aspirating and dispensing reagent capable of dissolving the material may clear the blockage. If these measures fail, it may be necessary to replace the tip, or the blockage could be upstream of the tip. -
Page 35: Takarabio.com
©2018 Takara Bio Inc. All Rights Reserved. All trademarks are the property of Takara Bio Inc. or its affiliate(s) in the U.S. and/or other countries or their respective owners. Certain trademarks may not be registered in all jurisdictions. Additional product, intellectual property, and restricted use information is available at takarabio.com.
Need help?
Do you have a question about the SMARTer ICELL8 cx and is the answer not in the manual?
Questions and answers