
Related Manuals for Launch DBScar

Summary of Contents for Launch DBScar
- Page 1 LAUNCH DBScar User's Manual V1.01.000 English • Please read this user’s manual carefully before operating your device. • Please keep this manual well for future use. • The illustrations herein is for reference purpose only.
-
Page 2: Table Of Contents
4. Using DBScar ..........3 5. Installing Software ........... 4 6. Bluetooth Setting ..........4 7. How to operate Client software ....... 5 7.1 Register DBScar and login ....... 5 7.2 Operate software ........8 7.2.1 Buddies ..........8 7.2.2 Gauges ..........10 7.2.3 Spendings ........ -
Page 3: Intruduction
Data communication and firmware upgrade can be done via bluetooth and USB. on DBScar stands for Car Cloud logo. Car Cloud is an state- of-an-art individual application product, which is developed based on our LAUNCH’s diagnostic devices and technology... -
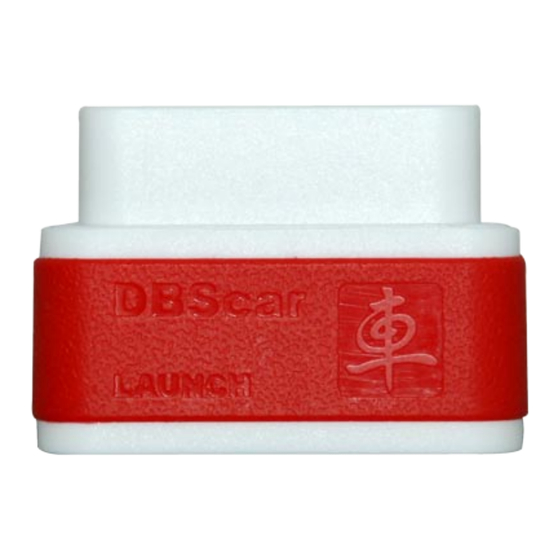
Page 4: Accessories
Name & Functions OBD-16 diagnostic connector: to connect vehicle’s OBD2 diagnostic socket. Serial number Power indicator: it will light up once DBScar is plugged into vihicle’s DLC socket Communication indicator Micro USB port: to connect to PC or LAUNCH’s diagnostic device via USB cable. -
Page 5: Technical Specifications
12 inch away from the center of dashboard. See Fig. 3-1. If no DLC is found, please refer to automobile repair manual. 2) Plug the DBScar into DLC socket and the power indicator on DBScar will light up. Fig. 3-1 4. -
Page 6: Installing Software
LAUNCH DBScar User’s Manual diagnostic result saved in DBScar to client software for review. (For “Installing Software” and “Bluetooth Setting”, please refer to Chapter 5 & 6.) 5. Installing Software Seach “dbscar“ in “Google Play“ on your phone, download DBScar software and click it to install(The method of installing this software is same as that of installing other phone applications. -
Page 7: How To Operate Client Software
7. How to operate Client software 7.1 Register DBScar and login Click on the desktop, the system will enter the initialization screen as indicated in Fig 7-1. And then it will jump to Disclaimer page (Fig. - Page 8 LAUNCH DBScar User’s Manual Fig. 7-1 Fig. 7-2 Fig. 7-3 Fig. 7-4 • Input the information (items with * must be filled), then click “Register” to enter Fig. 7-5. The system will prompt you that you have registered successfully and offer you a CC...
- Page 9 Fig. 7-5 Fig. 7-6 • In case you have a DBScar connector, click “Activate” to activate it (For details on how to activate DBScar, please refer to “Activate New Connector” under D. Update in Chapter 7.2.4 More). Otherwise, click “Purchase” to order it online.
-
Page 10: Operate Software
LAUNCH DBScar User’s Manual Fig. 7-7 Fig. 7-8 Note: It is strongly suggested to check the box “Save password” or “Auto login” on the login interface if you frequently log in car cloud website. 7.2 Operate software Login and you will see "Buddies", "Gauges", "Spendings" and "More"... - Page 11 LAUNCH DBScar User’s Manual • C. Doc. Record To view file sending records. • D. Add To add more CC members. Click “Add” to enter Fig. 7-9. There are 3 ways available for you to add a CC member: by Nickname, by CC number and Online.
-
Page 12: Gauges
LAUNCH DBScar User’s Manual and transfer it to your buddy. See Fig. 7-12. Fig. 7-11 Fig. 7-12 7.2.2 Gauges Click "Gauges" to enter a screen similar to Fig. 7-13. A. Instrument B. Fuel consumption Click to view fuel consumption value and analysis chart. -
Page 13: Spendings
LAUNCH DBScar User’s Manual Fig. 7-13 Click to view instrument readings. Instrument readings are displayed in character and graphic. 7.2.3 Spendings Choose your comsumption type and manually input the amount, then the system will calculate and output the Today/Monthly bill for you. - Page 14 LAUNCH DBScar User’s Manual [Button Descriptions]: Main: return to the main menu. Billing: view today’s spendings. See Fig. 7-16. Summary: view annual billing. See Fig. 7-17. Setting: Click “Setting” to enter Fig. 7-18, user can manage your vehicles, set your budget limits.
-
Page 15: More
LAUNCH DBScar User’s Manual Fig. 7-18 Fig. 7-19 7.2.4 More Click “More” to enter Fig. 7-19. • A. Footprint This option is designed to present you the driving record of your vehicle. Click “Footprint”, a screen similar to Fig. 7-20 will appear (If no GPS is activated, an error message will appear and no map can be read.). - Page 16 LAUNCH DBScar User’s Manual prompting you to name your track. Click “Save” to save your track. [ ]: To activate photographing. [ ]: To add note for your travel. [ ]: To define your destination on the map. Fig. 7-20 Fig.
- Page 17 LAUNCH DBScar User’s Manual Fig. 7-22 Fig. 7-23 • C. Car Cloud website Click “Car Cloud website” to visit it. • D. Update It includes the following options: Update via internet, Device update and Settings. Click “Update” to enter Fig. 7-24.
- Page 18 Note: To update successfully, please make sure your phone stays connected to the internet. Update via internet: To update DBScar. Click to start updating. If the current version is the latest one, a message box as indicated in Fig. 7-25 will appear. Click “Confirm” to cancel.
- Page 19 Click “Search” in Fig. 7-27 to start scanning bluetooth devices, then click the desired one from the search result list, the system will obtain the DBScar user information automatically. click “Activate”, the system will prompt you that it has been activated.
- Page 20 LAUNCH DBScar User’s Manual Fig. 7-28 Fig. 7-29 Input 17 VINs (Vehicle Identification Numbers. Refer to Maintenace Manual of Automotive for its detailed location) and click “Confirm” to enter device configuration interface.See Fig. 7-29. Click “Select” next to make to choose the desired vehicle make from the list (refer to Fig.
- Page 21 LAUNCH DBScar User’s Manual Fig. 7-30 Fig. 7-31 Click “Next”, a dialog box will pop up, prompting you whether to download the software. See Fig. 7-33. Click “OK” to start downloading. Once download is complete, the system will start upgrading automatically.
- Page 22 LAUNCH DBScar User’s Manual Fig. 7-32 Fig. 7-33 Settings: Select (Deselect) the desired option by checking(unchecking) the box next to it. • E. Fuel Diary This option enables you to view the refuel record and fuel consumptions. Click “Fuel”, the screen will display as Fig. 7-34.
- Page 23 LAUNCH DBScar User’s Manual Set start date Set end date Fig. 7-34 Click “Main” to return to the main menu screen. Click “Fuel”, the screen will enter Fig. 7-35. Input Cost, Price, Odometer readings, then choose the desired oil type from the pull-down list, and then click “Save”...
- Page 24 LAUNCH DBScar User’s Manual Fig. 7-35 Fig. 7-36 • F. Settings This option allows you to make some preferences to function items. • G. About To view the software version. Click “About”, a screen similar to Fig. 7-37 will appear.
-
Page 25: How To Diagnose
Fig. 7-38. Otherwise, a dialog box as shown in Fig. 7-39 will appear if the selected vehicle does not match with the current DBScar. Click [Update] to synchronize it; click [Yes] to continue. After the system loads all diagnostic programs, a screen similar to Fig. - Page 26 LAUNCH DBScar User’s Manual Fig. 7-40 Fig. 7-41 • A. Read fault code In Fig. 7-41, click “READ FAULT DATA”, all DTCs will be displayed on the screen. See Fig. 7-42. Fig. 7-42 Fig. 7-43 • B. Erase fault code...
- Page 27 LAUNCH DBScar User’s Manual In Fig. 7-41, click “ERASE FAULT DATA”, a dialog box as indicated Fig. 7-43 will pop up. Click [Yes] to erase trouble codes and a message “Erase Succeed” will appear; click [No] to exit. • C. Erase fault code In Fig.
-
Page 28: Manage Password
LAUNCH DBScar User’s Manual Fig. 7-46 Fig. 7-47 7.2.6 Manage password A. Set password and security questions Click the status bar in Fig. 7-7, the system will enter Fig. 7-48. In Fig. 7-48, click the CC colum to view your information. - Page 29 LAUNCH DBScar User’s Manual Fig. 7-48 Fig. 7-49 Fig. 7-50 Fig. 7-51 Click next to “Please type in a password hint”, Fig. 7-51...
- Page 30 LAUNCH DBScar User’s Manual will appear. Here you can set your questions and answers for getting your password back in future. After setting, click “OK” to save it. B. Get back your password While logging in, if you have registered, but forgot the password, click “Forget password”, a dialog box similar to Fig.
- Page 31 The company has the obligation to make some repair or replacements to this product according to the actual conditions. 5. This software is developed by Launch. The copyrights and all informative contents related to the software, which includes but is not limited...
- Page 32 LAUNCH DBScar User’s Manual 7. The company is not held responsible for any economic loss caused by communication line failure, technical issues, computer breakdown, unstable network and system, and other Force Majeure events. 8. If your service is affected by Force Majeure...
-
Page 33: Fcc Information
LAUNCH DBScar User’s Manual FCC INFORMATION This device complies with Part 15 of the FCC Rules. Operation is subject to the following two conditions: 1. This device may not cause harmful interference, and 2. This device must accept any interference received, including interference that may cause undesired operation. - Page 34 LAUNCH DBScar User’s Manual...
- Page 35 LAUNCH www.cnlaunch.com LAUNCH TECH. CO., LTD. Launch Industrial Park, North of Wuhe Avenue, Banxuegang, Longgang,Shenzhen, Guangdong, P.R.China, 518129 Tel: +86-755-84528767 http://www.dbscar.com...
Need help?
Do you have a question about the DBScar and is the answer not in the manual?
Questions and answers
My daystar vii 16 pin plug messed up a couple pins broke how can how can I fix it
You can fix a broken 16-pin plug on a Launch DBScar by replacing the OBD2 cable. A replacement OBD2 cable is available for the Launch DBScar VII, which connects the VCI to the vehicle's OBD DLC socket. The replacement cable has a DB-15 female connector on one end and an OBD-16 pin male connector on the other. To replace it, purchase the correct cable and swap it with the damaged one.
This answer is automatically generated