Table of Contents
Advertisement
Advertisement
Table of Contents

Related Manuals for Perfect Aire 2PAMSH18-MZ02


Summary of Contents for Perfect Aire 2PAMSH18-MZ02
-
Page 3: Table Of Contents
Table of Contents User Manual Safety Precautions Warning .......................... 1 Caution ........................... 2 Identification of Parts Indoor unit ........................ 3–13 Outdoor unit......................3–13 Display window......................3–13 Operating Instructions Operating temperature ....................14 Manual operation......................14 Airflow direction control ..................15–16 How the air conditioner works .................. -
Page 4: Safety Precautions
Safety Precautions To prevent injury to the user or other people and property damage, the following instructions must be followed. Incorrect operation due to ignoring or not following installation and usage instructions may cause harm or damage. The seriousness is classified by the following indications: WARNING This symbol indicates the possibility of death or serious injury. - Page 5 Safety Precautions • Never operate any controls with wet • If the air conditioner is to be used in hands. Doing so may cause an electric conjunction with other heaters, the air should be refreshed perioically; otherwise shock. • Never use the device for any other there is a risk of lack of oxygen.
-
Page 6: Indoor Unit
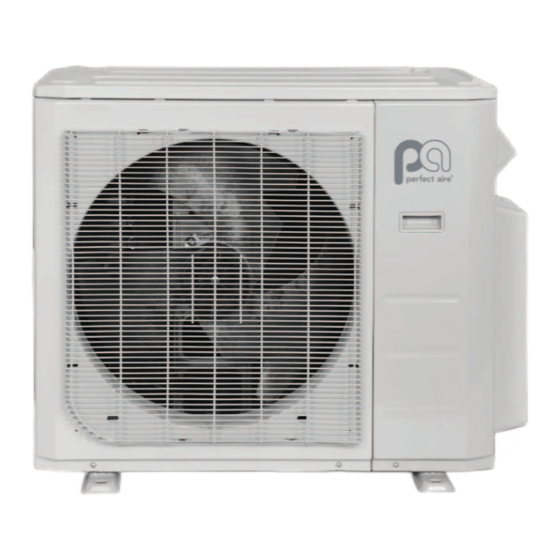
Identification of Parts IMPORTANT: For multi-split type air conditioners, one outdoor Indoor unit unit can match different types of indoor units. All of the pictures in this manual are for explan- ation purposes only. Your air conditioner may be slightly different. The actual shape shall prevail. One-five The following pages introduce several kinds of indoor units matching with the outdoor units. -
Page 7: Identification Of Parts
Identification of Parts (continued) Indoor unit Indoor unit Front panel frame Front panel Air filter One-five Horizontal air flow grille Vertical air flow louver Room temperature sensor Display panel One-four Infrared signal receiver Remote control Outdoor unit One-three Drain hose, refrigerant connecting pipe Connective cable Stop valve Fan hood... -
Page 8: Identification Of Parts Indoor Unit
Identification of Parts (continued) Identification of parts Indoor unit Indoor unit Front panel frame Front panel One-five Air filter Horizontal air flow grille Vertical air flow louver Room temperature sensor Display panel One-four Remote control Outdoor unit One-three Drain hose, refrigerant connecting pipe Connective cable Stop valve Fan hood... -
Page 9: Identification Of Parts
Identification of Parts (continued) Indoor unit Indoor unit One-five 1. Panel frame 2. Rear air intake grille 3. Front panel 4. Air filter (behind) 5. Horizontal louver 6. LCD display window One-four 7. Vertical louver 8. Manual control button (behind) Remote control holder One-three Outdoor unit... -
Page 10: Display Window
Identification of Parts (continued) Display window NOTE: The display window on the air conditioner you purchased may look like one of the following: OPERATION display Displayed when the air conditioner is in timer def. operation. AUTO operation display Displayed during Auto operation. DEFROST operation display (For Heating &... - Page 11 Identification of Parts (continued) Indoor unit Indoor unit 1. Front panel One-five 2. Air inlet 3. Air filter 4. Air outlet 5. Horizontal air flow grille 6. Vertical air flow louver (inside) 7. Display panel One-four 8. Remote control NOTE: The actual shape of the indoor unit you purchased may may be slight different One-three on front panel and display window.
-
Page 12: Identification Of Parts
Identification of Parts (continued) Indoor unit Indoor unit 1. Front panel 2. Air inlet 3. Air filter(inside) 4. Air outlet One-five 5. Horizontal air flow grille(outside) 6. Horizontal air flow grille(inside) 7. Vertical air flow louver 8. Display panel 9. Manual control button and receiver One-four 10. -
Page 13: Identification Of Parts
Identification of Parts (continued) Temporary button This button is used to operate the unit temporarily in case you misplace the remote control or its batteries are exhausted. One press of the manual control button will lead to the forced AUTO operation. If press the button twice within five seconds, the unit will operate under forced COOL operation. -
Page 14: Identification Of Parts
Identification of Parts (continued) Duct / Ceiling type Indoor unit Indoor unit 1. Air outlet 2. Air inlet 3. Air filter 4. Electric control cabinet 5. Wired controller 6. Drain pipe One-five Outdoor unit 7. Drain hose, refrigerant connecting pipe 8. -
Page 15: Identification Of Parts
Identification of Parts (continued) Duct type Indoor unit Indoor unit 1. Air outlet 2. Air inlet 3. Air filter 4. Remote control One-five Outdoor unit 5. Drain hose, refrigerant connecting pipe 6. Connective cable 7. Stop valve One-four 8. Fan hood DISPLAY PANEL OPERATION lamp One-three... - Page 16 Identification of Parts (continued) Compact four-way cassette type Indoor unit Indoor unit 1. Air flow louver (at air outlet) 2. Drain pump (drain water from indoor unit) 3. Drain pipe 4. Air outlet 5. Air filter (inside air-in grille) 6. Air inlet One-five 7.
-
Page 17: Operating Instructions
Operating Instructions NOTE: This manual does not include Remote Control Operation Instructions. See Remote Control User Manual included with the unit for those instructions. Operating Temperature Mode Cooling Operation Heating Operation Drying Operation Temperature Room Temperature 62ºF~90ºF 32ºF~86ºF 62ºF~90ºF (17ºC~32ºC) (32ºC~86ºC) (17ºC~32ºC) 32ºF~122ºF... -
Page 18: Airflow Direction Control
Operating Instructions (continued) Airflow direction control Adjust the air flow direction properly otherwise it might cause discomfort or cause uneven room temperatures. Adjust the horizontal/vertical louver using the remote control. For some models, the vertical louver can only be adjusted manually. To set the horizontal/vertical air flow direction Range Perform this function while the unit is in operation. - Page 19 Operating Instructions (continued) Duct-Ceiling Type The following is how to adjust the air flow direction when the air outlet parts (sold separately) are used with the indoor unit. Cooling Heating To effectively cool the whole room, please To effectively heat the bottom of the room adjust the louver horizontally.
-
Page 20: How The Air Conditioner Works
Operating Instructions (continued) How the air conditioner works AUTO operation When you set the air conditioner in AUTO mode, SLEEP operation it will automatically select cooling, heating (cooling/ heating models only), or fan only operation depending on what temperature you have selected 1 (2 F) and the room temperature. -
Page 21: Care And Maintenance
Care & Maintenance Cleaning the Grille, Case and Remote Control Turn the system off before cleaning. To clean, wipe with a soft, dry cloth. Do not use bleach or abrasives. NOTE: Supply power must be disconnectd before cleaning the indoor unit. CAUTIONS A cloth dampened with cold water may be used on the indoor unit if it is very dirty. - Page 22 Care & Maintenance (continued) Maintenance If you plan to idle the unit for a long time, perform the following: (1) Operate the fan for about half a day to dry the inside of the unit. (2) Stop the air conditioner and disconnect power. Remove the batteries from the remote control.
-
Page 23: Cassette Type
Care & Maintenance (continued) CASSETTE TYPE 1. Open the air intake grille by pushing the grille tabs toward the middle simultaneously as indicated in Fig. A. Caution: The wiring harness, which was originally connected with the main cassette body, must be disconnected before completely removing intake grille. - Page 24 Care & Maintenance (continued) DUCT TYPE 1. For rear ventilated units, please remove the screws (2 pieces) fixed on the filter and take down the filter away from the unit. See Fig. G1. 2. For downward ventilated units, please push the filter up slightly to let the position retainer escape away from the flange fixed holes, and take off the filter according to the arrow direction shows in Fig.
-
Page 25: Maintenance
Care & Maintenance (continued) Maintenance If you plan to idle the unit for a long time, perform the following: 1. Clean the indoor unit and air filter. 2. Select FAN only mode, let the indoor fan run for awhile to dry the inside of the unit. 3. - Page 26 4. Dust is blown out from the indoor unit. This is a normal condition when the air conditioner has not been used for a long time or during first use of the unit. 5. A peculiar smell comes out from the indoor unit. This is caused by the indoor unit giving off smells permeated from building material, from furniture, or smoke.
-
Page 27: Troubleshooting Tips
TROUBLESHOOTING TIPS Stop the air conditioner immediately if one of the following faults occur. Disconnect the power and contact a certified HVAC contractor. If the E( 0,1..) or P( 0, 1 ..) code appears on the LED(LCD)window, disconnect the power and contact the service people. Trouble Fuse blows frequently or circuit breaker trips frequently. - Page 28 Distributed by: f r e e r i 5401 Dansher Rd. Countryside, IL 60525 844-472-2473 www.perfectaire.us Specification and performance data is subject to change without notice. Printed in China PA/Manual_Gen2MZMSOutdoorUser/01182018...
Need help?
Do you have a question about the 2PAMSH18-MZ02 and is the answer not in the manual?
Questions and answers