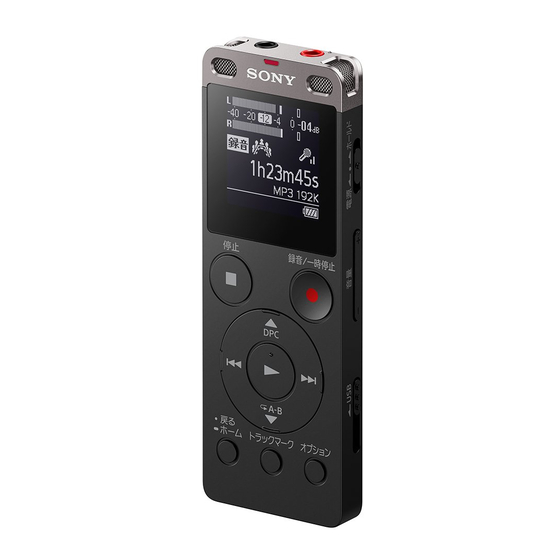
Sony ICD-UX560F Help Manual
Hide thumbs Also See for ICD-UX560F:
Table of Contents

Advertisement

Help Guide
IC Recorder
ICD-UX560 / ICD-UX560F / ICD-UX565F
Use this Help Guide when you have any questions on how to use your IC recorder.
Preparation
Parts and controls
HOME menu/OPTION menu
Using the HOME menu
Using the OPTION menu
About folders and files
Display window
While the HOME menu is displayed
While recording is in progress or on standby
While playback is in progress

Advertisement

Table of Contents
loading

Summary of Contents for Sony ICD-UX560F

  • Page 1 Help Guide IC Recorder ICD-UX560 / ICD-UX560F / ICD-UX565F Use this Help Guide when you have any questions on how to use your IC recorder. Preparation Parts and controls HOME menu/OPTION menu Using the HOME menu Using the OPTION menu...
  • Page 2 While the recording information is displayed While listening to the FM radio (ICD-UX560F / ICD-UX565F only) While recording FM radio broadcasts (ICD-UX560F / ICD-UX565F only) While the current file information is displayed While the file search categories are displayed Power...
  • Page 3 Additional recording operations/settings Selecting a recording scene for an individual situation Customizing the recording settings for “My Scene” Tips for better recording Default settings for the recording scenes of the Scene Select function Using the recording delay function Recording automatically in response to the input sound volume – the VOR function Recording with other devices Recording with an external microphone Recording audio from an external device with the synchronized recording function (SYNC REC)
  • Page 4 FM radio (ICD-UX560F / ICD-UX565F only) Assigning FM radio stations Assigning FM radio stations automatically to the preset numbers (Auto Preset) (ICD-UX560F / ICD-UX565F only) Assigning FM radio stations manually to the preset numbers (ICD-UX560F / ICD-UX565F only) Clearing the FM radio preset number assignment (ICD-UX560F / ICD-UX565F only)
  • Page 5 Recording FM radio broadcasts (ICD-UX560F / ICD-UX565F only) Changing the radio settings Selecting the sensitivity level for FM radio scanning (ICD-UX560F / ICD-UX565F only) Switching the FM radio output between the built-in speaker and the headphones (ICD-UX560F / ICD-UX565F only) Settings menu Using the Settings menu...
  • Page 6 Computer Connecting the IC recorder to a computer Structure of folders and files Copying files from the IC recorder to a computer Copying music files from a computer to the IC recorder Playing music files on the IC recorder that were copied from a computer Using the IC recorder as a USB storage device Software What you can do with Sound Organizer 2 (for Windows only)
  • Page 7 Troubleshooting Restarting the IC recorder Noise The recorded file is noisy and is hard to understand. The recorded file is noisy and you want to record with less noise. A rustling noise is recorded. A buzzing or humming noise is recorded. Noise is recorded when you use an external microphone (not supplied) for recording.
  • Page 8 You hear no sound from the built-in speaker (ICD-UX560F / ICD-UX565F only). You hear sound from the built-in speaker even when headphones (not supplied) are connected (ICD-UX560F / ICD-UX565F only). The FM radio signals are weak or the sound quality is poor (ICD-UX560F / ICD-UX565F only).
  • Page 9 The TV images are distorted when you listen to the FM radio (ICD-UX560F / ICD-UX565F only). You cannot tune in FM radio stations or you hear a lot of static (ICD-UX560F / ICD-UX565F only). You cannot assign an FM radio station to a preset number (ICD-UX560F / ICD-UX565F only).
  • Page 10: Table Of Contents

    While playback is in progress ....................While the recording information is displayed ................While listening to the FM radio (ICD-UX560F / ICD-UX565F only) ........While recording FM radio broadcasts (ICD-UX560F / ICD-UX565F only) ......While the current file information is displayed ................
  • Page 11 Additional recording operations/settings ..................Selecting a recording scene for an individual situation ............Customizing the recording settings for “My Scene” ............... Tips for better recording ......................Default settings for the recording scenes of the Scene Select function ......... Using the recording delay function ..................
  • Page 12 Assigning FM radio stations automatically to the preset numbers (Auto Preset) (ICD-UX560F / ICD-UX565F only) ................Assigning FM radio stations manually to the preset numbers (ICD-UX560F / ICD-UX565F only) ........................ Clearing the FM radio preset number assignment (ICD-UX560F / ICD- UX565F only) ........................
  • Page 13 Menu items with selectable setting items ..................Selecting the recording mode (REC Mode) ................Selecting the sensitivity level of the built-in microphones (Built-in Mic Sensitivity) ..........................Reducing noise during recording (Recording Filter) ............. Selecting the audio input type and the sensitivity level of the external microphone (Ext.
  • Page 14 Trademarks ..........................Notice for users .......................... License ............................Support website ..........................Customer support websites ....................Troubleshooting .......................... Restarting the IC recorder ......................Noise ............................. The recorded file is noisy and is hard to understand............The recorded file is noisy and you want to record with less noise........
  • Page 15 You hear sound from the built-in speaker even when headphones (not supplied) are connected (ICD-UX560F / ICD-UX565F only)..........The FM radio signals are weak or the sound quality is poor (ICD-UX560F / ICD-UX565F only)........................ The TV images are distorted when you listen to the FM radio (ICD-UX560F / ICD-UX565F only).
  • Page 16 You cannot assign an FM radio station to a preset number (ICD-UX560F / ICD-UX565F only)........................ Software operations (Sound Organizer 2) ..................You cannot install Sound Organizer 2.................. The IC recorder is not detected by Sound Organizer 2............
  • Page 17: Parts And Controls

    Help Guide IC Recorder ICD-UX560 / ICD-UX560F / ICD-UX565F Parts and controls Operation indicator Built-in microphones (stereo) (L) Built-in microphones (stereo) (R) Display window REC/PAUSE (record/pause) button STOP button Control button ( DPC (Digital Pitch Control), A-B (repeat A-B)/ (review/fast backward),...
  • Page 18 A tactile dot is provided. Use the tactile dot as a reference when operating the IC recorder. Sliding the POWER·HOLD switch to “POWER” and holding it for 8 seconds or longer restarts your IC recorder. See Restarting the IC recorder for more information. 4-573-936-32(1) Copyright 2015 Sony Corporation...
  • Page 19: Using The Home Menu

    Help Guide IC Recorder ICD-UX560 / ICD-UX560F / ICD-UX565F Using the HOME menu On your IC recorder, the HOME menu is the starting point for all functions. The HOME menu allows you to select a function, search for recorded files, or change the settings on the IC recorder.
  • Page 20 You can display the recording standby screen. To start recording, press REC/PAUSE. FM Radio: You can display the FM radio screen to listen to the FM radio or to record FM radio broadcasts. (ICD-UX560F / ICD- UX565F only) Settings: You can display the Settings menu and change various settings on the IC recorder.
  • Page 21: Using The Option Menu

    Help Guide IC Recorder ICD-UX560 / ICD-UX560F / ICD-UX565F Using the OPTION menu You can display the OPTION menu by pressing OPTION. The OPTION menu items vary depending on the selected function of your IC recorder. Select the function you want to use on the HOME menu, and then press OPTION.
  • Page 22 Hint To return to the previous screen, press BACK/HOME while the OPTION menu is on the display window. Related Topic Using the HOME menu 4-573-936-32(1) Copyright 2015 Sony Corporation...
  • Page 23: About Folders And Files

    Audio files recorded by your IC recorder are stored in folders of the IC recorder. The following folders are automatically created by default. “FOLDER01”: Files recorded via the built-in microphones are stored. “RADIO01”: Recorded FM radio files are stored. (ICD-UX560F / ICD-UX565F only) A: HOME menu B: Folders...
  • Page 24: While The Home Menu Is Displayed

    You can select one of the following: : Music : Recorded Files : Record : FM Radio (ICD-UX560F / ICD-UX565F only) : Settings : Return to XX (The function you are currently using is displayed in “XX.”) Current time Indicates the current time.
  • Page 25: While Recording Is In Progress Or On Standby

    Help Guide IC Recorder ICD-UX560 / ICD-UX560F / ICD-UX565F While recording is in progress or on standby The following describes the display window while recording is in progress or on standby. Note The above screen is provided for explanatory purposes. It may look different from what you actually see on your IC recorder.
  • Page 26 Indicates the sensitivity level of the built-in microphones that is currently selected. : Auto : High : Medium : Low : High(Focused) : Medium(Focused) : Low(Focused) : High(Wide) : Medium(Wide) : Low(Wide) : High(Music) : Medium(Music) : Low(Music) 4-573-936-32(1) Copyright 2015 Sony Corporation...
  • Page 27: While Playback Is In Progress

    Help Guide IC Recorder ICD-UX560 / ICD-UX560F / ICD-UX565F While playback is in progress The following describes the display window during playback. Note The above screens are provided for explanatory purposes. They may look different from what you actually see on your IC recorder.
  • Page 28 Track mark number Indicates the track mark number, if added, of the current playback point. Playback progress bar Indicates how far playback of the file has progressed. Elapsed time Indicates the elapsed time of the current playback. 4-573-936-32(1) Copyright 2015 Sony Corporation...
  • Page 29: While The Recording Information Is Displayed

    Help Guide IC Recorder ICD-UX560 / ICD-UX560F / ICD-UX565F While the recording information is displayed You can view the recording information of your IC recorder, including the remaining recording time, the memory storage for recorded files, and the folder setting.
  • Page 30: While Listening To The Fm Radio (Icd-Ux560F / Icd-Ux565F Only)

    Help Guide IC Recorder ICD-UX560 / ICD-UX560F / ICD-UX565F While listening to the FM radio (ICD-UX560F / ICD-UX565F only) The following describes the display window during FM radio broadcasts. Note The above screen is provided for explanatory purposes. It may look different from what you actually see on your IC recorder.
  • Page 31: While Recording Fm Radio Broadcasts (Icd-Ux560F / Icd-Ux565F Only)

    Help Guide IC Recorder ICD-UX560 / ICD-UX560F / ICD-UX565F While recording FM radio broadcasts (ICD-UX560F / ICD-UX565F only) The following describes the display window while recording of FM radio broadcasts is in progress. Note The above screen is provided for explanatory purposes. It may look different from what you actually see on your IC recorder.
  • Page 32: While The Current File Information Is Displayed

    Recording Filter: Recording filter selected at the time of recording. VOR: VOR (Voice Operated Recording) setting selected at the time of recording. Input: Audio input type (“Built-in Mic,” “External Mic,” “Audio IN,” or “FM Radio” (ICD-UX560F / ICD-UX565F only)) selected at the time of recording.
  • Page 33 Bit Rate: Bit rate selected at the time of recording. Sample Rate: Sampling rate selected at the time of recording. Bit Depth: Bit depth selected at the time of recording. Recording Memory: Memory storage containing the file. File Path: Path to the file. 4-573-936-32(1) Copyright 2015 Sony Corporation...
  • Page 34: While The File Search Categories Are Displayed

    Help Guide IC Recorder ICD-UX560 / ICD-UX560F / ICD-UX565F While the file search categories are displayed When you select “ Recorded Files” or “ Music” on the HOME menu, the search categories of the stored files appear on the display window.
  • Page 35 Artists: Music files are sorted by artist name. Folders: Music files in the selected folder are listed. 4-573-936-32(1) Copyright 2015 Sony Corporation...
  • Page 36: Power

    Help Guide IC Recorder ICD-UX560 / ICD-UX560F / ICD-UX565F Charging the battery with a computer Slide the USB slide lever in the direction of the arrow. Insert the USB connector into the USB port of a running computer. While the battery is charging, the “Connecting” animation and the battery indicator animation ( ) appear on the display window.
  • Page 37 If your IC recorder is connected to a computer which is not running or in a power saving mode (standby or sleep), the battery will not charge. Related Topic Disconnecting the IC recorder from the computer Connecting the IC recorder to a computer 4-573-936-32(1) Copyright 2015 Sony Corporation...
  • Page 38: Disconnecting The Ic Recorder From The Computer

    Help Guide IC Recorder ICD-UX560 / ICD-UX560F / ICD-UX565F Disconnecting the IC recorder from the computer Be sure to follow the procedure below, otherwise you may not be able to play the files stored on your IC recorder due to data corruption.
  • Page 39 Related Topic Charging the battery with a computer Connecting the IC recorder to a computer 4-573-936-32(1) Copyright 2015 Sony Corporation...
  • Page 40: Charging The Battery With The Usb Ac Adaptor

    Help Guide IC Recorder ICD-UX560 / ICD-UX560F / ICD-UX565F Charging the battery with the USB AC adaptor You can charge the battery or use your IC recorder by connecting it to an AC outlet with a USB AC adaptor (not supplied). It is helpful to use the IC recorder with AC power when you want to record for a long time.
  • Page 41 Related Topic Disconnecting the IC recorder from the USB AC adaptor Battery life 4-573-936-32(1) Copyright 2015 Sony Corporation...
  • Page 42: Disconnecting The Ic Recorder From The Usb Ac Adaptor

    Help Guide IC Recorder ICD-UX560 / ICD-UX560F / ICD-UX565F Disconnecting the IC recorder from the USB AC adaptor Be sure to follow the procedure below, otherwise you may not be able to play the files stored on your IC recorder due to data corruption.
  • Page 43: Turning The Power On

    Help Guide IC Recorder ICD-UX560 / ICD-UX560F / ICD-UX565F Turning the power on Slide the POWER·HOLD switch to “POWER” and hold it until the display window turns on. Hint The Screen Off Timer function [Details] on your IC recorder is set to “30sec” by default to save battery power. If you leave the IC recorder unused for 30 seconds, the display window will automatically turn off.
  • Page 44: Turning The Power Off

    Help Guide IC Recorder ICD-UX560 / ICD-UX560F / ICD-UX565F Turning the power off Slide the POWER·HOLD switch to “POWER” and hold it until “Power Off” appears on the display window. Note Sliding the POWER·HOLD switch to “POWER” and holding it for 8 seconds or longer restarts your IC recorder. If you restart...
  • Page 45: Using The Screen Off Timer

    Help Guide IC Recorder ICD-UX560 / ICD-UX560F / ICD-UX565F Using the screen off timer The Screen Off Timer function on your IC recorder is set to “30sec” by default to save battery power. If you leave the IC recorder unused for 30 seconds, the display window will turn off, but you can still perform any button operations. To turn the display window back on, press BACK/HOME.
  • Page 46: Inserting A Memory Card

    Help Guide IC Recorder ICD-UX560 / ICD-UX560F / ICD-UX565F Inserting a memory card In addition to the built-in memory, you can record files on a microSD card (not supplied). Make sure that the operation indicator of your IC recorder is not lit, and then open the cover of the microSD card slot.
  • Page 47 Card). Hint To remove the memory card, push the microSD card into the slot. When it pops out, remove it from the microSD card slot. Related Topic Structure of folders and files Compatible memory cards 4-573-936-32(1) Copyright 2015 Sony Corporation...
  • Page 48: Making The Initial Settings

    Help Guide IC Recorder ICD-UX560 / ICD-UX560F / ICD-UX565F Making the initial settings When you turn on your IC recorder for the first time, the Configure Initial Settings screen appears on the display window. You can then select the display language, set the clock, and turn on/off the beep sound.
  • Page 49 When you are finished with the last item, press to apply the settings to the clock. Press to select “Next,” and then press The setting window for turning the beep sound on or off is displayed. Press to select “ON” or “OFF” to turn on or off the beep sound, and then press When the initial settings finish, the completion message and then the HOME menu appears.
  • Page 50 Setting the clock (Date&Time) Turning the beep sound on or off (Beep) While the HOME menu is displayed 4-573-936-32(1) Copyright 2015 Sony Corporation...
  • Page 51: Placing The Ic Recorder Into The Hold State (Hold)

    Help Guide IC Recorder ICD-UX560 / ICD-UX560F / ICD-UX565F Placing the IC recorder into the HOLD state (HOLD) You can disable all the buttons (HOLD) on your IC recorder in order to prevent unintentional operations while you carry around the IC recorder.
  • Page 52: Releasing The Ic Recorder From The Hold State

    Help Guide IC Recorder ICD-UX560 / ICD-UX560F / ICD-UX565F Releasing the IC recorder from the HOLD state When all the buttons on your IC recorder are disabled, pressing any button displays “HOLD... Slide HOLD Switch to Activate.” on the display window.
  • Page 53: Maintaining The Moderate Volume Level (European Models Only)

    Help Guide IC Recorder ICD-UX560 / ICD-UX560F / ICD-UX565F Maintaining the moderate volume level (European models only) The IC recorder limits the maximum volume to allow you to listen to the sound at a moderate volume level when using the headphones.
  • Page 54: Recording

    Help Guide IC Recorder ICD-UX560 / ICD-UX560F / ICD-UX565F Recording with the built-in microphones The following describes the basic recording steps with the selected sensitivity level of the built-in microphones and recording mode. Note If you accidentally touch your IC recorder or let an object come in contact with it while recording is in progress, rustling or scratching noises may be recorded.
  • Page 55 Turn your IC recorder so that its built-in microphones ( ) point in the direction of the target sound source. Press REC/PAUSE. The operation indicator ( ) lights in red. You do not need to press and hold REC/PAUSE while recording. While recording is in progress, the peak meters ( ) appear to indicate the current and optimum recording volume levels of input sound.
  • Page 56 REC/PAUSE to make your IC recorder pause for recording. This helps you adjust the recording volume level without recording unnecessary audio data. Related Topic Additional operations available during recording Recording FM radio broadcasts (ICD-UX560F / ICD-UX565F only) 4-573-936-32(1) Copyright 2015 Sony Corporation...
  • Page 57: About The Peak Meters Indicating The Recording Volume Levels

    Help Guide IC Recorder ICD-UX560 / ICD-UX560F / ICD-UX565F About the peak meters indicating the recording volume levels During recording, the peak meters ( ) appear to help you adjust the recording level. Please adjust the orientation of the built-in microphones, the distance from the sound source, or the sensitivity setting of the microphones so that the recording level stays around -12 dB, which fits within the optimum range, as illustrated above.
  • Page 58: Monitoring The Recording Audio

    Help Guide IC Recorder ICD-UX560 / ICD-UX560F / ICD-UX565F Monitoring the recording audio You can monitor the ongoing recording by connecting headphones (not supplied) to the (headphones) jack. Connect headphones (not supplied) to the (headphones) jack. Press VOLUME -/+ to adjust the monitoring volume.
  • Page 59: Additional Operations Available During Recording

    Help Guide IC Recorder ICD-UX560 / ICD-UX560F / ICD-UX565F Additional operations available during recording You can perform the following operations during recording. To pause a recording Press REC/PAUSE. While a recording is paused, the operation indicator flashes in red and flashing appears on the display window.
  • Page 60: Changing The File Storage Destination Folder

    Changing the file storage destination folder By default, the recorded files via the built-in microphones are stored in “FOLDER01” while the recorded FM radio files are stored in “RADIO01” (ICD-UX560F / ICD-UX565F only) under “ Recorded Files.” You can change this storage folder setting by following the steps below: While recording is on standby, select “Recording Folder”...
  • Page 61: Selecting A Recording Scene For An Individual Situation

    Help Guide IC Recorder ICD-UX560 / ICD-UX560F / ICD-UX565F Selecting a recording scene for an individual situation According to a particular recording situation, you can change some recording settings, including the recording mode and the sensitivity level of the built-in microphones, at once by selecting one of the recording scenes (Scene Select).
  • Page 62 You can customize the recording settings, including the recording mode and the sensitivity level of the built-in microphones, to make your own recording scene. Related Topic Default settings for the recording scenes of the Scene Select function List of the Settings menu items Customizing the recording settings for “My Scene” 4-573-936-32(1) Copyright 2015 Sony Corporation...
  • Page 63: Customizing The Recording Settings For "My Scene

    Help Guide IC Recorder ICD-UX560 / ICD-UX560F / ICD-UX565F Customizing the recording settings for “My Scene” You can customize the recording settings for “My Scene 1” or “My Scene 2” of the Scene Select function to make a recording scene that suits your preference.
  • Page 64 Selecting the sensitivity level of the built-in microphones (Built-in Mic Sensitivity) Reducing noise during recording (Recording Filter) Recording automatically in response to the input sound volume – the VOR function 4-573-936-32(1) Copyright 2015 Sony Corporation...
  • Page 65: Tips For Better Recording

    Help Guide IC Recorder ICD-UX560 / ICD-UX560F / ICD-UX565F Tips for better recording Recording at a meeting Place your IC recorder close to speakers of the meeting. You can reduce noise (vibrations from the desk, etc.) by placing the IC recorder on a soft cloth, such as a handkerchief.
  • Page 66 Recording an interview Place your IC recorder so that the built-in microphones point in the direction of the interviewee. For recording an interview, it is suitable to select “Auto Voice Rec” or “Interview” of the Scene Select function. Recording a soft music performance With your IC recorder, you can record immersive stereo sound by placing it close to musical instruments.
  • Page 67 If the audio of a recorded file is distorted, place the IC recorder further away to record performances. Related Topic Selecting a recording scene for an individual situation Reducing noise during recording (Recording Filter) Selecting the sensitivity level of the built-in microphones (Built-in Mic Sensitivity) 4-573-936-32(1) Copyright 2015 Sony Corporation...
  • Page 68: Default Settings For The Recording Scenes Of The Scene Select Function

    Help Guide IC Recorder ICD-UX560 / ICD-UX560F / ICD-UX565F Default settings for the recording scenes of the Scene Select function By default, the settings for the recording scenes of the Scene Select function are as follows: Auto Voice Rec REC Mode: MP3 192kbps...
  • Page 69 My Scene 2 REC Mode: MP3 192kbps Built-in Mic Sensitivity: For Voice - Medium Ext. Input Setting(MIC IN): For Voice - Medium VOR: OFF Recording Filter: OFF Related Topic Selecting a recording scene for an individual situation 4-573-936-32(1) Copyright 2015 Sony Corporation...
  • Page 70: Using The Recording Delay Function

    Help Guide IC Recorder ICD-UX560 / ICD-UX560F / ICD-UX565F Using the recording delay function You can set your IC recorder to start recording automatically when the specified period of time expires. While recording is on standby, select “Recording Delay” on the OPTION menu, and then press...
  • Page 71 To cancel the recording delay function setup process, press BACK/HOME during the countdown, press to select “Yes”, and then If you press REC/PAUSE during the countdown, the recording delay function is cancelled, and recording starts. 4-573-936-32(1) Copyright 2015 Sony Corporation...
  • Page 72: Recording Automatically In Response To The Input Sound Volume - The Vor Function

    If the selected sensitivity level does not work as you expected or when you want make an important recording, follow the above steps to set “VOR” to “OFF.” During synchronized recording and FM radio recording (ICD-UX560F / ICD-UX565F only), the VOR function does not work. Hint...
  • Page 73 To cancel the VOR function setup process, set “VOR” to “OFF” in step 2. Related Topic Recording audio from an external device with the synchronized recording function (SYNC REC) Recording FM radio broadcasts (ICD-UX560F / ICD-UX565F only) 4-573-936-32(1) Copyright 2015 Sony Corporation...
  • Page 74: Recording With An External Microphone

    Help Guide IC Recorder ICD-UX560 / ICD-UX560F / ICD-UX565F Recording with an external microphone You can connect an external microphone to your IC recorder and use it for recording. While no IC recorder operations are in progress, connect an external microphone ( ) to the (microphone) jack.
  • Page 75: Recording Audio From An External Device With The Synchronized Recording Function (Sync Rec)

    Help Guide IC Recorder ICD-UX560 / ICD-UX560F / ICD-UX565F Recording audio from an external device with the synchronized recording function (SYNC REC) You can make music files without using a computer by recording audio/music from the device (a radio cassette recorder, a tape recorder, TV, etc.) connected to your IC recorder.
  • Page 76 Related Topic Recording the playback audio of the IC recorder on an external device Recording audio from an external device without the synchronized recording function (SYNC REC) 4-573-936-32(1) Copyright 2015 Sony Corporation...
  • Page 77: Recording Audio From An External Device Without The Synchronized Recording Function (Sync Rec)

    Help Guide IC Recorder ICD-UX560 / ICD-UX560F / ICD-UX565F Recording audio from an external device without the synchronized recording function (SYNC REC) You can make music files without using a computer by recording audio/music from the device (a radio cassette recorder, a tape recorder, TV, etc.) connected to your IC recorder.
  • Page 78 Start playback on the connected external device. Hint To stop recording, press STOP. Related Topic Recording the playback audio of the IC recorder on an external device Recording audio from an external device with the synchronized recording function (SYNC REC) 4-573-936-32(1) Copyright 2015 Sony Corporation...
  • Page 79: Recording The Playback Audio Of The Ic Recorder On An External Device

    Help Guide IC Recorder ICD-UX560 / ICD-UX560F / ICD-UX565F Recording the playback audio of the IC recorder on an external device You can connect an external device to your IC recorder and record playback audio from the IC recorder. Before you start recording, we recommend you make a trial recording first.
  • Page 80: Playback

    Help Guide IC Recorder ICD-UX560 / ICD-UX560F / ICD-UX565F Playing a file You can select a file from the HOME menu for playback. Select “ Music” or “ Recorded Files” on the HOME menu, and then press Search and select a file.
  • Page 81 To stop playback, press When you stop recording and the recording standby screen is on the display window, you can press to play the file you have just recorded. Related Topic Additional operations available during playback 4-573-936-32(1) Copyright 2015 Sony Corporation...
  • Page 82: Selecting A File

    Select a list or folder from the search results, and then select a file. Press to select a list or folder, and then select the file. Hint By default, “ Recorded Files” has either “FOLDER01” (ICD-UX560) or “FOLDER01” and “RADIO01”(ICD-UX560F / ICD-UX565F). 4-573-936-32(1) Copyright 2015 Sony Corporation...
  • Page 83: Locating A Playback Point With The Track Mark List (Track Mark List)

    Help Guide IC Recorder ICD-UX560 / ICD-UX560F / ICD-UX565F Locating a playback point with the track mark list (Track Mark List) You can locate a playback point by selecting a track mark on the Track Mark List screen. While playback is on standby or in progress, select “Track Mark List” on the OPTION menu, and then...
  • Page 84: Additional Operations Available During Playback

    Help Guide IC Recorder ICD-UX560 / ICD-UX560F / ICD-UX565F Additional operations available during playback You can perform the following operations while playback is in progress . To stop at the current position Press To resume playback from that point, press...
  • Page 85: Reducing Noise In The Playback Audio To Make Human Voices Sound Clearer - The Clear Voice Function

    Help Guide IC Recorder ICD-UX560 / ICD-UX560F / ICD-UX565F Reducing noise in the playback audio to make human voices sound clearer – the Clear Voice function The Clear Voice function reduces ambient noises to make human voices distinctive. You will hear human voices more clearly in the playback audio.
  • Page 86: Using The Transcription Playback Mode

    Help Guide IC Recorder ICD-UX560 / ICD-UX560F / ICD-UX565F Using the transcription playback mode In the transcription playback mode, you can fast-forward or fast-rewind to search for a particular point as well as use the DPC (Digital Pitch Control) function to slow down the playback speed. This is useful when you want to transcribe a recorded file of a meeting, etc.
  • Page 87 To listen to other files, press BACK/HOME to display the file list, and then select a file. Related Topic Adjusting the playback speed – the DPC (Digital Pitch Control) function Locating the desired playback point quickly (Easy Search) 4-573-936-32(1) Copyright 2015 Sony Corporation...
  • Page 88: Adjusting The Playback Speed - The Dpc (Digital Pitch Control) Function

    Help Guide IC Recorder ICD-UX560 / ICD-UX560F / ICD-UX565F Adjusting the playback speed – the DPC (Digital Pitch Control) function You can adjust the playback speed in a range from 0.25 times to 3.00 times. Changing the playback speed does not affect the playback audio.
  • Page 89 Press to set the playback speed. Hint To resume the normal playback speed, select “OFF” in step 3. Related Topic Using the transcription playback mode 4-573-936-32(1) Copyright 2015 Sony Corporation...
  • Page 90: Selecting The Sound Effect (Effect)

    Help Guide IC Recorder ICD-UX560 / ICD-UX560F / ICD-UX565F Selecting the sound effect (Effect) You can set the sound effect suitable for playing music files or recorded files. While playback is on standby or in progress, select “Effect” on the OPTION menu, and then press...
  • Page 91 Related Topic Customizing the sound effect Reducing noise in the playback audio to make human voices sound clearer – the Clear Voice function 4-573-936-32(1) Copyright 2015 Sony Corporation...
  • Page 92: Customizing The Sound Effect

    Help Guide IC Recorder ICD-UX560 / ICD-UX560F / ICD-UX565F Customizing the sound effect When selecting the sound effect (Effect), you can select “Custom” and customize the sound quality to suit your preference. While playback of a music or recorded file is on standby or in progress, select “Effect” on the OPTION...
  • Page 93: Selecting The Playback Mode

    Help Guide IC Recorder ICD-UX560 / ICD-UX560F / ICD-UX565F Selecting the playback mode You can select the playback mode that suits your needs. While playback is on standby or in progress, select “Play Mode” on the OPTION menu, and then press...
  • Page 94 4-573-936-32(1) Copyright 2015 Sony Corporation...
  • Page 95: Specifying A Segment Of A File To Play Repeatedly (A-B Repeat)

    Help Guide IC Recorder ICD-UX560 / ICD-UX560F / ICD-UX565F Specifying a segment of a file to play repeatedly (A-B repeat) While playback is on standby or in progress, press A-B to specify the starting point A. “A-B B?” is displayed.
  • Page 96: Specifying The Playback Range In The Stored File List

    Help Guide IC Recorder ICD-UX560 / ICD-UX560F / ICD-UX565F Specifying the playback range in the stored file list You can specify the playback range in the playback file list. The contents of the playback range will vary depending on the file search category (“Latest Recording,”...
  • Page 97: Listening To Sound With Better Quality

    Help Guide IC Recorder ICD-UX560 / ICD-UX560F / ICD-UX565F Listening to sound with better quality Use headphones: Connect headphones (not supplied) to the (headphones) jack. This disables the built-in speaker. Use external speakers: Connect active speakers (not supplied) to the (headphones) jack.
  • Page 98: Searching Forward/Backward (Cue/Review)

    Help Guide IC Recorder ICD-UX560 / ICD-UX560F / ICD-UX565F Searching forward/backward (Cue/Review) To search forward (Cue): While playback is on standby or in progress, press and hold and release it at the point you want to resume playback. To search backward (Review): While playback is on standby or in progress, press and hold and release it at the point you want to resume playback.
  • Page 99: Locating The Desired Playback Point Quickly (Easy Search)

    Help Guide IC Recorder ICD-UX560 / ICD-UX560F / ICD-UX565F Locating the desired playback point quickly (Easy Search) The Easy Search function helps you quickly locate the point from which you want to play. It would be more helpful in locating the desired point within a long file, such as a meeting recording, if you change the skip time length.
  • Page 100 For fast-rewinding: Select 1sec, 3sec (default setting), 5sec, 10sec, 30sec, 1min, 5min, or 10min to specify the skip time length for fast-rewinding. Hint You can also specify “Set Skip Time” while your IC recorder is in the transcription playback mode. For more information, see Using the transcription playback mode. 4-573-936-32(1) Copyright 2015 Sony Corporation...
  • Page 101: Deleting A File

    Help Guide IC Recorder ICD-UX560 / ICD-UX560F / ICD-UX565F Deleting a file You can select a file and delete it. Note Once you have deleted a file, you will not be able to restore it. Select a file you want to delete.
  • Page 102 To delete a part of a file, first divide the file into two files, select the file number of the one you want to delete, and proceed with step 2 and step 3. For instructions on dividing a file, see Dividing a file at the current playback point. Related Topic Deleting all files in the searched folder or list Deleting a folder 4-573-936-32(1) Copyright 2015 Sony Corporation...
  • Page 103: Deleting All Files In The Searched Folder Or List

    Help Guide IC Recorder ICD-UX560 / ICD-UX560F / ICD-UX565F Deleting all files in the searched folder or list You can select a folder or list from the file search results and delete all of the contained files. Select “ Music” or “...
  • Page 104 To cancel the deleting process, select “No” in step 5, and then press Related Topic Deleting a file Deleting a folder 4-573-936-32(1) Copyright 2015 Sony Corporation...
  • Page 105: Deleting A Folder

    Help Guide IC Recorder ICD-UX560 / ICD-UX560F / ICD-UX565F Deleting a folder You can select a folder from “ Recorded Files” on the HOME menu and delete it. Select “ Recorded Files” on the HOME menu, and then press Press to select “Folders”...
  • Page 106 If you delete all of the file storage destination folders, “No Folders - Creating New Recording Folder” appears on the display window and “FOLDER01” is automatically created. Related Topic Deleting a file Deleting all files in the searched folder or list 4-573-936-32(1) Copyright 2015 Sony Corporation...
  • Page 107: Moving A File To A Different Folder

    Help Guide IC Recorder ICD-UX560 / ICD-UX560F / ICD-UX565F Moving a file to a different folder You can select a file and move it to another folder. Select the file you want to move. [Details] While playback is on standby, select “Move/Copy File” on the OPTION menu, and then press Press to select “Move to Built-In Memory”...
  • Page 108 Related Topic Copying a file to a different folder 4-573-936-32(1) Copyright 2015 Sony Corporation...
  • Page 109: Copying A File To A Different Folder

    Help Guide IC Recorder ICD-UX560 / ICD-UX560F / ICD-UX565F Copying a file to a different folder You can select a file and copy it to another folder, which is useful in making a backup copy. Select the file you want to copy.
  • Page 110: Creating A Folder

    Help Guide IC Recorder ICD-UX560 / ICD-UX560F / ICD-UX565F Creating a folder You can create a folder in “ Recorded Files” on the HOME menu. Select “ Recorded Files” on the HOME menu, and then press Press to select “Folders” as the file search category, and then press Select “Built-In Memory”...
  • Page 111: Adding A Track Mark

    Help Guide IC Recorder ICD-UX560 / ICD-UX560F / ICD-UX565F Adding a track mark You can add a track mark at a point where you want to divide a file later or you want to locate during playback. You can add a maximum of 98 track marks to a single file.
  • Page 112 Although you can assign a name to track marks with Sound Organizer 2, your IC recorder is only capable of displaying up to 16 characters from the beginning of the track mark names. Related Topic Adding track marks automatically Deleting a track mark 4-573-936-32(1) Copyright 2015 Sony Corporation...
  • Page 113: Adding Track Marks Automatically

    Settings” - “Recording Settings” - “Auto Track Marks” from the HOME menu, and then press When recording FM radio broadcasts (ICD-UX560F / ICD-UX565F only), select “ Settings” - “FM Radio Settings” - “Auto Track Marks(FM Radio)” from the HOME menu, and then press Press to select “Interval,”...
  • Page 114 Adding a track mark Deleting a track mark 4-573-936-32(1) Copyright 2015 Sony Corporation...
  • Page 115: Deleting A Track Mark

    Help Guide IC Recorder ICD-UX560 / ICD-UX560F / ICD-UX565F Deleting a track mark You can delete the closest track mark before the point where you stopped playback. Select the file from which you want to delete track marks. [Details] Play the file and stop at a point after the track mark you want to delete.
  • Page 116 While recording is on standby, you cannot delete track marks with the OPTION menu. Use the HOME menu to select the file containing the track mark that you want to delete. Hint To cancel the deleting process, select “No” in step 4, and then press Related Topic Deleting all the track marks in the selected file at one time 4-573-936-32(1) Copyright 2015 Sony Corporation...
  • Page 117: Deleting All The Track Marks In The Selected File At One Time

    Help Guide IC Recorder ICD-UX560 / ICD-UX560F / ICD-UX565F Deleting all the track marks in the selected file at one time You can delete all the track marks of the selected file. Select the file from which you want to delete the track marks.
  • Page 118 Deleting a track mark 4-573-936-32(1) Copyright 2015 Sony Corporation...
  • Page 119: Dividing A File At The Current Playback Point

    Help Guide IC Recorder ICD-UX560 / ICD-UX560F / ICD-UX565F Dividing a file at the current playback point You can divide a single file into two files. Dividing a file helps you quickly locate the point from which you want to play in a long recording file, such as a meeting recording.
  • Page 120 You cannot divide a protected file. To divide a protected file, remove protection from the file first, then divide the file. For instructions on protecting a file, see Protecting a file. Hint To cancel the dividing process, select “No” in step 4, and then press Related Topic Dividing a file at all the track mark points 4-573-936-32(1) Copyright 2015 Sony Corporation...
  • Page 121: Dividing A File At All The Track Mark Points

    Help Guide IC Recorder ICD-UX560 / ICD-UX560F / ICD-UX565F Dividing a file at all the track mark points You can divide a file at all the track mark points. Select the file that you want to divide [Details], and then play the file and stop at any point.
  • Page 122 Track marks located near the beginning and end of the source file may not be used for dividing and remain in the divided files. Hint To cancel the dividing process, select “No” in step 3, and then press Related Topic Dividing a file at the current playback point 4-573-936-32(1) Copyright 2015 Sony Corporation...
  • Page 123: Changing A Folder Name

    Help Guide IC Recorder ICD-UX560 / ICD-UX560F / ICD-UX565F Changing a folder name You can change the name of the folders for storing the files you record with your IC recorder by selecting a folder name from the template. Select “...
  • Page 124 A sequential number (01 to 10) is always added to every folder name as a suffix. If you select the folder name that already exists, additional folders with the same name will be suffixed with a sequential number (02 to 10). Related Topic Changing a file name 4-573-936-32(1) Copyright 2015 Sony Corporation...
  • Page 125: Changing A File Name

    Help Guide IC Recorder ICD-UX560 / ICD-UX560F / ICD-UX565F Changing a file name You can change the name of the files stored under “ Recorded Files” on the HOME menu by adding one of the prefix templates. Select the file that you want to rename.
  • Page 126 Related Topic Changing a folder name 4-573-936-32(1) Copyright 2015 Sony Corporation...
  • Page 127: Protecting A File

    Help Guide IC Recorder ICD-UX560 / ICD-UX560F / ICD-UX565F Protecting a file To prevent a file from being accidentally deleted or edited, you can protect an important file. A protected file is marked with the (protect) indicator and is regarded as a read-only file that you cannot delete or edit.
  • Page 128: Assigning Fm Radio Stations Automatically To The Preset Numbers (Auto Preset) (Icd-Ux560F / Icd-Ux565F Only)

    Help Guide IC Recorder ICD-UX560 / ICD-UX560F / ICD-UX565F Assigning FM radio stations automatically to the preset numbers (Auto Preset) (ICD-UX560F / ICD-UX565F only) You can automatically assign up to 30 available FM radio stations to the preset numbers. The cord of headphones (not supplied) works as an FM radio antenna for your IC recorder. For better signal reception, we recommend you connect headphones to the (headphones) jack on the IC recorder and extend the cord as far as it can go.
  • Page 129 To cancel the automatic assignment process, select “No” in step 3, and then press Related Topic Assigning FM radio stations manually to the preset numbers (ICD-UX560F / ICD-UX565F only) Clearing the FM radio preset number assignment (ICD-UX560F / ICD-UX565F only)
  • Page 130: Assigning Fm Radio Stations Manually To The Preset Numbers (Icd-Ux560F / Icd-Ux565F Only)

    The FM radio station is assigned to one of the unassigned preset numbers. Related Topic Assigning FM radio stations automatically to the preset numbers (Auto Preset) (ICD-UX560F / ICD-UX565F only) Clearing the FM radio preset number assignment (ICD-UX560F / ICD-UX565F only)
  • Page 131: Clearing The Fm Radio Preset Number Assignment (Icd-Ux560F / Icd-Ux565F Only)

    The preset number turns to “P - -.” Related Topic Assigning FM radio stations automatically to the preset numbers (Auto Preset) (ICD-UX560F / ICD-UX565F only) Assigning FM radio stations manually to the preset numbers (ICD-UX560F / ICD-UX565F only) 4-573-936-32(1) Copyright 2015 Sony Corporation...
  • Page 132: Tuning In An Fm Radio Station Manually (Manual Scanning) (Icd-Ux560F / Icd-Ux565F Only)

    IC Recorder ICD-UX560 / ICD-UX560F / ICD-UX565F Tuning in an FM radio station manually (manual scanning) (ICD-UX560F / ICD- UX565F only) The cord of headphones (not supplied) works as an FM radio antenna for your IC recorder. For better signal reception, we recommend you connect headphones to the (headphones) jack on the IC recorder and extend the cord as far as it can go.
  • Page 133 Related Topic Switching the FM radio output between the built-in speaker and the headphones (ICD-UX560F / ICD-UX565F only) Tuning in an FM radio station automatically (automatic scanning) (ICD-UX560F / ICD-UX565F only) 4-573-936-32(1) Copyright 2015 Sony Corporation...
  • Page 134: Tuning In An Fm Radio Station Automatically (Automatic Scanning) (Icd-Ux560F / Icd-Ux565F Only)

    IC Recorder ICD-UX560 / ICD-UX560F / ICD-UX565F Tuning in an FM radio station automatically (automatic scanning) (ICD-UX560F / ICD-UX565F only) The cord of headphones (not supplied) works as an FM radio antenna for your IC recorder. For better signal reception, we recommend you connect headphones to the (headphones) jack on the IC recorder and extend the cord as far as it can go.
  • Page 135 Related Topic Switching the FM radio output between the built-in speaker and the headphones (ICD-UX560F / ICD-UX565F only) Tuning in an FM radio station manually (manual scanning) (ICD-UX560F / ICD-UX565F only) 4-573-936-32(1) Copyright 2015 Sony Corporation...
  • Page 136: Tuning In An Fm Radio Station With The Assigned Preset Number (Icd-Ux560F / Icd-Ux565F Only)

    IC Recorder ICD-UX560 / ICD-UX560F / ICD-UX565F Tuning in an FM radio station with the assigned preset number (ICD-UX560F / ICD-UX565F only) When you have assigned FM radio stations to the preset numbers, you can search for the preset number to tune in the assigned FM radio station.
  • Page 137 Assigning FM radio stations automatically to the preset numbers (Auto Preset) (ICD-UX560F / ICD-UX565F only) Assigning FM radio stations manually to the preset numbers (ICD-UX560F / ICD-UX565F only) Switching the FM radio output between the built-in speaker and the headphones (ICD-UX560F / ICD-UX565F only) 4-573-936-32(1) Copyright 2015 Sony Corporation...
  • Page 138: Recording Fm Radio Broadcasts (Icd-Ux560F / Icd-Ux565F Only)

    IC Recorder ICD-UX560 / ICD-UX560F / ICD-UX565F Recording FM radio broadcasts (ICD-UX560F / ICD-UX565F only) The cord of headphones (not supplied) works as an FM radio antenna for your IC recorder. For better signal reception, we recommend you connect headphones to the (headphones) jack on the IC recorder and extend the cord as far as it can go.
  • Page 139: Selecting The Sensitivity Level For Fm Radio Scanning (Icd-Ux560F / Icd-Ux565F Only)

    FM radio via the built-in speaker of the IC recorder as well. Related Topic Assigning FM radio stations automatically to the preset numbers (Auto Preset) (ICD-UX560F / ICD-UX565F only) Assigning FM radio stations manually to the preset numbers (ICD-UX560F / ICD-UX565F only)
  • Page 140: Switching The Fm Radio Output Between The Built-In Speaker And The Headphones (Icd-Ux560F / Icd-Ux565F Only)

    Help Guide IC Recorder ICD-UX560 / ICD-UX560F / ICD-UX565F Switching the FM radio output between the built-in speaker and the headphones (ICD-UX560F / ICD-UX565F only) You can switch the FM radio output between the built-in speaker and the headphones (not supplied) while listening to the FM radio or recording FM radio broadcasts.
  • Page 141: List Of The Settings Menu Items

    Help Guide IC Recorder ICD-UX560 / ICD-UX560F / ICD-UX565F List of the Settings menu items The following lists the Settings menu items on the HOME menu. Recording Settings Recording Folder: Changing the file storage destination folder Create Folder: Creating a folder...
  • Page 142 Scan Sensitivity: Selecting the sensitivity level for FM radio scanning (ICD-UX560F / ICD-UX565F only) Audio Output: Switching the FM radio output between the built-in speaker and the headphones (ICD-UX560F / ICD-UX565F only) Auto Track Marks: Adding track marks automatically Common Settings...
  • Page 143 Resetting all menu settings to the default ones (Reset All Settings) Available Rec. Time: Checking the remaining recording time (Available Rec. Time) System Information: Checking the information about the IC recorder (System Information) Related Topic Using the HOME menu 4-573-936-32(1) Copyright 2015 Sony Corporation...
  • Page 144: Selecting The Recording Mode (Rec Mode)

    MP3 (compressed) in stereo standard-quality recording mode (default setting) MP3 128kbps: MP3 (compressed) in long play stereo recording mode MP3 48kbps(MONO): MP3 (compressed) in monaural standard recording mode Note You cannot record FM radio broadcasts in the LPCM mode (ICD-UX560F / ICD-UX565F only).
  • Page 145: Selecting The Sensitivity Level Of The Built-In Microphones (Built-In Mic Sensitivity)

    Help Guide IC Recorder ICD-UX560 / ICD-UX560F / ICD-UX565F Selecting the sensitivity level of the built-in microphones (Built-in Mic Sensitivity) You can select the sensitivity level of the built-in microphones. Set this menu item before you start recording. Select “...
  • Page 146 While recording audio from an external device is in progress, the Built-in Mic Sensitivity function is disabled. Related Topic Selecting the audio input type and the sensitivity level of the external microphone (Ext. Input Setting) 4-573-936-32(1) Copyright 2015 Sony Corporation...
  • Page 147: Reducing Noise During Recording (Recording Filter)

    Help Guide IC Recorder ICD-UX560 / ICD-UX560F / ICD-UX565F Reducing noise during recording (Recording Filter) With the Recording Filter function, you can reduce noise in the recordings. Select “ Settings” - “Recording Settings” - “Recording Filter” from the HOME menu, and then press Press to select “NCF(Noise Cut)”...
  • Page 148 Note While “Audio IN” is selected for “Ext. Input Setting” or FM radio recording (ICD-UX560F / ICD-UX565F only) is in progress, the Recording Filter function does not work. Hint To cancel the Recording Filter function setup process, select “OFF” in step 2.
  • Page 149: Selecting The Audio Input Type And The Sensitivity Level Of The External Microphone (Ext. Input Setting)

    Help Guide IC Recorder ICD-UX560 / ICD-UX560F / ICD-UX565F Selecting the audio input type and the sensitivity level of the external microphone (Ext. Input Setting) You can select the audio input type (“MIC IN” or “Audio IN”) of the (microphone) jack and the sensitivity level of the external microphone.
  • Page 150 You can also select the audio input type and the sensitivity level of the external microphone by selecting “Ext. Input Setting” on the OPTION menu while playback is on standby. The recording volume level may vary depending on the external microphone. Check on the peak meters [Details] to change the microphone sensitivity level. 4-573-936-32(1) Copyright 2015 Sony Corporation...
  • Page 151: Turning The Operation Indicator On Or Off (Led)

    Help Guide IC Recorder ICD-UX560 / ICD-UX560F / ICD-UX565F Turning the operation indicator on or off (LED) You can set the operation indicator to turn on or off during IC recorder operations. Select “ Settings” - “Common Settings” - “LED” from the HOME menu, and then press Press to select “ON”...
  • Page 152: Selecting The Display Language (Language)

    Help Guide IC Recorder ICD-UX560 / ICD-UX560F / ICD-UX565F Selecting the display language (Language) You can select the language to be used for messages, menus, folder names, file names, etc. Select “ Settings” - “Common Settings” - “Language” from the HOME menu and then press...
  • Page 153: Setting The Clock (Date&Time)

    Help Guide IC Recorder ICD-UX560 / ICD-UX560F / ICD-UX565F Setting the clock (Date&Time) You can set the clock while no IC recorder operations are in progress. Select “ Settings” - “Common Settings” - “Date&Time” - “Set Date/Time” from the HOME menu, and then press Set the current date and time.
  • Page 154 (Time Display) on the Settings menu. In addition, the default clock display format depends on the country or region of your purchase. The default date display format depends on the country or region of your purchase. 4-573-936-32(1) Copyright 2015 Sony Corporation...
  • Page 155: Selecting The Date Display Format (Date Display Format)

    Help Guide IC Recorder ICD-UX560 / ICD-UX560F / ICD-UX565F Selecting the date display format (Date Display Format) You can select the date display format to suit your preference. Select “ Settings” - “Common Settings” - “Date&Time” - “Date Display Format” from the HOME...
  • Page 156: Selecting The Clock Display Format (Time Display)

    Help Guide IC Recorder ICD-UX560 / ICD-UX560F / ICD-UX565F Selecting the clock display format (Time Display) You can select ether the 12-Hour or 24-Hour format. Select “ Settings” - “Common Settings” - “Date&Time” - “Time Display” from the HOME menu, and...
  • Page 157: Turning The Beep Sound On Or Off (Beep)

    Help Guide IC Recorder ICD-UX560 / ICD-UX560F / ICD-UX565F Turning the beep sound on or off (Beep) You can turn the operation beep sound on or off. Select “ Settings” - “Common Settings” - “Beep” from the HOME menu, and then press Press to select “ON”...
  • Page 158: Using The Sleep Timer (Sleep Timer)

    To return to the screen before you displayed the HOME menu, press STOP. When you set the sleep timer, appears on the file playback (standby) and recording screens or on the FM radio (recording) screen (ICD-UX560F / ICD-UX565F only). Note If the Auto Power Off function [Details] is turned on, your IC recorder may turn off before the time period specified for the sleep timer expires.
  • Page 159: Setting The Time Period Before The Ic Recorder Automatically Turns Off (Auto Power Off)

    Help Guide IC Recorder ICD-UX560 / ICD-UX560F / ICD-UX565F Setting the time period before the IC recorder automatically turns off (Auto Power Off) You can set your IC recorder to automatically turn off if it is left unused for the specified period time.
  • Page 160 During the recording delay countdown [Details], your IC recorder does not turn off even when the period of time specified for the Auto Power Off function expires. 4-573-936-32(1) Copyright 2015 Sony Corporation...
  • Page 161: Resetting All Menu Settings To The Default Ones (Reset All Settings)

    To return to the screen before you displayed the HOME menu, press STOP. Note While listening to the FM radio or recording FM radio broadcasts(ICD-UX560F / ICD-UX565F only), you cannot reset the settings with “Reset All Settings.” Hint To cancel the resetting process, select “No” in step 2.
  • Page 162: Formatting The Memory (Format Built-In Memory/Format Sd Card)

    Help Guide IC Recorder ICD-UX560 / ICD-UX560F / ICD-UX565F Formatting the memory (Format Built-In Memory/Format SD Card) You can format either the built-in memory of your IC card or the microSD card. Formatting the built-in memory will delete all of the stored data and restore the original folder structure at your purchase.
  • Page 163: Checking The Remaining Recording Time (Available Rec. Time)

    Help Guide IC Recorder ICD-UX560 / ICD-UX560F / ICD-UX565F Checking the remaining recording time (Available Rec. Time) You can display the remaining recording time in hours, minutes, and seconds. Select “ Settings” - “Common Settings” - “Available Rec. Time” from the HOME menu, and then press Press and hold BACK/HOME to return to the HOME menu.
  • Page 164: Checking The Information About The Ic Recorder (System Information)

    Help Guide IC Recorder ICD-UX560 / ICD-UX560F / ICD-UX565F Checking the information about the IC recorder (System Information) You can display the information about your IC recorder, such as the IC recorder's model name and the software version number. Select “...
  • Page 165: Connecting The Ic Recorder To A Computer

    Help Guide IC Recorder ICD-UX560 / ICD-UX560F / ICD-UX565F Connecting the IC recorder to a computer To exchange files between your IC recorder and a computer, connect the IC recorder to the computer. Slide the USB slide lever on the back of the IC recorder in the direction of the arrow to push out the USB connector, and insert it into the USB port on a computer that is up and running.
  • Page 166: Structure Of Folders And Files

    Help Guide IC Recorder ICD-UX560 / ICD-UX560F / ICD-UX565F Structure of folders and files You can use a computer to view the structure of folders and files on the built-in memory of your IC recorder or the microSD card. Connect the IC recorder to the computer and use the Explorer (Windows) or the Finder (Mac) to open “IC RECORDER” or “MEMORY CARD.”...
  • Page 167 REC_FILE folder or in the MUSIC folder. Your IC recorder is not capable of detecting any folders and files stored at these folder structure levels. ICD-UX560F / ICD-UX565F only 4-573-936-32(1) Copyright 2015 Sony Corporation...
  • Page 168: Copying Files From The Ic Recorder To A Computer

    Help Guide IC Recorder ICD-UX560 / ICD-UX560F / ICD-UX565F Copying files from the IC recorder to a computer You can copy files and folders from your IC recorder to a computer to store them. Connect the IC recorder to the computer.
  • Page 169: Copying Music Files From A Computer To The Ic Recorder

    Help Guide IC Recorder ICD-UX560 / ICD-UX560F / ICD-UX565F Copying music files from a computer to the IC recorder You can copy music and audio files (LPCM(.wav) / MP3(.mp3) / WMA(.wma) / AAC-LC(.m4a)) from a computer to your IC recorder by drag and drop.
  • Page 170: Playing Music Files On The Ic Recorder That Were Copied From A Computer

    Help Guide IC Recorder ICD-UX560 / ICD-UX560F / ICD-UX565F Playing music files on the IC recorder that were copied from a computer You can play the music and audio files (LPCM(.wav) / MP3(.mp3) / WMA(.wma) / AAC-LC(.m4a)) that you copied from a computer on your IC recorder.
  • Page 171: Using The Ic Recorder As A Usb Storage Device

    Help Guide IC Recorder ICD-UX560 / ICD-UX560F / ICD-UX565F Using the IC recorder as a USB storage device You can connect your IC recorder to a computer and use it as a USB storage device. To use the IC recorder as a USB storage device, you need a computer that meets the system requirements. For more information,...
  • Page 172: What You Can Do With Sound Organizer 2 (For Windows Only)

    Help Guide IC Recorder ICD-UX560 / ICD-UX560F / ICD-UX565F What you can do with Sound Organizer 2 (for Windows only) You can install Sound Organizer 2 using the installer file (SoundOrganizer_V2001.exe) stored on the built-in memory of your IC recorder.
  • Page 173 You can select your favorites from the songs imported into Sound Organizer 2 and make your own original music CD. Other convenient usage You can start your e-mail software and attach recorded files to an e-mail. 4-573-936-32(1) Copyright 2015 Sony Corporation...
  • Page 174: System Requirements For Sound Organizer 2

    Help Guide IC Recorder ICD-UX560 / ICD-UX560F / ICD-UX565F System requirements for Sound Organizer 2 The following lists the system requirements for Sound Organizer 2. Operating systems Windows 10 Home Windows 10 Pro Windows 8.1 Windows 8.1 Pro Windows 7 Ultimate...
  • Page 175 A compatible USB port is required to use devices and media. Operation via a USB hub is not guaranteed except for models for which operation has been specifically guaranteed. Optical disc To create a music CD, you need a CD-R/RW drive. 4-573-936-32(1) Copyright 2015 Sony Corporation...
  • Page 176: Installing Sound Organizer 2 (For Windows Only)

    Help Guide IC Recorder ICD-UX560 / ICD-UX560F / ICD-UX565F Installing Sound Organizer 2 (for Windows only) Install Sound Organizer 2 on a computer. Note Be sure to install Sound Organizer 2 on the computer that has already Sound Organizer 1.6 installed as well.
  • Page 177 The appearance of the windows on the computer screen varies depending on the version of your operating system. Windows 7 is used as an example in this Help Guide. Double-click [SoundOrganizer_V2001] (or [SoundOrganizer_V2001.exe]). Depending on the version of your operating system, the setup preparation process (file extraction) may start automatically without showing any notice.
  • Page 178 When [Sound Organizer 2 has been installed successfully.] window appears, check [Launch Sound Organizer 2 Now], and then click [Finish]. Note You may need to restart the computer after you installed Sound Organizer 2. Related Topic Connecting the IC recorder to a computer 4-573-936-32(1) Copyright 2015 Sony Corporation...
  • Page 179: The Sound Organizer 2 Window (For Windows Only)

    Help Guide IC Recorder ICD-UX560 / ICD-UX560F / ICD-UX565F The Sound Organizer 2 window (for Windows only) Help Displays the help of Sound Organizer 2. For details on operations, refer to respective help topics. The file list of Sound Organizer 2 (My Library) Displays a list of files included in My Library of Sound Organizer 2 in accordance with a particular operation.
  • Page 180 : Transfers the files from Sound Organizer 2 to the connected IC recorder's built-in memory or microSD card. : Imports the files from the connected IC recorder's built-in memory or microSD card to My Library of Sound Organizer 2. 4-573-936-32(1) Copyright 2015 Sony Corporation...
  • Page 181: Compatible Memory Cards

    Help Guide IC Recorder ICD-UX560 / ICD-UX560F / ICD-UX565F Compatible memory cards You can use the following memory cards with your IC recorder. microSDHC cards (4 GB to 32 GB) microSDXC cards (64 GB or more) Due to the specifications of your IC recorder, the file size that you can store on the microSD card for playback is limited as...
  • Page 182: System Requirements

    Help Guide IC Recorder ICD-UX560 / ICD-UX560F / ICD-UX565F System requirements To connect your IC recorder to a computer or use it as a USB storage device, the computer must meet the following system requirements. For using Sound Organizer 2 on the computer, see...
  • Page 183: Technical Specifications

    IC Recorder ICD-UX560 / ICD-UX560F / ICD-UX565F Technical specifications Specifications ICD-UX560 / ICD-UX560F: 4 GB (approx. 3.20 GB = 3,435,973,837 Byte) Capacity (User available capacity) (*1) (*2) ICD-UX565F: 8 GB (approx. 6.40 GB = 6,871,947,674 Byte) Maximum number of recorded files (for a folder)
  • Page 184 Sampling frequencies: 11.025/12/16/22.05/24/32/44.1/48 kHz File extension: .m4a LPCM (*3) Quantization bit rate: 16 bit Sampling frequencies: 44.1 kHz File extension: .wav Frequency range for the FM radio reception (*7) 87.50 MHz - 108.00 MHz IF 128 kHz FM antenna (*7) Stereo headphone cord antenna (not supplied) Built-in speaker Approx.
  • Page 185 WMA Ver.9 is compatible, however, MBR (Multi Bit Rate), Lossless, Professional, and Voice are not supported. Copyright-protected files are not available for playback. ICD-UX560F / ICD-UX565F only Measured value by the standard of JEITA (Japan Electronics and Information Technology Industries Association) Depending on the region, some of the optional accessories are not available.
  • Page 186: Maximum Recording Time

    Help Guide IC Recorder ICD-UX560 / ICD-UX560F / ICD-UX565F Maximum recording time The following lists the maximum recording time (*1) (*2) per memory by recording mode (recording scene). The maximum recording time is estimated, provided that all the folders in the memory are used.
  • Page 187: Maximum Playback Time/Number Of Music Files

    Help Guide IC Recorder ICD-UX560 / ICD-UX560F / ICD-UX565F Maximum playback time/number of music files The following lists the maximum playback time of a music file and the number of music files (*) by bit rate. ICD-UX560 / ICD-UX560F ICD-UX565F...
  • Page 188: Battery Life

    Help Guide IC Recorder ICD-UX560 / ICD-UX560F / ICD-UX565F Battery life The following lists the battery life(*1) for the built-in rechargeable battery by file format. Playback with the built-in Playback with external FM recording REC Mode Recording speaker(*2) headphones (*3) Approx.
  • Page 189: Precautions

    Help Guide IC Recorder ICD-UX560 / ICD-UX560F / ICD-UX565F Precautions On power Operate the unit only on 3.7V DC with the built-in rechargeable lithium-ion battery. On safety Do not operate the unit while driving, cycling or operating any motorized vehicle.
  • Page 190 If you have any questions or problems concerning your unit, please consult your nearest Sony dealer. Backup recommendations To avoid potential risk of data loss caused by accidental operation or malfunction of the IC recorder, we recommend that you save a backup copy of your recorded files to a computer, etc.
  • Page 191: Safety Regulations

    The recorded music is limited to private use only. Use of the music beyond this limit requires permission of the copyright holders. Sony is not responsible for incomplete recording/downloading or damaged data due to problems of the IC recorder or computer.
  • Page 192 To prevent possible hearing damage, do not listen at high volume levels for long periods. The validity of the CE marking is restricted to only those countries where it is legally enforced, mainly in the countries EEA (European Economic Area). 4-573-936-32(1) Copyright 2015 Sony Corporation...
  • Page 193: Trademarks

    Help Guide IC Recorder ICD-UX560 / ICD-UX560F / ICD-UX565F Trademarks Microsoft, Windows, Windows Vista and Windows Media are registered trademarks or trademarks of Microsoft Corporation in the United States and/or other countries. Mac OS is a trademark of Apple Inc., registered in the USA and other countries.
  • Page 194: Notice For Users

    WHETHER BASED ON TORT, CONTRACT, OR OTHERWISE, ARISING OUT OF OR IN CONNECTION WITH THIS HELP GUIDE, THE SOFTWARE OR OTHER INFORMATION CONTAINED HEREIN OR THE USE THEREOF. Sony Corporation reserves the right to make any modification to this Help Guide or the information contained herein at any time without notice.
  • Page 195: License

    Help Guide IC Recorder ICD-UX560 / ICD-UX560F / ICD-UX565F License Notes on the License This IC recorder comes with software that are used based on licensing agreements with the owners of that software. Based on requests by the owners of copyright of these software applications, we have an obligation to inform you of the following.
  • Page 196: Customer Support Websites

    Help Guide IC Recorder ICD-UX560 / ICD-UX560F / ICD-UX565F Customer support websites Please access the following support home page to get the support information about your IC recorder: For customers in Europe: http://www.sony.eu/DNA For customers in Latin America: http://www.sony-latin.com/index.crp For customers in the U.S.A.: http://www.sony.com/recordersupport...
  • Page 197: Troubleshooting

    For details on the operation of Sound Organizer 2, refer to the Sound Organizer 2 help. Should any problem persist after you have made these checks, consult your nearest Sony dealer. Please access the following support home page to obtain the latest support information about the IC recorder: For customers in Europe: http://support.sony-europe.com/DNA...
  • Page 198: Restarting The Ic Recorder

    Help Guide IC Recorder ICD-UX560 / ICD-UX560F / ICD-UX565F Restarting the IC recorder When a problem persists after you have checked all corrective actions listed in the “Troubleshooting” topics, you may be able to solve the problem by restarting your IC recorder. Slide the POWER·HOLD switch to “POWER” and holding it for 8 seconds or longer ( ).
  • Page 199: The Recorded File Is Noisy And Is Hard To Understand

    Help Guide IC Recorder ICD-UX560 / ICD-UX560F / ICD-UX565F The recorded file is noisy and is hard to understand. Ambient noise is recorded as well as human voices. If you apply the Clear Voice function (“Clear Voice 1” or “Clear Voice 2,”) to the playback audio, ambient noise in all frequency bands (noise from projectors or air conditioners, etc) will be reduced to make human voices distinctive, and you will hear human voices more clearly.
  • Page 200: The Recorded File Is Noisy And You Want To Record With Less Noise

    Help Guide IC Recorder ICD-UX560 / ICD-UX560F / ICD-UX565F The recorded file is noisy and you want to record with less noise. With the Recording Filter function (“NCF(Noise Cut)” or “LCF(Low Cut)”), you can reduce noise in the recordings. Additionally, you can use the Scene Select function to change some recording settings, including the recording mode and the sensitivity level of the built-in microphones, at once by selecting one of the recording scenes.
  • Page 201: A Rustling Noise Is Recorded

    Help Guide IC Recorder ICD-UX560 / ICD-UX560F / ICD-UX565F A rustling noise is recorded. If you accidentally touch your IC recorder or let an object come in contact with it while recording is in progress, rustling noises may be recorded. Keep your hand away from the IC recorder until you finish recording.
  • Page 202: A Buzzing Or Humming Noise Is Recorded

    Help Guide IC Recorder ICD-UX560 / ICD-UX560F / ICD-UX565F A buzzing or humming noise is recorded. A buzzing or humming noise may be recorded if your IC recorder is placed near an AC power source, a fluorescent lamp, or a mobile phone during recording or playback.
  • Page 203: Noise Is Recorded When You Use An External Microphone (Not Supplied) For Recording

    Help Guide IC Recorder ICD-UX560 / ICD-UX560F / ICD-UX565F Noise is recorded when you use an external microphone (not supplied) for recording. The plug of the connected external microphone is dirty. Clean the plug. 4-573-936-32(1) Copyright 2015 Sony Corporation...
  • Page 204: You Hear Noise When Using Headphones (Not Supplied) For Playback

    Help Guide IC Recorder ICD-UX560 / ICD-UX560F / ICD-UX565F You hear noise when using headphones (not supplied) for playback. The plug of the connected headphones is dirty. Clean the plug. 4-573-936-32(1) Copyright 2015 Sony Corporation...
  • Page 205: The Volume Of The Audio You Recorded From An External Device Is Low Or You Hear Squeaking Noises When You Listen To The Audio Via The Built-In Speaker

    Help Guide IC Recorder ICD-UX560 / ICD-UX560F / ICD-UX565F The volume of the audio you recorded from an external device is low or you hear squeaking noises when you listen to the audio via the built-in speaker. If you record audio from a monaural external device that is connected to your IC recorder with a stereo connection cable, playing the recorded files may sound low in volume or make squeaking noises when you listen to the audio via the built-in speaker.
  • Page 206: You Hear Noise During Playback Even With The Clear Voice Function Turned On

    Help Guide IC Recorder ICD-UX560 / ICD-UX560F / ICD-UX565F You hear noise during playback even with the Clear Voice function turned on. While playback with the built-in speaker or playback of the files in “ Music” is in progress, the Clear Voice function does not work.
  • Page 207: The Ic Recorder Does Not Turn On Or Pressing Any Button Does Not Work

    Help Guide IC Recorder ICD-UX560 / ICD-UX560F / ICD-UX565F The IC recorder does not turn on or pressing any button does not work. The battery is running out of power. Charge the battery. Your IC recorder is turned off. Slide the POWER·HOLD switch to “POWER” and hold it until the display window turns on.
  • Page 208: The Ic Recorder Does Not Turn Off

    Help Guide IC Recorder ICD-UX560 / ICD-UX560F / ICD-UX565F The IC recorder does not turn off. Slide and hold the POWER·HOLD switch to “POWER” and hold it until “Power Off” appears on the display window. Related Topic Turning the power off...
  • Page 209: The Ic Recorder Automatically Turns Off

    Help Guide IC Recorder ICD-UX560 / ICD-UX560F / ICD-UX565F The IC recorder automatically turns off. The Auto Power Off function on your IC recorder is set to “10min” by default to save battery power. If you leave the IC recorder unused for 10 minutes, it will automatically turn off. You can change the current setting with the Settings menu.
  • Page 210: The Battery Life Is Short

    Help Guide IC Recorder ICD-UX560 / ICD-UX560F / ICD-UX565F The battery life is short. “Screen Off Timer” is set to “No Auto Screen Off.” You can save battery power by changing the screen off timer setting to “15sec,” “30sec,” “1min,” “3min,” or “5min.”...
  • Page 211: Charging

    Help Guide IC Recorder ICD-UX560 / ICD-UX560F / ICD-UX565F You cannot charge the battery by connecting the IC recorder to your computer. When your IC recorder is connected to a computer which is not running, the battery will not charge. When the computer is in a power saving mode (standby or sleep), it will not charge, either.
  • Page 212: The Charge Indicator Does Not Appear Or It Disappears In The Middle Of Charging

    Help Guide IC Recorder ICD-UX560 / ICD-UX560F / ICD-UX565F The charge indicator does not appear or it disappears in the middle of charging. The USB connector of your IC recorder is not connected properly. 4-573-936-32(1) Copyright 2015 Sony Corporation...
  • Page 213: The Charge Error Indicator Appears Where The Battery Indicator Should Be Displayed

    Help Guide IC Recorder ICD-UX560 / ICD-UX560F / ICD-UX565F The charge error indicator appears where the battery indicator should be displayed. When the charge error indicator appears, the ambient temperature is out of the range for charging the battery. Charge the battery under the temperature of 5 °C - 35 °C (41 °F - 95 °F).
  • Page 214: The Ic Recorder Does Not Operate Correctly

    Help Guide IC Recorder ICD-UX560 / ICD-UX560F / ICD-UX565F The IC recorder does not operate correctly. You may have formatted the built-in memory of your IC recorder with a computer. Be sure to use the IC recorder for formatting. Related Topic...
  • Page 215: The Operation Indicator Does Not Light

    Help Guide IC Recorder ICD-UX560 / ICD-UX560F / ICD-UX565F The operation indicator does not light. “LED” is set to “OFF.” Set “LED” to “ON.” Related Topic Turning the operation indicator on or off (LED) 4-573-936-32(1) Copyright 2015 Sony Corporation...
  • Page 216: You Cannot Record A File

    Help Guide IC Recorder ICD-UX560 / ICD-UX560F / ICD-UX565F You cannot record a file. The remaining recording time is insufficient. Related Topic Checking the remaining recording time (Available Rec. Time) 4-573-936-32(1) Copyright 2015 Sony Corporation...
  • Page 217: Recording Is Interrupted

    Help Guide IC Recorder ICD-UX560 / ICD-UX560F / ICD-UX565F Recording is interrupted. The VOR function is turned on. To turn off the VOR function, set “VOR” to “OFF” with the OPTION menu. Related Topic Recording automatically in response to the input sound volume – the VOR function...
  • Page 218: The Vor Function Does Not Work

    The VOR function does not work. During synchronized recording, the VOR function does not work. You are recording an FM broadcast (ICD-UX560F / ICD-UX565F only), the VOR function does not work. Related Topic Recording automatically in response to the input sound volume – the VOR function...
  • Page 219: The Input Audio Volume Is Too Loud Or Not Loud Enough When You Record Audio From An External Device

    Help Guide IC Recorder ICD-UX560 / ICD-UX560F / ICD-UX565F The input audio volume is too loud or not loud enough when you record audio from an external device. Use an audio connection cable to connect your IC recorder to an external device and adjust the volume level on the external device.
  • Page 220: The Playback Volume Is Low

    Help Guide IC Recorder ICD-UX560 / ICD-UX560F / ICD-UX565F The playback volume is low. The built-in speaker is provided mainly for checking recorded audio files. If you find the volume not loud enough or have difficulty in understanding what you hear, use headphones (not supplied).
  • Page 221: You Hear No Sound From The Built-In Speaker

    You hear no sound from the built-in speaker. Headphones (not supplied) are connected to your IC recorder. Disconnect the headphones. “Audio Output” for the FM radio function is set to “Headphones” with the OPTION menu (ICD-UX560F / ICD-UX565F only). Set “Audio Output” to “Speaker.”...
  • Page 222: You Hear Sound From The Built-In Speaker Even When Headphones (Not Supplied) Are Connected

    When the headphones connection is loose, you may hear sound from the built-in speaker as well. Disconnect the headphones and connect them once again. “Audio Output” for the FM radio function is set to “Speaker” with the OPTION menu (ICD-UX560F / ICD-UX565F only). Set “Audio Output” to “Headphones.”...
  • Page 223: The Sound Effect You Selected With "Effect" Does Not Work

    Help Guide IC Recorder ICD-UX560 / ICD-UX560F / ICD-UX565F The sound effect you selected with “Effect” does not work. The Effect function does not work for audio playback with the built-in speaker. 4-573-936-32(1) Copyright 2015 Sony Corporation...
  • Page 224: Playback Speed Is Too Fast Or Too Slow

    Help Guide IC Recorder ICD-UX560 / ICD-UX560F / ICD-UX565F Playback speed is too fast or too slow. The DPC (Digital Pitch Control) setting is set to “ON,” and you have changed the playback speed. Set the DPC (Digital Pitch Control) setting to “OFF,” or change the playback speed to normal.
  • Page 225: You Cannot Divide A File

    Help Guide IC Recorder ICD-UX560 / ICD-UX560F / ICD-UX565F You cannot divide a file. You need a certain amount of free space in the built-in memory to divide a file. Because of the system limitations, you may not be able to divide a file at the very beginning or at the very end of the file.
  • Page 226: You Cannot Move A File

    Help Guide IC Recorder ICD-UX560 / ICD-UX560F / ICD-UX565F You cannot move a file. You cannot move files in “ Music” to another folder in the built-in memory or the microSD card. Related Topic Protecting a file 4-573-936-32(1) Copyright 2015 Sony Corporation...
  • Page 227: You Cannot Copy A File To A Different Folder

    Help Guide IC Recorder ICD-UX560 / ICD-UX560F / ICD-UX565F You cannot copy a file to a different folder. You cannot copy files in “ Music” to another folder in the built-in memory or the microSD card. 4-573-936-32(1) Copyright 2015 Sony Corporation...
  • Page 228: The Recording Date Of A File Appears As

    The recording date of a file appears as “----/--/--” or “--:--.” The file may have been recorded by a model of the IC recorder other than ICD-UX560 / ICD-UX560F / ICD-UX565F. The date and time recording format varies depending on the model.
  • Page 229: The Display Window Turns Off Too Soon

    Help Guide IC Recorder ICD-UX560 / ICD-UX560F / ICD-UX565F The display window turns off too soon. You can change the screen off timer setting to make the display screen stay longer. When “Screen Off Timer” is set to “Auto Screen Off,” the battery wears quickly.
  • Page 230: The Remaining Recording Time On The Display Window Is Shorter Than The One Displayed On The Computer

    Help Guide IC Recorder ICD-UX560 / ICD-UX560F / ICD-UX565F The remaining recording time on the display window is shorter than the one displayed on the computer. As the remaining recording time on the display window is calculated by subtracting the memory capacity required for system operations from the remaining built-in memory capacity, it may not be consistent with the one that Sound Organizer 2 shows on the computer.
  • Page 231: Files

    Help Guide IC Recorder ICD-UX560 / ICD-UX560F / ICD-UX565F The “Memory Full” message appears and you cannot start recording. The built-in memory is full. Delete unnecessary files from the built-in memory or copy some files to another microSD card or a computer and delete the files.
  • Page 232: The "File Full" Message Appears And You Cannot Operate The Ic Recorder

    Help Guide IC Recorder ICD-UX560 / ICD-UX560F / ICD-UX565F The “File Full” message appears and you cannot operate the IC recorder. Your IC recorder is capable of storing up to 5,000 folders and files all together in total. Delete unnecessary files from the built-in memory or copy some files to another microSD card or a computer and delete the files.
  • Page 233: The Microsd Card Is Not Detected

    Help Guide IC Recorder ICD-UX560 / ICD-UX560F / ICD-UX565F The microSD card is not detected. Remove the microSD card and insert it in the correct orientation. Related Topic Inserting a memory card 4-573-936-32(1) Copyright 2015 Sony Corporation...
  • Page 234: A Folder Or File Name Appears In Unreadable Characters

    Help Guide IC Recorder ICD-UX560 / ICD-UX560F / ICD-UX565F A folder or file name appears in unreadable characters. Some characters you use on Windows Explorer or Mac Finder are not supported by your IC recorder. Folder and file names containing such characters appear in unreadable characters on the IC recorder.
  • Page 235: Copying A File Takes Time

    Help Guide IC Recorder ICD-UX560 / ICD-UX560F / ICD-UX565F Copying a file takes time. If the size of a file is large, it takes a considerable time to finish copying. Wait until the copying finishes. 4-573-936-32(1) Copyright 2015 Sony Corporation...
  • Page 236: The Ic Recorder Is Not Detected By The Computer And You Cannot Transfer Folders/Files From The Computer

    Help Guide IC Recorder ICD-UX560 / ICD-UX560F / ICD-UX565F The IC recorder is not detected by the computer and you cannot transfer folders/files from the computer. Disconnect your IC recorder from the computer and connect it once again. If your IC recorder is connected to the computer with a USB hub (not supplied) or a USB extension cable (not supplied), remove the hub or cable and connect the IC recorder directly to a USB port on the computer.
  • Page 237: The File You Transferred From The Computer Does Not Appear On The Ic Recorder And You Cannot Play The File

    Help Guide IC Recorder ICD-UX560 / ICD-UX560F / ICD-UX565F The file you transferred from the computer does not appear on the IC recorder and you cannot play the file. Your IC recorder is capable of displaying up to 8 folder levels.
  • Page 238: The Computer Does Not Start

    Help Guide IC Recorder ICD-UX560 / ICD-UX560F / ICD-UX565F The computer does not start. If you start the computer with your IC recorder connected to the computer, the computer may freeze or may not start properly. Disconnect the IC recorder from the computer and start the computer once again.
  • Page 239: You Hear No Sound From The Built-In Speaker (Icd-Ux560F / Icd-Ux565F Only)

    “Audio Output” for the FM radio function is set to “Headphones” with the OPTION menu. Set “Audio Output” to “Speaker.” Related Topic Switching the FM radio output between the built-in speaker and the headphones (ICD-UX560F / ICD-UX565F only) 4-573-936-32(1) Copyright 2015 Sony Corporation...
  • Page 240: You Hear Sound From The Built-In Speaker Even When Headphones (Not Supplied) Are Connected (Icd-Ux560F / Icd-Ux565F Only)

    “Audio Output” for the FM radio function is set to “Speaker” with the OPTION menu. Set “Audio Output” to “Headphones.” Related Topic Switching the FM radio output between the built-in speaker and the headphones (ICD-UX560F / ICD-UX565F only) 4-573-936-32(1) Copyright 2015 Sony Corporation...
  • Page 241: The Fm Radio Signals Are Weak Or The Sound Quality Is Poor (Icd-Ux560F / Icd-Ux565F Only)

    Help Guide IC Recorder ICD-UX560 / ICD-UX560F / ICD-UX565F The FM radio signals are weak or the sound quality is poor (ICD-UX560F / ICD- UX565F only). Move the IC recorder away from the TV. 4-573-936-32(1) Copyright 2015 Sony Corporation...
  • Page 242: The Tv Images Are Distorted When You Listen To The Fm Radio (Icd-Ux560F / Icd-Ux565F Only)

    IC Recorder ICD-UX560 / ICD-UX560F / ICD-UX565F The TV images are distorted when you listen to the FM radio (ICD-UX560F / ICD- UX565F only). If you are listening to the FM radio near the TV with an indoor antenna, move away from the TV.
  • Page 243: You Cannot Tune In Fm Radio Stations Or You Hear A Lot Of Static (Icd-Ux560F / Icd-Ux565F Only)

    IC Recorder ICD-UX560 / ICD-UX560F / ICD-UX565F You cannot tune in FM radio stations or you hear a lot of static (ICD-UX560F / ICD-UX565F only). The cord of headphones (not supplied) works as an FM radio antenna for your IC recorder. For better signal reception, we recommend you connect headphones to the (headphones) jack on the IC recorder and extend the cord as far as it can go.
  • Page 244: You Cannot Assign An Fm Radio Station To A Preset Number

    Help Guide IC Recorder ICD-UX560 / ICD-UX560F / ICD-UX565F You cannot assign an FM radio station to a preset number (ICD-UX560F / ICD- UX565F only). You have already assigned FM radio stations to 30 preset numbers. Clear unwanted preset number assignments.
  • Page 245: You Cannot Install Sound Organizer 2

    Help Guide IC Recorder ICD-UX560 / ICD-UX560F / ICD-UX565F You cannot install Sound Organizer 2. The capacity of the computer's hard disk is insufficient. Check the hard disk capacity. You cannot install Sound Organizer 2 on the computer with the operating system that is not supported by the software.
  • Page 246: The Ic Recorder Is Not Detected By Sound Organizer 2

    Help Guide IC Recorder ICD-UX560 / ICD-UX560F / ICD-UX565F The IC recorder is not detected by Sound Organizer 2. Check if the software is successfully installed, and then check the connections with your IC recorder as follows: When you are using a USB hub, remove the hub and connect the IC recorder directly to a USB port on the computer.
  • Page 247: The Playback Volume Of The Computer Is Low Or You Hear No Audio From The Computer

    Help Guide IC Recorder ICD-UX560 / ICD-UX560F / ICD-UX565F The playback volume of the computer is low or you hear no audio from the computer. The computer has no sound board. The computer has no built-in speakers or no external speakers are connected.
  • Page 248: You Cannot Play Or Edit Stored Files

    Help Guide IC Recorder ICD-UX560 / ICD-UX560F / ICD-UX565F You cannot play or edit stored files. Sound Organizer 2 is only capable of playing files in the supported format. Depending on the file format, you cannot use part of editorial features of the software. Refer to the help files of Sound Organizer 2.
  • Page 249: The Counter Or Slider Does Not Operate Correctly Or You Hear Noise

    Help Guide IC Recorder ICD-UX560 / ICD-UX560F / ICD-UX565F The counter or slider does not operate correctly or you hear noise. You may be attempting to play one of the divided files. Save the file on the computer (*), and then transfer it to your IC recorder. The file data will be optimized.
  • Page 250: Operations Slow Down As The Number Of Stored Files Increases

    Help Guide IC Recorder ICD-UX560 / ICD-UX560F / ICD-UX565F Operations slow down as the number of stored files increases. Regardless of the recording length of files, operations slow down as the total number of files stored on your IC recorder increases.
  • Page 251: The Computer Seems To Freeze While A File Is Being Saved, Added, Or Deleted

    Help Guide IC Recorder ICD-UX560 / ICD-UX560F / ICD-UX565F The computer seems to freeze while a file is being saved, added, or deleted. It takes a longer time to copy or delete a large file. Wait until the copying or deleting finishes.
  • Page 252: Sound Organizer 2 Freezes During Start-Up

    Help Guide IC Recorder ICD-UX560 / ICD-UX560F / ICD-UX565F Sound Organizer 2 freezes during start-up. While the computer is accessing your IC recorder, do not disconnect any cables as it may cause unstable computer operations or data corruption. There may be a conflict between Sound Organizer 2 and another driver or application.
  • Page 253: List Of Messages

    Help Guide IC Recorder ICD-UX560 / ICD-UX560F / ICD-UX565F List of messages HOLD... Slide HOLD Switch to Activate. All the buttons are disabled because your IC recorder is in the HOLD state to prevent unintentional operations. Slide the POWER·HOLD switch to the center dot to release the IC recorder from the HOLD state.
  • Page 254 Formatting the memory (Format Built-In Memory/Format SD Card).) If the above actions do not work, consult your nearest Sony dealer. No folder The memory storage you selected as the move/copy destination does not contain any folders. Create a folder and repeat the operation once again.
  • Page 255 (See Inserting a memory card.) No SD Card Your IC recorder does not have a microSD card inserted. “Move to SD Card” and “Copy to SD Card” of the “Move/Copy File” operation do not work. Cannot Add Additional Folders The sum of folders and files has reached the limit. You cannot create any more files. Delete some folders or files and create the folder once again.
  • Page 256 System Error A system error was detected for some reason. Slide the POWER·HOLD switch to “POWER” and holding it for 8 seconds or longer to restart your IC recorder. If the error persists, consult your nearest Sony dealer. (See Restarting the IC recorder.)
  • Page 257 You select an item in the OPTION or HOME menu that cannot be executed while you are listening to the FM radio. Turn the FM radio off, and then select the menu (ICD-UX560F / ICD-UX565F only). Deactivated When Audio IN Used You are attempting to change the Recording Filter setting while “Ext.
  • Page 258: System Limitations

    Help Guide IC Recorder ICD-UX560 / ICD-UX560F / ICD-UX565F System limitations Due to some system limitations on your IC recorder, you may encounter the following issues that do not indicate malfunctions. Music files are not displayed in the sequence you expected or you cannot play them in that sequence.

This manual is also suitable for:

Icd-ux565fIcd-ux560

Table of Contents