Advertisement
Quick Links
Download this manual
See also:
Owner's Manual
Thank you for choosing Springs Window Fashions. Your window treatment has been
custom-sized based on your specifications and created with the highest standards
of quality and craftsmanship. Follow the easy step-by-step instructions to install your
window treatment. Should you need additional support, please feel free to call our
customer service center at 1-800-221-6352 or email us at
motorization.support@springswindowfashions.com. We are glad to help you.
For additional safety information in Canada, contact 1-866-662-0666.
Gracias por elegir Springs Window Fashions. Su decoración para ventanas se ha
confeccionado a la medida según sus especificaciones y con los estándares más altos
de calidad y fabricación. Siga las instrucciones sencillas y detalladas para instalar la
decoración para ventanas. Si necesita asistencia adicional, comuníquese con nuestro
centro de servicio al cliente al 1-800-221-6352 o por correo electrónico a
motorization.support@springswindowfashions.com. Es un gusto poder ayudarle.
Para obtener más información de seguridad en Canadá, llame al 1-866-662-0666.
Merci d'avoir choisi Springs Window Fashions. Votre traitement de fenêtre a été
taillé sur mesure selon vos spécifications et créé avec les normes les plus élevées de
qualité et de fabrication. Suivez les directives étape par étape faciles pour installer
votre traitement de fenêtre. Si vous avez besoin d'aide supplémentaire, n'hésitez pas
à communiquer avec notre centre de service à la clientèle au 1-800-221-6352 ou
envoyez-nous un courriel à motorization.support@springswindowfashions.com. Nous
sommes heureux de vous aider.
Pour obtenir des renseignements supplémentaires sur la sécurité au Canada,
composez le 1-866-662-0666.
HOW TO INSTALL
CÓMO INSTALAR
COMMENT INSTALLER
Motorized Shades
Persiana Motorizada
Store Motorisé
Everything needed to install your shade
USE ONLY 8 AA BATTERIES • INSTALL AS SHOWN
CAUTION: BATTERIES MUST BE INSTALLED AS SHOWN. FAILURE TO DO SO MAY RESULT IN INJURY AND WILL INVALDATE WARRANTY.
Todo lo necesario para instalar su persiana
Tout le nécessaire pour installer le store
1. Reloadable battery case (optional)
2. Plug-in transformer (optional)
3. Battery pack hanger (optional)
4. Two-button remote (not available with
sheer or layered shades) (optional)
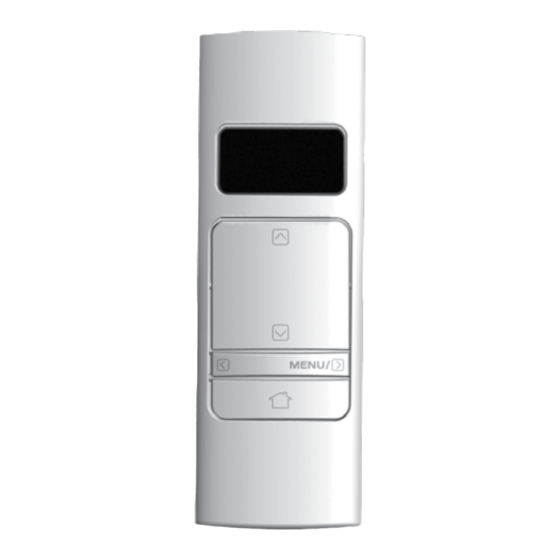
5. Single-channel remote (optional)
6. Multi-channel remote (optional)
7. 8 AA batteries (optional)
8. Owner's manual
1. Caja de batería recargable (opcional)
2. Transformador enchufable (opcional)
3. Soporte colgante de la batería (opcional)
4. Control remoto de dos botones (no está
disponible con persianas transparentes
o en capas) (opcional)
5. Control remoto de un solo canal (opcional)
6. Control remoto multicanal (opcional)
7. 8 baterías AA (opcional)
8. Manual del propietario
1. Boîtier à piles rechargeable (en option)
2. Transformateur à fiche (en option)
3. Support à piles (en option)
4. Télécommande à deux boutons (non
offerte avec les stores transparents
ou superposés) (en option)
5. Télécommande à un canal (en option)
6. Télécommande à plusieurs canaux
(en option)
7. 8 piles AA (en option)
8. Manuel d'utilisation
Tools Needed • Herramientas Necesarias • Outils Nécessaires
1
2
4
3
6
5
MOTORIZED SHADES
FEATURING Z-WAVE TECHNOLOGY
8
7
AA
8
⁄
" drill bit
1
16
Broca de 1,6 mm
Mèche de 1,6 mm
79074-00 (03/18) 18-8285
Advertisement

Subscribe to Our Youtube Channel
Related Manuals for Bali Motorized Shades


Summary of Contents for Bali Motorized Shades
- Page 1 1. Boîtier à piles rechargeable (en option) composez le 1-866-662-0666. 2. Transformateur à fiche (en option) 3. Support à piles (en option) HOW TO INSTALL MOTORIZED SHADES FEATURING Z-WAVE TECHNOLOGY 4. Télécommande à deux boutons (non offerte avec les stores transparents CÓMO INSTALAR ou superposés) (en option)
- Page 2 Headrail Bracket Battery Pack Base Shade d - Herramientas necesarias - Outillage nécessaire Battery Pack Lid Headrail Bracket Screw Mount Option Battery Pack Hanger 6optionalb Battery Pack Base 8 AA Lithium Batteries Battery Pack Lid Screws 6optionalb Battery Pack Hanger 6optionalb 8 AA Lithium Batteries Screws 6optionalb Battery pack location and installation...
- Page 3 Mount space-saving hanger behind the shade (inside mount) Connect battery wire connector to motor lead Montaje del soporte para ahorrar espacio detrás de la persiana (montaje interno) Conecte los conectores del cable de la batería al cable de motor Montage du support compact derrière le store (montage intérieur) Relier le connecteur de fil des piles au fil du moteur Mark and predrill screw holes;...
- Page 4 Presione y suelte el botón ABAJO para Presione y suelte el botón ABAJO para BAJAR/ BAJAR/ABRIR la persiana CERRAR la persianan MOTORIZED SHADES Pruebe la persiana con el control de botón pulsador de la tapa del FEATURING Z-WAVE TECHNOLOGY Touche BAS—...
- Page 5 FCC Class B Notice Mounting your remote This device complies with Part 15 of the FCC Rules. Operation is subject to the following two Montaje del control remoto conditions: Montage de votre télécommande 1. This device may not cause harmful interference. Two-button remote •...
- Page 6 Aviso Clase B de la FCC Remarque : Cet équipement a été testé et trouvé conforme aux limites de classe B pour un appareil numérique, conformément à la partie 15 des règlements de la FCC.Ces limites Este dispositivo cumple con la Parte 15 de las reglas de la FCC. Su funcionamiento está sujeto sont conçues pour fournir une protection raisonnable contre l’interférence nocive dans a las dos condiciones siguientes: une installation résidentielle.
Need help?
Do you have a question about the Motorized Shades and is the answer not in the manual?
Questions and answers