Table of Contents
Advertisement
Quick Links
Advertisement
Table of Contents

Related Manuals for Squarp Instruments Pyramid Sequencer


Summary of Contents for Squarp Instruments Pyramid Sequencer
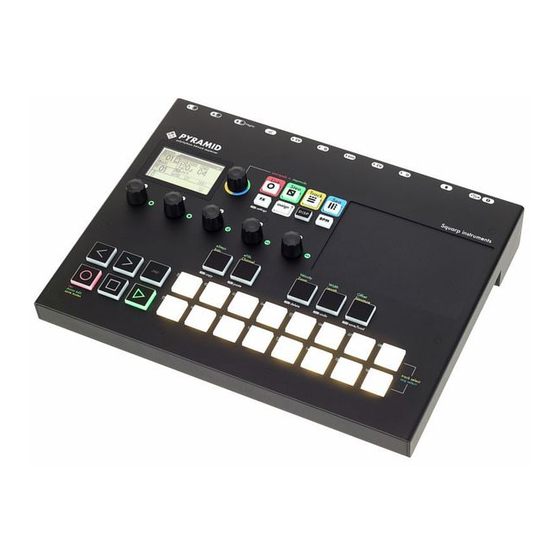
- Page 1 Pyramid Sequencer User Guide Squarp Instruments...
- Page 2 Manual based on PyraOS version V 3.0 Transcribed from Squarp Instrument’s original HTML to L T E X by Juan Pumarino. Edited and revised by Ryan Gallagher (ryanpg). This document was generated on September 12, 2018.
-
Page 3: Table Of Contents
Screen ..... . . Pads ......Contents Play with the keypad . - Page 4 Step-lock automation ... . Pads ......Track player: pages, zoom and length ..How to create and edit sequences .
- Page 5 Analog sync (CV inputs or pedal) ..8 Save/Load Save/load principles ....Save ......Save As .
-
Page 7: Quickstart
Pyramid allows you to easily produce your tracks from scratch thanks to powerful creative tools, such as: 1 Quickstart • smart chord harmonizer, • scale generator, • beat repeat, Pyramid Workflow • hold and relatch, • groundbreaking step sequencer (unlimited number of notes and CC messages per step, per-step FX param- WIRE UP eter locks),... -
Page 8: Quick Tour Of The Four Pyramid Modes
In the example below SE01, (sequence 01) has only or scaled piano), an attached MIDI controller, a Control TR02 (track 02) unmuted. In SE02 (sequence 02), Voltage instrument, or your computer. TR02A and TR11A (tracks 02 and 11) are unmuted. In SE03 (sequence 03), tracks 01, 06, and 14 are unmuted: Press STEP : fill steps of the currently selected track with notes and chords using the 16 pads... -
Page 9: Screen
Player zone: track player (a representation of the current track, the level of zoom, the track length), the player posi- tion, and the page you are viewing in Live, Step and Track modes: The example above shows a 12 and 1/4 measure long track (12 measures + 1 beat). -
Page 10: Basics
Basics CAPTURING A PERFORMANCE When in LIVE mode, capture a performance on a cur- HOW TO SELECT THE CURRENT rently playing track by pressing press rec . If the track TRACK (TR01A TO TR16D) is paused, press rec to ”arm” the track, then press to begin a count-off... -
Page 11: Muting And Unmuting Tracks
SELECTING THE CURRENT SEQUENCE Press DISP to view the piano roll of the current track and the notes entered in LIVE and STEP mode. The current sequence number is displayed on the screen: In any mode, hold SEQ and select a sequence (from SE01 to SE16) by pressing the corresponding pad . -
Page 12: Tempo
You can select how Pyramid transitions between se- quences: instant, 1 beat, 1 bar, 2 bars, which gives you deep control over performing with sequences. Press any sequence number to launch it. Pyramid waits until the current sequence ends (the end of the bar, if “1 BAR”... -
Page 13: Assign A Control
There are 12 effects to choose from: • Quantizer (with integrated humanizer) • Arpeggiator • Harmonizer • Swing • Randomization • Delay • Equalizer • Scale • Note to CC converter • BPM • Chance (probability) Press an encoder to display its assignment and its •... -
Page 14: Display Features
DISPLAY FEATURES stops the player at the current track page, while pressing twice rewinds to the beginning of the track. You can access extra information in some modes by Two presses on STOP will send an All Note Off MIDI message pressing DISP . -
Page 15: Inputs/Outputs
Inputs/Outputs USB CONNECTIVITY USB MIDI input MIDI CONNECTIVITY MIDI input Connect Pyramid to your computer with a standard mini USB cable and Pyramid will receive MIDI notes, CC mes- sages, pitch, aftertouch, transport messages and MIDI Connect one or more MIDI controllers (e.g. keyboard, clock. -
Page 16: Cv/Gate Connectivity
CV/GATE CONNECTIVITY DIN SYNC CONNECTIVITY CV/Gate inputs Pyramid provides an optional DIN sync output (config- urable to Sync48, Sync24, Sync12, …in menu SET- There is one CV and one Gate input on the Pyramid. TINGS) that lets you synchronise your vintage instru- ments with tempo clock and a run/stop message. -
Page 17: Connectivity Examples
Connectivity examples PYRAMID ON THE STUDIO TABLE PYRAMID ON STAGE PYRAMID SEQUENCING VIRTUAL INSTRUMENTS Quickstart | 11... -
Page 19: The Live Mode
Play with the keypad 2 The Live mode Use the keypads to play your performance live. Press < or > to shift down and up octaves. You can also use external MIDI controllers (keyboards, Live Mode is the quickest way to create tracks from drumpads, fader surfaces) connected to the Pyramid’s scratch. -
Page 20: Live Looper
LIVE LOOPER Holding + rotating will jump to the next ma- jor/minor tonality. Add complexity by pressing and rotat- Pyramid provides you a new way to capture your per- ing : formance in the style of looper pedals! In this mode, the length of a track grows to fit your initial performance. -
Page 21: Repeat Smartpads
Rotate to select a scale from the list: Hold and rotate to select the root note of the scale. With the Romanian Minor scale and a root note of C, you can perform the following notes using the smartpads: Custom smartpads This livemode allows you to create and save up to 32 cus- tom chords or scales. -
Page 22: Hold
Copy/Paste/Delete + copy to copy the selected track (copy all Press notes + FX + FX automation + CC automation). Press DISP to display an alternative view of the smart- pads: + paste to paste the copied track to the se- Press lected track. -
Page 23: The Step Mode
Change the Stepmode 3 The Step Mode Stepmode defines how steps are filled. Hold STEP and turn the data knob to select Stepmode from the follow- ing modes: Step Mode is another way to create rhythms and • NOTE (default) melodies. -
Page 24: Poly / Mono Editing
Press a step to fill it with the current note. note E3. Very handy to quickly view or edit a note in a step. Press the step again to remove the note. You can add multiple notes on a single step. The pad correspond- ing to the step filled with the selected note will be softly NOTE PARAMETERS: VELOCITY, backlit. -
Page 25: Note Learn With A Keyboard
MUTE A STEP Press 2ND + a step to mute/unmute notes in this step. It’s a great way to play with your notes. In POLY EDITING mode, you will mute only the selected note of the step. In MONO EDITING mode, you will mute all notes of the step. -
Page 26: Chord Stepmode
Chord Stepmode This mode is similar to Note Stepmode except the steps are filled with chords. ● In MONO EDITING, hold rec and rotate to trans- pose all notes of the track. ADD CHORDS Select a chord degree on the screen with : ●... -
Page 27: Piano Roll
PIANO ROLL This leads to a great number of well-known rhythm pat- terns, as well as many odd-sounding ones. Almost all Press DISP to view the piano roll sequencer: traditional rhythms from across the world can be gener- ated with this tool, which is why we decided to implement on the Pyramid. -
Page 28: Note Learn With A Keyboard
NOTE LEARN WITH A KEYBOARD Use your external keyboard to set a note, or even a chord, from any mode! The euclidean note can be filled with a note received on the MIDI input, (for example C3♯). You can also perform a chord with your external keyboard (for example C2+2) instead of a note. -
Page 29: Draw Automation
Effects Stepmode This stepmode allows you to create FX parameter au- tomation. First, you need to add at least one effect with the FX manager on the current track, for example an arpeggiator. A live recorded automation of the CC10 (PAN), zoomed. You can create an infinite number of automation on the same track. -
Page 30: Step-Lock Automation
DRAW AN AUTOMATION Hold rec while moving your finger across the touch- pad to draw FX automation. Very useful for experiment- ing with complex automation! Newly drawn automation replaces all prior automation on that track. STEP-LOCK AUTOMATION Hold a step and rotate to increase or decrease A 16-step automation of the ARPEGGIATOR effect: RATE pa-... -
Page 31: Rotate
zoom on a row of 16 pads, also called a page. In 400% Note: copy/paste is not available in EUCLID stepmode. zoom, only 1 bar is displayed. Delete Press delete to delete all events contained in the 16 steps of the current page. Microscope mode: 1600% zoom provides you with Note: delete is not available in EUCLID stepmode. -
Page 32: Filter
• FX value touchpad X • FX value In LIVE mode, you can also use the touchpad to set the velocity of the keyboard and the smartpads. Press ASSIGN again to disable these shortcuts. Filter In stepmode NOTE and stepmode CC MESSAGES, press 2ND + STEP to activate the filter, in order to scroll only through programmed notes or CC messages. -
Page 33: The Track Mode
Pads 4 The Track Mode Track Mode has three purposes: 1. to configure the current track (MIDI channel, zoom, length, time signature) using the shortcuts before playing in Live Mode or programming in Step Mode. 2. to mute/unmute the 64 tracks using the 16 pads and <... -
Page 34: Mute/Unmute In Sync
MUTE/UNMUTE IN SYNC SAVE MUTE STATES OFF Mute/unmute changes are in sync, depending on the By default, track mute states changes are saved in the PERFORM type selected in SEQ mode: current sequence (rec is lit). If you mute or unmute a track, the sequence will save the mute states. -
Page 35: Call Instruments
CALL INSTRUMENTS On any track, you can ”call” an instrument (defined in the .txt file). It will auto-set the track name, the track channel and the track output. To know how to use this feature, please refer to the sec- tion Definition files >... -
Page 36: Track Pc + Bank
TRACK PC + BANK Rotate encoder 1 to set the track PROGRAM CHANGE, rotateencoder 2 to set the track BANK MSB, rotate en- coder 3 to set the track BANK LSB: You can also select the MASTER TRANSPOSE logo. In this case, this track can be used to transpose any track which is TRSP enable (in 2ND+TRACK display): Each track and each pattern can have its own PC and BANK. -
Page 37: Length
While zoom is pressed: press a pad (from 01 to 07) Bear in mind that you can, in every mode, hold to set the track zoom (from /4 to x16) in a flash. TRACK to activate the following shortcuts: • solo Note: please read the Step Mode section “Track player: pages, •... -
Page 38: Trackmode Patterns
Now you can fill your track patterns with notes and au- tomation, change each pattern length, time signature and run mode. Track’s effects (for e.g. quantizer, swing, arp, ...) will affect all patterns of the track. Finally, if you use STEP mode, you can set in each se- quence (SE01 to SE32) a different pattern (P1 to P32): This track has 6 patterns. -
Page 39: Polyrhythms Signature (X:4) (Default)
The difference is the length of each quarternote. If you in- crease the time signature’s upper number, it will increase the number of quarternotes in one bar: 4/4 means 4 quar- ternotes in a bar, 15:4 means 15 quarternotes in a bar. Hold time signature and rotate to change the time signature’s upper number on the current track:... -
Page 40: Track Length Fraction And Polymetry
Track length fraction and Irrational rhythms polymetry (advanced users) Changing the length of a track is an other way to create An irrational rhythm uses step durations that lie outside polymeters. the scope of the 4/4 system and loop on a different bar length. -
Page 41: Microstep Track
The DISP view displays tracks from TR01 to TR16 of the selected bank. With DISP activated, the 16 pads flashes when tracks send MIDI events (notes and CC messages). Microstep track To create a Microstep track, set the track length on 0+1/4 bar, the zoom on 1600% and increase the time signature lower number to 4/16. -
Page 43: The Seq Mode
Screen 5 The Seq Mode After creating your tracks in LIVE and STEP mode, and assembling them into several sequences in TRACK mode, you are now able to play with the sequences. The SEQ Mode is the second way to perform your song. Instead of muting/unmuting tracks like you do in TRACK Mode, Pyramid offers an advanced system of playing se- quences:... -
Page 44: Perform" Project
Then mute/unmute your active tracks to build the se- quence. As soon as you made a mute state change, the sequence is created. When selecting an empty sequence, Pyramid will copy • INST: The next sequence will be launched instantly, the previous mute states, so you can perform your live without delay. -
Page 45: Loop" Project
Repeat this one-handed operation to create a sequence chain as long as you choose, there is no limit to the num- ber of sequences you can chain: If you play these tracks organized in sequences: Select the PLAY PROJECT Submode: TR01 is unmuted in all sequences: it plays fully. -
Page 46: Relatch Run Mode
RELATCH RUN MODE Each of these 4 tracks are configured in RELATCH run mode: Copy/Paste/Delete a If you play these tracks organized in sequences: sequence copy Press + a sequence to copy it. paste Press + a sequence to paste it. Copy saves only tracks mute states. -
Page 47: Effect Manager
How to add effects to a track 6 Effect Manager Press FX to display the Effect manager of the current track: Effect manager principles You can add up to 5 real-time MIDI effects per track, from TR01A to TR16D. Notes (played or recorded in LIVE mode, or programmed in STEP mode) are processed and sent to the outputs in real-time by the effect engines. -
Page 48: Other Tools
A disabled effect is greyed (in the screen below, the effect Quick FX selection: CC is disabled): • Press encoder to enter the edit view of effect 1 • Press encoder to enter the edit view of effect 2 • Press encoder to enter the edit view of effect 3 •... -
Page 49: Effect List
Effect list QUANTIZER / HUMANIZER Eliminates or adds imprecision to your performance or step note edits. ENABLE ON OFF Activate/disable the arpeggiator engine. STYLE DOWN UP/DOWN RANDOM ASSIGN DRUNK DOUBLE OCT UP UP DOWN FIFTHS ONE TWO SILENCE RUNNER DISCO MARBLE ENABLE RHYTHM1 RHYTHM2 RHYTHM3 ON OFF... -
Page 50: Harmonizer
To create octave progressions. If OCTAVE=1 the arpeg- giator will play the original pattern, followed by the same pattern one octave higher. If OCTAVE=-2 the arpeggiator will play the original pattern, followed by the same pattern one octave lower, followed by the same pattern two oc- taves lower. -
Page 51: Delay
domized to an other octave. If NOTE LENGTH selected, Change the MIDI velocity of each delay note. The veloc- each note length will set to the GRID parameter, and then ity of the delay notes will be gradually decreased (positive randomized. -
Page 52: Scale
Select the gain of the highest notes (F9#). SCALE This effect quantizes all note pitches to a defined scale in real time, to refine your melody. ENABLE ON OFF Activate/disable the Note 2 CC engine. PARAM NT ON VELOCITY NT ON/OFF Select the note parameter value to convert (pitch of the note ON, velocity of the note, pitch of the note ON and ENABLE... -
Page 53: Chance
CHANCE This effect plays or does not play a note based on prob- ability. It’s a great way to add variations to drums or melodies. WAVEFORM OFF SINE TRIANGLE SQUARE RAMP S AND H Set the LFO waveform. S AND H means ”sample and hold”, generating a random value at each synchronized step. - Page 54 OFFSET 0 ... 64 ... 127 Set the offset of the waveform (the central value). You can also add a CC automation in stepmode CC, in order to set or automate this offset. S AND H It’s possible to chain multiple LFOs (with the same CC number, on the same track), in order to create original waveforms: TRIANGLE + TRIANGLE...
-
Page 55: Assign Assign Principles
7 Assign Assign principles The 5 encoders , the analog inputs, as well as the touchpad X+Y axis, are able to control CC messages and effect parameters in real-time. Once they are assigned, you can perform with them in all Now select the CC message number, from CC0 to Pyramid’s modes and submodes. -
Page 56: Assign An Fx Parameter
Assign an FX parameter Hold ASSIGN and … • turn an encoder , or • slide the touchpad X or Y axis, or • plug a jack into the CV or the GATE input. The display “assign control to…” must popup. Select and press EFFECT PARAM with : Select the effect you want to assign with : Using , select the parameter you want to assign:... -
Page 57: Assign A Master Fx
Automation recording and overdub Unlike notes, automation is not recorded with overdub. That means that the player will erase existing automation step. For example, if you activate rec in LIVE mode and pro- gressively change an assigned value (e.g. CC10) during the first loop, an automation is created: Assign a master FX You can change with a single control the Quantizer GRID,... -
Page 58: Assign Touchpad To Smartpads
If you don’t disable rec during the second loop, and even if you don’t change the assigned value, the automa- tion will be erased step: This operation applies to all CC messages, pitch bend, pressure, program change and effects parameters. Assign touchpad to smartpads When assigning the touchpad, another option appears:... -
Page 59: Assign External Knobs (Midi In "Learn" Cc Messages)
Hold ASSIGN and plug a mini jack on the input you want to assign (CV input or GATE input), the assign manager display will appear. Then select the CC message or the FX you want to assign. Analog sync (CV inputs or pedal) You can assign the CV input and the gate input to slave Pyramid with an analog clock. -
Page 61: Save/Load
8 Save/Load Save/load principles To save or load a project, make sure a SD card is in- serted, hold and press save/load to enter the menu: Select “<” to delete the last character. Select “SAVE” to confirm. Hold and rotate to move the cursor vertically in the edit display. -
Page 62: Import And Export Files
You can read the project files on your computer: ware sequencer (e.g. Ableton) and play and edit this pat- tern on the DAW: You can also create a MIDI track from scratch on your DAW and export it to an existing SD card project direc- tory, with a valid name. -
Page 63: Settings Settings Menu
OMNI MODE MULTITRK OFF MULTITRK BK A MULTITRK BK B 9 Settings MULTITRK BK C MULTITRK BK D CH01 ... CH16 Specifies if received midi notes are performed as: • MULTITRACK OFF will play notes and CC on the current Settings menu track, regardless of the controller channel. -
Page 64: Midi Out
MIDI out CV/pedal MIDI A MODE CV IN MODE MIDI OUT MIDI THRU MIDI OUT + THRU MIDI OFF OFF CV/GATE MONO ASSIGN STEREO ASSIGN TURBO MIDI X2 TURBO MIDI X4 TURBO MIDI X5 Selects if the CV inputs control notes of the track (CV/GATE) or TURBO MIDI X6.7 can be used to assign CC messages and FX parameters (see Configures Pyramid MIDI out A as a MIDI out (default), as a... -
Page 65: Misc
PEDAL HOT Select the metronome output note. If the metronome is acti- HARD REC PLAY/PAUSE PLAY/STOP vated ( 2ND + LIVE ), the metronome will click on the selected PREVIOUS TRACK NEXT TRACK PREVIOUS SEQ note. NEXT SEQ TAP TEMPO STEP LEARN OFF LEARN NOTES Sets the action triggered by the footswitch pedal. -
Page 66: Info
DEFAULT TS L ANALOG OUT 1/ … 24/ Display the 3 outputted analog voltages (0 to 5V). MIDI IN MONITOR Define the default time signature top number of all tracks at startup. Display all inputted midi messages. DEFAULT TS R MIDI OUT A MONITOR /1 …... -
Page 67: 10 Shortcuts
Step mode 10 Shortcuts Hold STEP and turn to change Stepmode. Hold and rotate to scroll the note list or the CC list faster. In any mode Preview the selected note by pressing . Pressing < or > while holding allows you to jump octaves for a Hold TRACK to activate the following shortcuts: quicker note navigation. -
Page 68: Track Mode
Track mode Save/load mode Hold and select a track to mute/unmute it Hold and rotate to move the cursor vertically in instantly. the SAVE AS…edit display. Hold MIDI channel and press + rotate to quickly se- In the LOAD project list, press + delete to remove lect the MIDI output of the track. -
Page 69: 11 Definition Files
11 Definition Files Definition files principles By default, Pyramid always the same CC and NOTE la- bels on the screen. For example, CC1 message is named MODULATION, CC7 is named VOLUME, and the NOTE 60 is named C4. These names are defined by midi standards, but they does not always match your synthetizer or drum machine names. -
Page 70: How To Create A Note Definition File
• Each file can include up to 120 CC definition names. display the defined note names in the file above: note 36 The syntax is XX:??? where XX is the number of the = BD-ATT, note 37= SNARE,… CC (0 to 119) and ??? is the name of the CC. There is no maximum name length, although Pyramid will •... -
Page 71: Call An Instrument
Call an instrument Download users definition files On any track, you can ”call” an instrument (defined in the .txt files). It will auto-set the track name, the track channel You can download ready-to-use definition files on and the track output. the Squarp forum squarp.community[slash]c[slash]def To call an instrument, press + TRACK and select...
Need help?
Do you have a question about the Pyramid Sequencer and is the answer not in the manual?
Questions and answers