Advertisement
Quick Links
Advertisement

Related Manuals for WILSON AUDIO POLARIS


Summary of Contents for WILSON AUDIO POLARIS
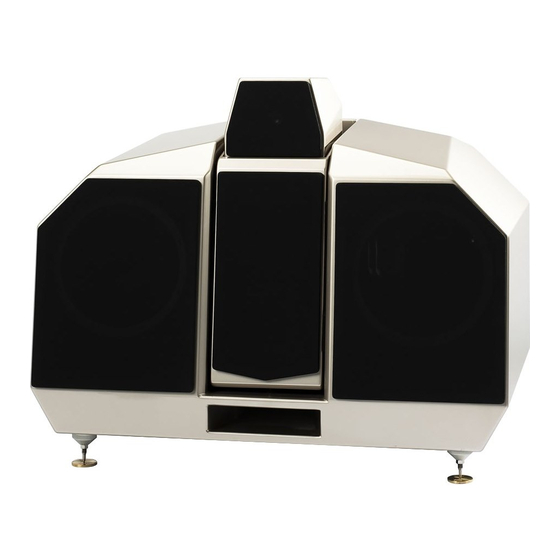
- Page 1 P o l a r i s O w n e r ’ s M a n u a l...
- Page 2 Polaris Owner’s Manual W i l s o n A u d i o ® i s a r e g i s t e r e d t r a d e m a r k o f W i l s o n A u d i o S p e c i a l t i e s , I n c .
- Page 3 ’ ’ a b l e o n T e n T s o l a r i s w n e r a n u a l o l a r i s w n e r a n u a l Contents ’...
- Page 4 ’ o l a r i s w n e r a n u a l � � � � � � � � � � � � � � � � � � � � � � � � � � � � � � � � � � 3 7 e M o V i n g t h e r o t e c t i V e i l M...
- Page 5 ’ ’ a b l e o n T e n T s o l a r i s w n e r a n u a l o l a r i s w n e r a n u a l �...
- Page 6 ’ o l a r i s w n e r a n u a l � � � � � � � � � � � � � � � � � � � � � � � � � � � � � � � � � � � � � � � � � � � � � � � � � 9 3 i M i t e d A r r A n t y �...
- Page 7 ’ o l a r i s w n e r a n u a l W i l s o n A u d i o S p e c i a l t i e s...
- Page 8 W i l s o n A u d i o S p e c i a l t i e s W i l s o n A u d i o S p e c i a l t i e s...
- Page 9 S e c t i o n 1 – I n t r o d u c t i o n...
- Page 11 T r o d u C T i o n Section 1.1 – Introduction From all of us at Wilson Audio Specialties—thank you for purchasing the Polaris loud- speaker. The information contained within the pages of this manual will inform and instruct on the proper assembly, set up, and long term care of your Polaris.
- Page 12 ’ o l a r i s w n e r a n u a l bitious project. Here, the goal was to design a loudspeaker that would perform to Wilson Standards in environments hostile to good sound, such as against a wall or in a custom cabinet.
- Page 13 Any out phase or time- delayed reflections that make their way out of the front of the diaphragm is heard and measured as noise and distortion. The Polaris tweeter employs proprietary materials in combination with proven mechanical configura-...
- Page 14 Polaris with alacrity and effortlessness. • Front-firing port. Polaris’s bass port is located on the front of the cabinet. The Polaris can be placed near a wall, which is often needed when the center channel is located just beneath the movie screen, without compro- mising low-frequency linearity or transient speed.
- Page 15 The Polaris cabinet is a further evolution of Wilson’s philosophy that truly great forms follow a corresponding function. It is a visual metaphor for the solution Wilson Au- dio pioneered to address issues of phase coherence exacerbated by large speaker systems.
- Page 16 With Polaris, you and others you listen with, will hear your favorite recordings and soundtracks with true time coherency, full frequency range, unfet tered dynamics, and vanishingly low distortion.
- Page 18 W i l s o n A u d i o S p e c i a l t i e s W i l s o n A u d i o S p e c i a l t i e s...
- Page 19 S e c t i o n 2 – U n c r a t i n g y o u r P o l a r i s...
- Page 21 Rotate the crate up on its end so that the casters on the woofer are toward the floor. Gen- tly roll the Polaris out of the crate. Remove the plastic outer bags from each of the three modules. The Woofer Module is extremely heavy; removing the bag is a two-man job. In- ventory the crate contents.
- Page 22 Polaris Crate 1 – Owner’s Manual 1 – Warranty Registration 1 – Polaris Midrange Module Grill 1 – Polaris Tweeter Module Grill 1 – Polaris Woofer Module Grill 4 – Hex Nut 4 – Threaded Pin 4 –...
- Page 23 1 – 9/16” Comb Wrench 1 – Caster Wrench 1 – Blue Polish Cloth 1 – 7/16” Ratchet Wrench 1 – Wilson Audio Spike Jack with Bag 1 – 5.3 ohm (parallel) spare resistor 1 – .5 ohm (parallel) spare resistor 1 – 18 ohm barrel spare resistor W i l s o n A u d i o S p e c i a l t i e s...
- Page 24 W i l s o n A u d i o S p e c i a l t i e s W i l s o n A u d i o S p e c i a l t i e s...
- Page 25 S e c t i o n 3 – I n Y o u r R o o m...
- Page 27 While we will also outline some detailed suggestions on the setup of the Polaris, we strongly suggest that you have your lo - cal Wilson Audio dealer perform the final speaker “voicing” with you. Wilson dealers are specially trained in set ting up Wilson loudspeakers and will ensure that you realize the full value of your purchase.
- Page 28 ’ o l a r i s w n e r a n u a l your loudspeakers. Speaking in a moderately loud voice and at a constant volume, project your voice out into the room. Your voice will have an overly heavy, “chesty”...
- Page 29 (behind the speakers), they would intersect. Af ter you complete this procedure for the other loudspeaker, you will now have two rectangles, one on the floor on either side of the room. This same procedure will be used to locate your Polaris as a center channel. Section 3.2 – Room Acoustics Note: The following section contains general information on room acoustics and loud- speaker/room interaction.
- Page 30 ’ o l a r i s w n e r a n u a l the sound quality of a stereo system in two ways: • It adds harshness to the upper midrange and treble by storing time-domain smearing energy. • It destroys the delicate phase relationships, which help to establish an ac- curate soundstage. Slap echo (see Figure 2) is a common acoustical problem in the typical domestic lis- tening room because most of these rooms have walls with a hard, reflective nature, only occasionally interrupted by curtains, wall art, or drapes.
- Page 31 3 . 2 – r e C T i o n o o M C o u s T i C s for during the construction process. For existing rooms, slap echo can also be controlled entirely by the application of absorptive materials to the hard surfaces. These are absorp- tive materials that can be used to ameliorate slap echo: • Illbruck Sonex®...
- Page 32 ’ o l a r i s w n e r a n u a l Standing Waves Another type of reflection phenomenon is “standing waves.” Standing waves cause the unnatural boosting or accentuation of certain frequencies, typically in the bass, to be found at certain discreet locations in the room.
- Page 33 3 . 3 – r e C T i o n e s o n a n C e s distance between one speaker and its adjacent walls and floors are not the same as the standing wave frequencies excited by the dimensions in the other channel. Comb Filter Effect The “comb filter”...
- Page 34 ’ o l a r i s w n e r a n u a l • The volume of air itself within the listening room. Structural Resonance Structural resonances are familiar to most people as buzzes and rat tles, but this type of resonance usually only occurs at extremely high volume levels and is usually masked by the music.
- Page 35 3 . 4 – Y e C T i o n o u r o o M room can dramatically reduce the speakers’ destructive interaction with low frequency modes. ASC Tube Traps™ are ef fective in reducing some of this low frequency room col- oration. Custom designed bass traps, such as perforated Helmholtz resonators, provide the greatest degree of low frequency control.
- Page 36 In this way, both speakers are firing the same distance to the back wall. The asymmetry of the walls in L-shaped rooms resists the buildup of standing waves (see Figure Polaris in a Dedicated Home Theater Home theaters can be organized many dif ferent ways. Some use rows of couches.
- Page 37 The location of your listening position is as important as the careful setup of your Wilson Audio loudspeakers. The listening position should ideally be no more than 1.1 to 1.25 times the distance between the tweeters on each speaker. Therefore, in a long, rect- angular room of 12’...
- Page 38 Polaris. A poor placement of the Polaris will hamper its integration with the rest of the system. As a general rule, when Polaris is used as a center channel, the distance from the main Lef t and Right channels, as well as the Polaris (as measured from the tweet- ers) should be equal in their relationship to the listening position.
- Page 39 3 . 4 – Y e C T i o n o u r o o M W i l s o n A u d i o S p e c i a l t i e s...
- Page 40 W i l s o n A u d i o S p e c i a l t i e s W i l s o n A u d i o S p e c i a l t i e s...
- Page 41 S e c t i o n 4 – I n i t i a l S e t u p...
- Page 43 Wilson Audio installer. Your dealer will have a person trained in the art of the Polaris installation. If you choose to do this installation yourself, here are some guidelines to assist you. These guidelines come from many years of experience and should be followed closely.
- Page 44 Propagation delay Alignment Propagation delay alignment accuracy of the Polaris has been established and verified by Wilson Audio. The graphs and charts used in this section are a result of this testing. Room Setup As indicated in Figure 4, the Polaris system allows for dif ferent listening distances (away from the speakers) and listening ear heights (measured distances from the floor to your ear).
- Page 45 4 . 2 – g e C T i o n e o M e T r i C i M e o M a i n l i g n M e n T Audio has measured the correct geometric time domain alignment for dif ferent distance/ ear height combinations.
- Page 46 ’ o l a r i s w n e r a n u a l If you are using the Polaris as ste- reo pair, repeat each step of this procedure on the lef t and right channels simultaneously.
- Page 47 4 . 2 – g e C T i o n e o M e T r i C i M e o M a i n l i g n M e n T Note: The spike labeled B is always used in the front of the Midrange Module. Make a mark on the labeled “Midrange Spike Position”...
- Page 48 Tweeter Module will rest. Section 4.3 – Mounting the Midrange Module Materials Required • Correct spikes for the modules. Refer to the Polaris Propagation delay Tables and the procedure in the previous section to determine the correct Aspherical Propagation delay spikes necessary, the Spike position, and the proper indent location.
- Page 49 4 . 3 – M e C T i o n o u n T i n g T h e i d r a n g e o d u l e vis a vis the listener. Install the rear “B” length spike into in the bot tom of each module (see Figure 5). Install the Midrange Module The Midrange Module is installed first.
- Page 50 ’ o l a r i s w n e r a n u a l Section 4.4 – Mounting the Tweeter Module Refer to Chart (Section 10) labeled Tweeter Module Spike Length, and install the correct propagation delay spike in the rear of the Tweeter Module. Install two “A” spikes in the front of the module. With the front pair of short spikes pointing down, carefully lower the Tweet- er Module between the woofer and set the front two spikes on top of the Midrange module.
- Page 51 Note: We strongly recommend that your authorized Wilson Audio installer finalize and fine tune your Polaris. Your dealer is trained in the art of the Polaris installation. If you choose to adjust the Polaris on your own, before spiking your Polaris, refer to Section 3.1 which contains instruction on the Wilson Audio Setup Procedure (WASP).
- Page 52 Section 4.7 – Using the Lift to Install Spikes Materials Required Note: This is a two person job. Do not attempt this by yourself. The Polaris’s weigh over 400 LBS and may seriously injure someone if tipped over. 11 - P...
- Page 53 Remove the casters. Insert and screw-in the finished spike assembly. Hand tighten only! Note: Be very careful NOT TO CROSS THREAD the spikes. The base of the Polaris is made of “X” material and is vulnerable to cross-threading.
- Page 54 Then continue the process on the other channel. Leveling the Polaris It is not necessary to use the jack to level the Polaris. Place a level on the lef t to right oriented axis on the plane above the port. If it is level, move to the next step.
- Page 55 Section 4.8 – Resistors By removing the large aluminum back cover on the rear of the Woofer Module of your Polaris, you may gain access to the resistor plate (see Figure 13). These resistors serve several functions. Note: Only Wilson Audio replacement resistors should be used in your Polaris. Changing...
- Page 56 Wilson Audio Warranty. Midrange and Tweeter Resistors The Midrange Level, which consists of two .5 ohm resistors in parallel, and Tweeter Level, which consists of two 5.3 ohm resistors in parallel, resistors provide precise level matching for the midrange and tweeter drivers correspondingly.
- Page 57 All audio equipment will sound its best af ter its components have been broken in for some period of use. Wilson Audio breaks in all woofers and mid-range drivers for a 12 hour period. The drivers are then tested, calibrated, and matched for their acoustical properties.
- Page 58 W i l s o n A u d i o S p e c i a l t i e s W i l s o n A u d i o S p e c i a l t i e s...
- Page 59 S e c t i o n 5 – F i n a l S e t u p...
- Page 61 Participating in numerous audio/multi-channel/home theater shows with very dif ferent and dif ficult acoustic environments necessitated this procedure. Currently, all Wilson Audio dealers employ this setup procedure for their customers, in order to quickly and predictably achieve the best performance from their systems (this procedure can be used successfully with ANY moving coil speaker system).
- Page 62 ’ o l a r i s w n e r a n u a l Section 5.2 - Left and Right Channels Determining Front to Back Distance The proper setup of the lef t and right channels is crucial for optimum system perfor- mance.
- Page 63 5 . 2 - l 5 . 2 - l e C T i o n e C T i o n e f T a n d e f T a n d i g h T i g h T h a n n e l s h a n n e l s • Find the front to back location where the bass is tight, dynamics are cor-...
- Page 64 Set the alignment spikes as indicated in Section 10. • Follow the processor instructions on level adjustment. Adjust the level on the Polaris so it matches in level with the left and right channels. Do not be surprised if the Polaris requires 3-7 dB lower adjustment than the left and right channel.
- Page 65 Using a pink noise generator, play pink noise through the Polaris together with alter- nating Lef t and Right channels. If the polarity is correct on the Polaris, you will hear the pink noise centered between the Polaris and either the Lef t or Right speakers. If the polar- ity is incorrect, you will hear two point sources that are unfocused and located at each speaker playing.
- Page 66 ’ o l a r i s w n e r a n u a l tion. Be careful when rotating the speaker as it is very heavy and could fall off of the mounting bracket. Integrating the Passive WATCH Dog or Thor’s Hammer The WATCH Dog or Thor’s Hammer will perform well in almost any location in the room.
- Page 67 5 . 3 - i e C T i o n n T e g r a T i n g T h e o l a r i s i n T o a i l s o n h e a T e r W i l s o n A u d i o S p e c i a l t i e s...
- Page 68 W i l s o n A u d i o S p e c i a l t i e s W i l s o n A u d i o S p e c i a l t i e s...
- Page 69 S e c t i o n 6 – C a r e o f P o l a r i s...
- Page 71 Care of the Grills Periodically, you will want to clean the Polaris’s grills. This is best done by using the W i l s o n A u d i o S p e c i a l t i e s...
- Page 72 Of ten Wilson speaker owners desire to change the look of their listening room by changing the color of their speaker grills. In addition to basic black, Wilson Audio of fers a variety of grill colors to match most WilsonGloss finishes. Contact your local dealer for grill cloth samples or to order replacement grills for your Polaris.
- Page 73 The use of these materials in the Polaris results in an enclosure that is inherently inert and low- resonant. All of these structural aspects are combined, allowing Wilson Audio to deliver a product that maintains the strictest structural tolerances, durability, and reliability.
- Page 74 W i l s o n A u d i o S p e c i a l t i e s W i l s o n A u d i o S p e c i a l t i e s...
- Page 75 S e c t i o n 7 – T r o u b l e s h o o t i n g...
- Page 77 Section 7.1 – Troubleshooting: Polaris is not operating: C h e c k t h e i n t e r c o n n e c t s f r o m t h e s o u r c e .
- Page 78 ’ o l a r i s w n e r a n u a l i n g t h e a m p l i f i e r c h a s s i s . Tu r n t h e a m p l i f i e r o f f a n d d i s c o n n e c t i t f r o m t h e A C w a l l o u t l e t .
- Page 79 7 . 1 – T e C T i o n r o u b l e s h o o T i n g W i l s o n A u d i o S p e c i a l t i e s...
- Page 80 W i l s o n A u d i o S p e c i a l t i e s W i l s o n A u d i o S p e c i a l t i e s...
- Page 81 S e c t i o n 8 - R e p a i r P r o c e d u r e s...
- Page 83 C e d u r e s Section 8.1 - Repair Procedures Replacing a Blown Resistor The Polaris tweeter and midrange drivers are protected by resistors, which will open, in most cases if the speaker is over driven during normal operation before the driver is damaged.
- Page 84 ’ o l a r i s w n e r a n u a l resistor. Remove the allen bolts at taching the resistor to its heatsinks. Using the 5/8” nutdriver, loosen the binding post and remove the open resis- tor.
- Page 85 8 . 1 - r e C T i o n e P a i r r o C e d u r e s Make sure to heat up the solder joint completely and hold firmly in place until the solder sets. Replace the driver foam gasket.
- Page 86 W i l s o n A u d i o S p e c i a l t i e s W i l s o n A u d i o S p e c i a l t i e s...
- Page 87 S e c t i o n 9 – S p e c i f i c a t i o n s...
- Page 89 9 . 1 - P e C T i o n o l a r i s P e C i f i C a T i o n s Section 9.1 - Polaris Specifications Enclosure Type: Front Ported Woofer:...
- Page 90 ’ o l a r i s w n e r a n u a l Polaris Dimensions W i l s o n A u d i o S p e c i a l t i e s...
- Page 91 M P e d a n C e u r V e Polaris Impedance Curve W i l s o n A u d i o S p e c i a l t i e s...
- Page 92 W i l s o n A u d i o S p e c i a l t i e s W i l s o n A u d i o S p e c i a l t i e s...
- Page 93 S e c t i o n 1 0 – A l i g n m e n t T a b l e s...
- Page 95 1 0 . 1 – P 1 0 . 1 – P e C T i o n e C T i o n o l a r i s o l a r i s r o P a g a T i o n r o P a g a T i o n e l a Y e l a Y...
- Page 96 ’ o l a r i s w n e r a n u a l W i l s o n A u d i o S p e c i a l t i e s...
- Page 97 1 0 . 1 – P e C T i o n o l a r i s r o P a g a T i o n e l a Y a b l e Note: Always install the “A” length spikes into in the front bottom of Tweeter Module. W i l s o n A u d i o S p e c i a l t i e s...
- Page 98 ’ o l a r i s w n e r a n u a l W i l s o n A u d i o S p e c i a l t i e s...
- Page 99 o o T n o T e s T o l i g n M e n T a b l e s Footnotes to Alignment Tables Note 1: For positions labeled “N/A,” please contact your dealer for information for this listening distance and ear height. Note 2: Add one spacer to each front woofer diode and spike assembly.
- Page 101 Most repairs can be made in the field. In instances where return to Wilson Audio’s factory is required, the dealer or customer must first obtain W i l s o n A u d i o S p e c i a l t i e s...
- Page 102 W i l s o n A u d i o S p e c i a l t i e s W i l s o n A u d i o S p e c i a l t i e s...
- Page 103 S e c t i o n 1 1 – Wa r r a n t y I n f o r m a t i o n...
- Page 104 Dealer, then purchaser may obtain a return authorization from Wilson Audio and at purchaser’s expense return the product to Wilson Audio where the defect will be rectified without charge for parts or labor.
- Page 105 Wilson Audio by the dealer at dealer’s sole expense. Wilson Audio will pay return freight of its choice. A returned product must be accompanied by a writ ten description of the defect.
Need help?
Do you have a question about the POLARIS and is the answer not in the manual?
Questions and answers