
Related Manuals for Carrier 69NT40-541-500


Summary of Contents for Carrier 69NT40-541-500
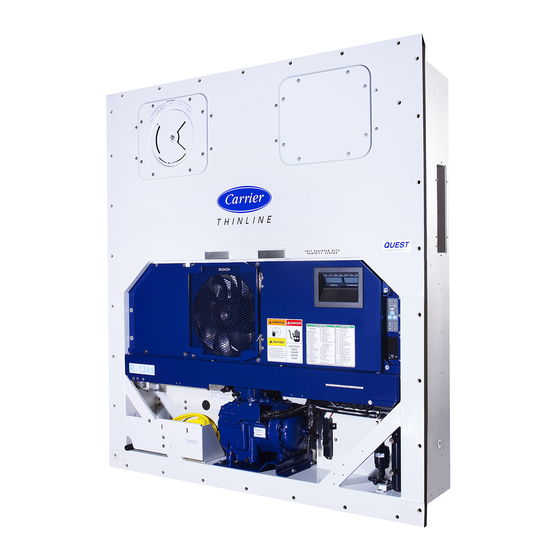
- Page 1 Container Refrigeration OPERATIONS AND SERVICE MANUAL 69NT40-541-500 to 599 Container Refrigeration Units T-363 Rev C...
- Page 3 OPERATIONS AND SERVICE MANUAL 69NT40-541-500 to 599 © Carrier Corporation, 2017 Printed in U. S. A. December 2017...
- Page 5 TABLE OF CONTENTS Paragraph Number Page SAFETY SUMMARY ..............1–1 GENERAL SAFETY NOTICES .
-
Page 6: Table Of Contents
DESCRIPTION ............... . 3–1 GENERAL DESCRIPTION . - Page 7 PRE-TRIP DIAGNOSTICS ........... . . 4–15 DATACORDER .
- Page 8 UNIT WILL NOT TERMINATE HEATING ......... . . 6–2 UNIT WILL NOT DEFROST PROPERLY .
- Page 9 7.14 EVAPORATOR FAN AND MOTOR ASSEMBLY ........7–21 7.14.1 Replacing the Evaporator Fan Assembly .
- Page 11 LIST OF ILLUSTRATIONS FIGURE NUMBER Page Figure 3.1 Refrigeration Unit - Front Section ..........3–1 Figure 3.2 Evaporator Section - Units with Center Access Panel .
- Page 12 Figure 7.23 Suction Modulation Valve (SMV) ..........7–25 Figure 7.24 Controller Section of the Control Box .
- Page 13 LIST OF TABLES TABLE NUMBER Page Table 3–1 Safety and Protective Devices ........... . 3–8 Table 4–1 Keypad Function .
- Page 15 SECTION 1 SAFETY SUMMARY GENERAL SAFETY NOTICES Installation and servicing of refrigeration equipment can be hazardous due to system pressures and electrical com- ponents. Only trained and qualified service personnel should install, repair, or service refrigeration equipment. The following general safety notices supplement specific warnings and cautions appearing elsewhere in this man- ual.
- Page 16 WARNING EXPLOSION HAZARD: Failure to follow this WARNING can result in death, serious personal injury and / or property damage. Never use air or gas mixtures containing oxygen (O2) for leak testing or operating the product. Charge Only With R−134a: Refrigerant must conform to AHRI Standard 700 specification. WARNING Beware of unannounced starting of the evaporator and condenser fans.
- Page 17 WARNING Before disassembly of any external compressor component make sure to relieve possible internal pressure by loosening the bolts and tapping the component with a soft hammer to break the seal. CAUTION Do not remove wire harnesses from controller unless you are grounded to the unit frame with a static safe wrist strap.
- Page 18 The set screw on the crankshaft must be removed for this type of oil pump. (See Figure 6-8.) CAUTION Use only Carrier Transicold approved Polyol Ester Oil (POE) − Castrol-Icematic SW20 compres- sor oil with R-134a. Buy in quantities of one quart or smaller. When using this hygroscopic oil, immediately reseal.
- Page 19 INTRODUCTION INTRODUCTION The Carrier Transicold model 69NT40-541-500 to 599 series units are of lightweight aluminum frame construction designed to fit in the front of a container and serve as the container’s front wall. They are one piece, self-contained, all-electric units, which include cooling and heating systems to provide precise temperature control.
- Page 20 2.3.9 Evaporator Fan Operation Units are equipped with three-phase evaporator fan motors. Opening of an evaporator fan internal protector will shut down the unit. 2.3.10 Plate Set Each unit is equipped with a tethered set of wiring schematic and wiring diagram plates. The plate sets are ordered using a seven-digit base part number and a two-digit dash number.
- Page 21 For information on the TransFresh system, contact TransFresh Corporation, P.O. Box 1788, Salinas CA 93902 The EverFresh option is the addition of the Carrier Transicold EverFresh controlled atmosphere system. This sys- tem continuously monitors and controls oxygen and carbon dioxide levels in the container.
-
Page 23: Description
SECTION 3 DESCRIPTION GENERAL DESCRIPTION 3.1.1 Refrigeration Unit - Front Section The unit is designed so the majority of the components are accessible from the front (see Figure 3.1). The unit model number, serial number, and parts identification number can be found on the serial plate to the left of the compressor. 3.1.2 Fresh Air Makeup Vent The function of the upper or lower makeup air vent is to provide ventilation for commodities that require fresh air circula-... -
Page 24: Evaporator Section
3.1.3 Evaporator Section The evaporator section is shown below. The evaporator fans circulate air through the container by pulling it in the top of the unit, directing it through the evaporator coil where it is heated or cooled, and discharging it at the bottom. If the unit is equipped with eAutoFresh, system components are mounted in addition to the standard refrigeration unit components. -
Page 25: Compressor Section
3.1.4 Compressor Section The compressor section includes the compressor (with high pressure switch), power cable storage compartment, and autotransformer. This section also contains the quench valve, suction modulating valve, discharge pressure regulating valve, discharge temperature sensor, and discharge/suction pressure transducers. The supply tempera- ture sensor, supply recorder sensor, and ambient sensor are located at the right side of the compressor. -
Page 26: Air-Cooled Condenser Section
3.1.5 Air-Cooled Condenser Section The air-cooled condenser section (Figure 3.4) consists of the condenser fan, condenser coil, receiver with sight glass/ moisture indicator, quench valve, liquid line service valve, filter-drier, condenser pressure transducer, and fusible plug. The condenser fan pulls air from around the coil and discharges it horizontally through the condenser fan grille. Figure 3.4 Condenser Section 1. -
Page 27: Control Box Section
3.1.6 Control Box Section The control box (Figure 3.5) includes the manual operation switches, circuit breaker (CB-1), compressor, fan and heater contactors, control power transformer, current sensor module, controller module and the communications interface module. 3.1.7 Communications Interface Module (option) The communications interface module is a slave module which allows communication between the refrigeration unit and a ship system master central monitoring station. -
Page 28: Refrigeration System Data
REFRIGERATION SYSTEM DATA Number of Cylinders Model 06DR Weight (Dry) 118kg (260 lb) a. Compressor/Motor Assembly Approved Oil Castrol Icematic Oil Charge degrees 3.6 liters (7.6 U.S. pints) Oil Sight Glass The oil level range, with the compressor off, should be between the bottom and one-eighth level of the sight glass. -
Page 29: Electrical Data
ELECTRICAL DATA CB-1 Trips at 29 amps a. Circuit Breaker CB-2 (50 amps) Trips at 62.5 amps CB-2 (70 amps) Trips at 87.5 amps 17.6 amps @ 460 VAC b. Compressor Motor Full Load Amps (FLA) (with current limiting set at 21 amps) Nominal Supply 380 VAC, Three Phase, 460 VAC, Three Phase,... -
Page 30: Safety And Protective Devices
ELECTRICAL DATA (Continued) Orange wire Power Red wire Output Brown wire Ground Input voltage 5 vdc Output voltage 0 to 3.3 vdc h. Humidity Sensor Output voltage readings verses relative humidity (RH) percentage: 0.99V 1.65V 2.31V 2.97V i. Controller Setpoint Range -30 to +30°C ( -22 to +86°F) SAFETY AND PROTECTIVE DEVICES Unit components are protected from damage by safety and protective devices listed in the following table. -
Page 31: Refrigeration Circuit
REFRIGERATION CIRCUIT Starting at the compressor (see Figure 3.6), the suction gas is compressed to a higher pressure and temperature. The gas flows out the compressor through the discharge service valve. Refrigerant gas then moves into the air- cooled condenser, where air flowing across the coil fins and tubes cools the gas to saturation temperature. By removing latent heat, the gas condenses to a high pressure/high temperature liquid and flows to the receiver, which stores the additional charge necessary for low temperature operation. -
Page 32: Figure 3.6 Refrigeration Circuit Schematic
Figure 3.6 Refrigeration Circuit Schematic Refrigeration Circuit with Receiver EVAPORATOR TXV BULB THERMOSTATIC EXPANSION VALVE (TXV) CONDENSER HEAT EXCHANGER FUSIBLE PLUG SIGHT GLASS FILTER SIGHT GLASS / QUENCH VALVE MOISTURE DRIER INDICATOR LIQUID LINE RECEIVER VALVE DISCHARGE QUENCH VALVE BULB SERVICE VALVE SUCTION... -
Page 33: Microprocessor
SECTION 4 MICROPROCESSOR TEMPERATURE CONTROL MICROPROCESSOR SYSTEM The temperature control Micro-Link 3 microprocessor system (see Figure 4.1) consists of a keypad, display mod- ule, control module (controller), and interconnecting wiring. The controller houses the temperature control software and the DataCORDER Software. The temperature control software functions to operate the unit components as required to provide the desired cargo temperature and humidity. -
Page 34: Keypad
4.1.1 Keypad The keypad (Figure 4.2) is mounted on the control box door. The keypad consists of 11 push button switches that act as the user’s interface with the controller. Descriptions of the switch functions are provided in Table 4–1. Figure 4.2 Keypad CODE SELECT... -
Page 35: Controller
Table 4–1 Keypad Function FUNCTION CODE SELECT Accesses function codes. PRE TRIP Displays the pre-trip selection menu. Discontinues pre-trip in progress. ALARM LIST Displays alarm list and clears the alarm queue. MANUAL DEFROST / Displays selected defrost mode. Depressing and holding the Defrost interval key for five seconds will initiate defrost using the same logic INTERVAL as if the optional manual defrost switch was toggled on. -
Page 36: Controller Software
CAUTION Do not attempt to use an ML2i PC card in an ML3 equipped unit. The PC cards are physically different and will result in damage to the controller. NOTE Do not attempt to service the controller. Breaking the seal will void the warranty. The Micro-Link 3 controller is a single module microprocessor as shown in Figure 4.4. -
Page 37: Operational Software (Cd Function Codes)
4.2.2 Operational Software (Cd Function Codes) The operational software is the actual operation programming of the controller which activates or deactivates com- ponents in accordance with current unit operation conditions and selected modes of operation. The programming is divided into function codes. Some of the codes are read only, while the remaining codes may be user configured. -
Page 38: Perishable Idle, Air Circulation
4.3.4 Perishable Idle, Air Circulation Perishable Idle Mode is used when it is unnecessary to run the compressor to maintain control temperature. If the controller has determined that cooling is not required or the controller logic determines suction pressure is at the low pressure limit, the unit will transition to Perishable Idle Mode. -
Page 39: Perishable, Dehumidification - Bulb Mode
If the above conditions remain true for at least one hour, the evaporator fans will switch from high speed to low speed. Evaporator fan speed will then switch every hour, as long as the 4 conditions are met (see Bulb Mode, Section 4.3.7 for different evaporator fan speed options). -
Page 40: Perishable Mode Cooling - Sequence Of Operation
After the initial three minutes, they will then be switched to low speed any time supply air temperature is within +/- 0.25°C (0.45°F) of set point and return air temperature is less than or equal to supply air temperature +3°C (5.4°F). The fans will continue to run in low speed for one hour. -
Page 41: Perishable Mode Heating - Sequence Of Operation
4.3.10 Perishable Mode Heating - Sequence of Operation NOTE The unit will heat only when in the Perishable Mode, relay TH is electronically locked out when in the Frozen Mode. a. If the supply air temperature decreases 0.5°C (0.9°F) below set point, the system enters the heating mode (see Figure 4.5). -
Page 42: Frozen Idle Mode
Figure 4.8 Controller Operation - Frozen Mode Frozen Mode Controller Set Point at or BELOW 10 C (+14 F), or 5 C (+23 F) optionally +2.5 C (+4.5 F) Cooling +.20 C Set Point .20 C Air Circulation Falling Rising Temperature Temperature 4.3.13... -
Page 43: Frozen Mode Cooling - Sequence Of Operation
After an off-cycle period of 60 minutes, the unit will turn on high speed evaporator fans for three minutes and then check the control temperature. If the control temperature is greater than or equal to the frozen set point +0.2°C (0.36°F), the unit will restart the refrigeration system and continue to cool until the previously mentioned off-cycle temperature criteria are met. -
Page 44: Defrost Operation
If defrost was initiated by the probe check logic, then a Probe Check is carried out after the completion of the defrost cycle. A Probe Check is initiated only when there is an inaccuracy between the controller temperature sensors. For more information on Probe Check refer to Section 5.9. -
Page 45: Defrost Related Settings
When defrost is initiated, the controller closes the SMV, opens contacts TC, TN and TE (or TV) to de-energize the compressor, condenser fan and evaporator fans. The controller then closes contacts TH to supply power to the heaters. The orange DEFROST light and heat light are illuminated and the COOL light is also de-energized. -
Page 46: Protection Modes Of Operation
If CnF64 is configured in the operator will be allowed to choose “PuLS” as a defrost interval option. For units operating with “PuLS” selected, defrost interval is determined by the unit temperature setpoint and the Evaporator Fan Pulsing Temperature Setting (Cd60). When the unit temperature setpoint is equal to or less than the Evaporator Fan Pulsing Temperature Setting, the defrost interval is set to 6 hours. -
Page 47: Controller Alarms
CONTROLLER ALARMS Alarm display is an independent controller software function. If an operating parameter is outside of expected range or a component does not return the correct signals back to the controller, an alarm is generated. A listing of the alarms is provided in Table 4–6. -
Page 48: Datacorder
5.8. DATACORDER The Carrier Transicold “DataCORDER” software is integrated into the controller and serves to eliminate the tem- perature recorder and paper chart. DataCORDER functions may be accessed by keypad selections and viewed on the display module. The unit is also fitted with interrogation connections (see Figure 4.1). -
Page 49: Datacorder Software
A list of the data points available for recording follows. Changing the configura- tion to generic and selecting which data points to record may be done using the Carrier Transicold Data Retrieval Pro- gram. -
Page 50: Logging Interval (Dcf03)
9. Suction modulation valve percentage 10. Discrete outputs (See Note ) 11. Discrete inputs (See Note ) 12. Ambient sensor 13. Compressor suction sensor 14. Compressor discharge sensor 15. Return temperature sensor 16. Supply temperature sensor 17. Defrost temperature sensor 18. -
Page 51: Figure 4.11 Standard Configuration Report
Figure 4.11 Standard Configuration Report Raw Data Report for ABCU1234567 Aug 22, 2012 to Sept 05, 2012 System Configuration at the Time of Interrogation: Interrogated On Sept 05, 2012 Extracted by DataLine Rev 2.1 Controller Software: 5154 Controller Serial #: 04163552 Bill of Lading #: 1 Origin: Origin Date:... -
Page 52: Sampling Type (Dcf05 & Dcf06)
Table 4–3 Data CORDER Standard Configurations STANDARD CONFIG DESCRIPTION 2 sensors (dCF02=2) 2 thermistor inputs (supply & return) 2 thermistor inputs (supply & return) 5 sensors (dCF02=5) 3 USDA thermistor inputs 2 thermistor inputs (supply & return) 6 sensors (dCF02=6) 3 USDA thermistor inputs 1 humidity input 9 sensors (dCF02=9) -
Page 53: Pre-Trip Data Recording
In response to the demand to replace fumigation with this environmentally sound process, Carrier has integrated Cold Treatment capability into its microprocessor system. These units have the ability to maintain supply air tem- perature within one-quarter degree Celsius of setpoint and record minute changes in product temperature within the DataCORDER memory, thus meeting USDA criteria. -
Page 54: Usda Cold Treatment Procedure
The standard DataCORDER report displays the supply and return air temperatures. The cold treatment report displays USDA #1, #2, #3, and the supply and return air temperatures. Cold treatment recording is backed up by a battery so recording can continue if AC power is lost. b. -
Page 55: Iso Trip Header
d. “END” is displayed to indicate the end of the alarm list if any alarms are active. “CLEAr” is displayed if all the alarms in the list are inactive. e. If no alarms are active, the Alarm Queue may be cleared. The exception to this rule is the DataCORDER Alarm Queue Full alarm (AL91), which does not have to be inactive in order to clear the alarm list. -
Page 56: Controller Configuration Variables
CONTROLLER CONFIGURATION VARIABLES Table 4–4 Controller Configuration Variables CONFIGURATION TITLE DEFAULT OPTION NUMBER CnF01 Bypass Valve Enable 0-in, 1-out CnF02 Evaporator Fan Speed dS (Dual) 0-single, 1-dual CnF03 Control Sensors FOUr (quad) 0-duAL, 1-quad CnF04 Dehumidification Mode 0-on, 1-off CnF07 Unit Selection, 20FT/ 40FT/45FT 40ft 0-40ft, 1-20ft, 2- 45ft... - Page 57 Table 4–4 Controller Configuration Variables (Continued) CONFIGURATION TITLE DEFAULT OPTION NUMBER CnF40 Demand Defrost 0-Out 1-in CnF41 Lower DTT Setting 0-Out 1-in CnF42 Enable Auto Pretrip Start 0-Out 1-in CnF43 Pulldown Defrost 0-Out 1-in CnF44 Autoslide Enabled 0-Out 1-Lo, 2-Up CnF45 Low Humidity Enabled 0-Out...
-
Page 58: 4.10 Controller Function Codes
4.10 CONTROLLER FUNCTION CODES Table 4–5 Controller Function Codes CODE TITLE DESCRIPTION Note: If the function is not applicable, the display will read “-----” Display Only Functions - Cd01 through Cd26 are display only functions. Suction Modulation Displays the SMV percent open. The right display reads 100% when the valve is Cd01 Valve (SMV) fully open and 0% when the valve is fully closed. - Page 59 Table 4–5 Controller Function Codes (Continued) CODE TITLE DESCRIPTION This code checks the Controller/DataCORDER battery pack. While the test is run- ning, “btest” will flash on the right display, followed by the result. PASS will be dis- played for battery voltages greater than 7.0 volts. FAIL will be displayed for battery Cd19 Battery Check voltages between 4.5 and 7.0 volts, and ----- will be displayed for battery voltages...
- Page 60 Table 4–5 Controller Function Codes (Continued) CODE TITLE DESCRIPTION Configurable Functions Configurable Functions - Cd27 through Cd37 are user-selectable functions. The operator can change the value of these functions to meet the operational needs of the container. There are two modes for defrost initiation, either user-selected timed intervals or automatic control.
- Page 61 Table 4–5 Controller Function Codes (Continued) CODE TITLE DESCRIPTION The in-range tolerance will determine the band of temperatures around the set point which will be designated as in-range. For normal temperature control, control temperature is considered in range if it is within setpoint In-Range Tolerance.
- Page 62 Table 4–5 Controller Function Codes (Continued) CODE TITLE DESCRIPTION This is the desired evaporator fan speed for use during the bulb Dehumidification and Humidification mode option. (Replaced by Cd48 if CnF50, Enhanced Bulb Mode, is active.) This code is enabled only if in the dehumidification mode (Cd33) and bulb mode (Cd35) has been set to bulb.
- Page 63 Table 4–5 Controller Function Codes (Continued) CODE TITLE DESCRIPTION Configurable Functions - Cd43 is a user-selectable function. The operator can change the value of this function to meet the operational needs of the container. Cd43 is a user selectable mode of operation that allows opening and closing of a mechanical air vent door via a stepper motor.
- Page 64 Table 4–5 Controller Function Codes (Continued) CODE TITLE DESCRIPTION Initially Cd48 will display current dehumidification-mode; bUlb - bulb cargo mode, dEhUM - normal dehumidification, or OFF - off. This display is steady. Pressing ENTER key will take the interface down into a hierarchy of parameter se- lection menus (mode, setpoint, evaporator speed, DTT setting).
- Page 65 Table 4–5 Controller Function Codes (Continued) CODE TITLE DESCRIPTION Configurable Functions - Cd50 through Cd53 are user-selectable functions. The operator can change the value of these functions to meet the operational needs of the container. "OFF" = disabled. "On" = enabled. "SEtPt"...
- Page 66 Table 4–5 Controller Function Codes (Continued) CODE TITLE DESCRIPTION ASC-mode: Cd53 increments of (1 day)_(1hr), Display: default 0_0 done mm-dd this will be display is ASC has completed ASC value “On” “OFF” Display /Select: default OFF nSC value “1 - 6” (This is the value n for the subsequent entries). SP (n-1) value °C/°F on 0.1 degree increments Display/Select: default 10.0°C DAY (n-1) value “1-99”...
-
Page 67: Figure 4.12 Alarm Troubleshooting Sequence
Figure 4.12 Alarm Troubleshooting Sequence Start Troubleshooting Check Power Refer to Connect Power, Section 5.2 Unit does Supply self test? Check Power Refer to Connect Power, Section 5.2 Evaporator Supply fans start? Correct Install Latest Refer to Controller Software, Section 4.2 software Software version? -
Page 68: 4.11 Controller Alarm Indications
4.11 CONTROLLER ALARM INDICATIONS AL05 MANUAL DEFROST SWITCH FAILURE Cause: Controller has detected continuous Manual Defrost Switch activity for five minutes or more. Component Keypad Troubleshooting Power cycle the unit. Corrective Action Resetting the unit may correct problem, monitor the unit. If the alarm reappears after 5 minutes replace the keypad. - Page 69 AL12 EVAPORATOR FAN 2 IP Cause: Alarm 12 is triggered when configured for single evap operation and KB10 sensed high. Component Evaporator Fan 2 Troubleshooting The unit will suspend probe check diagnostic logic and disable the probe check portion of defrost cycle. Corrective Action AL12 is triggered off when KB10 sensed low.
- Page 70 AL21 CONTROL CIRCUIT FUSE (F1/F2) Cause: One of the 18 VAC controller fuses (F1/F2) is open. Refer to Cd08. Component System Sensors Troubleshooting Check system sensors for short to ground. Corrective Action Replace defective sensor(s). Component Wiring Troubleshooting Check wiring for short to ground. Corrective Action Repair as needed.
- Page 71 AL25 CONDENSER IP Cause: Condenser fan motor internal protector (IP) is open. Component Insufficient Air Flow Troubleshooting Shut down unit and check condenser fan for obstructions. Corrective Action Remove obstructions. Component Condenser Fan Motor Troubleshooting Shut down unit, disconnect power, & check Condenser Fan Motor IP at plug connection pins 4 &...
- Page 72 AL50 AIR VENT POSITION SENSOR (VPS) Cause: VPS Sensor out of range. Component Vent Position Sensor (VPS) Troubleshooting Make sure VPS is secure. Corrective Action Manually tighten panel. Component Vent Position Sensor (VPS) Troubleshooting If the alarm persists, replace the sensor or the assembly. Corrective Action Replace VPS.
- Page 73 AL54 PRIMARY SUPPLY SENSOR (STS) Cause: Invalid Supply Temperature Sensor (STS) reading. Component Supply Temperature Sensor (STS) Troubleshooting Perform Pre-trip P5: Corrective Action If P5 passes, no further action is required. If P5 fails, replace the defective sensor as determined by P5. Refer to Tem- perature Sensor Service, Section 7.21.
- Page 74 AL59 HEATER TERMINATION THERMOSTAT (HTT) Troubleshooting Check for 24 volts at test point TP10. If no voltage at TP10 after unit has reached set point, HTT is open. Corrective Action Replace HTT if defective. AL60 DEFROST TEMPERATURE SENSOR (DTS) Cause: Failure of the Defrost Temperature Sensor (DTS) to open. Component Defrost Temperature Sensor (DTS) Troubleshooting Test the DTS.
- Page 75 AL63 CURRENT LIMIT Component Current limit set too low Troubleshooting Check current limit setting Code Cd32. Corrective Action The current limit can be raised (maximum of 23 amps) using Cd32. AL64 DISCHARGE TEMPERATURE SENSOR (CPDS) Cause: Discharge Temperature sensor out of range. Component Discharge temperature sensor (CPDS) Troubleshooting Test the CPDS.
- Page 76 AL68 CPC PRESSURE SENSOR (PS3) Cause: Condenser Pressure Transducer (CPC) out of range. Component Condenser Pressure Transducer (CPC) Troubleshooting NA Corrective Action Unit will disable Condenser Pressure Control if configured. AL69 SUCTION TEMP SENSOR (CPSS) Cause: Suction Temperature Sensor (CPSS) out of range. Component Suction Temperature Sensor (CPSS) Troubleshooting Test the CPSS.
-
Page 77: Table 4-6 Controller Alarm Indications
Table 4–6 Controller Alarm Indications NOTE If the controller is configured for four probes without a DataCORDER, the DataCORDER alarms AL70 and AL71 will be processed as Controller alarms AL70 and AL71. Refer to Table 4–10. The controller performs self-check routines. If an internal failure occurs, an ERR alarm will appear on the display. -
Page 78: 4.12 Controller Pre-Trip Test Codes
4.12 CONTROLLER PRE-TRIP TEST CODES Table 4–7 Controller Pre-Trip Test Codes NOTE Auto or Auto1 menu includes the: P, P1, P2, P3, P4, P5, P6 and rSLts. Auto2 menu includes P, P1, P2, P3, P4, P5, P6, P7, P8, P9, P10 and rSLts.Auto3 menu includes P, P1, P2, P3, P4, P5, P6, P7, P8 and rSLts Container identifier code, Cd18 Software Revision Number, Cd20 Container Unit Model Number, &... - Page 79 Table 4–7 Controller Pre-Trip Test Codes P4 Tests - High Speed Evaporator Fans Current Draw: High speed evaporator fans are turned on, then off. Current draw must fall within specified range and measured current changes must exceed specified ratios. No other system components will change state during this test.
- Page 80 Table 4–7 Controller Pre-Trip Test Codes P5-4 - P5-9 Not Applicable This is a Pass/Fail/Skip test of the humidity sensor configuration. Test passes if the controller configuration has humidity sensor in. Humidity Sensor Test fails if the controller configuration has humidity sensor out and Vout is greater Controller P5-10 than 0.20 Volts for the humidity sensor.
- Page 81 Table 4–7 Controller Pre-Trip Test Codes P7 Tests - High Pressure Tests: Unit is run at full capacity without condenser fan running to make sure that the HPS opens and closes properly. With the unit running, the condenser fan is de-energized, and a 15 minute timer is started.
- Page 82 Table 4–7 Controller Pre-Trip Test Codes Control temperature must be at least 15.6C (60F). The set point is changed to 0C (32F), and a 180-minute timer is started. The left display will read P81, the right display will show the supply air temperature. The unit will then start to pull down the temperature to the 0C set point.
- Page 83 Table 4–7 Controller Pre-Trip Test Codes P10 Tests - Frozen Mode Tests: After completion of the Defrost Test, if the container temperature is below 7.2C, the setpoint is changed to 7.2C, and a 180 minute timer is started. The control will then be placed in the equivalent of normal heating.
-
Page 84: Table 4-8 Datacorder Function Code Assignments
Table 4–8 DataCORDER Function Code Assignments NOTE Inapplicable Functions Display “-----” To Access: Press ALT. MODE key then CODE SELECT key CODE TITLE DESCRIPTION Recorder Supply Current reading of the supply recorder sensor. Temperature Recorder Return Current reading of the return recorder sensor. Temperature dC3-5 USDA 1,2,3 Temperatures Current readings of the three USDA probes. -
Page 85: Table 4-9 Datacorder Pre-Trip Result Records
Table 4–9 DataCORDER Pre-Trip Result Records TEST TITLE DATA Heater On Pass/Fail/Skip Result, Change in current for Phase A, B and C Heater Off Pass/Fail/Skip Result, Change in currents for Phase A, B and C Pass/Fail/Skip Result, Water pressure switch (WPS) - Open/ Condenser Fan On Closed, Change in currents for Phase A, B and C Condenser Fan Off... -
Page 86: Table 4-10 Datacorder Alarm Indications
Table 4–10 DataCORDER Alarm Indications To Access: Press ALT. MODE key then ALARM LIST key CODE TITLE DESCRIPTION dAL70 Recorder Supply The supply recorder sensor reading is outside of the range of 50 to 70C Temperature Out of (58F to +158F) or, the probe check logic has determined there is a fault Range with this sensor. -
Page 87: Operation
SECTION 5 OPERATION INSPECTION (BEFORE LOADING) WARNING Beware of unannounced starting of the evaporator and condenser fans. The unit may cycle the fans and compressor unexpectedly as control requirements dictate. a. If container is empty, check inside for the following: 1. -
Page 88: Adjust Fresh Air Makeup Vent
1. Make sure that the start-stop switch (ST, on control panel) and circuit breakers CB-1 (in the control box and CB-2 (on the transformer) are in position “O” (OFF). Plug in and lock the 460VAC power plug at the recepta- cle on the transformer. -
Page 89: Vent Position Sensor
Figure 5.2 Make Up Air Flow Chart AIR FLOW AIR FLOW (CMH) 60HZ (CMH) 50HZ TBAR TBAR 1 1/2” 1 1/2” TBAR TBAR 2 5/8” 2 5/8” TBAR 3” TBAR 3” 90 100 90 100 PERCENT OPEN PERCENT OPEN 5.3.2 Vent Position Sensor The VPS allows the user to determine position of the fresh air vent via Cd45. -
Page 90: Eautofresh Pre-Trip Inspection
5.4.1 eAutoFresh Pre-Trip Inspection Pre-trip testing of the eAutoFresh system is performed during Pre-Trip test P0. Operation of the system may be observed during this test. Upon initiation of Pre-Trip P0, the current state will be saved and the vent will fully close. This will be followed by two sequences of opening to 100% and returning to the closed position. -
Page 91: Connect Remote Monitoring Receptacle
To set the unit in Delay mode, scroll until “DELAY“ appears in the left window, press the ENTER key to activate the submenu. The first selection is the amount of time (tIM) for the delay. Select the amount of time for the delay by using the UP and DOWN arrow keys. -
Page 92: Starting And Stopping Instructions
STARTING AND STOPPING INSTRUCTIONS WARNING Make sure that the unit circuit breaker(s) (CB-1 & CB-2) and the START-STOP switch (ST) are in the “O” (OFF) position before connecting to any electrical power source. 5.6.1 Starting the Unit a. With power properly applied, the fresh air vent in proper position, place the START-STOP switch to “I” (ON), Figure 3.5. - Page 93 Pre-Trip diagnostics provides automatic testing of the unit components using internal measurements and compari- son logic. The program will provide a “PASS” or “FAIL” display to indicate test results. The testing begins with access to a Pre-trip selection menu. The user may have the option of selecting one of three automatic tests.
-
Page 94: Probe Diagnostics
If configuration variable CnF42 is set to IN, a DataCORDER trip start will be entered. If CnF42 is set to OUT, the trip start will not be entered. However, dehumidification and bulb mode must be reactivated manually if required. c. TO RUN AN INDIVIDUAL TEST: Scroll through the selections by pressing the UP ARROW or DOWN ARROW keys to display an individual test code. -
Page 95: Emergency Bypass Operation (Option)
5.10 EMERGENCY BYPASS OPERATION (OPTION) Operation by the refrigeration controller may be overridden by use of the EMERGENCY BYPASS switch. The EMERGENCY BYPASS switch functions to bypass the controller in the event of controller failure. To place the unit in the emergency bypass mode, cut the wire tie installed at the switch mounting and place the EMERGENCY BYPASS switch in the BYPASS position. -
Page 97: Troubleshooting
SECTION 6 TROUBLESHOOTING UNIT WILL NOT START OR STARTS THEN STOPS Condition Possible Cause Remedy/Refer- ence Section External power source OFF Turn on Start-Stop switch OFF or defective Check No power to unit Circuit breaker tripped or OFF Check Autotransformer not connected 5.2.2 Circuit breaker OFF or defective Check... -
Page 98: Unit Runs But Has Insufficient Cooling
UNIT RUNS BUT HAS INSUFFICIENT COOLING Condition Possible Cause Remedy/Refer- ence Section Compressor Compressor valves defective Abnormal pressures Controller malfunction Evaporator fan or motor defective 7.14 Refrigeration System Suction modulation valve malfunction 7.17 Condenser Pressure Transducer defective Check Shortage of refrigerant 7.7.1 UNIT WILL NOT HEAT OR HAS INSUFFICIENT HEATING Condition... -
Page 99: Unit Will Not Defrost Properly
UNIT WILL NOT DEFROST PROPERLY Condition Possible Cause Remedy/Refer- ence Section Defrost timer malfunction (Cd27) Table 4–5 Loose terminal connections Tighten Will not initiate defrost Defective wiring Replace automatically Defrost temperature sensor defective or heat termination Replace thermostat open Heater contactor or coil defective Replace Manual defrost switch defective Replace... -
Page 100: Abnormal Noise Or Vibrations
ABNORMAL NOISE OR VIBRATIONS Condition Possible Cause Remedy/Refer- ence Section Loose mounting bolts Tighten Worn bearings Compressor Worn or broken valves Liquid slugging 7.16 Insufficient oil 7.8.6 Bent, loose or striking venturi Check Condenser or Evaporator Fan Worn motor bearings 7.11/7.14 Bent motor shaft 7.11/7.14... -
Page 101: 6.11 Eautofresh Not Operating
6.11 EAUTOFRESH NOT OPERATING Condition Possible Cause Remedy/Refer- ence Section Unit not Configured for eAutoFresh Operation No action Cd43 in Off mode 5.4.2 Wiring disconnected Check wiring Vent not opening Stepper drive defective 7.23.2 Stepper motor defective 7.23.2 Unit operating in frozen mode 5.4.3 Check CO sensor... -
Page 103: Service
SECTION 7 SERVICE NOTE Use a refrigerant recovery system whenever removing refrigerant. When working with refrigerants you must comply with all local government environmental laws. In the U.S.A., refer to EPA section 608. WARNING EXPLOSION HAZARD: Failure to follow this WARNING can result in death, serious personal injury and / or property damage. -
Page 104: Service Valves
A R-134a manifold gauge/hose set with self-sealing hoses (see Figure 7.2) is required for service of the models covered within this manual. The manifold gauge/hose set is available from Carrier Transicold. (Carrier Transicold P/N 07-00294-00, which includes items 1 through 6, Figure 7.2). -
Page 105: Pump The Unit Down
Figure 7.3 Service Valve 1. Line Connection 5. Compressor or Filter Drier Inlet Connection 2. Access Valve 6. Valve (Frontseated) 3. Stem Cap 7. Valve (Backseated) 4. Valve stem - - - - - Connection of the manifold gauge/hose set (see Figure 7.4) is dependent on the component being serviced. -
Page 106: Refrigerant Leak Checking
Essential tools to properly evacuate and dehydrate any system include a vacuum pump (8m-/hr = 5cfm vol- ume displacement) and an electronic vacuum gauge. The pump is available from Carrier Transicold, P/N 07-00176-11. The micron gauge is P/N 07-00414-00. -
Page 107: Complete System
Figure 7.4 Refrigeration System Service Connections 1. Discharge Service Valve 8. Center Hose 2. Compressor 9. High Side Hose 3. Suction Service Valve 10. Electronic Vacuum Gauge 4. Receiver or Water Cooled Condenser 11. Manifold Gauge Set 5. Liquid Service Valve 12. -
Page 108: Procedure - Partial System
7.6.4 Procedure - Partial System a. If the refrigerant charge has been removed from the compressor for service, evacuate only the compressor by connecting the evacuation set-up at the compressor service valves. Follow evacuation procedures of the preceding paragraph except leave compressor service valves frontseated until evacuation is completed. b. -
Page 109: Adding Refrigerant To System (Partial Charge)
7.7.3 Adding Refrigerant to System (Partial Charge) a. Examine the unit refrigerant system for any evidence of leaks. Repair as necessary (refer to Section 7.5). b. Maintain the conditions outlined in Section 7.7.1. c. Fully backseat the suction service valve and remove the service port cap. d. -
Page 110: Figure 7.5 Compressor
Figure 7.5 Compressor 1. Discharge Valve Flange 9. Oil Drain Plug 2. High Side Pressure Connection 10. Oil Charging Valve 3. Low Side Pressure Connection 11. Bearing Head 4. Suction Valve Flange 12. Oil Pump 5. Motor End Cover 13. Oil Fill Plug 6. -
Page 111: Compressor Disassembly
7.8.2 Compressor Disassembly WARNING Before disassembly of any external compressor component make sure to relieve possible internal pressure by loosening the bolts and tapping the component with a soft hammer to break the seal. WARNING Removing the compressor motor press-fit stator in the field is not recommended. The rotor and stator are a matched pair and should not be separated. -
Page 112: Figure 7.8 Oil Pump And Bearing Head
b. Loosen cylinder head cap screws. If the cylinder head is stuck, tap the center of the cylinder head with a wooden or lead mallet. Do not strike the side of the cylinder head. Be careful not to drop the head or damage the gasket sealing surface. -
Page 113: Figure 7.9 Low Profile Oil Pump
Figure 7.9 Low Profile Oil Pump 1. Cap screws 7. O-Ring 2. Cover 8. Oil Pump & Bearing 3. Reversing Assembly 9. Set Screw 4. Pinion 10. Relief Valve 5. Gear 11. Pin 6. Drive 12. Gasket - - - - - h. -
Page 114: Figure 7.11 Equalizing Tube And Lock Screw Assembly
Block the compressor crankshaft so that it cannot turn. Use a screwdriver to bend back the tabs on the lock- washer, and remove the equalizer tube and lock screw assembly (see Figure 7.11). The slingers at the end of the tube draw vapor from the crankcase. Remove the rotor using a jack bolt. Insert a brass plug into the rotor hole to prevent damage to the end of the crankshaft. -
Page 115: Compressor Reassembly
7.8.3 Compressor Reassembly Clean all compressor parts, using a suitable solvent with proper precautions. Coat all moving parts with the proper compressor oil before assembly. Refer to Table 7–5 for applicable compressor torque values. 7.8.4 Preparation a. Suction and Discharge Valves If the valve seats look damaged or worn, replace valve plate assembly. -
Page 116: Installing The Components
Compressor Oil Level CAUTION Use only Carrier Transicold approved Polyol Ester Oil (POE) - Castrol-Icematic SW20 compres- sor oil with R-134a. Buy in quantities of one quart or smaller. When using this hygroscopic oil, immediately reseal. Do not leave container of oil open or contamination will occur. -
Page 117: High Pressure Switch
Connect the suction connection of the gauge manifold to compressor suction service valve port and immerse the common connection of the gauge manifold in a container of refrigeration oil. Extreme care must be taken to ensure the manifold common connection remains immersed in oil at all times. Other- wise air and moisture will be drawn into compressor. -
Page 118: Replacing The High Pressure Switch
Figure 7.15 High Pressure Switch Testing 1. Cylinder Valve and Gauge 4. Pressure Gauge (0 to 36 kg/cm = 0 to 400 psig) 2. Pressure Regulator 5. Bleed-Off Valve 3. Nitrogen Cylinder 6. 1/4 Inch Connection - - - - - d. -
Page 119: Condenser Coil Removal
e. Wash down the center section, and then through the bottom of the coil, continue washing until the water runs clear. f. After the coil is clean, rinse the condenser fan to remove any dirt build up from the blades. g. -
Page 120: Figure 7.16 Condenser Fan Position
b. Secure the condenser coil into the unit using the retained hardware; refit the mylar and fender washers: 1. Refit the side support bracket bolts. 2. Refit the top support bracket bolts as well as the top grille extension support. 3. -
Page 121: 7.11 Condenser Fan And Fan Motor
v. Evacuate the entire unit, refer to Section 7.6. w. Recharge the unit with the charge shown on the unit serial plate, refer to Section 7.7. It is important for proper unit operation that the charge is weighed into the unit. 7.11 CONDENSER FAN AND FAN MOTOR The condenser fan rotates counter-clockwise (viewed from front of unit). -
Page 122: 7.13 Evaporator Coil & Heater Assembly
b. To replace filter drier: 1. Pump down the unit (refer to Section 7.4) and replace filter-drier. 2. Evacuate the low side in accordance with Section 7.6. 3. After unit is in operation, inspect for moisture in system and check charge. 7.13 EVAPORATOR COIL &... -
Page 123: Figure 7.17 Heater Arrangement
Figure 7.17 Heater Arrangement Bracket Heater Element Retainer 7.14 EVAPORATOR FAN AND MOTOR ASSEMBLY The evaporator fans circulate air throughout the container by pulling air in the top of the unit. The air is forced through the evaporator coil where it is either heated or cooled and then discharged out the bottom of the refrigera- tion unit into the container. -
Page 124: Figure 7.18 Evaporator Fan Assembly
Analyses by Carrier Transicold environmental specialists have identified the white powder as consisting predomi- nantly of aluminum oxide. Aluminum oxide is a coarse crystalline deposit most likely the result of surface corrosion on the aluminum parts within the container. -
Page 125: Figure 7.19 Thermostatic Expansion Valve Bulb
HD) for the unit. This will assist in helping to remove the corrosive fumigation chemicals and dislodging of the cor- rosive elements. This cleaner is available from the Carrier Transicold Performance Parts Group (PPG) and can be ordered through any of the PPG locations; Part Number NU4371-88. -
Page 126: Figure 7.20 Thermostatic Expansion Valve
7.16.1 Checking Superheat NOTE Proper superheat measurement should be completed at -18°C (0°F) container box temperature where possible. a. Open the upper right (EFM#1) access panel (see Figure 3.1) to expose the expansion valve. b. Attach a temperature sensor near the expansion valve bulb and insulate. Make sure the suction line is clean and that firm contact is made with the sensor. -
Page 127: Figure 7.21 Hermetic Thermostatic Expansion Valve Bulb Location
Figure 7.21 Hermetic Thermostatic Expansion Valve Bulb Location 1. Hermetic Expansion Valve Bulb 4. Velcro strip 2. Insulation 5. Bulb Clamp 3. Insulation Flap 6. Thumb Screw - - - - - b. Installing the TXV 1. Braze inlet connection to inlet line (see Figure 7.22). - Page 128 7.17.1 Pre-check Procedure a. Check unit for abnormal operation. b. Check charge. If refrigerant is low repair as required and again check operation. c. If sufficient capacity cannot be maintained or unit is tripping excessively on high pressure switch (HPS) in high ambients, check coils and clean if required.
-
Page 129: Table 7-1 Valve Override Control Displays
If near normal or normal reading occurs, proceed to step 7.18.2 to check out the controller. b. Checking with SMA-12 portable stepper drive tester The SMA-12 portable stepper drive tester (Carrier Transicold P/N 07-00375-00) is a battery-operated stepper drive that will open and close the SMV, allowing a more thorough check of the motor. - Page 130 7.18.2 Checking the Controller a. Turn unit OFF. b. With voltmeter set to read 20 volts DC, attach the positive lead to MC1 of the 4-pin connector and the nega- tive lead to the TP9. Turn ON unit and watch the volt meter. After a short delay, the reading should remain unchanged at 0 volts.
- Page 131 Obtain a grounding wrist strap (Carrier Transicold P/N 07-00304-00) and a static dissipation mat (Carrier Transicold P/N 07-00304-00). The wrist strap, when properly grounded, will dissipate any potential electro- static buildup on the body. The dissipation mat will provide a static-free work surface on which to place and/ or service the controller.
-
Page 132: Figure 7.24 Controller Section Of The Control Box
Figure 7.24 Controller Section of the Control Box 1. Controller Software Programming Port 3. Controller 2. Mounting Screw 4. Test Points - - - - - 7.20.3 Controller Programming Procedure To load new software into the module, the programming card (PCMIA) is inserted into the programming/ software port. - Page 133 11. Turn unit OFF via start-stop switch (ST). 12. Remove the programming card from the programming/ software port and return the unit to normal operation by placing the start-stop switch in the ON position. 13. Turn power on and wait 15 seconds. The status LED will flash quickly and there will be no display. The con- troller is loading the new software into memory.
- Page 134 Disconnect the battery wires from the “KA” plug positions 14, 13, 11. d. Using Driver Bit, Carrier Transicold part number 07-00418-00, remove the 4 screws securing the display module to the control box. Disconnect the ribbon cable and set the display module aside.
-
Page 135: Table 7-2 Sensor Temperature/Resistance Chart
7.21 TEMPERATURE SENSOR SERVICE Service procedures for service of the return recorder, return temperature, supply recorder, supply temperature, ambient, defrost temperature, compressor discharge and compressor suction temperature sensors are provided in the following sub paragraphs. 7.21.1 Sensor Checkout Procedure To verify that accuracy of a temperature sensor: a. -
Page 136: Figure 7.25 Sensor Types
Figure 7.25 Sensor Types Sensor 40 mm (1 1/2 inch) 6.3 mm (1/4 inch) Mounting Stud Type 40 mm (1-1/2 inches) 6.3 mm (1/4 inch) Sensor Bulb Type When installing a single wire color two wire sensor, cut one wire of existing two wire cable 40mm (1-1/2 inch) shorter than the other wire. -
Page 137: Figure 7.26 Sensor And Cable Splice
Figure 7.26 Sensor and Cable Splice REPLACEMENT 2 WIRE TO 2 WIRE OR 3 WIRE TO 3 WIRE Cable Sensor REPLACEMENT FOR DUAL, SINGLE SENSOR CONFIGURATION Cables BLACK Sensor Heat Shrink Tubing Large Heat Shrink Tubing RED/WHITE 7.21.3 Sensor Re-Installation a. -
Page 138: Figure 7.28 Return Sensor Positioning
Figure 7.28 Return Sensor Positioning Evaporator Grille Combination Sensor (Mount in Either Clamp) Seal Mounting Clamp 7.22 VENT POSITION SENSOR (VPS) The vent position sensor (VPS) determines the position of the fresh air vent in near real-time via the Cd45. The fresh air VPS alarm (AL50) will occur if the sensor reading is not stable for five minutes or if the sensor is out- side of its valid range (shorted or open). -
Page 139: Figure 7.29 Stepper Components
If near normal or normal reading occurs, proceed to Checking the Controller. b. To check with a SMA-12 portable stepper drive tester. The SMA-12 portable stepper drive tester (Carrier Transicold P/N 07-00375-00) is a battery operated stepper drive which will open and close the auto slide, which allows a more thorough check of the motor. -
Page 140: Figure 7.30 Jumper Assembly
Checking the outputs on A, B and E will verify that the controller is supplying power to the drive module. To be thor- ough, and if it is desired, the signals on pins C and D can be checked as follows: h. Install a jumper assembly (Carrier part number 07-00408-00) to connect the drive module and controller connectors as shown in Figure 7.30. -
Page 141: Figure 7.31 Motor Cup Replacement
g. Mount the upper & lower rails, slide plate and gasket plate using original hardware. Apply thread sealant and torque screws to 0.29 mkg (25 +/- 1 Inch pounds). h. Mount grille assembly using original hardware. Apply thread sealant and torque screws to 0.29 mkg (25 +/- 1 Inch pounds). -
Page 142: Figure 7.32 Communications Interface Installation
7.24 MAINTENANCE OF PAINTED SURFACES The refrigeration unit is protected by a special paint system against the corrosive atmosphere in which it normally operates. However, should the paint system be damaged, the base metal can corrode. In order to protect the refrig- eration unit from the highly corrosive sea atmosphere or if the protective paint system is scratched or damaged, clean area to bare metal using a wire brush, emery paper, or equivalent cleaning method. -
Page 143: Table 7-3 Recommended Bolt Torque Values (Dry, Non-Lubricated For 18-8 Stainless Steel)
Table 7–3 Recommended Bolt Torque Values (Dry, Non-Lubricated for 18-8 Stainless Steel) BOLT DIAMETER THREADS IN-LBS FT-LBS Free Spinning 5/16 14.9 27.1 7/16 58.3 9/16 77.3 1104 124.7 1488 168.1 Non Free Spinning (Locknuts etc.) 82.5 5/16 145.2 12.1 16.4 22.0 29.8 7/16... -
Page 144: Table 7-5 Compressor Torque Values
Table 7–5 Compressor Torque Values SIZE TORQUE RANGE THREADS DIAMETER USAGE PER INCH ft-lb (inches) 1/16 27 (pipe) 8 - 12 11 - 16 Pipe Plug - Crankshaft 20 (pipe) 6 - 10 8 - 13 Oil Return Check Valve - Crankcase 20 (pipe) 20 - 25 27 - 34... -
Page 145: Table 7-6 R-134A Temperature - Pressure Chart
Table 7–6 R-134a Temperature - Pressure Chart Note: Underline figures are inches of mercury vacuum TEMP °F TEMP °C PRESSURE (psig) TEMP °C TEMP °F PRESSURE (bar) -40.0 14.8 -40.0 -0.49 -38.9 13.9 -38.2 -0.46 -37.8 13.0 -36.4 -0.43 -36.7 12.0 -34.6 -0.40... - Page 146 TEMP °F TEMP °C PRESSURE (psig) TEMP °C TEMP °F PRESSURE (bar) 33.1 30.2 1.82 35.0 32.0 1.93 37.0 33.8 2.04 39.0 35.6 2.15 41.1 37.4 2.26 43.2 39.2 2.38 10.0 45.4 41.0 2.50 11.1 47.7 42.8 2.62 12.2 50.0 44.6 2.75 13.3...
- Page 147 TEMP °F TEMP °C PRESSURE (psig) TEMP °C TEMP °F PRESSURE (bar) 48.9 171.2 104.0 9.17 50.0 176.5 105.8 9.44 51.1 181.8 107.6 9.72 52.2 187.4 109.4 10.01 53.3 193.0 111.2 10.30 54.4 198.7 113.0 10.60 55.6 204.6 114.8 10.90 56.7 210.6 116.6...
-
Page 148: Figure 7.33 R-134A Compressor Pressure And Motor Current Curves Vs. Ambient Temperature, Sheet 1
Figure 7.33 R-134a Compressor Pressure and Motor Current Curves Vs. Ambient Temperature, Sheet 1 Note: Curves to be used as troubleshooting guide only for model series 69NT40 with fresh air makeup vent closed, unit powered on 460VAC/60Hz and SMV 100% open. (Bar) psig (22.0) -
Page 149: Figure 7.34 R-134A Compressor Pressure And Motor Current Curves Vs. Ambient Temperature, Sheet 2
Figure 7.34 R-134a Compressor Pressure and Motor Current Curves Vs. Ambient Temperature, Sheet 2 (Bar) psig (.97) (.83) (.69) (.55) 35 F (1.7 C) Box (.41) (.28) (.14) 0 F (-17.8 C) Box (-.14) (-.28) (-.41) ( F) (15.6) (21.1) (26.7) (32.2) (37.8) -
Page 151: Figure 8.1 Legend
SECTION 8 ELECTRICAL WIRING SCHEMATIC AND DIAGRAMS INTRODUCTION This section contains the Electrical Schematics and Wiring Diagrams. Figure 8.1 LEGEND LEGEND SYMBOL DESCRIPTION SYMBOL DESCRIPTION AMBS AMBIENT SENSOR (D 22) INTERROGATOR CONNECTOR (OPTION) (T 23) CONTROLLER (C 21) INTERNAL PROTECTOR (E 10, E 13, G 13, G 12) CIRCUIT BREAKER 460 VOLT (K 1) IN RANGE LIGHT (OPTION) (M 16) -
Page 152: Figure 8.2 Schematic Diagram
Figure 8.2 Schematic Diagram Based on Drawing 62 11730 T-363 8–2... -
Page 153: Figure 8.3 Unit Wiring Diagram (Sheet 1 Of 2)
Figure 8.3 Unit Wiring Diagram (Sheet 1 of 2) Based on Drawing 62 11730 8–3 T-363... -
Page 154: Figure 8.4 Unit Wiring Diagram (Sheet 2 Of 2)
Figure 8.4 Unit Wiring Diagram (Sheet 2 of 2) Based on Drawing 62 11730 T-363 8–4... - Page 155 Carrier Transicold Pte Ltd 251 Jalan Ahmad Ibrahim Singapore 629146 Declare, under our sole responsibility, that the ThinLINE Container Unit: Models: 69NT40-541-500 to -599 are in conformity with the provisions of the following European Directives: • Machinery Directive 2006/42/EC following Annex VIII •...
- Page 157 China RoHS per SJ/T 11364-2014 (Pb) (Hg) (Cd) (Cr (VI)) (PBB) (PBDE) SJ/T 11364 GB/T 26572 GB/T 26572 62-66122-01, Rev A...
- Page 159 INDEX Numerics Connection to 190/230VAC Power 5–1 Connection To 380/460 VAC Power 5–1 230 Volt Cable 2–2 Control Box 2–1 460 Volt Cable 2–2 Control Box Section 3–5 Controlled Atmosphere 2–3 Controller 2–1 4–3 7–28 Controller Alarms 4–15 Adding Refrigerant to System 7–6 Controller Configuration Variables 4–24 Adding Refrigerant to System - Partial 7–7 Controller Function Codes 4–26...
- Page 160 Failure Action 4–14 Perishable Economy 4–7 Feature Descriptions 2–1 Perishable Heating 4–6 Filter-Drier 7–19 Perishable Idle, Air Circulation 4–6 First Aid 1–1 Perishable Mode Cooling − Sequence of Operation 4–8 Fresh Air Makeup Vent 3–1 Perishable Mode Dehumidification 4–6 Frozen “Heat” Mode 4–10 Perishable Mode Heating −...
- Page 161 Start-Up Inspection 5–6 Stopping the Unit 5–6 Suction Modulation Valve 7–25 Temperature Control Microprocessor System 4–1 Temperature Readout 2–1 Temperature Sensor Service 7–33 Thermistor Format (dCF04) 4–18 Thermometer Port 2–3 Thermostatic Expansion Valve 7–23 TXV Replacement 7–24 Unit Introduction 2–1 Upper Air (Fresh Air Make Up) 2–3 Upper Fresh Air Makeup Vent 5–2 USDA 2–2...
- Page 164 Carrier Transicold Division, Carrier Corporation A part of UTC Building & Industrial Systems, a business unit of United P.O. Box 4805 Technologies Corporation. Stock symbol UTX. Syracuse, NY 13221 USA Original Instructions www.carrier.transicold.com...
Need help?
Do you have a question about the 69NT40-541-500 and is the answer not in the manual?
Questions and answers