Table of Contents
Advertisement
Advertisement
Table of Contents

Related Manuals for Carestream CS 8100 3D


Summary of Contents for Carestream CS 8100 3D
- Page 1 User Guide...
- Page 2 Notice Congratulations on your purchase of the Panoramic and 3D Modality for the CS 8100 3D Family. Thank you for your confidence in our products and we will do all in our power to ensure your complete satisfaction. The Panoramic and 3D Modality User guide for the CS 8100 3D Family provides information on complete or segmented tomographic digital panoramic X-ray image and three-dimensional digital X-ray image features.
-
Page 3: Table Of Contents
Launching the X-ray ..... . 38 X-ray Dose Emission Information ....39 Panoramic and 3D Modality User guide for CS 8100 3D Family (SM842) Ed07... - Page 4 Chapter 6 Acquiring a 3D Image of the Full, Upper and Lower Jaw Acquiring 3D for the Adult and Pediatric Patient ....41 Images Preparing the Unit and Setting the Acquisition Parameters .
- Page 5 Factory ....... . 91 Authorized Representatives ..... 91 Panoramic and 3D Modality User guide for CS 8100 3D Family (SM842) Ed07...
-
Page 7: Conventions In This Guide
CAUTION: Alerts you to a condition that might cause serious damage. Important: Alerts you to a condition that might cause problems. Note: Emphasizes important information. Tip: Provides extra information and hints. Panoramic and 3D Modality User guide for CS 8100 3D Family (SM842) Ed07... - Page 8 Chapter 1 Conventions in This Guide...
-
Page 9: Guide
3D full upper and lower jaw acquisition and to the cephalometric 26x24 FoV with licence upgrade (see relevant documentation). CS 8100 3D and CS 8100 3D Access can be upgraded to Cephalometric Modality, when the Scan Ceph module is provided as an upgrade kit. -
Page 10: Mobile Components
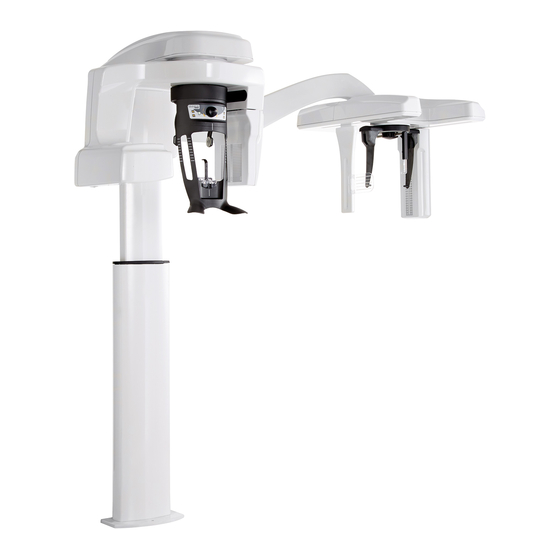
• Rotation and translation movement of the rotative arm The patient can enter by either the left side or the Important: right side of the unit. Figure 1 CS 8100 3D Unit Mobile Components Chapter 2 CS 8100 3D Overview... -
Page 11: General Functional Components
Digital sensor Unit rotative arm Unit head X-ray source assembly X-ray remote control Unit column Computer hosting the imaging and the acquisition software Head and chin rest Panoramic and 3D Modality User guide for CS 8100 3D Family (SM842) Ed07... -
Page 12: Head And Chin Rest
The following figure illustrates the functional components of the head and chin rest. Figure 3 Head and Chin Rest Functional Components Positioning Panel Bite block support Temple support adjustment knob Chin rest Temple support Hand grips Chapter 2 CS 8100 3D Overview... -
Page 13: Positioning Accessories
Bite block for edentulous patients (x2) Single use sheaths for bite block (500 pcs box) Single use sheaths for 3D bite block and Frankfort guide bite block (100 pcs box) Panoramic and 3D Modality User guide for CS 8100 3D Family (SM842) Ed07... - Page 14 (4) 3D child bite block (x2) (2) 3rd Molar offset 3D bite block (x2) (for use with 5x5 Ml and Mr FoV only) Temple support cone (for use with 3rd Molar offset 3D bite block only) Chapter 2 CS 8100 3D Overview...
-
Page 15: Positioning Panel
Ready Indicator LED: Green indicates that the unit is ready for acquisition. Temple support adjustment knob: Opens and closes the temple supports when you turn the knob. Panoramic and 3D Modality User guide for CS 8100 3D Family (SM842) Ed07... -
Page 16: X-Ray Remote Control Overview
Figure 5 X-ray Remote Control Exposure button: launches image acquisition. WARNING: X-rays can be harmful and dangerous if not used properly. The instructions and warnings contained in this guide must be followed carefully. 10 Chapter 2 CS 8100 3D Overview... -
Page 17: Computer System Requirements
Computer System Requirements For the minimum computer system requirements and configuration for the Imaging Software, see the CS 8100 3D Family Safety, Regulatory and Technical Specifications User Guide. WARNING: It is MANDATORY to check that the computer system configuration is compatible with the computer system requirements for the CS 8100 3D Family software. -
Page 18: Acquisition Interface
Acquisition Interface Panoramic Acquisition Interface Overview The Panoramic Acquisition interface provides you with panoramic imaging acquisition functions. Figure 6 Panoramic Acquisition Interface Information button: • Show versions: Identifies Software and Firmware versions. • Additional features: Contains information on additional activated options and date of expiration. -
Page 19: Program Pane
TMJ acquisition. The selected area of interest will highlight: Double click appears for a TMJ x4 acquisition. Bitewing acquisition: Click Select one or both area of interest: Panoramic and 3D Modality User guide for CS 8100 3D Family (SM842) Ed07... -
Page 20: Patient Pane
• kV and mA • jaw size Important: See the CS 8100 3D Family Safety, Regulatory and Technical Specifications User Guide for information on radiation protection and recommendations when you select a patient type, especially the pediatric patient. Patient type parameters:... -
Page 21: Parameter Pane
To save a parameter setting for a specific patient type, click and select Memorize Anatomy setting. Figure 9 Parameter Pane Exposure setting options: kilovolt milliampere Fine-tuning buttons: Click to fine-tune the kV and the mA. Panoramic and 3D Modality User guide for CS 8100 3D Family (SM842) Ed07... -
Page 22: 3D Acquisition Interface Overview
3D Acquisition Interface Overview The 3D Acquisition interface provides you with 3D imaging acquisition functions. Figure 10 3D Acquisition Interface Information button: • Show versions: Identifies Software and Firmware versions. • Additional features: Contains information on additional activated options and date of expiration. -
Page 23: 3D Program Pane
Full upper and lower jaw exam. Upper only jaw exam. Lower only jaw exam. Minimizes acquisition time to avoid patient movement. Fast scan: Low dose: Minimizes the acquisition X-ray dosage Panoramic and 3D Modality User guide for CS 8100 3D Family (SM842) Ed07... - Page 24 * Optional for CS 8100 3D Access and CS 8100SC 3D Note: Access. 18 Chapter 3 Imaging Software Overview...
- Page 25 To enable an acquisition at a higher resolution. Select if you want to have an image with more precision. Fast scan: Minimizes acquisition time to avoid patient movement. Low dose: Minimizes the acquisition X-ray dosage Panoramic and 3D Modality User guide for CS 8100 3D Family (SM842) Ed07...
-
Page 26: 3D Patient Pane
3D Patient Pane The Patient pane enables you to choose and select the different patient parameters. The selected parameters for a patient influences the image quality because the default kV and mA exposure settings are set for the selected patient mode. The selected parameters must be based on the age and morphology of the patient. -
Page 27: 3D Parameter Pane
To save a parameter setting for a specific patient type, click and select Memorize Anatomy setting. Figure 14 Parameter Pane Exposure setting options: kilovolt milliampere Fine-tuning buttons: Click to fine-tune the kV and the mA. Panoramic and 3D Modality User guide for CS 8100 3D Family (SM842) Ed07... - Page 28 22 Chapter 3 Imaging Software Overview...
-
Page 29: Switching On The Unit
Repeat Steps 2 to 4 for the following parameters: • 80 kV - 10 mA • 85 kV - 10 mA The unit is now ready to be used for acquisition. Panoramic and 3D Modality User guide for CS 8100 3D Family (SM842) Ed07... -
Page 30: Firewall Or Network Settings
Firewall or Network Settings You will not be able to access the Acquisition interface if you did not configured the firewall or network settings. To configured the firewall or network settings, follow these steps: On your desktop, double-click to open the CS Imaging Software. The Windows Security Alert dialog box displays. -
Page 31: Accessing The Acquisition Interface
The selected acquisition interface is displayed. To launch an acquisition, see the following image acquisition chapters: • Chapter 5—Acquiring Panoramic Images • Chapter 6—Acquiring 3D Images • Chapter 7—3D Object Acquisition Panoramic and 3D Modality User guide for CS 8100 3D Family (SM842) Ed07... - Page 32 26 Chapter 4 Getting Started...
-
Page 33: Acquiring Panoramic Images
Important: See the CS 8100 3D Family Safety, Regulatory and Technical Specifications User Guide (SM844) for information on radiation protection and recommendations when you select a patient type, especially the pediatric patient. Panoramic and 3D Modality User guide for CS 8100 3D Family (SM842) Ed07... - Page 34 2. Click the Program button to access the Program pane. Click on one area of interest that you want to examine: • Panoramic: for example, • TMJ x2: • Sinus: 3. (Optional) If the default parameter setting is not adapted to your patient type, click the Parameter button: •...
- Page 35 Make sure that you cover the bite block completely with the hygienic barrier. Important: You must cover the bite blocks with FDA-cleared protective sheaths that are available from distributors. Panoramic and 3D Modality User guide for CS 8100 3D Family (SM842) Ed07...
- Page 36 Note: To acquire a bitewing segmented panoramic image: • Click • Select one or both area of interest. • Position the patient in the Camper plane alignment (horizontal occlusion) as shown. For a more accurate Camper plane alignment, you can: •...
-
Page 37: Preparing And Positioning The Adult And Pediatric Patient
• Grip both the lower handles of the head and chin rest. • Relax and lower the shoulders for full motion of the unit rotative arm. Panoramic and 3D Modality User guide for CS 8100 3D Family (SM842) Ed07... - Page 38 By correctly positioning the patient, you can reduce the spinal Note: column shadow that is transferred to the acquired image 6. Ask the patient to place the chin on the chin rest support (A). Ask the patient to bite on the bite block: Important: You must cover the bite blocks with FDA-cleared protective sheaths that are available from distributors.
- Page 39 10. Ask the patient to: • Close the eyes (E). • Swallow. • Remain still. • Breathe through the nose. • Place the tongue on the palate. Panoramic and 3D Modality User guide for CS 8100 3D Family (SM842) Ed07...
-
Page 40: Launching The X-Ray
Launching the X-ray To launch the X-ray, follow these steps: 1. Leave the X-ray room and close the door. You must keep visual contact with the patient during acquisition. Important: To stop the acquisition, if there is any problem, release the exposure button of the remote control or press the red emergency stop button. -
Page 41: Acquiring A Tmj X4 Image For The Adult And Pediatric Patient
Technical Specifications User Guide (SM844) for information on radiation protection and recommendations when you select a patient type, especially the pediatric patient. 2. Click the Program button to access the Program pane. Panoramic and 3D Modality User guide for CS 8100 3D Family (SM842) Ed07... -
Page 42: Preparing And Positioning The Adult And Pediatric Patient
3. Click . The selected are of interest will highlight: 4. Double click appears for a TMJ x4 acquisition. 5. (Optional) If the default parameter setting is not adapted to your patient type, click the Parameter button: • Select the appropriate parameters. •... - Page 43 By correctly positioning the patient, you can reduce the spinal Note: column shadow that is transferred to the acquired image 6. Turn the adjustment knob to close the temple supports. Panoramic and 3D Modality User guide for CS 8100 3D Family (SM842) Ed07...
-
Page 44: Launching The X-Ray
Launching the X-ray To launch the X-ray, follow these steps: 1. Ask the patient to remain still, eyes closed, mouth closed, and tongue placed on the palate. Leave the X-ray room and close the door. You must keep visual contact with the patient during acquisition. -
Page 45: X-Ray Dose Emission Information
You can use this information to calculate the effective dose received by the patient for the image. The radiation emission dose is expressed in mGy.cm . This dose is measured at the primary collimator outlet. The dose is accurate to +/-30%. Panoramic and 3D Modality User guide for CS 8100 3D Family (SM842) Ed07... - Page 46 40 Chapter 5 Acquiring Panoramic Images...
-
Page 47: Acquiring A 3D Image Of The Full, Upper And Lower Jaw For The Adult And Pediatric Patient
2. Click the Program button to access the Program pane. 3. Click on one of the following programs and select the area of interest that you intend to examine: Panoramic and 3D Modality User guide for CS 8100 3D Family (SM842) Ed07... - Page 48 3D bite block Acquisition types * Optional for CS 8100 3D Access and CS 8100SC 3D Access. ** In Canada, the full upper and lower jaw acquisition is limited to 8x8 FOV instead of 8x9 FOV. 42 Chapter 6 Acquiring 3D Images...
- Page 49 (D). Make sure that you cover the bite block completely with the hygienic barrier (E) Important: You must cover the bite blocks with FDA-cleared protective sheaths that are available from distributors. Panoramic and 3D Modality User guide for CS 8100 3D Family (SM842) Ed07...
-
Page 50: Preparing And Positioning The Adult And Pediatric Patient
Preparing and Positioning the Adult and Pediatric Patient To prepare and position the patient, follow these steps: 1. Ask the patient to remove all metal objects. 2. Ask the patient to wear a lead apron. Ensure that the apron lays flat across the patient’s shoulders. 3. - Page 51 9. Ask the patient to: • Close the eyes (E). • Swallow. • Remain still. • Breathe through the nose. • Place the tongue on the palate. Panoramic and 3D Modality User guide for CS 8100 3D Family (SM842) Ed07...
-
Page 52: Launching The X-Ray
Launching the X-ray To launch the X-ray, follow these steps: 1. Leave the X-ray room and close the door. You must keep visual contact with the patient during acquisition. Important: To stop the acquisition, if there is any problem, release the exposure button of the remote control or press the red emergency stop button. -
Page 53: Acquiring A 3D Focused Teeth Image For The Adult And Pediatric Patient
Specifications User Guide (SM844) for information on radiation protection and recommendations when you select a patient type. 2. Click the Program button to access the Program pane. Panoramic and 3D Modality User guide for CS 8100 3D Family (SM842) Ed07... - Page 54 Memorize Anatomy setting if you want to save the new parameter settings as future default settings. Important: See the CS 8100 3D Family Safety, Regulatory and Technical Specifications User Guide (SM844) for information on radiation protection and recommendations when you select a patient type, especially the pediatric patient.
- Page 55 (D). Make sure that you cover the bite block completely with the hygienic barrier (E). Important: You must cover the bite blocks with FDA-cleared protective sheaths that are available from distributors. Panoramic and 3D Modality User guide for CS 8100 3D Family (SM842) Ed07...
-
Page 56: Preparing And Positioning The Adult And Pediatric Patient
Preparing and Positioning the Adult and Pediatric Patient To prepare and position the patient, follow these steps: 1. Ask the patient to remove all metal objects. 2. Ask the patient to wear a lead apron. Ensure that the apron lays flat across the patient’s shoulders. 3. - Page 57 Grip both the lower handles of the head and chin rest. • Relax and lower the shoulders for full motion of the unit rotative arm. 6. To position the patient: Panoramic and 3D Modality User guide for CS 8100 3D Family (SM842) Ed07...
- Page 58 • If you are using a standard 3D bite block or a 3rd molar bite block, ask the patient to bite on the 3D bite block as shown (A), (B). • If you are using a 3rd molar offset 3D bite block •...
- Page 59 9. Ask the patient to: • Close the eyes (E). • Swallow. • Remain still. • Breathe through the nose. • Place the tongue on the palate. Panoramic and 3D Modality User guide for CS 8100 3D Family (SM842) Ed07...
-
Page 60: Launching The X-Ray
Launching the X-ray To launch the X-ray, follow these steps: 1. Leave the X-ray room and close the door. You must keep visual contact with the patient during acquisition. Important: To stop the acquisition, if there is any problem, release the exposure button of the remote control or press the red emergency stop button. -
Page 61: 3D Object Acquisition Interface Overview
Ready Indicator LED: • Green indicates that the unit is ready to start an acquisition. • Black indicates that the unit is not ready to start an acquisition. Panoramic and 3D Modality User guide for CS 8100 3D Family (SM842) Ed07... -
Page 62: Cs Restore: Plaster Pane Overview
Exit button: Closes the Acquisition interface. X-ray Emission indicator: Yellow indicates that X-ray emission is in progress. Acquisition Options: Provides the various acquisition scenarios. Acquisition Export Mode: Provides one of the following acquisition export modes to view the acquired images: •... -
Page 63: Cs Restore: Impression Material Pane Overview
The CS Restore impression material program pane becomes active when you: • Click • Select Click for the triple tray impression mode. Click for the lower jaw mode. Click for the upper jaw mode. Panoramic and 3D Modality User guide for CS 8100 3D Family (SM842) Ed07... -
Page 64: Cs Model: Plaster Pane Overview
CS Model: Plaster Pane Overview The CS Model plaster program pane becomes active when you: • Click • Select Important: To have a true occlusion alignment of the full jaw mode, make sure that the rear ends of both the occlusion models are cut flat. -
Page 65: Cs Model: Impression Material Pane Overview
Click for the full jaw mode. Click for the full jaw mode with wax bite. Click for the lower jaw mode. Click for the upper jaw mode. Panoramic and 3D Modality User guide for CS 8100 3D Family (SM842) Ed07... -
Page 66: Appliance: Radiological Guide Pane Overview
Appliance: Radiological Guide Pane Overview radiological guide program pane becomes active when you click Click for the lower jaw mode. Click for the upper jaw mode. 60 Chapter 7 3D Object Acquisition... -
Page 67: 3D Object Acquisition Accessories
Item Description Quantity 3D dental impression holder support 3D dental impression holder Black foam: A - Center of the big circle B- Center of the small circle Panoramic and 3D Modality User guide for CS 8100 3D Family (SM842) Ed07... -
Page 68: Acquiring Images Of Cs Restore Impression Material Objects
Acquiring Images of CS Restore Impression Material Objects Before acquiring an image of the object, do the following: • On your desktop, double-click to open the CS Imaging Software. • Select the patient record. • Access the imaging window. • Click then to access the Acquisition Interface. -
Page 69: Launching The Acquisition For The Impression Material
X-ray emission is in progress. The acquired image appears in the Preview Screen. Panoramic and 3D Modality User guide for CS 8100 3D Family (SM842) Ed07... - Page 70 5. Once all items have been scanned, the Acquisition interface closes. Wait for the 3D object reconstruction. The completely reconstructed object will display in the image browser. 64 Chapter 7 3D Object Acquisition...
-
Page 71: Launching The Triple Tray Impression Acquisition
The acquired image appears in the Preview Screen. 5. Once the triple tray impression has been scanned, the Acquisition interface closes. Wait for the 3D object reconstruction. Panoramic and 3D Modality User guide for CS 8100 3D Family (SM842) Ed07... - Page 72 The completely reconstructed object will display in the image browser. 66 Chapter 7 3D Object Acquisition...
-
Page 73: Acquiring Images Of Cs Restore Plaster Objects
5. Click to access the plaster acquisition mode interface. 6. Select the acquisition option that you require. See “Launching the Plaster Acquisition” “Launching the Triple Tray Acquisition” Panoramic and 3D Modality User guide for CS 8100 3D Family (SM842) Ed07... -
Page 74: Launching The Plaster Acquisition
Important: The animated display screen will guide you on how to position the acquisition material that you have selected. WARNING: Make sure that you position the acquisition material correctly to obtain quality data. Launching the Plaster Acquisition To launch the acquisition, follow these steps: 1. -
Page 75: Launching The Triple Tray Acquisition
5. Once the triple tray impression has been scanned, the Acquisition interface closes. Wait for the 3D object reconstruction. The completely reconstructed object will display in the image browser. Panoramic and 3D Modality User guide for CS 8100 3D Family (SM842) Ed07... -
Page 76: Acquiring Images Of Cs Model Impression Material Objects
Acquiring Images of CS Model Impression Material Objects Before acquiring an image of the object, do the following: • On your desktop, double-click to open the CS Imaging Software. • Select the patient record. • Access the imaging window. • Click then to access the Acquisition Interface. -
Page 77: Launching The Impression Material Acquisition
5. Once all items have been scanned, the Acquisition interface closes. Wait for the 3D object reconstruction. The completely reconstructed object will display in the image browser. Panoramic and 3D Modality User guide for CS 8100 3D Family (SM842) Ed07... -
Page 78: Launching The Wax Bite Acquisition
Launching the Wax Bite Acquisition To launch the wax bite acquisition, follow these steps: Important: Make sure that the wax bite is dry. 1. Follow the on-screen animated instruction on how to correctly position the wax bite at the center of the black foam. -
Page 79: Acquiring Images Of Cs Model Plaster Objects
Important: The animated display screen will guide you on how to position the acquisition material that you have selected. WARNING: Make sure that you position the acquisition material correctly to obtain quality data. Panoramic and 3D Modality User guide for CS 8100 3D Family (SM842) Ed07... -
Page 80: Launching The Plaster Acquisition
Launching the Plaster Acquisition To launch the acquisition, follow these steps: 1. Select either one of the acquisition options. 2. Follow the on-screen animated instruction on how to correctly position either one of the following objects at the center of the black foam: •... -
Page 81: Launching The Wax Bite Acquisition
4. Once the wax bite has been scanned, the Acquisition interface closes. Wait for the 3D object reconstruction. The completely reconstructed object will display in the image browser. Panoramic and 3D Modality User guide for CS 8100 3D Family (SM842) Ed07... -
Page 82: Acquiring Images Of The Radiological Guide In The Patient Mouth
Child • Adult: Small, Medium, Large Important: See the CS 8100 3D Family Safety, Regulatory and Technical Specifications User Guide (SM844) for information on radiation protection and recommendations when you select a patient type. 2. Click the Program button to access the Program pane... - Page 83 Optional for CS 8100 3D Access and CS 8100SC 3D Access ** In Canada, the full upper and lower jaw acquisition is limited to 8x8 FOV instead of 8x9 FOV. Panoramic and 3D Modality User guide for CS 8100 3D Family (SM842) Ed07...
-
Page 84: Preparing And Positioning The Patient
Preparing and Positioning the Patient To prepare and position the patient, follow these steps: 1. Ask the patient to remove all metal objects. 2. Ask the patient to wear a lead apron. Ensure that the apron lays flat across the patient’s shoulders. 3. -
Page 85: Launching The X-Ray
Repeat steps 1 to 2. 4. Once the acquisition is completed, the Acquisition interface closes. Wait for the 3D object reconstruction. The reconstruction object will display in the image browser. Panoramic and 3D Modality User guide for CS 8100 3D Family (SM842) Ed07... -
Page 86: Acquiring Images Of The Radiological Guide Alone
Acquiring Images of the Radiological Guide Alone Before acquiring the images, do the following: • On your desktop, double-click to open the CS Imaging Software. • Select the patient record. • Access the imaging window. • Click then to access the 3D Acquisition interface. Preparing the Unit and Setting the Acquisition Options To prepare the unit for acquisition, follow these steps: 1. -
Page 87: Launching The X-Ray
The acquired image appears in the Preview Screen. 3. Once all items have been scanned, the Acquisition interface closes. Wait for the 3D object reconstruction. The reconstruction object will display in the image browser. Panoramic and 3D Modality User guide for CS 8100 3D Family (SM842) Ed07... -
Page 88: Acquiring Appliance-Based Images
Acquiring Appliance-Based Images Important: Make sure that you have a calibration phantom that is provided by Nobel Biocare before you perform a NobelGuide™ or NobelClinician™ calibration procedure. Before acquiring images of the NobelGuide™ or NobelClinician™ Biocare calibration phantom, do the following: •... - Page 89 Important: The animated display screen will guide you on how to position the acquisition mode that you have selected. WARNING: Make sure that you position the acquisition material correctly to obtain quality data. Panoramic and 3D Modality User guide for CS 8100 3D Family (SM842) Ed07...
-
Page 90: Launching The X-Ray To Acquire An Image Of The Nobelguide™ Or Nobelclinician™ Calibration Phantom
Launching the X-Ray To Acquire an Image of the NobelGuide™ or NobelClinician™ Calibration Phantom To launch the X-ray, follow these steps: 1. Leave the X-ray room and close the door. 2. On the Acquisition interface, when is green, press and hold the exposure button of the X-ray remote control until the end of acquisition. -
Page 91: Maintenance Actions
Controlling the Image Quality To maintain optimum image quality, the image quality must be controlled once a month. To control the image quality, follow these steps: Panoramic and 3D Modality User guide for CS 8100 3D Family (SM842) Ed07... - Page 92 1. On your desktop, double-click . The CS 8100 3D Technician Tools window is displayed. 2. In the left pane, double-click Image Quality Tool to launch the Image Quality Control software. 86 Chapter 8 Maintenance...
- Page 93 Click Next to access the Image Quality Control window. 4. Click test options to select the desired test or to modify default test parameters. Click Start a new test, and follow the on-screen instructions. Panoramic and 3D Modality User guide for CS 8100 3D Family (SM842) Ed07...
- Page 94 88 Chapter 8 Maintenance...
-
Page 95: Quick Troubleshooting
The acquisition has been Keep pressing and holding the exposure button. launched. Upgrade of the firmware The system is being upgraded. Wait for completion of the upgrade. Panoramic and 3D Modality User guide for CS 8100 3D Family (SM842) Ed07... - Page 96 90 Chapter 9 Troubleshooting...
-
Page 97: Manufacturer's Address
Representante no Brasil Carestream do Brasil Comércio e Serviços de Produtos MédicosLtda. Rua Pequetita, 215 cjs. 31 E 32 Edifício Atrium VII - Vila Olímpia São Paulo - Brazil CEP (Zip code): 04552-060 Panoramic and 3D Modality User guide for CS 8100 3D Family (SM842) Ed07... - Page 98 Carestream Dental A Division of Carestream Health, Inc. 150 Verona St. Rochester, NY 14608 For more information visit: www.carestreamdental.com ©Carestream Health, Inc., 2017. SM842 Ed07 2017-06...
Need help?
Do you have a question about the CS 8100 3D and is the answer not in the manual?
Questions and answers