
Related Manuals for National Vacuum Equipment 607 PRO Challenger Series


Summary of Contents for National Vacuum Equipment 607 PRO Challenger Series
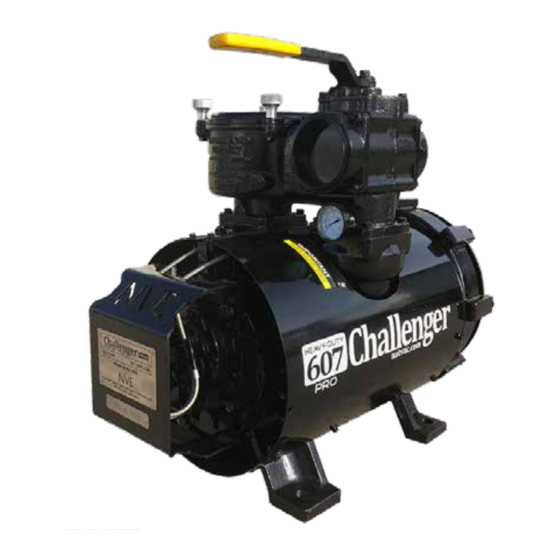
- Page 1 National Vacuum Equipment Owner’s Manual 607 PRO Challenger Series Rotary Vane Vacuum Pumps Visit our web site to download pump setup guides, MADE IN USA brochures and other technical information.
- Page 2 Serial Number: ____________________________ © 2017 National Vacuum Equipment, Inc. Revision: 6 (Released) August, 2017 No part of this manual may be reproduced without the written permission of National Vacuum Equipment, Inc. www.natvac.com | 800.253.5500 2 | 607 PRO Challenger Series...
- Page 3 IMPORTANT INFORMATION FOR INSTALLING PUMP 607 PRO CHALLENGER SERIES PUMPS AERIAL VIEW SHADED AREA MUST BE KEPT CLEAR FOR SERVICING THE FILTER Clockwise Counter Clockwise Rotation Rotation www.natvac.com | 800.253.5500 607 PRO Challenger Series | 3...
-
Page 4: Table Of Contents
System Troubleshooting �������������������������������������������������������� 19 Making a vacuum tester �������������������������������������������������������� 20 Parts Breakdown 607 PRO Challenger Series Vacuum Pumps Parts List �������� 21 607 PRO Fan Cooled Parts Diagram ������������������������������������ 24 607 PRO Liquid Cooled Parts Diagram ��������������������������������� 25 607 PRO SV Parts Diagram �������������������������������������������������� 26 607 PRO Fan Cooled Parts Oil Line Routing ������������������������... -
Page 5: Introduction
“one-stop shop” for manufacturers and distributors of vacuum equipment� Our History National Vacuum Equipment, Inc� was founded in 1980 by Bruce Luoma� The Company started as a retailer of vacuum pumps� Soon after it started, the Company secured the rights to exclusive distribution of the Battioni vacuum pumps in North America�... -
Page 6: Limited Warranty
Manufacturer’s liability under this or any other warranty, whether express or implied, is limited to repair of or, at the manufacturer’s option, replacement of parts which are shown to have been defective when shipped www.natvac.com | 800.253.5500 6 | 607 PRO Challenger Series... - Page 7 7� Manufacturer’s liability shall not be enforceable for any product until National Vacuum Equipment, Inc� has been paid in full for such product� 8� Except to the extent expressly stated herein, manufacturer’s liability for incidental and consequential damage is hereby excluded to the full extent permitted by law�...
- Page 8 • Product must be returned to NVE freight prepaid in the most economical way� • Credit will be issued for material found to be defective upon our inspection, based upon prices at the time of purchase� www.natvac.com | 800.253.5500 8 | 607 PRO Challenger Series...
-
Page 9: 607 Pro Challenger
Recommended RPM 1000-1250 ** Maximum of 1500 RPM is for intermittent operation only. *** Ambient temperature, altitude, and a variety of other factors will affect the values listed in this table www.natvac.com | 800.253.5500 607 PRO Challenger Series | 9... -
Page 10: System Requirements
3. Once obtained the desired pressure, screw down the lock nut “D” 4. Screw down the protection cap and fix it using the rings “E” situated on the valve body and on the cap www.natvac.com | 800.253.5500 10 | 607 PRO Challenger Series... -
Page 11: Drive System
The oil pump is easily adjustable 5-24 ounces per hour� The 607 should use between 10-12 oz/hr� • It is the responsibility of the installer to ensure proper vacuum and pressure settings and RPM� www.natvac.com | 800.253.5500 607 PRO Challenger Series | 11... - Page 12 4� Tighten adjustment screw (CW) until it seats on the cam� (Do not force! Springs Located Over Screws Seated If oil pump requires further adjustment, the Against Flat rule is 1/2 turn CCW = 1 oz / hr higher oil flow. of Cam www.natvac.com | 800.253.5500 12 | 607 PRO Challenger Series...
-
Page 13: Adjusting Factory Oil Settings
Adjusting Factory Oil Settings Continued NVE 4 Port Oil Pump Adjustment Rate Chart Tested at 1100 RPM Turns From Bottom Ounces Per Hour 7.25 6.75 4.75 4.25 www.natvac.com | 800.253.5500 607 PRO Challenger Series | 13... -
Page 14: Operating Instructions
• Do not operate your pump for extended periods of time at vacuum levels which cause the pump to exceed 375 degrees Fahrenheit exhaust gas temperature� Guards • Make certain all guards are in place prior to running your pump� Think Safety! www.natvac.com | 800.253.5500 14 | 607 PRO Challenger Series... -
Page 15: Recommended Lubricant
(must not exceed 375 degrees)� Using a non-turbine oil outside of the recommended range may cause problems such as overheating, lacquering and excessive wear, which can lead to severe damage to your equipment� www.natvac.com | 800.253.5500 607 PRO Challenger Series | 15... -
Page 16: Maintenance
8 vane slots, it’s time to replace the vanes� • Vanes should be replaced in sets and it is always a good idea to have an extra set of vanes on hand for emergencies� www.natvac.com | 800.253.5500 16 | 607 PRO Challenger Series... -
Page 17: Cold Weather Operation
• If the pump is frozen, thaw it out by moving the truck into a heated building� Avoid freezing problems • You can avoid freezing problems by putting a small amount of diesel fuel into the pump at the end of the day� www.natvac.com | 800.253.5500 607 PRO Challenger Series | 17... -
Page 18: Troubleshooting
• Leaving pump under vacuum between jobs • Product running through pump Problem: Pump doesn’t turn Causes: • Broken vane or bearing • Pump is frozen • Problem in the drive train www.natvac.com | 800.253.5500 18 | 607 PRO Challenger Series... -
Page 19: No Vacuum
• Check the vacuum level at the pump inlet� The 607 PRO Challenger in new condition will develop 27-28�5” hg� • If the pump checks out ok, check the vacuum level at the secondary, then the primary shutoff� Keep working your way back until you find the problem. www.natvac.com | 800.253.5500 607 PRO Challenger Series | 19... -
Page 20: Making A Vacuum Tester
4� Remove a flange from the four-way valve on your pump� 5� Start the pump and confirm the location you have chosen to test from is at vacuum� 6� Using the existing O-ring, fasten the testing flange to your pump� 7� Start your pump and read the vacuum level on the gauge� www.natvac.com | 800.253.5500 20 | 607 PRO Challenger Series... -
Page 21: Parts Breakdown
PARTS BREAKDOWN *Parts List Page 24 - 26 www.natvac.com | 800.253.5500 607 PRO Challenger Series | 21... - Page 22 *Parts List Page 26 - 28 www.natvac.com | 800.253.5500 22 | 607 PRO Challenger Series...
- Page 23 *Parts List Page 29 - 30 www.natvac.com | 800.253.5500 607 PRO Challenger Series | 23...
-
Page 24: 607 Pro Fan Cooled Parts Diagram
"E-COAT FAN GUARD, 367, 460, 466 & 506 120-074-001 FAN SHROUD 607 120-076 KEY 3/8" X 3/8" X 1" 120-077-004 SHROUD SUPPORT PLATE 607 120-079-008 GUARD NVE OIL PUMP 607/887 W/ SN TAG MOUNT www.natvac.com | 800.253.5500 24 | 607 PRO Challenger Series... -
Page 25: 607 Pro Liquid Cooled Parts Diagram
BHCS - 1/4-20 UNC X 0.50 FW - 1_4 USS FLAT WASHER - 1/4" USS FW - 3_8 FLAT WASHER, 3/8" HHCS - 1_2-13 UNC X 1.00 HHCS - 1/2-13 UNC X 1.00 www.natvac.com | 800.253.5500 607 PRO Challenger Series | 25... -
Page 26: 607 Pro Sv Parts Diagram
SEAL SLEEVE 607 120-018-367 SEAL 60 X 72 X 8 VITON SGL LIP 120-019-367 BEARING NJ308 C3 120-039-367 GASKET 607 INTAKE/EXHAUST 120-041-367 CHECK VALVE 3" 120-042-367 RETAINER RING CHECK VALVE 3" www.natvac.com | 800.253.5500 26 | 607 PRO Challenger Series... -
Page 27: 607 Pro Fan Cooled Parts Oil Line Routing
FILTER ELEMENT 607/866 120-320-003 HOUSING FILTER 607 W/ RELIEF BOSS 120-351-002 LIFT EYE SHOULDERED 3/8-16 PLATED 123-000-003 OIL PUMP 4 PORT BIDIRECTIONAL 123-013-001 WASHER 3/8" SEALING NBR 123-408-014 BANJO BOLT 1/8" BSPP www.natvac.com | 800.253.5500 607 PRO Challenger Series | 27... -
Page 28: 607 Pro Liquid Cooled Oil Line Routing
SHCS - 5/16-18 UNC X 1 SHCS - 5/16-18 UNC X 1 SHCS - 5_16-24 UNF X 1.25 SHCS - 5/16-24 UNF X 1.25 TAPSCR - 1_4-14 X 0.75 HEX HEAD SELF TAPPING SCREW 1/4-14 www.natvac.com | 800.253.5500 28 | 607 PRO Challenger Series... -
Page 29: Vane Replacement
NVE 607 PRO Challenger Series Liquid Cooled Parts List ITEM PART NUMBER DESCRIPTION 120-001-367-L HOUSING 607 LIQ 120-003-002 ENDPLATE, CW MACHINED 607 (CW PUMP) 120-003-003 ENDPLATE, CCW MACHINED 607 (CCW PUMP) 120-003-003 ENDPLATE, CCW MACHINED 607 (CW PUMP) 120-003-002 ENDPLATE, CW MACHINED 607 (CCW PUMP) - Page 30 NVE 607 PRO Challenger Series Liquid Cooled| Parts List Continuted ITEM PART NUMBER DESCRIPTION 120-103-367 VALVE, DRAIN 1/8" NPT 120-105-607 DECAL, IMPORTANT, MAX OPERATING TEMP 120-107-001 NAME PLATE SS, 607 120-220 SERIAL TAG SS 120-220-1 THERMOMETER, 50- 400 DEG, 2" FACE...
- Page 31 | 800.253.5500 607 PRO Challenger Series | 31...
- Page 32 | 800.253.5500 32 | 607 PRO Challenger Series...
- Page 33 National Vacuum Equipment Vane Replacement & Complete Rebuild Manual Challenger Series Rotary Vane Vacuum Pumps www.natvac.com | 800.253.5500 607 PRO Challenger Series | 33...
-
Page 34: Complete Rebuild
Uninstall the oil pump from the rear bearing cover� 3� Remove the four (4) bolts that hold the rear bearing cover to the rear endplate and note that the wave spring seal is to be re-used� www.natvac.com | 800.253.5500 34 | 607 PRO Challenger Series... - Page 35 “tin” to the rear endplate� 6� Remove the endplate bolts� 7� Remove the rear endplate with a gentle “wiggle”, clean gasket surface and remove the vanes for inspection� www.natvac.com | 800.253.5500 607 PRO Challenger Series | 35...
- Page 36 9� Install one (1) new endplate gasket between the housing and the endplate, do not use any gasket sealer. Carefully guide the endplate onto the rotor www.natvac.com | 800.253.5500 36 | 607 PRO Challenger Series...
- Page 37 Ensure the oil pump shaft is aligned with the drive key� Reconnect the oil lines to the oil pump, (Do not overtighten fittings) Reconnect the pump to its oil reservoir and start at a slow R�P�M� www.natvac.com | 800.253.5500 607 PRO Challenger Series | 37...
- Page 38 Uninstall the oil pump from the rear bearing cover� 3� Remove the four (4) bolts that hold the rear bearing cover to the rear endplate and remove the rear bearing cover� www.natvac.com | 800.253.5500 38 | 607 PRO Challenger Series...
- Page 39 (2) 3/8-16 threaded dowels� Once in place, remove the lower six (6) 3/8 hex bolts� 7� Remove the rear endplate, gasket, and vanes� www.natvac.com | 800.253.5500 607 PRO Challenger Series | 39...
- Page 40 Remove the rotor with care from the housing. Place a Tag on the housing side that corresponds to your drive end side! www.natvac.com | 800.253.5500 40 | 607 PRO Challenger Series...
- Page 41 Be sure to line up the cutting wheel with one of the vane slots so as not to damage the rotor or seal sleeve� www.natvac.com | 800.253.5500 607 PRO Challenger Series | 41...
- Page 42 The bearing race shoulder should be tight against the seal sleeve� Install on both sides of the rotor� Allow ample time for the inner races to cool and set onto the rotor before continuing� www.natvac.com | 800.253.5500 42 | 607 PRO Challenger Series...
- Page 43 Divert the pull wire into the housing cavity and out through the intake port� Repeat for both ends of the rotor� www.natvac.com | 800.253.5500 607 PRO Challenger Series | 43...
- Page 44 Install one (1) new endplate gasket between the housing and the endplate, do not use any gasket sealer� Carefully guide the endplate onto the rotor and threaded rod segments www.natvac.com | 800.253.5500 44 | 607 PRO Challenger Series...
- Page 45 25� Reinstall the bearing cover gaskets, lubricate along the rotor bearing cover interface, reinstall the bearing covers (with wave washers installed) www.natvac.com | 800.253.5500 607 PRO Challenger Series | 45...
- Page 46 Make sure there is sufficient clearance to mount the fan cover when positioning the fan assembly� Tighten the fan hub screw� Refer to step 9 for additional information� www.natvac.com | 800.253.5500 46 | 607 PRO Challenger Series...
- Page 47 30� Reconnect the pump to its oil reservoir and start at a slow R�P�M� The pump is now ready to go to work! www.natvac.com | 800.253.5500 607 PRO Challenger Series | 47...
- Page 48 National Vacuum Equipment, Inc. 2707 Aero Park Drive Traverse City, MI 4968 USA 231.941.0215 Phone 231.941.2354 Fax www.natvac.com | 800.253.5500 48 | 607 PRO Challenger Series...
Need help?
Do you have a question about the 607 PRO Challenger Series and is the answer not in the manual?
Questions and answers