National Vacuum Equipment 607 challenger series Replacement And Rebuild Manual
Rotary vane vacuum pumps
Hide thumbs
Also See for 607 challenger series:
- Owner's manual and operating instructions (32 pages)

Related Manuals for National Vacuum Equipment 607 challenger series


Summary of Contents for National Vacuum Equipment 607 challenger series
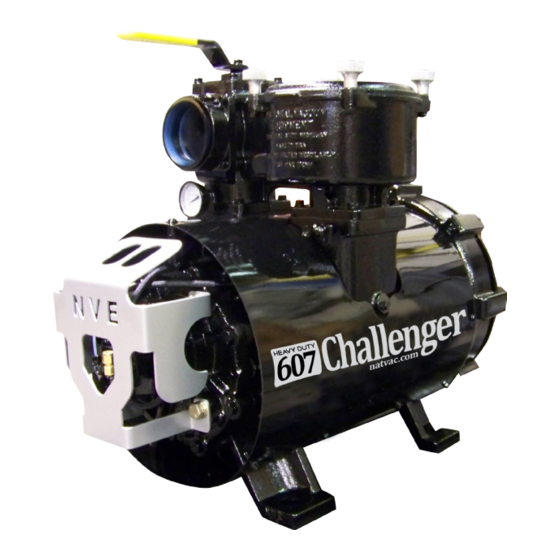
- Page 1 National Vacuum Equipment Vane Replacement & Complete Rebuild Manual 607 Challenger Series Rotary Vane Vacuum Pumps MADE IN USA...
- Page 2 © 2013 National Vacuum Equipment, Inc. Revision: 5 (Release) March 2013 No part of this manual may be reproduced without the written permission of National Vacuum Equipment, Inc. www.natvac.com | 800.253.5500 2 | 607 Challenger Series...
- Page 3 607 Challenger Owner’s Record Date of Purchase: _________________________ Purchased from: __________________________ Serial Number: ____________________________ www.natvac.com | 800.253.5500 607 Challenger Series | 3...
-
Page 4: Table Of Contents
Contents Introduction General Information ���������������������������������������������������������5 Pump Rebuilding Vane Replacement ����������������������������������������������������������6 Complete Rebuild ����������������������������������������������������������10 www.natvac.com | 800.253.5500 4 | 607 Challenger Series... -
Page 5: Introduction
“one-stop shop” for manufacturers and distributors of vacuum equip- ment� Our History National Vacuum Equipment, Inc� was founded in 1980 by Bruce Luoma� The Company started as a retailer of vacuum pumps� Soon after it started, the Company secured the rights to exclusive distribution of the Battioni vacuum pumps in North America�... -
Page 6: Pump Rebuilding
Uninstall the oil pump from the rear bearing cover� 3� Remove the four (4) bolts that hold the rear bearing cover to the rear endplate and note that the wave spring seal is to be re-used� www.natvac.com | 800.253.5500 6 | 607 Challenger Series... - Page 7 (2) 3/8-16 stud/ dowels (or de-headed bolts), and then remove the remaining bolts� 7� Remove the rear end- plate with a gentle “wiggle”, clean gasket surface and remove the vanes for inspection� www.natvac.com | 800.253.5500 607 Challenger Series | 7...
- Page 8 (Fan Cooled Only) Reinstall the eleven (11) self-tapping screws and holding the fan shroud to the rear end-plate� Fasten the upper fan shroud tin to the fan shroud support on the rear endplate� www.natvac.com | 800.253.5500 8 | 607 Challenger Series...
- Page 9 R�P�M� Run the pump for a few minutes to allow oil to fill the lines. Inspect the translucent oil lines to check that oil is flowing. www.natvac.com | 800.253.5500 607 Challenger Series | 9...
-
Page 10: Complete Rebuild
Uninstall the oil pump from the rear bearing cover� 3� Remove the four (4) bolts that hold the rear bearing cover to the rear endplate and remove the rear bearing cover� www.natvac.com | 800.253.5500 10 | 607 Challenger Series... - Page 11 (2) 3/8-16 threaded dowels� Once in place, remove the lower six (6) 3/8 hex bolts� 7� Remove the rear endplate, gasket, and vanes� www.natvac.com | 800.253.5500 607 Challenger Series | 11...
- Page 12 Remove the rotor with care from the housing. Place a Tag on the housing side that corre- sponds to your drive end side! www.natvac.com | 800.253.5500 12 | 607 Challenger Series...
- Page 13 Be sure to line up the cutting wheel with one of the vane slots so as not to dam- age the rotor or seal sleeve� www.natvac.com | 800.253.5500 607 Challenger Series | 13...
- Page 14 The bearing race shoulder should be tight against the seal sleeve� Install on both sides of the rotor� Allow ample time for the inner races to cool and set onto the rotor before continuing� www.natvac.com | 800.253.5500 14 | 607 Challenger Series...
- Page 15 Divert the pull wire into the housing cavity and out through the intake port� Repeat for both ends of the rotor� www.natvac.com | 800.253.5500 607 Challenger Series | 15...
- Page 16 Install one (1) new endplate gas- ket between the housing and the endplate, do not use any gasket sealer� Carefully guide the endplate onto the rotor and threaded rod seg- ments www.natvac.com | 800.253.5500 16 | 607 Challenger Series...
- Page 17 You may need to rotate your pump and pull the wires simultaneously to get them to release� 25� Reinstall the bearing cover gaskets, lubricate along the rotor bearing cover interface, reinstall the bearing covers (with wave washers installed) www.natvac.com | 800.253.5500 607 Challenger Series | 17...
- Page 18 Make sure there is sufficient clearance to mount the fan cover when positioning the fan assem- bly� Tighten the fan hub screw� Refer to step 9 for additional information� www.natvac.com | 800.253.5500 18 | 607 Challenger Series...
- Page 19 Run the pump for a few min- utes to allow oil to fill the lines. Inspect the translucent oil lines to check that oil is flowing. The pump is now ready to go to work! www.natvac.com | 800.253.5500 607 Challenger Series | 19...
- Page 20 National Vacuum Equipment, Inc. P.O. Box 685 Traverse City, MI 49685 USA 231.941.0215 Phone 231.941.2354 Fax www.natvac.com | 800.253.5500 20 | 607 Challenger Series...
Need help?
Do you have a question about the 607 challenger series and is the answer not in the manual?
Questions and answers