Sign In
Upload
Download
Table of Contents
Contents
Add to my manuals
Delete from my manuals
Share
URL of this page:
HTML Link:
Bookmark this page
Add
Manual will be automatically added to "My Manuals"
Print this page
×
Bookmark added
×
Added to my manuals
Manuals
Brands
KUHN Manuals
Spreader
MDS 55
Operator's manual
KUHN MDS 55 Operator's Manual
Fertiliser spreader
Hide thumbs
1
2
Table Of Contents
3
4
5
6
7
8
9
10
11
12
13
14
15
16
17
18
19
20
21
22
23
24
25
26
27
28
29
30
31
32
33
34
35
36
37
38
39
40
41
42
43
44
45
46
47
48
49
50
51
52
53
54
55
56
57
58
59
60
61
62
63
64
65
66
67
68
69
70
71
72
73
74
75
76
77
78
79
80
81
page
of
81
Go
/
81
Contents
Table of Contents
Bookmarks
Table of Contents
Introduction
Technical Improvements
Table of Contents
Contents
1 Explanation of Warning and Safety Decals
2 Correct Use
Operational Safety
No Liability Is Accepted for Crop, Property or Environmental Damage
Public Road Safety
Lighting (Applicable for Germany)
Towing of Trailers
3 Accident Prevention and Safety Issues
General Safety Recommendations for the Hydraulic System
Warning and Instruction Decals
4 Machine Specifications
Technical Specifications MDS 55 / 65 / 85 / 735 / 935
5 Preparation of the Fertiliser Spreader
Taking Delivery of the Fertiliser Spreader
Assembly of the MDS 55-935 Fertiliser Spreader
Assembly of the MDS 55 M / 65 M / 85 M / 735 M / 935 M Fertiliser Spreaders
Assembly of MDS 55 K / 55 R / 55 D / 65 K / 65 R / 65 D / 735 K / R / D / 935 K / R / D Fertiliser Spreaders
Assembling the Hopper to the Frame and Fitting the Agitator
Attaching to the Tractor
Fitting the Pto Shaft
Fitting and Connecting the Hydraulic Metering Slide Controls
Single Acting Hydraulic Metering Control for MDS 55 K / 65 K / 85 K / 735 K / 935 K
Double Acting Hydraulic Metering Control for MDS 55 D / 65 D / 85 D / 735 D / 935 D
Single Acting Hydraulic Metering Control with Double Acting Mechanism for MDS 55 R / 65 R / 85 R / 735 R / 935 R
Fitting the Single Acting Hydraulic Metering Slide Control FHK 4 and the Double Acting
Hydraulic Metering Slide Control FHD 4
Position Indicator Function: (Only for MDS K / R / D)
6 Adjusting the Fertiliser Spreader
General
Attachment Height
Attachment Height for Normal Spreading
Attachment Height for Late Top Dressing
Hopper Capacity / Hopper Extension Sets
Calculation of Maximum Loading
Hopper Level Scale
Setting Application Rates on the MDS 55 M / MDS 65 M / MDS 85 M / 735 M / MDS 935 M
Setting Application Rates on the MDS 55 K / R / D MDS 65 K / R / D MDS 85 K / R / D MDS 735 K / R / D and MDS 935 K / R / D
Adjustment of the Multi-Disc Spreading Discs
Principle of Operation
Adjusting the Disc Vanes
Adjustment According to the Spreading Charts
Setting Disc Vanes for Fertilisers Not Listed in the Spreading Charts
Dis
Ptk
One-Sided Spreading
One-Sided Spreading MDS 55 M / MDS 65 M / MDS 85 M / MDS 735 M / MDS 935 M
One-Sided Spreading MDS 55 K / MDS 65 K / MDS 85 K / MDS 735 K / MDS 935 K
One-Sided Spreading MDS 55 D / MDS 65 D / MDS 85 D / MDS 735 D / MDS 935 D
One-Sided Spreading MDS 55 R / MDS 65 R / MDS 85 R / MDS 735 R / MDS 935 R
Yield and Environmental Optimised Border Spreading
Yield Optimised Border Spreading in the First Tramline
Environmental and Yield Border Spreading Using the Border Spreading Limiter GSE 7 (Optional Equipment). Only One Metering Slide Is Opened
Environmental and Yield Border Spreading Using the Border Spreading Limiter TELIMAT T1 (Optional Equipment)
The Tellimat T1 Is Deployed from the First Tramline (1/2 Working Width from the Field Edge)
Spreading on Small Field Strips
7 Calibration Check / Purging Unused Fertiliser
Calculating the Mean Application Rate
The Calibration Check Process
Purging Unused Fertiliser
8 Service and Maintenance
Cleaning
Lubrication
Pto Shaft
Agitator Shaft and Agitator
Metering Slides, Positioning Levers, Links and Adjustment Scale Segment
Disc Hubs
Gearbox Oil Level
Wearing Parts
Checking and Setting the Metering Slide Balance and Specially Checking the Metering Slides for Seed and Slug Pellet Spreading
Checking the Metering Slide
Rebalancing the Metering Slides MDS 55 M / MDS 65 M / MDS 85 M / 735 M / 935 M
Rebalancing the Metering Slides MDS 55 K / R / D MDS 65 K / R / D MDS 85 K / R / DMDS 735 K / R / D and MDS 935 K / R / D
9 Changing the Spreading Discs
Spreading Disc Removal
Replacing the Extension Vanes
Replacing the Main Vane or the Complete Vane Assembly
Replacing the MDS Vane with an X-Vane
Refitting the Spreading Discs
10 Valuable Tips for Precision Spreading
Spreading Procedure on Headlands
11 Fault Diagnosis
Uneven Spread Pattern
Fault Diagnoses for Hydraulic Metering Controls
Disc Vane Wear
12 Optional Equipment
Hopper Extension Sets
Hopper Cover
Hopper Sieve
RFZ 7M (All MDS Fertiliser Spreaders Except MDS 55)
Double Acting Mechanism
Tele-Space
Practical Test Kit Ptk
Fertiliser Identification System Fis
Row Spreading Unit RV 2M for Hopyards and Orchards
Boundary Spreading Limiter GSE 7
Electronic Remote Control EF 24
Hydraulic Remote Control FHZ 10
Lighting Without Warning Shield BLO1 (for Rear Profile Lighting Security) for MDS 65 / MDS 85)
Lighting Without Warning Shield BLO2 (for Rear Profile Lighting Security)
Lighting with Warning Shield BLW 1 (for Rear Profile Lighting Security) for MDS 65 / MDS 85
Lighting with Warning Shield BLW 8 (for Rear Profile Lighting Security)
Telimat T1
Hydraulic Metering Slide Control FHK 4
Hydraulic Metering Slide Control FHD 4
Agitator for Grass Seeds RWK 7
Agitator RWK 15
13 Axle Load Calculation
14 Warranty Conditions
Advertisement
Quick Links
1
Technical Specifications Mds 55 / 65 / 85 / 735 / 935
2
Setting Application Rates on the Mds 55 M / Mds 65 M / Mds 85 M / 735 M / Mds 935 M
Download this manual
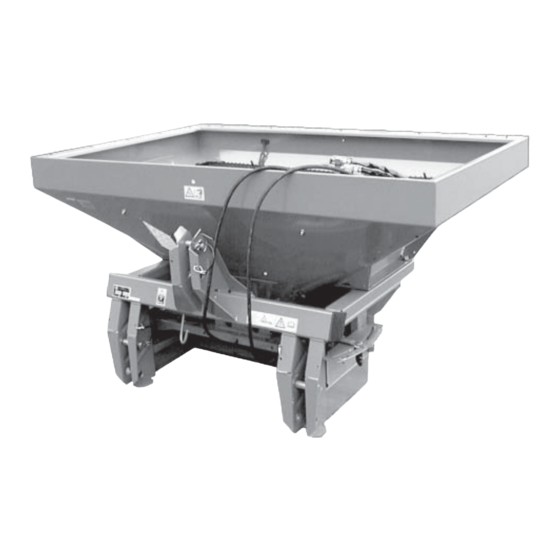
OPERATOR'S MANUAL
FERTILISER SPREADER
MDS 55 - 65 - 85 - 735 - 935
N° 95743 A.GB - 07.2003
Table of
Contents
Previous
Page
Next
Page
1
2
3
4
5
Advertisement
Table of Contents
Need help?
Do you have a question about the MDS 55 and is the answer not in the manual?
Ask a question
Questions and answers
Subscribe to Our Youtube Channel
Related Manuals for KUHN MDS 55
Spreader KUHN MDS 65 Operator's Manual
Fertiliser spreader (81 pages)
Spreader KUHN MDS 85 Operator's Manual
Fertiliser spreader (81 pages)
Spreader KUHN MDS 735 Operator's Manual
Fertiliser spreader (81 pages)
Spreader KUHN MDS 935 Operator's Manual
Fertiliser spreader (81 pages)
Spreader KUHN PROPUSH 2000 Series Operator's Manual
Box spreader trailer type (56 pages)
Spreader KUHN AXIS 20.1 Operator's Manual
Axis series fertilizer spreader (216 pages)
Spreader KUHN ALTOR 6070 Operator's Manual
Silo unloader - straw spreader (96 pages)
Spreader KUHN RAUCH AXIS QUANTRON-A Manual
(138 pages)
This manual is also suitable for:
Mds 65
Mds 85
Mds 735
Mds 935
Table of Contents
Save PDF
Print
Rename the bookmark
Delete bookmark?
Delete from my manuals?
Login
Sign In
OR
Sign in with Facebook
Sign in with Google
Upload manual
Upload from disk
Upload from URL


Need help?
Do you have a question about the MDS 55 and is the answer not in the manual?
Questions and answers