
Related Manuals for Olympia IC 1280Z

Summary of Contents for Olympia IC 1280Z
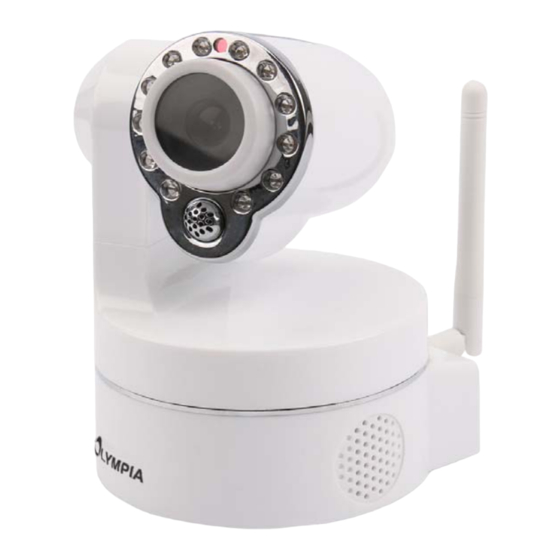
- Page 1 IP Camera with Receiver …easy to operate using the "ProHomeIPC" app from Olympia Operating Manual 01.2016 en...
-
Page 3: Table Of Contents
Contents Contents General Information ... . Connecting the Camera ..General Safety Information ..Inserting the MicroSD Memory Card Intended Use . - Page 4 Contents Connecting the Smartphone/Tablet PC Camera List ..... to the Camera ....Event .
- Page 5 Contents Operating the Camera (Android) View Event ......View Snapshot ..... . . Moving the Screen Section .
-
Page 6: General Information
General Information General Safety Information General Information CAUTION! • Risk of hearing damage! The audio signals are emit Please read and observe the following ted through a loudspeaker. Pay attention that a reason information and keep this operating able loudspeaker volume is set for transmitting the audio manual in a safe place for future reference! signals. -
Page 7: Intended Use
General Information Intended Use and Notations Used in this Manual Legal Notice Intended Use All the trademarks or brand names on the product and/or The IP camera (subsequently referred to as the camera) accessories or which appear in this operating manual is designed to perform video surveillance (CCTV) by day serve solely for descriptive purposes and do not imply that and night. -
Page 8: System Requirements
General Information System Requirements System Requirements This operating manual assumes users have a basic knowledge of connecting and configuring network-capable devices and smartphones or tablet PCs. In order to exploit the full functional scope of the camera using the ProHomeIPC App for iOS, you require: an internet-capable iPhone (from iPhone 4) operating system iOS 7 or later ProHomeIPC App... -
Page 9: General Overview
General Overview Checking the Package Contents General Overview Connections and Operating Elements Before connecting the camera, familiarise yourself with This section provides information on the package contents the connections and operating elements on it. as well as the connections and operating elements on the camera. - Page 10 General Overview Connections and Operating Elements I/O Alarm DC 5 V AUDIO...
-
Page 11: Receiver
General Overview Receiver Pivoting Range and Angle of Vision Receiver 80° 330° 67° Vertical pivoting range Power cable (connect to power connection port on the camera) Horizontal pivoting range Power adapter connection port Angle of vision I/O port Status LED (not illustrated here) -
Page 12: Connecting The Camera
Connecting the Camera Inserting the MicroSD, Positioning or Mounting the Camera Connecting the Camera Positioning the Camera When the camera is put into operation for the first time, it This section provides information on how to position and must be connected to a network connection port (LAN) on connect the camera and insert a microSD memory card in your router via the network cable. -
Page 13: Connecting The Camera - Network Cable
Connecting the Camera - If you want to integrate the camera in an alarm system Network Cable (Protect Series 6xxx / 9xxx alarm system from Olympia), Connect the network cable to the network connection you must use the receiver supplied. -
Page 14: Registering The Receiver On The Alarm System
Connecting the Camera Registering the Receiver on the Alarm System 3. Connect the power adapter to the power connection Registering the Receiver on the Alarm port (17) on the receiver and a properly installed, easily System accessible power socket. After connecting the power supply and network to the re The LEDs on the network connection port (10) signal ceiver, you must register the receiver on the base unit of when a connection exists to the network (lights up... - Page 15 Connecting the Camera Registering the Receiver on the Alarm System Alarm System Communication Camera + Sensor Network Cable Router...
-
Page 16: Use Without An Alarm System
Property damage is possible! If you want to use the camera without an alarm system (Protect Series 6xxx / 9xxx alarm system from Olympia), The camera could be damaged if you move the servomotors by hand or interrupt the movement. -
Page 17: Installing The Prohomeipc App
Connecting the Camera Installing the ProHomeIPC App Installing the ProHomeIPC App 1. Download the ProHomeIPC App from the App Store or Google Play Store. 2. Enable the ProHomeIPC App access to the camera of your smartphone or tablet PC and mobile internet. This simplifies connecting the camera and ProHomeIPC App and also enables remote access to the camera via the smartphone or tablet PC. -
Page 18: Connecting The Smartphone/Tablet Pc To The Camera
Connecting the Smartphone/Tablet PC to the Camera Installing the ProHomeIPC App Connecting the Smartphone/Tablet PC to the Camera The following conditions must be fulfilled in order that you can use the camera: You have downloaded and installed the ProHomeIPC App as described in Section Installing the ProHomeIPC App. - Page 19 Connecting the Smartphone/Tablet PC to the Camera Installing the ProHomeIPC App The ProHomeIPC App automatically searches for all the cameras available in the network. If your smart phone or tablet PC is connected in the same network as the camera, the camera is displayed (together with the user identifier and IP address).
-
Page 20: Using The Prohomeipc App
Using the ProHomeIPC App Installing the ProHomeIPC App Using the ProHomeIPC App Familiarise yourself with how to use the ProHomeIPC App. 2. Tap your finger on the display of your smartphone or tablet PC to open the submenus and activate functions. 1. - Page 21 Using the ProHomeIPC App Installing the ProHomeIPC App 3. Zoom the image displayed on the display of your smart 4. Rotate your smartphone or tablet PC on its side. The phone or tablet PC by touching the image section with image then appears as a full screen display.
-
Page 22: Operating The Camera (Ios)
Operating the Camera (iOS) Moving the Screen Section Operating the Camera (iOS) Moving the Screen Section Opening the Menu Bar Swipe your finger in any direction over the display of your Touch your finger on the smartphone or tablet PC screen. smartphone or tablet PC to move the screen section dis... -
Page 23: Buttons In The Menu Bar
Operating the Camera (iOS) Buttons in the Menu Bar Buttons in the Menu Bar Snapshots You can take a photo of the live image currently scanned This section provides information on which functions are by the camera. assigned to the buttons in the menu bar while a live pic ture is on screen and what you can do with them. -
Page 24: Saving Image Sections As A Preset
Operating the Camera (iOS) Buttons in the Menu Bar Saving Image Sections as a Preset Quick Access You can divide the image of the entire area under surveil 1. Touch one of the memory locations. The camera moves lance (limited by the angle of detection and pivoting range to the image section which you have defined in the of the camera) into different sections and save the sec... -
Page 25: Activating Night Vision
Operating the Camera (iOS) Buttons in the Menu Bar Activating Night Vision If the brightness of the area being monitored falls below a certain level, the infrared LEDs are automatically activat The infrared LEDs serve as a residual light amplifier so 3. -
Page 26: Flipping The Image Section Vertically
Operating the Camera (iOS) Buttons in the Menu Bar Flipping the Image Section Vertically You can flip (mirror) the live image displayed about the vertical axis. This can be useful, for example, when the camera is mounted in such a way that parts of the area under surveillance lie in a blind spot. -
Page 27: Start Screen Of The Prohomeipc App
Operating the Camera (iOS) Start Screen of the ProHomeIPC App Start Screen of the ProHomeIPC App When a camera has been found and integrated success fully in the ProHomeIPC App, the corresponding camera is displayed on the start screen. In this view, all the cameras integrated in the ProHomeIPC App are displayed. -
Page 28: Context Menu Of The Prohomeipc App
Operating the Camera (iOS) Context Menu of the ProHomeIPC App Context Menu of the ProHomeIPC App At the bottom edge of the start screen are four buttons which can be used to complete different settings and func tions. 1. Touch the respective button to define the setting or start the function. -
Page 29: Camera List
Operating the Camera (iOS) Camera List Camera List The Device button is normally active when you open the ProHomeIPC App. 1. Touch Device. A list of all the cameras integrated in your smartphone app is displayed. If you touch one of the cameras listed, the live image from the camera selected is displayed. -
Page 30: Event
Operating the Camera (iOS) Event Event This button provides the option of displaying a list of events which the camera has recorded and saved in chronological order. 1. Touch Event. 2. Touch the camera whose recorded events you want to display. -
Page 31: Add Device
Operating the Camera (iOS) Add Device Add Device You have the possibility of connecting new cameras using the ProHomeIPC App. All the cameras connected are displayed on the start screen. 1. Touch Add Device. -
Page 32: Qr Code
Operating the Camera (iOS) Add Device QR Code 1. Touch QRCode. 2. Scan the QR code on the rear of the camera using your smartphone or tablet PC. 3. Enter the camera's password (security code). When the default settings are set, the password is admin. -
Page 33: Automatic Search
Operating the Camera (iOS) Add Device Automatic Search The ProHomeIPC App automatically searches for all the cameras available in the network. If your smartphone or tablet PC is connected in the same network as the cam era, the camera is displayed (together with the unambigu ous user identifier UID and IP address). -
Page 34: Connecting Manually
Operating the Camera (iOS) Add Device Connecting Manually You can also connect your camera to the ProHomeIPC App manually. 1. Touch Add. 2. Enter the user identifier (UID), the name and password of the camera. The user identifier (UID), the name and password are on the rear of the camera. -
Page 35: Version Information
Operating the Camera (iOS) Version Information Version Information It is possible to display detailed information on the version of the ProHomeIPC App. The version information changes with each time the app is updated. 1. Touch Info. Information on the current version of the ProHomeIPC App is displayed. -
Page 36: Deleting Cameras
Operating the Camera (iOS) Deleting Cameras Deleting Cameras It is possible to delete individual cameras from the ProHomeIPC App. All personally defined settings are stored locally on the camera. If you want to reconnect cameras deleted from the list to your smartphone or tablet PC at a later point in time, the personally defined settings are reactivated. -
Page 37: Settings
Operating the Camera (iOS) Settings Settings You can use this menu to define the various functions and settings which control the way in which the camera be haves. The Settings menu is arranged into four areas. Camera Advanced Settings Alarm Settings Time Settings 1. -
Page 38: Camera
Operating the Camera (iOS) Settings Camera This area contains information on the unambiguous user identifier (UID), the camera password and the name of the camera. Example Camera... - Page 39 Operating the Camera (iOS) Settings User Identifier (UID) The camera's user identifier serves to identify the camera within the network. The user identifier cannot be changed. Example Camera...
- Page 40 Operating the Camera (iOS) Settings Name The name of the camera is displayed on the ProHomeIPC App start screen. This enables you to simplify the assignment of your cam era if you have connected several cameras to the ProHomeIPC App. You should assign each camera an unambiguous name, such as Living room, Office or Workshop.
- Page 41 Operating the Camera (iOS) Settings Password The camera password protects the camera from access by unauthorised third-parties. For reasons of security, we recommend that you change the camera password when you put it into operation for the first time (refer to Security Set tings).
-
Page 42: Advanced Settings
Operating the Camera (iOS) Advanced Settings Advanced Settings This option provides various functions and settings with which you can define how the camera behaves according to your own individual requirements. Security code settings WiFi settings SD card settings Device information. Example Camera 1. - Page 43 Operating the Camera (iOS) Advanced Settings Security Code This menu option enables you to change the camera security code. The camera's security code protects the camera from access by unauthorised third-parties. For reasons of security, we recommend that you change the camera security code when you put it into operation for the first time.
- Page 44 Operating the Camera (iOS) Advanced Settings WiFi This menu enables you to see the wireless network with which your camera is connected. Proceed as follows to connect your camera to another wireless network: 1. Touch WiFi in the Advanced Setting menu. 2.
- Page 45 Operating the Camera (iOS) Advanced Settings Formatting the MicroSD Memory Card This menu enables you to format the microSD memory card inserted in the camera. 1. Touch SDCard in the Advanced Setting menu. 2. Touch SDCard and confirm the prompt. The microSD memory card is formatted.
- Page 46 Operating the Camera (iOS) Advanced Settings About Device This menu option provides information on the model name of the camera, the firmware version on the camera, the camera manufacturer, the total memory space on the microSD memory card inserted and the memory space available on the microSD memory card inserted.
-
Page 47: Alarm Setting
Operating the Camera (iOS) Alarm Setting Alarm Setting This area contains various information and settings op tions with which to define the alarm settings of the camera and ProHomeIPC App. 1. Touch Alarm Setting. Your smartphone or tablet PC can be set-up to issue an acoustic signal on detecting a movement. - Page 48 Operating the Camera (iOS) Alarm Setting Guard This option is used to define whether surveillance by the camera should be activated or not. If the Guard function is active, a recording is made of the area under surveil lance and you are alerted to an alarm situation by an acoustic alarm and Push Notification on your smartphone or tablet PC according to the settings defined.
- Page 49 Operating the Camera (iOS) Alarm Setting Motion Detection You can select from the list how sensitive the camera should react to movements in the area under surveillance. In the case of a static image, we recommend the High setting, in the case of possibly recurrent movements (such as a pet or clouds), we recommend the Medium or Low setting in order to prevent false alarms.
- Page 50 Operating the Camera (iOS) Alarm Setting Receiver Use this menu to define whether the receiver is active or not. A condition for successful activation of this function is that you have connected the receiver to your camera and registered it on your alarm system. When this function is activated, the camera receives a signal from the alarm system in the event of an alarm.
- Page 51 Operating the Camera (iOS) Alarm Setting Alarm Preset You can use this menu to define which of the image sec tions saved should be permanently monitored (refer to Saving Image Sections as Presets). A condition for the successful use of this function is that the Guard function is active.
- Page 52 Operating the Camera (iOS) Alarm Setting Alarm SD Record You can use this option to define whether the recordings made should be saved on the microSD memory card in serted or not. A condition for the successful use of this function is that you have inserted a microSD memory card in your camera (refer to Inserting a MicroSD Memory Card).
- Page 53 Operating the Camera (iOS) Alarm Setting Push Notification You can use this option to define whether the ProHomeIPC App push notifications should be sent to your smartphone or tablet PC when the camera detects movements or the alarm system connected is triggered. A condition for the successful activation of this func...
-
Page 54: Time Setting
Operating the Camera (iOS) Time Setting Time Setting This option provides information and functions regarding the time settings used. 1. Touch Time Setting in the Settings menu. 2. Define the respective settings as required. When the default settings are active, the time and date stamp displayed in the live image reflect the time and date provided by the network connected. -
Page 55: Operating The Camera (Android)
Operating the Camera (Android) Moving the Screen Section Operating the Camera (Android) Moving the Screen Section Opening the Menu Bar Swipe your finger in any direction over the display of your Touch your finger on the smartphone or tablet PC screen. smartphones or tablet PC to move the screen section dis... -
Page 56: Buttons In The Menu Bar
Operating the Camera (Android) Buttons in the Menu Bar Buttons in the Menu Bar Snapshots You can take a photo of the live image currently scanned This section provides information on which functions are by the camera. assigned to the buttons in the menu bar while a live pic ture is on screen and what you can do with them. -
Page 57: Saving Image Sections As A Preset
Operating the Camera (Android) Buttons in the Menu Bar Saving Image Sections as a Preset Quick Access You can divide the image of the entire area under surveil 1. Touch one of the memory locations. The camera moves lance (limited by the angle of detection and pivoting range to the image section which you have defined in the of the camera) into different sections and save the sec... -
Page 58: Activating Night Vision
Operating the Camera (Android) Buttons in the Menu Bar Activating Night Vision If the brightness of the area being monitored falls below a certain level, the infrared LEDs are automatically activat The infrared LEDs serve as a residual light amplifier so 3. -
Page 59: Flipping The Image Section Vertically
Operating the Camera (Android) Buttons in the Menu Bar Flipping the Image Section Vertically You can flip (mirror) the live image displayed about the vertical axis. This can be useful, for example, when the camera is mounted in such a way that parts of the area under surveillance lie in a blind spot. -
Page 60: Start Screen Of The Prohomeipc App
Operating the Camera (Android) Start Screen of the ProHomeIPC App Start Screen of the ProHomeIPC App When a camera has been found and integrated success fully in the ProHomeIPC App, the corresponding camera is displayed on the start screen. All the cameras integrated in the ProHomeIPC App are displayed in this view. -
Page 61: Add Device
Operating the Camera (Android) Add Device Add Device You have the possibility of connecting more cameras by means of different processes using the ProHomeIPC App. All the cameras connected are displayed on the start screen. 1. Touch Click here to add camera. -
Page 62: Qr Code
Operating the Camera (Android) Add Device QR Code 1. Touch Scan. 2. Scan the QR code on the rear of the camera using your smartphone or tablet PC. 3. Enter the camera's security code. When the default settings are set, the security code is admin. -
Page 63: Automatic Search
Operating the Camera (Android) Add Device Automatic Search The ProHomeIPC App automatically searches for all the cameras available in the network. If your smartphone or tablet PC is connected within the same network as the camera, the camera is displayed (together with the unam biguous user identifier UID and IP address). -
Page 64: Connecting Manually
Operating the Camera (Android) Add Device Connecting Manually You can also connect your camera to the ProHomeIPC App manually. 1. Enter the user identifier (UID), the name and security code of the camera. 2. Save the settings by touching OK. The user identifier (UID), name and security code are on the rear of the camera. -
Page 65: Context Menu Of The Camera
Operating the Camera (Android) Context Menu of the Camera Context Menu of the Camera You can use the start screen to open the context menu of the connected cameras individually. 1. Touch the arrow to the right of the camera name to open the respective context menu. -
Page 66: Reconnect
Operating the Camera (Android) Context Menu of the Camera Reconnect Should problems arise involving the connection, you can connect the camera again using the ProHomeIPC App. 1. Touch Reconnect. The camera selected is reconnect You cannot access the camera while this process is in progress. -
Page 67: View Event
Operating the Camera (Android) Context Menu of the Camera View Event This option enables you to display a list of events which the camera has recorded and saved in chronological or der. 1. Touch View Event. If no event has (yet) been recorded, the No result found message appears. -
Page 68: View Snapshot
Operating the Camera (Android) Context Menu of the Camera View Snapshot This option enables you to display a list of snapshots which you have taken with the camera and saved in chronological order. 1. Touch View Snapshot. A list of the snapshots available is displayed. -
Page 69: Remove Camera
Operating the Camera (Android) Context Menu of the Camera Remove Camera It is possible to delete individual cameras from the ProHomeIPC App. All personally defined settings are stored locally on the camera. If you want to reconnect cameras deleted from the list to your smartphone or tablet PC at a later point in time, the personally defined settings are reactivated. -
Page 70: Edit Camera
Operating the Camera (Android) Context Menu of the Camera Edit Camera Various functions and settings can be defined in the Edit Camera menu to adapt the way the camera responds to your own specific needs. 1. Touch Edit Camera. -
Page 71: Edit Camera
Operating the Camera (Android) Edit Camera Edit Camera You can use this menu to define the various functions and settings which control the way in which the camera be haves. The Edit Camera menu is arranged into four areas. Device Setting Advanced Setting Alarm Setting Time Setting... -
Page 72: Device Setting
Operating the Camera (Android) Edit Camera Device Setting This menu option provides information on the unambiguous user identifier (UID), the camera's security code and the name of the camera. TEST WLAN... - Page 73 Operating the Camera (Android) Edit Camera User Identifier (UID) The camera's user identifier serves to identify the camera unambiguously within the network. The user identifier cannot be changed. TEST WLAN...
- Page 74 Operating the Camera (Android) Edit Camera Security Code The camera security code protects the camera from ac cess by unauthorised third-parties. For reasons of security, we recommend that you change the camera's security code when you put the camera into operation for the first time (refer to Se curity Settings).
- Page 75 Operating the Camera (Android) Edit Camera Name The name of the camera is displayed on the ProHomeIPC App start screen. This enables you to simplify the assignment of your cam era if you have connected several cameras to the ProHomeIPC App. You should assign each camera an unambiguous name, such as Living room, Office or Workshop.
-
Page 76: Advanced Setting
Operating the Camera (Android) Advanced Setting Advanced Setting This option provides information and functions regarding the following settings. This option provides various functions and settings with which you can define how the camera behaves according to your own individual requirements. Security Setting Wi-Fi Setting Device Information... - Page 77 Operating the Camera (Android) Advanced Setting Security Setting This menu option enables you to change the camera's security code. The camera security code protects the camera from ac cess by unauthorised third-parties. For reasons of security, we recommend that you change the camera security code when you put the camera into operation for the first time.
- Page 78 Operating the Camera (Android) Advanced Setting Wi-Fi Setting This menu enables you to see the wireless network with which your camera is connected. Proceed as follows to connect your camera to another wireless network: 1. Touch Manage Wi-Fi networks in the Wi-Fi Setting menu.
- Page 79 Operating the Camera (Android) Advanced Setting Device Information This menu option provides information on the model name of the camera, the firmware version on the camera, the camera manufacturer, the total memory space on the microSD memory card TEST WLAN inserted and Connected the memory space available on the microSD memory...
-
Page 80: Alarm Setting
Operating the Camera (Android) Alarm Setting Alarm Setting This area contains various information and options with which to define the alarm settings of the camera and ProHomeIPC App. Your smartphone or tablet PC can be setup to issue an acoustic signal on detecting a movement. To do this, activate the Push Notification option in the ProHomeIPC App in the settings options provided by the smartphone or tablet PC. - Page 81 Operating the Camera (Android) Alarm Setting Alarm Switch This option is used to define whether surveillance by the camera should be activated or not. If the surveillance function is active, a recording is made of the area under surveillance and you are alerted to an alarm situation by an acoustic alarm and Push Notification on your smart...
- Page 82 Operating the Camera (Android) Alarm Setting Motion Detection You can select from the list how sensitive the camera should react to movements in the area under surveillance. In the case of a static image, we recommend the High, setting, in the case of possibly recurrent movements (such as a pet or clouds), we recommend the Medium or Low setting in order to prevent false alarms.
- Page 83 Operating the Camera (Android) Alarm Setting Receiver (Protect) Use this menu to define whether the receiver is active or not. A condition for successful activation of this function is that you have connected the receiver to your camera and registered it on your alarm system. When this function is activated, the camera receives a signal from the alarm system in the event of an alarm.
- Page 84 Operating the Camera (Android) Alarm Setting Preset Alarm Linkage You can use this menu to define which of the image sec tions saved should be permanently monitored (refer to Saving Image Sections as Presets)). A condition for the successful use of this function is that the Alarm Switch function is active.
- Page 85 Operating the Camera (Android) Alarm Setting Alarm Recording on the SD Card You can use this option to define whether the recordings made should be saved on the microSD memory card in serted or not. A condition for the successful use of this function is that you have inserted a microSD memory card in your camera (refer to Inserting a MicroSD Memory Card).
- Page 86 Operating the Camera (Android) Alarm Setting Push Notification You can use this option to define whether the ProHomeIPC App push notifications should be sent to your smartphone or tablet PC when the camera detects movements or the alarm system connected is triggered. A condition for the successful activation of this func...
-
Page 87: Time Setting
Operating the Camera (Android) Time Setting Time Setting This option provides information and functions regarding the time settings used. 1. Touch Advanced in the Time Setting menu. 2. Define the respective settings as required. 3. Save the settings by touching OK. When the default settings are active, the time and date stamp displayed in the live image reflect the time and date provided by the network connected. -
Page 88: Other Important Information
CE Mark Regular Maintenance and Service Olympia Business Systems Vertriebs GmbH, Zum Clean the housing surfaces with a soft, fluff-free cloth. Kraftwerk 1, 45527 Hattingen hereby declares that Never use any chemicals or scouring agents. -
Page 89: Technical Data
Other Important Information Technical Data Technical Data Property Value Lens / Sensor 1/5" CMOS sensor (colour), 4 - 9 mm, optional: 3 x optical zoom (Model 720Z only ) Resolution Max. 1280 x 720 pixel Image compression H.264 Light sensitivity 0.5 lux Image refresh rate 15 fps (VGA), 30 fps (QVGA) -
Page 90: Troubleshooting
Other Important Information Troubleshooting Troubleshooting My camera is not detected within the My camera is detected within the network network. but I cannot access it. Check all the cable connections. Observe the informa Check the entries for the user identifier and password tion in Section Connecting the Camera. - Page 91 Other Important Information Troubleshooting My camera does not respond at all or only very slowly to input via the ProHomeIPC App. The connection to your network is slow or faulty. Check all the cable connections. Use a shorter network cable, if necessary.
- Page 92 Olympia Business Systems Vertriebs GmbH Zum Kraftwerk 1 45527 Hattingen...
Need help?
Do you have a question about the IC 1280Z and is the answer not in the manual?
Questions and answers