
Related Manuals for Genesis GES40


Summary of Contents for Genesis GES40
- Page 1 GES40 Electric Metal Shear Cisalle à métaux électrique Cizalla eléctrica para metales Operator’s Manual Manuel d’utilisation Manual del Operario TOLL FREE 888-552-8665 HELP LINE: www.genesispowertools.com WEBSITE:...
-
Page 2: Specifications
SPECIFICATIONS • Model: ------------------------------------ GES40 • Rated Power: ----------------------------- 120V~/ 60Hz, 4.0 Amp • Load Speed: ------------------------------ 0-2500 SPM • Cutting Capacity (Aluminum): ------------ 14 Gauge • Cutting Capacity (Steel): ------------------ 18 Gauge • Cutting Capacity (Stainless Steel): -------- 20 Gauge • Minimum Cutting Radius: ----------------- 5-1/2” • Net Weight: -------------------------------- 4.9 lbs Includes: Hex key WArNING: o reduce the risk of injury, user must read and understand this operator’s manual before operating this tool. Save this Manual for future reference. -
Page 3: Work Area Safety
WORK AREA SAFETY Keep your work area clean and well lit. • Cluttered benches and dark areas invite accidents. Do not operate power tools in explosive atmospheres, • such as in the presence of flammable liquids, gases, or dust. Power tools create sparks which may ignite the dust or fumes. Keep bystanders, children, and visitors away while operating a power tool. • Distractions can cause you to lose control. ELECTRICAL SAFETY Power tool plugs must match the outlet •... -
Page 4: Extension Cords
. When cleaning a tool, be careful not to disassemble any portion of the tool since internal wires may be misplaced or pinched. SAVE THESE INSTRUCTIONS EXTENSION COrDS Grounded tools require a three wire extension cord Double insulated tools can use either a two or three wire extension cord. As the distance from the power supply outlet increases, you must use a heavier gauge extension cord. using extension cords with inadequately sized wire causes a serious drop in voltage, resulting in loss of power and possible tool damage. Refer to the table shown below to determine the required minimum wire size. The smaller the gauge number of the wire, the greater the capacity of the cord. for example: a 14-gauge cord can carry a higher current than a 16-gauge cord. When using more than one extension cord to make up the total length, be sure each cord contains at least the minimum wire size required. If you are using one extension cord for more than one tool, add the nameplate amperes and use the sum to determine the required minimum wire size. Guidelines for Using Extension Cords • If you are using an extension cord outdoors, be sure it is marked with the suffix “W-A” (“W” in Canada) to indicate that it is acceptable for outdoor use. Electric Metal Shear Operator’s Manual GES40... - Page 5 • Be sure your extension cord is properly wired and in good electrical condition. Always replace a damaged extension cord or have it repaired by a qualified person before using it. • Protect your extension cords from sharp objects, excessive heat, and damp or wet areas. Recommended Minimum Wire Gauge for Extension Cords (120 Volt) Nameplate Extension Cord Length Amperes 25 Feet 50 Feet 75 Feet 100 Feet 150 Feet 200 Feet (At Full Load) 0–2.0 2.1–3.4 3.5–5.0 5.1–7.0 7.1–12.0 12.1–16.0 16.1–20.0 SPECIFIC SAFETY rULES FOr ELECTrIC METAL SHEAr WArNING:...
-
Page 6: Symbol Description
Wear safety glasses, ear protection and respiratory protection Hours Do not dispose with house- hold waste Revolutions per minute Do not touch the running blade Strokes per minute Do not use in wet conditions Oscillations per minute Do not put battery in fire .../min Per minute Battery cannot exceed 59° C This symbol designates that this product is listed with U.S. and Canada requirements by ETL testing Laboratories, Inc. Electric Metal Shear Operator’s Manual GES40... -
Page 7: Contents In Package
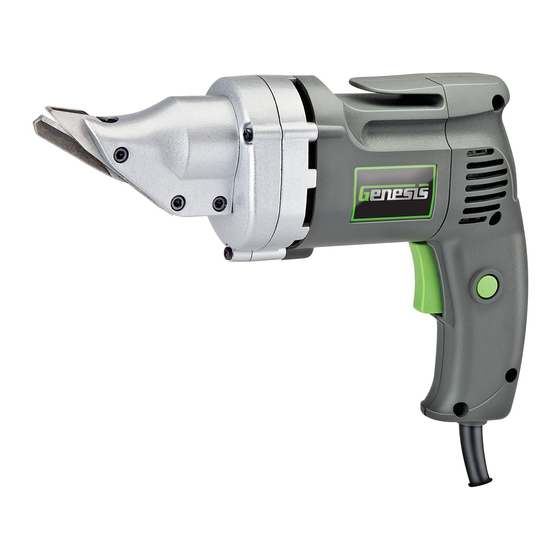
KNOWING YOUr ELECTrIC METAL SHEAr FIG 1 Trigger Switch Cutter Head Lock-On Button Hex Key Belt Clip UNPACKING AND CONTENTS IMPOrTANT: Due to modern mass production techniques, it is unlikely the tool is faulty or that a part is missing. If you find anything wrong, do not operate the tool until the parts have been replaced or the fault has been rectified. -
Page 8: Assembly And Adjustments
Never hold the workpiece with one hand and the tool with the other hand. Severe injury may result. NOTE: Always check that the power supply corresponds to the voltage on the ratings plate. 1. Secure the workpiece. 2. Place the side blades on the top side of edge of the workpiece where you want to begin your cut. 3. Pull the Trigger Switch and guide into work. > Hold the shear so the main body is parallel to the workpiece. > Blades are to be at right angles to work. > Engage the blades at the edge of the material. > Apply sufficient forward pressure to begin cutting. Too much tilt in operation will stop the cut. > Do not force. 4. To make an inside cut (a cut completely inside the perimeter of the workpiece), drill a starting hole and follow instruction above. 5. If there is a problem in the operation, stop using the tool. Check for the following: proper lubrication, thickness of the material and sharpness of the blades. Electric Metal Shear Operator’s Manual GES40... -
Page 9: Maintenance
MAINTENANCE BLADE MAINTENANCE (FIG 3) 1. unplug the tool. 2. using the Hex key remove the three head bolts (5). 3. The left blade (3), right blade (2), center blade (1) and the two bushings (6) will be loose. 4. Clean, replace or sharpen the blades as required. Replace blades as a set only. 5. Reassemble by repositioning the blades and bushings as illustrated. Replace the head bolts and tighten them securely. 6. Test the product to be sure that it is working properly. FIG 3 7. The left and right blades are slotted. They can be adjusted to change the direction of the curl of waste material. To adjust: a) unplug the tool. b) Loosen all three head bolts. c) Make a slight adjustment to the left or right blade as needed. -
Page 10: Two Year Warranty
THIS PRODUCT IS NOT WARRANTED IF USED FOR INDUSTRIAL OR COMMERCIAL PURPOSES. ACCESSORIES INCLUDED IN THIS KIT ARE NOT COVERED BY THE 2 YEAR WARRANTY. TOLL-FrEE HELP LINE 888-552-8665 for questions about this or any other GENESIS™ Product, please call Toll-free: www.genesispowertools.com Or visit our web site: ©Richpower Industries, Inc. All Rights reserved Richpower Industries, Inc. 736 Hampton Road Williamston, SC 29697 Printed in China, on recycled paper Electric Metal Shear Operator’s Manual GES40... - Page 11 Richpower Industries, Inc. 736 Hampton Road Williamston, SC USA www.genesispowertools.com 2016.03, V01...
Need help?
Do you have a question about the GES40 and is the answer not in the manual?
Questions and answers