Table of Contents
Advertisement
Advertisement
Table of Contents

Subscribe to Our Youtube Channel
Related Manuals for Kalmar Ottawa T2


Summary of Contents for Kalmar Ottawa T2
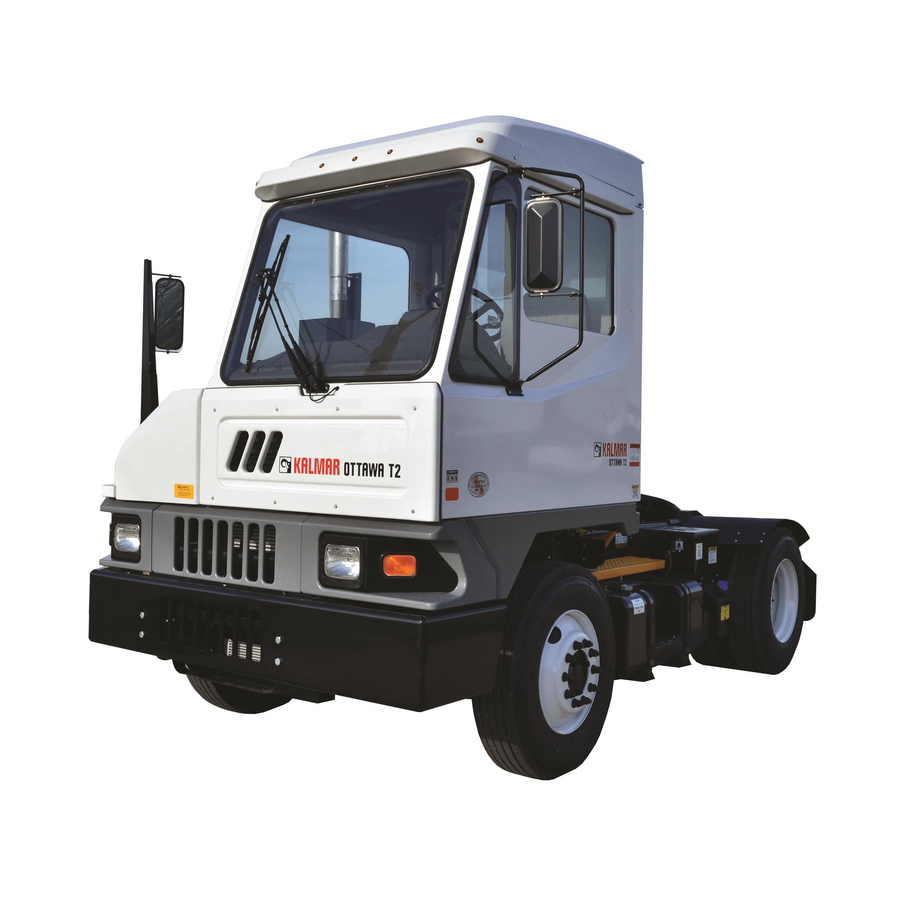
- Page 1 OP E R A T OR ’ SMA N U A L...
- Page 2 Warning Battery posts, terminals and related accessories contain lead and lead compounds, chemicals known to the State of California to cause cancer and reproductive harm. Wash hands after handling. Proposition 65, a California law, requires warnings on products which expose individuals in California to chemicals listed under that law, including certain chemicals in diesel engine exhaust.
- Page 3 DO NOT REMOVE THIS MANUAL FROM THE VEHICLE. STUDY THIS MANUAL. READ AND COMPLY WITH ALL WARNINGS IN THIS MANUAL. IF THE VEHICLE IS SOLD, GIVE THIS MANUAL TO THE NEW OWNER. Kalmar Solutions, LLC 415 East Dundee Street Ottawa, Kansas USA...
- Page 4 Notes Notes...
-
Page 5: Table Of Contents
Table of Contents Table of Contents Foreword ................................. 1 From Kalmar to the Owner ..........................1 About the Operator’s Manual ..........................1 1 Introduction ................................2 1.2 Safety Summary ............................2 CAUTIONS and WARNINGS .......................... 2 NOTICES ................................ 2 1.5 Vehicle Towing .............................. 2 Towing Vehicle with Front Wheels Suspended .................... - Page 6 Table of Contents Manually Releasing Tractor Spring Brakes (Caging) ................38 Trailer Brakes ............................39 Trailer Air Lines ............................39 3.2.5 Hydraulic System ..........................40 Hydraulic Fifth Wheel Lifting System ......................40 Hydraulic Boom Operation ........................40 Fifth Wheel Unlatch Control Valve ......................40 Basic Trailer Spotting Steps ........................
-
Page 7: Foreword
Kalmar dealer for assistance. NOTICE The Kalmar tractor may also be referred to throughout this manual as “vehicle” or “the vehicle”. Throughout this manual reference is made to “Operator”. In the context of this manual, the “Operator”... -
Page 8: Introduction
Kalmar Solutions, LLC, recommends that a professional towing service be used when towing a disabled Kalmar tractor. The best way to tow a Kalmar tractor is with the rear wheels lifted off the road. This prevents any possible damage to the transmission and drivetrain. -
Page 9: Towing Vehicle With Front Wheels Suspended
Pay close attention to the following rules to prevent vehicle damage if you must tow your Kalmar tractor with the rear wheels on the road. Always obey the following when towing a Kalmar tractor with the front wheels lifted and the rear wheels on the road. -
Page 10: Vehicle Modifications
1 Introduction 1.6 Vehicle Modifications Do not make modifications to your Kalmar tractor without written approval from Kalmar Solutions, LLC. Your vehicle has been designed and manufactured with safety and reliability in mind. Any modifications by the operator or owner could decrease the safety and reliability of your vehicle. -
Page 11: Axle - Front
Brake System Do not operate the vehicle until the brake system has been thoroughly inspected. Failure to conduct a complete Kalmar Daily Inspection prior to operation could lead to serious injury or death. Check the following: 1. Check brake controls for proper operation. Make sure the foot-operated treadle in the cab is operating smoothly and is not damaged. -
Page 12: Cab
1 Introduction Defroster — Operate the defroster to make sure sufficient air is being directed against the windshield. Make sure the blower is operating before the weather requires the defroster. Door Latches — Check for positive closing, latching and locking. Walkways/Steps —... -
Page 13: Electrical
1 Introduction 4. Inspect latch for proper operation by inserting into buckle. Latch must insert smoothly and you must hear an audible click. Verify proper latching by tugging on belt. Latch must not be worn, deformed or corroded. Replace the entire belt system. -
Page 14: Exhaust System
Contact your dealer for instructions on frame repair. Do not weld on frame rails unless directed to do so by your Kalmar dealer or by the factory. Fuel System The throttle should operate smoothly and with minimal effort. -
Page 15: Suspension
Do not operate this vehicle with damaged wheels. NOTICE Because of the many options available on Kalmar tractors, it is critical that the owner be aware of all options that may affect the safe operation of the vehicle and take appropriate measures to maintain his/her specific vehicle. - Page 16 1 Introduction Kalmar Daily Inspection Form (Walk Around Inspection) _____ Check tires and wheels for damage and proper inflation. _____ Check cab hold down latch (air suspension unit) for proper latching. _____ Check all fluid levels: engine oil, hydraulic and coolant.
-
Page 17: Additional Manuals And Safety Information
The video should be used in conjunction with this manual to instruct the operator on the proper operation of the Kalmar tractor. Shipped with every tractor, this video is also available through your Kalmar dealer or directly from Kalmar Solutions, LLC. -
Page 18: Service Assistance
The serial number is located on an ID plate inside of the cab. Kalmar is proud to have been the leader in the Port and Terminal Tractor Industry for over 50 years. We strive to serve our customers in every way possible. Thank you for buying our Kalmar tractor. -
Page 19: Description And Operation
If the operation of any component or system on your vehicle is not covered in this manual, call your Kalmar dealer for assistance. All individuals who operate this vehicle must have sufficient training to operate this type of vehicle and should have a valid commercial driver’s license. -
Page 20: Cab Tilting
3 Description and Operation Do not remove or modify factory-installed walkways, steps or handholds. Do not operate your vehicle unless all of the factory-installed steps, walkways and handholds are installed and in good working condition. If the walkways, steps or handholds have been modified or removed, or are not in good working order, anyone attempting to enter or exit the vehicle could be injured or killed. -
Page 21: To Tilt Cab
3 Description and Operation To Tilt Cab In most cases, the cab tilt control switch is located on the left- hand frame rail (Figure 2). The safety prop release cable is located on the left-hand rail, within reach of the tilt switch. Ensure that no part of the body is under the cab while tilting. -
Page 22: To Lower Cab
3 Description and Operation To Lower Cab CAB SAFETY PROP IS ENGAGED CORRECTLY 1. Move the cab tilt switch to the UP position and raise the cab slightly until the safety prop is free from the top of the tilt cylinder. 2. -
Page 23: Seating
The Kalmar tractor is designed and equipped to carry only the driver (unless built with a trainer seat). Never allow anyone to ride anywhere inside or outside of the cab. -
Page 24: Instrument Panel Gauges, Controls And Indicators
3 Description and Operation 3.1.5 Instrument Panel Gauges, Controls and Indicators Instrument Panel Overview 9 10 Figure 5... - Page 25 3 Description and Operation S=Standard A=Assigned options U=Unassigned options Standard DOT/EPA Name Off-Highway Tractor Tractor Air Diffuser Radio Main Gauge Panel Headlight Switch Dimmer Switch Air Diffuser Rear Wiper Switch Front Wiper Switch Ignition Switch Push Button Start Air Diffuser Dome Light Air Horn Option Switches...
- Page 26 3 Description and Operation Left Dash Panel 1. Headlight Switch Controls headlights and running lights on the tractor and trailer. This switch also activates the interior dash and gauge lights when either the headlights or the running lights are on. 2.
- Page 27 3 Description and Operation Tell Tale Indicator Lights The indicator lights are located along the top of the main gauge panel (Figure 8). The standard indicators are listed LEFT CENTER RIGHT below: Figure 8 Indicator Lights on the Main Gauge Panel Left Side Indicator Lights 1.
- Page 28 3 Description and Operation Center Indicator Lights 7. Low DEF Level Indicates the diesel exhaust fluid level is low and should be filled. DOT/EPA Tractors Only. Lamp function indicates the following status: BRAKE Low: First warning to the driver that the reducing agent is low. The DEF lamp light will be solid.
- Page 29 3 Description and Operation Right Side Indicator Lights 15. Wait to Start Indicates the engine temperature is too cool to start the engine immediately. Wait until the engine has been properly heated before starting the engine. WAIT TO 16. Seat Belt START Indicates the seat belt should be fastened.
- Page 30 Push the button back down to reset the indicator. Turn Signal, High Beam and Emergency Flasher Control The column-mounted control on the Kalmar tractor has three functions. It is located on the left-hand side of the steering column (Figure 14).
- Page 31 Ignition Switches Figure 15 Driver Controlled Differential Lock The standard ignition switch on the Kalmar tractor is a key type, similar to the kind found on automobiles. Push button and other types of ignition switches are installed as optional equipment.
-
Page 32: Electrical Equipment
For starting the vehicle, refer to page 30, Starting the Engine. 3.1.6 Electrical Equipment Accessory Connections The wiring harness in the Kalmar tractor is designed to support many vehicle options. These options may or may not already be on your vehicle. If any electrical equipment is installed on the vehicle after it leaves the factory, contact your Kalmar dealer first. - Page 33 3 Description and Operation Figure 16 Cab Power Board...
- Page 34 3 Description and Operation Figure 17 Chassis Power Board...
-
Page 35: Occupant Restraint System
The seat belt system used on Kalmar tractors is a lap-type restraint with an automatic retractor. Before fastening the seat belt, be sure to adjust the seat to a comfortable driving position. - Page 36 To start a vehicle equipped with the standard electrical starting system, follow these steps: Starting Procedure NOTICE All Kalmar tractors are designed to start in NEUTRAL ONLY. The starter should not operate if the vehicle is in any other gear. 1. Set the parking brake.
- Page 37 3 Description and Operation 2. Place the transmission control in NEUTRAL. 3. Apply the service brakes using the foot-operated treadle valve and hold the brakes in this position. 4. Turn the ignition switch to the OFF position (if your vehicle is not equipped with an ignition-operated engine shut down, then use the engine shut down button or control to stop the engine).
-
Page 38: Transmission
Parking with an Automatic Transmission The Allison transmission does not have a PARK position like an automobile transmission. For information on how to properly park your Kalmar tractor, see the following sections in this manual: Page 37, Parking the Vehicle... -
Page 39: Air System And Brakes
This makes more frequent changes necessary. Rear Axles with Locking Differentials Kalmar tractors may be equipped with a variety of special axle and differential combinations. Because of the affect of special differentials on vehicle operation, it is important to understand how your particular differential operates. -
Page 40: Low Air Pressure Indicators
3 Description and Operation Kalmar tractors come equipped with a pneumatic (air) brake system. This system has two basic parts: the service brakes and the spring parking brakes. The service brakes are the part of the system that the driver uses when he operates the foot-operated treadle valve (or foot pedal) in the cab (Figure 18). -
Page 41: Service Brakes
3 Description and Operation Service Brakes The service brake system is controlled by a foot-operated treadle valve (foot pedal) in the cab. This is the left-hand pedal, located to the right of the steering column (Figure 18). The amount of foot pedal pressure determines the amount of air pressure delivered to the brakes. -
Page 42: Abs
Trucks should not be operated if the indicator light is on. Contact your nearest Kalmar dealer for qualified service on the ABS. Trucks built with ABS after March of 2002 have the capability to check the trailer for a properly operating system. -
Page 43: Parking Brake
Parking Brake Kalmar tractors are equipped with spring brakes for parking. The parking system is operated manually by a cab-mounted parking brake control valve (Figure 19). (Also see page 21, items 5 and 6.) -
Page 44: Manually Releasing Tractor Spring Brakes (Caging)
This could result in serious injury or death. The following steps can be used to release the standard brake chambers used on most Kalmar tractors. If your vehicle is equipped with other optional brake chambers, refer to that manufacturer’s operation or service manual. -
Page 45: Trailer Brakes
50 ft. lbs. (67.79 N•m) of torque on the release nut or the chamber may be damaged. Trailer Brakes Kalmar tractors are designed to use the trailer’s brakes when towing trailers. All Kalmar tractors are equipped with a trailer Supply air line and trailer Service air line. The service line is BLUE. -
Page 46: Hydraulic System
3 Description and Operation 3.2.5 Hydraulic System Hydraulic Fifth Wheel Lifting System The standard fifth wheel lifting system on Kalmar tractors is hydraulically operated. A P.T.O. and hydraulic pump mounted on the transmission provide the hydraulic power to operate the Hydraulic Fifth Wheel Lifting System. -
Page 47: Basic Trailer Spotting Steps
Basic Trailer Spotting Steps NOTICE The following information is for reference only. Kalmar Solutions, LLC highly recommends using the following information to create procedures that match your particular application and vehicle. It is the operator’s responsibility to ensure that proper trailer moving procedures are used for a particular situation and vehicle application. - Page 48 3 Description and Operation 9. With the brake treadle FULLY applied, push in BOTH the parking brake control (yellow) and the trailer air supply (red). This will charge the trailer air supply and release the trailer spring/parking brakes. 10. After the tractor air system is fully charged, move the transmission shift lever to the proper gear and release pressure on the foot-operated brake treadle.
-
Page 49: Exhaust System - Dot/Epa-Approved Engines
3 Description and Operation Never tow trailers without BOTH the service and emergency brake lines connected to the trailer. Never tow trailers without functioning service and emergency brake systems. Operating the vehicle while towing trailers without functioning trailer brake systems may lead to loss of control of the vehicle, serious injury or death. - Page 50 3 Description and Operation DPF (Diesel Particulate Filter) Regen Needed Lamp The "DPF Regen Needed" lamp indicates, when illuminated or flashing, that the diesel particulate filter requires regeneration. Figure 24 When the "DPF Regen Needed" lamp illuminates, the diesel DPF Regen Needed Lamp particulate filter needs to regenerate within the next 2-6 hours of operation.
-
Page 51: Exhaust-Related Engine Indicator Lamps
3 Description and Operation After prolonged idle, you may notice momentary white vapor and odor. This is normal. Use only Ultra Low Sulfur Diesel (ULSD) fuel. Oil classification CJ-4 (low ash) is the recommended oil. This will increase the time between regeneration events. Exhaust-Related Engine Indicator Lamps Malfunction Indicator Lamp... - Page 52 3 Description and Operation Illuminated An illuminated DPF Regen Needed Lamp is an indication that the truck needs to perform a regeneration. Figure 31 DPF Regen Needed Lamp Flashing If a regeneration is not performed in a timely manner after the DEF lamp is illuminated, the DEF lamp will begin to flash.
-
Page 53: Scheduled Maintenance
Preventative Maintenance Program. A vehicle that has not been properly maintained, may not be safe to operate. The operator of a Kalmar tractor must be satisfied that his/her vehicle has been properly maintained and is in safe working condition, before operating that vehicle. -
Page 54: Checklists
6 Scheduled Maintenance 6.1 Checklists Chassis Lubrication Diagram (left-hand drive chassis shown) Figure 35 Chassis Lubrication Diagram *Both Sides **Both Sides Front and Rear... -
Page 55: Boom And Fifth Wheel Lubrication Diagram
6 Scheduled Maintenance Part/Description Lubricant Used/Note Coolant/Anti-Freeze 50/50 Ethyl-Glycol/Water Engine Oil SAE 15W-40 See Engine Operator Manual Slack Adjusters Brake Cam Lithium Grease Pivot Front Axle King Pins Lithium Grease Tie Rod Ends Lithium Grease Transmission Fluid Transynd See Transmission Operator Manual Diesel Fuel ULSD... - Page 56 6 Scheduled Maintenance Preventative Maintenance Form KALMAR TERMINAL TRACTOR PREVENTATIVE MAINTENANCE FORM NON-SYNTHETIC (NON – TES-295) LUBE USED IN THE TRANSMISSION TRUCK NUMBER LOCATION TECHNICIAN HOURS DATE EACH OF THE FOLLOWING ITEMS SHOULD BE CHECKED AND THE CORRESPONDING BOX MARKED WITH THE APPROPRIATE NOTATION.
- Page 57 6 Scheduled Maintenance KALMAR TERMINAL TRACTOR PREVENTATIVE MAINTENANCE FORM SYNTHETIC (TES-295) LUBE AND ALLISON HIGH-CAPACITY FILTERS USED IN THE TRANSMISSION TRUCK NUMBER LOCATION TECHNICIAN HOURS DATE EACH OF THE FOLLOWING ITEMS SHOULD BE CHECKED AND THE CORRESPONDING BOX MARKED WITH THE APPROPRIATE NOTATION.
-
Page 58: Lubrication And Fluids
The fluids and lubricants covered in this section are listed below. If a specific lubricant or fluid used on your vehicle is not covered in this section, contact your Kalmar dealer for the information. Automatic Transmission Fluid... -
Page 59: Automatic Transmission Fluid
The fluid in these front hubs needs to be checked every 250 hours. Coolant/Anti-Freeze The cooling system of the new Kalmar tractor is filled at the factory with the following solution: 50% ethyl-glycol heavy-duty anti-freeze with rust inhibitor, and 50% water. -
Page 60: Fuel
Fuel All Kalmar tractors come with an Engine Operator’s Manual provided by the engine manufacturer. This manual is for the specific engine in your vehicle. Refer to this Engine Operator’s Manual for fuel requirements. -
Page 61: Engine Oil
6 Scheduled Maintenance engine damage, injury and void the warranty on the engine. Contact your Kalmar dealer if you did not receive an Engine Operator’s Manual with your new Kalmar tractor. NEVER smoke in or around the fueling area when filling the fuel tank. -
Page 62: Hydraulic System Fluid
3. Base Oil Timken 40 rating minimum Filters Refer to your Kalmar Parts Manual for the required part numbers. Remember, your parts manual is custom built to match your specific vehicle. If you are in doubt of the correct part numbers, contact your Kalmar dealer for help. -
Page 63: Preventative Maintenance Guidelines
6 Scheduled Maintenance These intervals are the absolute maximum allowable under normal conditions. Intervals for your vehicle may be shorter due to actual vehicle operating conditions. Operating a vehicle in harsh conditions, or for extended periods of heavy use, will make more frequent filter changes necessary. -
Page 64: Check Hvac System
6 Scheduled Maintenance Check Air System for Leak Down — Disconnect the gladhands from the trailer. Run the engine at fast idle and allow air pressure to stabilize at 120 P.S.I. for at least 1 minute. Shut off the engine and observe the dash gauge(s) for 2 minutes. -
Page 65: Seat Belt System
6 Scheduled Maintenance Seat Belt System Inspect the seat belt system every 20,000 miles (32,187 km) or more often if exposed to severe environmental conditions or vocation. Check the following: 1. Inspect belt on entire system for cuts, fraying, extreme or unusual wear. -
Page 66: Cab Down - Exterior
6 Scheduled Maintenance Cab Down — Exterior Check Side Door Hinge (if applicable) — Inspect the door hinge for wear or damage. Check Cab Access Steps and Handles — Inspect all steps and grab handles for proper mounting and the absence of cracks. -
Page 67: Cab Up
6 Scheduled Maintenance Cab Up Check Operation of Cab Tilt Pump — Pull the safety prop release cable and activate the cab tilt switch. The cab should rise. Check Cab Safety Prop — Inspect the cab safety prop that encloses the cab lift cylinder. It should drop freely into place to support the cab when it is in the raised position. - Page 68 6 Scheduled Maintenance Check Engine Belts and Tensioner — Inspect the belt(s) for cracking and wear. The belt tensioner should be checked for proper operation. Change Engine Coolant Filter (if applicable) — Replace the engine coolant filter. A filter containing the proper supplemental coolant additive should be used to maintain the SCA concentration level.
-
Page 69: Under Vehicle
6 Scheduled Maintenance Under Vehicle Check Steering Gear — Inspect the steering gear for fluid leaks and excessive play. Inspect the steering linkage for wear or looseness. Check Brake Linings and Drums — Visually check the linings and drums for wear and cracks. If the lining is 0.25 inch (6.35 mm) thick or less in any location, the shoes should be replaced or relined. -
Page 70: Chassis
6 Scheduled Maintenance Check Differential for Leaks — Inspect the rear axle housing for signs of leaks. Repair as necessary. Check Differential Oil Level — Check the differential oil level per the component manufacturer's instructions. Change Differential Oil — Drain and replace the differential oil. -
Page 71: Lubrication
6 Scheduled Maintenance Check Tire Air Pressure, Tread Depth and Condition — Inspect the tires for damage and wear. Adjust to the proper air pressure. Check Rear Axle Planetary Fluid Level (if applicable) — Check and adjust the lubricant level in planetary housings per the component manufacturer's instructions. -
Page 72: Test Drive
6 Scheduled Maintenance Check/Lubricate Driveline U-Joints — Inspect the driveline and u-joints for wear or damage. Lubricate with lithium grease. Clean, Check, Adjust and Lube Fifth Wheel Jaws — Remove dirt and excessive grease from the fifth wheel jaws. Using a fifth wheel jaw gauge, measure the free play. If free play exceeds 1/8 inch (3.175 mm), determine the cause of the excessive play and either repair or replace the jaws per the component manufacturer's recommendation. -
Page 73: Environment
7 Environment 7 Environment 7 Environment General Increasing industrialization has a significant effect on our environment on a global scale. Nature, animals and people are every day exposed to risks caused by exposure to various chemicals. In this light, the long-term objective is to develop chemicals that are completely friendly to the environment. -
Page 74: Environmental Awareness
7 Environment Environmental Awareness Aim to define your own environmental awareness. Ask your supervisor for more training if required. After the training, make sure that you can adapt the information received to your everyday tasks. Product manuals also contain environmental information about the product. -
Page 75: Use Of Materials And Energy
7 Environment Use of Materials and Energy Reasonable and appropriate use of materials can yield surprisingly high savings in costs and also decrease environmental load. Preventive maintenance has a decisive influence on decreasing machine downtime. User and maintenance manuals are intended to teach how to use the machine correctly and safely. -
Page 76: Recycling
7 Environment Recycling The primary goal of environmental protection is to decrease the amount of waste produced. If waste is produced, you must try to utilize it as a material or source of energy. Appropriate and safe processing must be arranged for all kinds of waste. The sorting of the waste created in our operations is influenced by the legislation, environmental factors and general tidiness, among other things. -
Page 77: Problem Waste
7 Environment As to the disposal of toxic waste, you must find out the appropriate methods of disposing of the liquids, materials and components. The safety bulletins of the various liquids and materials contain instructions for disposal. You can also consult the suppliers of components and the product manufacturer for disposal and sorting. -
Page 78: Occupational Health And Safety
7 Environment Occupational Health and Safety Pay attention to your working environment. Perform the necessary maintenance and repair work to prevent sickness or accidents caused by vibration, noise or other factors. Recognize the needs for safety training and get to know the safety bulletins of the hazardous substances you have to work with. -
Page 79: Standards
7 Environment Report all abnormal events Contact your supervisor or the person responsible for environmental issues if necessary. Keeping your own working environment tidy and in good order is your personal responsibility. Tidiness and orderliness influence how the workplace functions, decrease the number of accidents at work and contribute to the positive image of the company and its employees.
Need help?
Do you have a question about the Ottawa T2 and is the answer not in the manual?
Questions and answers