Table of Contents
Advertisement
Quick Links
Advertisement
Table of Contents

Related Manuals for Kalmar Ottawa t2


Summary of Contents for Kalmar Ottawa t2
-
Page 2: Table Of Contents
Lubrication ........................20 Maintenance ....................20 Test Drive ........................21 Maintenance ....................21 0. Machine Complete ......................23 The Ottawa T2 Terminal Tractor ..................23 Description ...................... 23 Diesel Fuel Requirements ....................24 Precautions ..................... 24 Emergency Starting ......................26 Precautions ..................... - Page 3 Engine Serial Number ..................32 Component Location ....................... 33 Chassis/Cab, Left Side ....................33 Ottawa T2, Left Side (4x2 HHD chassis shown) ........33 Chassis/Cab, Right Side ..................... 34 Ottawa T2, Right Side (4x2 HHD chassis shown) ........34 Chassis/Cab, Front/Rear .................... 35 Ottawa T2, Front/Rear (4x2 HHD chassis shown) ........
- Page 4 Speedometer ......................82 Diagnosis ....................82 Voltmeter ........................83 Diagnosis ....................83 Seating ..........................84 Description ...................... 84 Heating, Ventilation and Air Conditioning ................ 85 Description ...................... 85 Wiping and Cleaning of Windows ................... 86 Maintenance Manual Ottawa T2 4x2...
- Page 5 Description ....................101 Repair (Rear Door Adjustment) ..............101 Roof and Door Mouldings ..................102 Description ....................102 Cab Tilting ........................ 102 Description ....................102 Cab Tilt (Hydraulic) Components ............. 104 Diagnosis (Cab Tilt) .................. 105 Maintenance Manual Ottawa T2 4x2...
- Page 6 Temperature Control, Cleaning and Hydraulic Oil ............132 Return Filter ......................132 Description ....................132 Common Electric ......................133 Controls and Instruments ....................133 Description (Wiring Harness) ................ 133 Safety ..........................134 Fuses, Relays and Circuit Breakers ................. 134 Description ....................134 Maintenance Manual Ottawa T2 4x2...
- Page 7 Grease Jockey Lube Pump ..................168 Air Lines — Grease Jockey Lube Pump Option ........168 Grease Jockey Lube Pump Option Circuit ..........168 Differential Axle Lock ....................169 Air Lines — Differential Axle Lock Option ..........169 Maintenance Manual Ottawa T2 4x2...
- Page 8 Voltmeter ....................202 Gauge Cluster Wiring ................203 Chassis Circuits ....................... 209 Chassis Power Board ................209 Air Dryer (Optional) .................. 210 Cab Tilt Pump ..................211 Cab Exterior/Front Chassis Wiring ............212 Chassis Wiring ..................215 Maintenance Manual Ottawa T2 4x2...
- Page 9 Exhaust ........................245 Aftertreatment Wiring ................245 F. Technical Data ......................247 Standard Vehicle Data ....................247 Ottawa T2 Series Terminal Tractor ............... 247 Hydraulic System ......................249 Ottawa T2 Series 4x2 ..................249 Fluids, Lubricants and Sealants ..................250 Ottawa T2 Series 4x2 ..................
-
Page 10: Foreword
– About this manual This service manual covers the Ottawa T2 4x2 and 6x4 termi- nal (yard) tractors produced by Kalmar Solutions LLC, Kalmar Terminal Tractors. You will find here descriptions of the fea- tures, location and operation of the components. Diagnostic and repair procedures are included along with schematic dia- grams of the electric, pneumatic and hydraulic circuits. - Page 11 Parker Hydraulic pump - www.parker.com • Cab Tilt Pump - www.bucherhydraulics.com • Denso Starter - www.densoheavyduty.com • Remy Alternator - www.delcoremy.com • Bostrom Seat - www.bostromseating.com • Link Cab Suspension - www.linkmfg.com • Ottawa Kalmar - www.ottawatrucksna.com Maintenance Manual Ottawa T2 4x2...
-
Page 12: Safety
A situation that may result in damage to the product if the instruction is not followed. NOTE Information that is important without being safety related. Note is used to facilitate the work process, operation/handling or to increase understanding of the information. Maintenance Manual Ottawa T2 4x2... -
Page 13: Do's And Dont's
Don’t jump start the vehicle using welding equipment. • Don’t operate the vehicle with air pressure below 70 PSI. • Don’t shift the transmission from neutral to drive or reverse at engine speeds above idle. Maintenance Manual Ottawa T2 4x2... -
Page 14: Preventive Maintenance
18. Boom Cylinder Bearings 19 * 19. Fifth-Wheel Pivot 18 * 20. Fifth-Wheel Top Plate 21. Fifth-Wheel Jaws Side Door Hinge (not shown) Optional Rear Door Upper Rollers (not shown) * BOTH SIDES Boom and Fifth-Wheel Lubrication Diagram Maintenance Manual Ottawa T2 4x2... -
Page 15: Inspections
Every 2,000 Hours of Operation Perform the inspections listed in column D of the chart. Refer to the Preventive Maintenance Forms on page 10, and page 11. These service procedures must be performed after every 2,000 hours of operation. Maintenance Manual Ottawa T2 4x2... -
Page 16: Checklists
❒ Radio equipment ❒ Gauges and dash lights ❒ Dome lights ❒ Turn signals ❒ Hazard lights ❒ Headlights ❒ Marker lights ❒ Backup lights ❒ Brake lights ❒ Strobe light (if applicable) ❒ Auxiliary backup lights Maintenance Manual Ottawa T2 4x2... - Page 17 0.3 Checklists – C. Preventive Maintenance ❒ Clean the cab interior. ❒ Clean the windows. ❒ Clean and adjust the mirrors. Maintenance Manual Ottawa T2 4x2...
- Page 18 CHECK THE FOLLOWING ITEMS AND INDICATE IF “OK” OR “REPAIR NEEDED”. CIRCLE LOCATON ON DRAWINGS IF NECESSARY. DESCRIBE PROBLEMS IN REMARKS AREA AT BOTTOM OF PAGE. REPAIR REPAIR REPAIR NEEDED NEEDED NEEDED WHEEL RELEASE STROBE LIGHT REMARKS: Daily Inspection Form Maintenance Manual Ottawa T2 4x2...
-
Page 19: Preventive Maintenance Forms
0.3 Checklists – C. Preventive Maintenance page – Preventive Maintenance Forms KALMAR TERMINAL TRACTOR PREVENTATIVE MAINTENANCE FORM NON-SYNTHETIC (NON – TES-295) LUBE USED IN THE TRANSMISSION TRUCK NUMBER LOCATION TECHNICIAN HOURS DATE EACH OF THE FOLLOWING ITEMS SHOULD BE CHECKED AND THE CORRESPONDING BOX MARKED WITH THE APPROPRIATE NOTATION. - Page 20 0.3 Checklists – C. Preventive Maintenance KALMAR TERMINAL TRACTOR PREVENTATIVE MAINTENANCE FORM SYNTHETIC (TES-295) LUBE AND ALLISON HIGH-CAPACITY FILTERS USED IN THE TRANSMISSION TRUCK NUMBER LOCATION TECHNICIAN HOURS DATE EACH OF THE FOLLOWING ITEMS SHOULD BE CHECKED AND THE CORRESPONDING BOX MARKED WITH THE APPROPRIATE NOTATION.
-
Page 21: Preventive Maintenance Technique
34F (37C). Determine the reason for lost flu- id. Repair as necessary. The Kalmar Parts Catalog is customized to the vehicle. Refer to this catalog for filter part numbers. Kalmar recommends API Grade 1 grease, any high-quality lith- ium-based grease, or a base oil with a Timken 40 minimum rat- ing for use in axles. -
Page 22: Cab Interior
• Blower Motor Operation With the key on, ensure that the blower motor oper- ates at each position of the blower speed switch. • Temperature Control Confirm proper operation of the temperature con- trol switch. Maintenance Manual Ottawa T2 4x2... -
Page 23: Seat Belt System
Replace the entire belt system. Inspect buckle cable (optional component) black coating on buckle cable must not be damaged. Internal cable wires must not be exposed, frayed or broken. Replace the entire system. Maintenance Manual Ottawa T2 4x2... -
Page 24: Cab Down - Exterior
Check Rear Door Roller/Slide Adjustment — Inspect rear door rollers and slide for wear or damage. Check Gladhand Seals and Trailer Air Lines — Inspect seals for tears and wear. Check air lines for kinks or cracks. Maintenance Manual Ottawa T2 4x2... -
Page 25: Cab Up
Check Radiator for Leaks — Inspect radiator core and tanks for signs of coolant leaks. Check Radiator Mounts — Inspect radiator mounts for wear or excessive looseness. Maintenance Manual Ottawa T2 4x2... - Page 26 Clean Transmission Breather — Confirm that the breath- er, located on top of the transmission, is clean and the pas- sage is open. Do not spray directly with high pressure or cleaning solvents. Maintenance Manual Ottawa T2 4x2...
-
Page 27: Under Vehicle
Replace if leaking. Clean Rear Axle Breather — Ensure that the rear axle vent turns freely. Check Differential for Leaks — Inspect rear axle housing for signs of leaks. Repair as necessary. Maintenance Manual Ottawa T2 4x2... -
Page 28: Chassis
Inspect tires for damage and wear. Adjust to the proper air pressure. Check Rear Axle Planetary Fluid Level (if applicable) — Check and adjust the lubricant level in the planetary hous- ings per the component manufacturer’s instructions. Maintenance Manual Ottawa T2 4x2... -
Page 29: Lubrication
Using a 5th wheel jaw gauge measure the free play. If free play exceeds 1/8" (3.175 mm) determine the cause of the excessive play and either repair or replace the jaws per the component manufacturer's recommendation. Maintenance Manual Ottawa T2 4x2... -
Page 30: Test Drive
0.4.8 Test Drive page – Maintenance Drive Vehicle to Check Overall Operation — Start and drive vehicle. Test the operation of all systems and compo- nents. Maintenance Manual Ottawa T2 4x2... - Page 31 0.4 Preventive Maintenance Technique – C. Preventive Maintenance Maintenance Manual Ottawa T2 4x2...
-
Page 32: Machine Complete
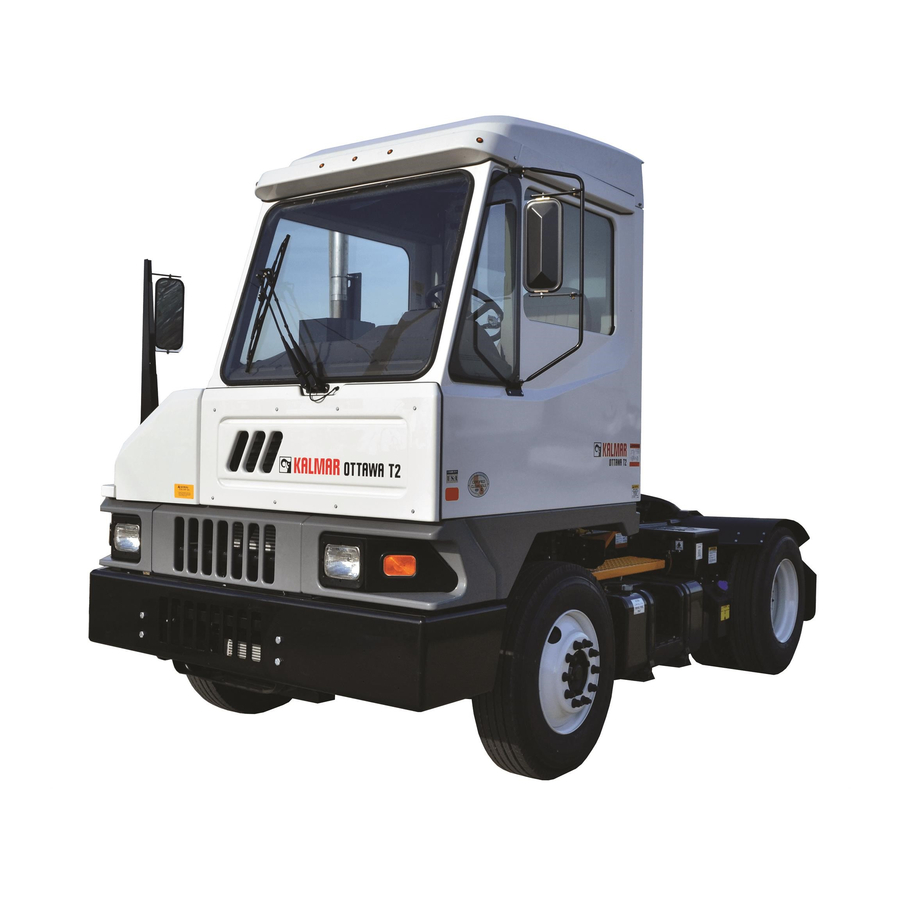
– Description The Ottawa T2 terminal tractor by Kalmar is designed to suit the operator and the tasks. Ottawa T2 tractors are pur- pose-built vehicles, designed to move trailers in the most effi- cient manner. Controls are conveniently arranged around the operator's seat. -
Page 33: Diesel Fuel Requirements
If the Diesel Exhaust Fluid level is found to be low, Diesel Ex- haust Fluid must be added. Maintenance Manual Ottawa T2 4x2... - Page 34 • AdBlue • NOx Reduction Agent • Catalyst Solution Regardless of what the Diesel Exhaust Fluid is called, the Die- sel Exhaust Fluid must meet the engine manufacturer's speci- fication. See your engine operator's manual. Maintenance Manual Ottawa T2 4x2...
-
Page 35: Emergency Starting
Due to the higher torque requirements for starting diesel en- gines, Ottawa T2 tractors use multiple batteries. At low temper- atures, it may not be possible to start the engine in an Ottawa T2 tractor using only one battery. - Page 36 Do NOT allow battery acid to contact eyes or skin. Flush any contacted area thoroughly with water immediately and seek medical attention. Failure to heed this warning may result in serious per- sonal injury and property damage. Maintenance Manual Ottawa T2 4x2...
-
Page 37: Vehicle Towing
4. Remove the axle shafts if there is damage or suspected damage to the axle(s). 5. Cover the hub openings to prevent loss of lubricant or entry of dirt or foreign objects. Maintenance Manual Ottawa T2 4x2... -
Page 38: Front End Towing (All Wheels On The Ground)
When towing the vehicle with rear wheels raised, secure the steering wheel to maintain straight ahead position. Ensure that the front axle load is not more than the gross axle weight rating as indicated on the vehicle identification plate. Maintenance Manual Ottawa T2 4x2... -
Page 39: Vehicle Modifications
0.5 Vehicle Modifications – 0. Machine Complete Vehicle Modifications page – Approval Do not modify your Ottawa T2 tractor without approval in writing from Kalmar Solutions LLC, Kalmar Terminal Tractors. Unau- thorized modifications may void the vehicle warranty. Maintenance Manual Ottawa T2 4x2... -
Page 40: Vehicle Identification
Also shown are the Ve- hicle Identification Number (VIN), gross vehicle weight rating (GVWR), front and rear gross axle weight ratings (GAWR), wheel base, tire and rim sizes, and tire air pressure. Maintenance Manual Ottawa T2 4x2... -
Page 41: Vehicle Serial Number
(See page 31). Always refer to this num- ber when ordering parts or requesting field service assistance. Engine Serial Number – Cummins serial numbers are located on the top of the valve cover. Maintenance Manual Ottawa T2 4x2... -
Page 42: Component Location
Component Location 0.7.1 Chassis/Cab, Left Side page – Ottawa T2, Left Side (4x2 HHD chassis shown) 1. Cab Air Ride Air Spring 2. Height Control Valve Assembly 3. Cab Tilt Switch 4. Boom Lift Cylinder Upper Mount 5. Fifth-Wheel Pivot 6. -
Page 43: Chassis/Cab, Right Side
13. Fuel Tank 0.7.2 Chassis/Cab, Right Side page – Ottawa T2, Right Side (4x2 HHD chassis shown) 1. Fifth Wheel Pivot 2. Boom Lift Cylinder Upper Mount 3. Vertical Muffler and Exhaust Pipe 4. Tow Hook 5. Cab Tilt Pump 6. -
Page 44: Chassis/Cab, Front/Rear
0.7 Component Location – 0. Machine Complete 0.7.3 Chassis/Cab, Front/Rear page – Ottawa T2, Front/Rear (4x2 HHD chassis shown) 1. Front Panel (Removable) 2. Rear Door 3. Glad Hands (Air Brake) 4. Trailer Electrical Connector (7-pin) 5. Air Brake Chambers 6. -
Page 45: Chassis, Plan View
0.7 Component Location – 0. Machine Complete 0.7.4 Chassis, Plan View page – Ottawa T2 Plan View (4x2 HHD chassis shown) 1. Fifth-Wheel Boom 2. Hydraulic Fluid Tank 3. Hydraulic Fluid Filter 4. Air Tank, Service (Air Brakes) 5. Battery Box 6. -
Page 46: Electrical Instruments
– Guide to Troubleshooting This guide is provided for diagnosis of problems in Kalmar elec- trical instruments. The sequence presented is intended to min- imize duplication. Follow the sequence as described to prevent misdiagnosis. This guide presumes that senders and gauges are properly matched and wired and that the correct voltage is applied. - Page 47 0.8 Electrical Instruments – 0. Machine Complete Maintenance Manual Ottawa T2 4x2...
-
Page 48: Engine
– Description The Ottawa T2 yard tractor is designed to utilize the benefits of a diesel engine of the type customarily found in fire engines, dump trucks and refuse haulers. Engine options are provided for OFF-HIGHWAY and DOT/EPA certified applications with a choice of power ratings available from several engine manufac- turers. -
Page 49: Controls And Instruments
Open circuit, loose connection Test. Repair as needed. Defective gauge cluster Test. Replace as needed. Defective alternator Test. Replace as needed. Inaccurate gauge Defective gauge cluster Test. Replace as needed. Maintenance Manual Ottawa T2 4x2... -
Page 50: Fuel System
A float riding on the surface of the fuel causes current changes which are transmitted via the sending unit to the instrument panel gauge. 1.2.8 Pipes and Hoses page – Description Fuel hoses are constructed of rubber and braided steel wire. Maintenance Manual Ottawa T2 4x2... -
Page 51: Diesel Exhaust Fluid (Def)
5/16" straight fittings. The DEF suction (throttle) line (1000 mm long) connects to the multifunction head unit with a 3/8" 90-degree fitting. The DEF return (pressure) line (1750 mm long) connects to the multifunction head unit with a 5/16" 90-degree fitting. Maintenance Manual Ottawa T2 4x2... -
Page 52: Start/Stop
Repair or replace as needed. Engine does not crank Battery charge low/discharged See above. Defective wiring Inspect connections and wires. Test circuits. Repair or replace as needed. Defective relay Replace. Defective solenoid Replace. Defective starter Replace. Maintenance Manual Ottawa T2 4x2... - Page 53 1.11 Start/Stop – 1 Engine Maintenance Manual Ottawa T2 4x2...
-
Page 54: Transmission
The standard transmission is an automatic Allison, RDS series. For service and maintenance information, consult the manuals included with your vehicle, contact the Kalmar dealer or the manufacturer of the component installed in your vehicle. Maintenance Manual Ottawa T2 4x2... - Page 55 – 2 Transmission Maintenance Manual Ottawa T2 4x2...
-
Page 56: Driveline/Axle
– Description An Ottawa T2 tractor will be equipped with one of several man- ufacturer’s rear axles. Special features, such as a locking or a “No-Spin” differential, are optional. Contact your Kalmar dealer if you do not know whether your vehicle contains these fea- tures. - Page 57 – 3 Driveline/Axle Maintenance Manual Ottawa T2 4x2...
-
Page 58: Brakes
Operating in bobtail mode requires that the red knob be pulled out (stop trailer air supply) and the yellow knob be depressed (release tractor parking brakes). Instrument Panel 4 — Trailer Air Supply and Tractor Parking Control Knobs Maintenance Manual Ottawa T2 4x2... -
Page 59: Brake System
A buzzer and an indicator light warn of low pressure in the sys- tem when pressure falls below 70 psi. The air pressure gauge reflects the actual system pressure. Maintenance Manual Ottawa T2 4x2... -
Page 60: Air Compressor And Governor
70 psi. 4.3.9 Stop Light Switch page – Description This is an air-actuated switch that causes the stop lights to illu- minate when system air pressure increases to 5 psi after de- pressing the foot pedal. Maintenance Manual Ottawa T2 4x2... -
Page 61: Brakes
S-CAM drums. Air pressure controlled by the foot pedal supplies the BRAKE force necessary to stop the wheels from rotating. SHOES BRAKE DRUM Slack Adjuster Diagram Maintenance Manual Ottawa T2 4x2... -
Page 62: Trailer Brake Air Lines
EC-60 electronic control unit if so equipped. There is a diagnos- tic connection behind the grille opening in the front bumper. The connection can be used by a laptop with appropriate soft- ware or a handheld Bendix RDU diagnostic tool. Maintenance Manual Ottawa T2 4x2... -
Page 63: Automatic Traction Control (Optional)
Never manually release (cage) the spring brakes be- fore the wheels are properly blocked. If the wheels are not properly blocked before releasing the spring brakes, the vehicle may move unexpectedly. This could result in serious injury or death. Maintenance Manual Ottawa T2 4x2... - Page 64 4.3 Brake System – 4 Brakes The following steps can be used to release the standard brake chambers used on most Kalmar tractors. If your vehicle is equipped with other optional brake chambers, refer to that manufacturer’s operation or service manual.
-
Page 65: Diagnosis (Mechanical)
Air line(s) restricted Inspect. Repair or replace as need- Treadle valve leaking Inspect. Repair or replace as need- Brake chamber leaking Inspect. Repair or replace as need- Spring brake chamber leaking Inspect. Repair or replace as need- Maintenance Manual Ottawa T2 4x2... - Page 66 Repair as needed. Clean drums and replace shoes. Broken diaphragm or return spring Inspect. Repair or replace as need- Drum out of round Inspect. Repair or replace as need- Brake chamber diaphragm leaking Inspect. Repair or replace as need- Maintenance Manual Ottawa T2 4x2...
- Page 67 Refer to Brake Air System Diagno- sis table. Low air pressure warning Pressure drops quickly: engine stopped, brakes applied Pressure drops: engine stopped, brakes applied Pressure does not reach normal Pressure builds too slowly Pressure too high No brakes Maintenance Manual Ottawa T2 4x2...
-
Page 68: Steering
The metering section consists of a rotor that orbits within a fixed stator to force oil through the section, and a commutator to channel the fluid to the valve section. Maintenance Manual Ottawa T2 4x2... -
Page 69: Diagnosis (Power Steering)
Install a steering analyzer or flow meter between the pump and the steering gear box and record the flow ________ GPM. b. The steering gear box needs 4-1/2 to 5 GPM of flow to op- erate correctly. Maintenance Manual Ottawa T2 4x2... -
Page 70: Tools Needed
2100 to 2200 psi at pump relief. d. If pump pressure is less than 2100 psi, the pressure relief on the pump needs to be adjusted. (Contact a Kalmar Field Service Representative for more information on set- ting the pump pressure relief.) e. - Page 71 5.3 Diagnosis (Power Steering) – 5 Steering • 1/2” end wrench • Allen wrench 5/16” Maintenance Manual Ottawa T2 4x2...
-
Page 72: Diagnosis (Hydrostatic Steering)
Repair or replace as needed. Wheel cuts restricted Axle stop setting incorrect Reset. Inconsistent steering pressure Air in system Bleed system. Low fluid level Add fluid as needed. Leaking fluid hoses Repair or replace as needed. Maintenance Manual Ottawa T2 4x2... - Page 73 5.4 Diagnosis (Hydrostatic Steering) – 5 Steering Maintenance Manual Ottawa T2 4x2...
-
Page 74: Suspension
The standard vehicle is equipped with a rear axle (or axles) at- tached directly to the frame rails without any suspension sys- tem. Axle housings are rigidly attached to the frame, captured by means of weldments mounted inside and outside of each rail. Rear Spring Slipper Maintenance Manual Ottawa T2 4x2... -
Page 75: Front Springs
4. Repeat steps 1 through 3 to install the spring assembly at the opposite side. 5. Remove the jack stands and lower the vehicle to the ground. NOTE After 50 hours of operation — Check and retighten the bolts, if necessary. Maintenance Manual Ottawa T2 4x2... -
Page 76: Load Handling
(127 mm) diameter cylinders. The valve is actuated remotely from the cab by the boom lift control lever. The boom lift control lever is attached to a control cable that pulls and pushes the control valve spool to the desired positions. Maintenance Manual Ottawa T2 4x2... -
Page 77: Boom Lift Cylinders
17.7 inches (450 mm). The cylinders are double acting in that they are hydraulically powered up and down. Restrictor fittings are threaded into the base end work ports to better control downward (lowering) speed. Maintenance Manual Ottawa T2 4x2... -
Page 78: Diagnosis (Boom)
Wet Line Kit Connection Maximum Pressure — Hydraulic Relief Valve Vehicle Maximum Pressure All Ottawa T2 4x2 and 6x4 tractors with 4-inch cylinders 2000 psi (138 bar) WARNING Do NOT feel for leaks. Hydraulic fluid under high pressure may have knife-like characteristics. Failure to heed this warning could result in severe personal injury. -
Page 79: Hydraulic Pump With Priority Valve Tests - Boom
__________GPM. The flow should be 3- 1/2 to 5 GPM at engine idle and 23-25 GPM at maximum engine RPMS. Maintenance Manual Ottawa T2 4x2... - Page 80 RPM there should be 23-25 GPM of flow. If you are unable to get the required GPM of flow, replace the pump. If replacing the pump, check the splines on the pump shaft and the splines inside the PTO for wear. Maintenance Manual Ottawa T2 4x2...
- Page 81 7.11 Diagnosis (Boom) – 7 Load Handling Maintenance Manual Ottawa T2 4x2...
-
Page 82: Control System
– 8 Control System mm mm mm mm mm mm 8 Control System page – Introduction - General Information Not available. Maintenance Manual Ottawa T2 4x2... - Page 83 – 8 Control System Maintenance Manual Ottawa T2 4x2...
-
Page 84: Frame, Body, Cab And Accessories
9.1 Controls and Instruments – 9 Frame, Body, Cab and Accessories mm mm mm mm mm mm 9 Frame, Body, Cab and Accessories Controls and Instruments page – 9 10 30 32 Maintenance Manual Ottawa T2 4x2... - Page 85 Transmission Shifter 5th Wheel Control 5th Wheel Latch Control Power Outlet Option Switches Air Restriction Indicator Power Studs Start Regen Switch Idle Increase/Decrease Switch Diagnostic Switch On-Board Diagnostic Plug Port S=Standard A=Assigned options U=Unassigned options Maintenance Manual Ottawa T2 4x2...
-
Page 86: Description
Lower Left Dash Panel — Provides the following controls and interface connections. • Start Regen Switch IDLE INCREASE/ DECREASE SWITCH • Idle Increase/Decrease Switch • Diagnostic Switch • On-Board Diagnostic Plug Port START DIAGNOSTIC REGEN SWITCH PLUG SWITCH PORT Lower Left Dash Panel Maintenance Manual Ottawa T2 4x2... - Page 87 Right Side Indicator Lights – Wait to Start – Seat Belt – Right Turn Signal – High Exhaust System Temperature. DOT/EPA Tractors only. – DPF (Diesel Particulate Filter) Regen needed. DOT/EPA Tractors only. – Service Maintenance Manual Ottawa T2 4x2...
- Page 88 Controls – Trailer Air Supply – Parking Brake Control – Transmission Shift Selector – Boom Control Lever – Fifth Wheel Unlatch Control – Power Outlet – Optional Switches – Power Studs – Air Restriction Indicator Maintenance Manual Ottawa T2 4x2...
- Page 89 Turn Signal, High Beam and Emergency Flasher Control A multifunction switch is also provided on the stalk on the left side of the steering wheel. Driver Controlled Differential Lock Maintenance Manual Ottawa T2 4x2...
-
Page 90: Low Air Warning
– Diagnosis Components • Cab Accessory Fuse • Gauge Cluster • Ignition Switch Hourmeter Circuit Diagnosis Observation Cause Action Inoperative Circuit breaker open Reset. Repair short as needed. Re- place circuit breaker as needed. Maintenance Manual Ottawa T2 4x2... -
Page 91: Speedometer
Reset. Repair short as needed. Re- place circuit breaker as needed. Mislocated wiring Inspect routing. Relocate wires or isolate terminals as needed. Defective wiring Inspect connections and wires. Test circuits. Repair or replace as needed. Maintenance Manual Ottawa T2 4x2... -
Page 92: Voltmeter
Test circuits. Repair or replace as needed. Inoperative Circuit breaker open Reset. Repair short as needed. Re- place circuit breaker as needed. Defective gauge cluster Replace. Defective wiring Inspect connections and wires. Test circuits. Repair or replace as needed. Maintenance Manual Ottawa T2 4x2... -
Page 93: Seating
A fore and aft isolator is included for snubbing undesirable chugging. This locking lever is mounted on the in- side of the seat. Driver's Seat — Side View Maintenance Manual Ottawa T2 4x2... -
Page 94: Heating, Ventilation And Air Conditioning
Air flow can also be directed to the windshield and side windows. Instrument panel controls give the driver several air handling options including fan speed and cab air temperature. Maintenance Manual Ottawa T2 4x2... -
Page 95: Wiping And Cleaning Of Windows
Defective wiring Inspect connections and wires. Test circuits. Repair or replace as needed. Defective motor Replace. Operate at one speed Defective switch Replace. Defective motor Replace. Do not park Linkage binding Repair or replace as needed. Maintenance Manual Ottawa T2 4x2... -
Page 96: Windshield Washer
Clean as needed. Circuit breaker open Reset. Repair short as needed. Re- place circuit breaker as needed. Defective relay Replace. Defective motor Replace. Defective wiring Inspect connections and wires. Test circuits. Repair or replace as needed. Maintenance Manual Ottawa T2 4x2... -
Page 97: Lighting System
– Description Kalmar provides a dome light, instrument panel lighting, head- lights, marker lights and a trailer electrical connector with circuit breakers. A work area floodlight and a beacon are mounted on an upper rear corner of the cab. -
Page 98: Clearance, Marker And Tail Lights
Replace. Defective wiring Inspect connections and wires. Test circuits. Repair or replace as needed. All lights inoperative Circuit breaker open Reset. Repair short as needed. Re- place circuit breaker as needed. Defective headlight switch Replace. Maintenance Manual Ottawa T2 4x2... -
Page 99: Brake Lights
Defective lamp Replace. Defective brake light switch Replace. Circuit breaker open Reset. Repair short as needed. Re- place circuit breaker as needed. Defective wiring Inspect connections and wires. Test circuits. Repair or replace as needed. Maintenance Manual Ottawa T2 4x2... -
Page 100: Backup Light
Replace. Defective light switch Replace. Circuit breaker open Reset. Repair short as needed. Re- place circuit breaker as needed. Defective relay Replace. Defective wiring Inspect connections and wires. Test circuits. Repair or replace as needed. Maintenance Manual Ottawa T2 4x2... -
Page 101: Turn Signal
Defective turn signal flasher Replace. Defective turn signal switch Replace. Circuit breaker open Reset. Repair short as needed. Re- place circuit breaker as needed. Defective wiring Inspect connections and wires. Test circuits. Repair or replace as needed. Maintenance Manual Ottawa T2 4x2... -
Page 102: Beacon Light
Defective lamp Replace. Defective dome light switch Replace. Circuit breaker open Reset. Repair short as needed. Re- place circuit breaker as needed. Defective wiring Inspect connections and wires. Test circuits. Repair or replace as needed. Maintenance Manual Ottawa T2 4x2... -
Page 103: Daytime Running Lights
Trailer Auxiliary Circuit Diagnosis Observation Cause Action No power at connector Circuit breaker open Reset. Repair short as needed. Re- place circuit breaker as needed. Defective wiring Inspect connections and wires. Test circuits. Repair or replace as needed. Maintenance Manual Ottawa T2 4x2... -
Page 104: Transmission Shifter/Fifth-Wheel Control And Panel Lighting
Defective lamp Replace. Defective dimmer switch Replace. Circuit breaker open Reset. Repair short as needed. Re- place circuit breaker as needed. Defective wiring (or inverter) Inspect connections and wires. Test circuits. Repair or replace as needed. Maintenance Manual Ottawa T2 4x2... -
Page 105: Signal System
Flasher Circuit Breaker 30A • Stop/Tilt Circuit Breaker 20A • Trailer Circuit Breakers 15A • Turn Signal Flasher • Turn Signal Switch • Turn/Stop Light Lamps Emergency Flasher Circuit Diagnosis Observation Cause Action Inoperative light Defective lamp Replace. Maintenance Manual Ottawa T2 4x2... -
Page 106: Backup Alarm
Inoperative alarm Circuit breaker open Reset. Repair short as needed. Re- place circuit breaker as needed. Defective alarm Replace. Defective backup relay Replace. Defective wiring Inspect connections and wires. Test circuits. Repair or replace as needed. Maintenance Manual Ottawa T2 4x2... -
Page 107: Maintenance And Communication
Test circuits. Repair or replace as needed. Poor performance Defective antenna Repair or replace. Defective speakers Repair or replace. Defective radio Replace. Defective wiring Inspect connections and wires. Test circuits. Repair or replace as needed. Maintenance Manual Ottawa T2 4x2... -
Page 108: Glass/Window/Mirrors
A solid window on the opposite wall allows an unob- structed view in that direction. 9.9.5 Rear-View Mirror page – Description Mirrors — Heated and heated/motorized outside rear view mir- rors are optional equipment. Maintenance Manual Ottawa T2 4x2... -
Page 109: Construction And Suspension Of Cab/Deck
The instrument panel frame and the engine bulkhead inside the cab help make the assembly rigid. Foam insulation lines the en- Ottawa 4x2 — Rear View with Tilted Cab gine side of the firewall. Maintenance Manual Ottawa T2 4x2... -
Page 110: Door
5. Adjust the rubber bumpers (C) to compress the rubber 1/16 inch (1.6 mm) when the door is latched and tighten the lock- ing nut. 6. Repeat steps 4 and 5 with the door in the closed position. Maintenance Manual Ottawa T2 4x2... -
Page 111: Roof And Door Mouldings
Cab Tilt Cylinder and Safety Prop The cab attaches and pivots in front on two pins. The pins are fastened to the front ends of the rails. Left Front Cab Tilt Pivot Maintenance Manual Ottawa T2 4x2... - Page 112 After the cab reaches the full down position, the latching mechanism makes a loud sound. The latching bar alignment can be adjusted. Refer to the repair procedures section for more information. Cab Suspension Latching Bar Maintenance Manual Ottawa T2 4x2...
-
Page 113: Cab Tilt (Hydraulic) Components
Since the latch cylinders require less pressure to operate, they will unlatch prior to the lifting of the cab. After they are unlatched and pressure rises, the tilt cyl- inder will extend, raising the cab. Maintenance Manual Ottawa T2 4x2... -
Page 114: Diagnosis (Cab Tilt)
Cab Tilt Diagnosis Observation Cause Action Inoperative pump Electrical See Electrical section. Motor runs — cab does not tilt Low fluid Add fluid as needed. Line leakage Locate and repair. Maintenance Manual Ottawa T2 4x2... -
Page 115: Cab Tilt Pump And Motor
Safety glasses must be worn when working on the hydraulic system. Failure to heed this warning may result in serious per- sonal injury or property damage. The cab tilt pump and motor are located on the hydraulic tank. Maintenance Manual Ottawa T2 4x2... -
Page 116: Repair (Pump And Motor Installation)
4. Locate the adjusting screw (A) on the pressure relief valve body. The valve can be found between the inlet port on the pump and the motor. 5. While holding the adjusting screw with an Allen wrench, loosen the jam nut. Maintenance Manual Ottawa T2 4x2... - Page 117 9. Disconnect the hydraulic gauge and remove the “T” fitting from the supply line; reconnect the supply line. 10. Check the supply line hose and fittings for leaks. 11. Lower the cab. Maintenance Manual Ottawa T2 4x2...
-
Page 118: Cab Tilt Cylinder
5. Position a catch can under the fitting to prevent spills. 6. Remove the hydraulic line from the cylinder. 7. Plug or cap the hose end to prevent contamination; secure the line above the frame rail to prevent loss of hydraulic fluid. Maintenance Manual Ottawa T2 4x2... -
Page 119: Repair (Cylinder Installation)
8. Check all hoses and fittings for leaks. 9. Check the fluid level in the hydraulic tank; adjust as necessary. SPACER PIVOT PIN BRACKET RETAINER CAB PIVOT CAB PIVOT BUSHING Maintenance Manual Ottawa T2 4x2... -
Page 120: Cab Pivot Bushing
9.10 Construction and Suspension of Cab/Deck – 9 Frame, Body, Cab and Accessories 9.10.8 Cab Pivot Bushing page – Repair (Pivot Bushing Removal) WARNING Make sure all safety devices are in place while the cab is in the raised position. Maintenance Manual Ottawa T2 4x2... - Page 121 13. Support the front of the cab deck by placing additional blocks between the deck and frame. 14. Using a drift, drive the old bushings out of the left and right cab pivot blocks. SPACER BRACKET CAB PIVOT PIVOT PIN RETAINER CAB PIVOT BUSHING – Maintenance Manual Ottawa T2 4x2...
-
Page 122: Repair (Pivot Bushing Installation)
The flow of system air for adjustment is audible. The sound can be used to determine the serviceability of the valve. Adjustment should be complete in two to 10 seconds. Cab Air Suspension and Latching System page – Maintenance Manual Ottawa T2 4x2... -
Page 123: Diagnosis (Cab Air Suspension)
5. Disconnect the air line (2) from the leveling valve on the suspension assembly. 6. Remove the four mounting bolts (3, 4) securing the suspen- sion assembly to the frame rail (driver's side). Maintenance Manual Ottawa T2 4x2... -
Page 124: Repair (Cab Suspension Assembly Installation)
11. Make sure all lines are routed away from the rubber bum- per contact area on the deck. Reroute and secure the lines if necessary. 12. Check the hydraulic lines for leaks. NOTE After 100 hours of operation — Recheck fasteners for tightness. – Maintenance Manual Ottawa T2 4x2... -
Page 125: Repair (Air Ride Level Adjustment)
Under 2 seconds — Valve is damaged or filter is clogged. Over 10 seconds — Valve is damaged or filter is clogged. 3. Replace the valve if the valve is damaged or the filter is clogged. Maintenance Manual Ottawa T2 4x2... -
Page 126: Shock Absorbers
3. Remove the bolts and remove the shock absorber from the assembly. 4. Repeat the procedure to remove the second shock absorb- er at the opposite side of the assembly. – Maintenance Manual Ottawa T2 4x2... -
Page 127: Repair (Shock Installation)
5. Raise the cab and tighten all four (1, 2) cab latch bar plate mounting nuts to specification. 6. Lower the cab and recheck the position of the bar in the latch. Readjust if necessary. Maintenance Manual Ottawa T2 4x2... -
Page 128: Chassis
5. Inverted-L Channel Rail Reinforcement (2 when equipped) 6. Boom Cylinder Lower Support/Axle Mounting Bracket (2) 7. Skid Ramp/Rear Crossmember Mounting Bracket(2) 8. Skid Ramp Weldment 9. Rear Tie Bar Angle 10. Rear Crossmember Weldment Maintenance Manual Ottawa T2 4x2... -
Page 129: Diagnosis (Chassis)
Kal- mar sevice department, or ensure that best welding practices are rigorously followed so as to avoid changing the properties of the steel. Failure to heed this warning may result in severe property damage. Maintenance Manual Ottawa T2 4x2... - Page 130 Notches anywhere in rails Vehicle fire Vehicle collision Equipment added beyond vehicle capacity Buckled rails Fifth wheel raised to maximum Straighten, reinforce and align the while maneuvering a loaded trailer rails, or replace the frame as needed. Maintenance Manual Ottawa T2 4x2...
- Page 131 Align the front end. Misaligned rails Straighten, reinforce and align the rails, or replace the frame as needed. Misaligned axle Align the axle. Broken Huck bolts Replace broken Huck bolts with 5/8, grade 8 bolts. page – Maintenance Manual Ottawa T2 4x2...
-
Page 132: Repair (Frame Damage Analysis)
In general, when making reinforcements of any type, observe the following practices. 1. Contact the Kalmar Engineering Department for design ap- proval. 2. Taper reinforcement plates to avoid abrupt changes in sec- tion modulus. Angles at the edge of a reinforcement plate should be less than 45 degrees. -
Page 133: Repair (Making Reinforcements, Attachment)
Use a copper spacer between the flanges of cracked base rail flanges and reinforcement flanges. Cross member mounting flange cracks may be repaired in the same manner as side rail cracks. However, the weld bead should be built up to provide a Maintenance Manual Ottawa T2 4x2... - Page 134 5. Weld with the proper electrode and proper welding tech- niques. 6. Grind the weld smooth on both the inside and outside of the rail or cross member. Be extremely careful to eliminate weld buildup or notches on the edge of the flange. Maintenance Manual Ottawa T2 4x2...
-
Page 135: Bodywork
Perforated decking made from 10-gauge steel is attached across the frame rails at the rear of the cab. Additional perforat- ed decking extends toward the fifth wheel on top of the boom. Cab Access Ladders and Decking Maintenance Manual Ottawa T2 4x2... -
Page 136: Accessories And Options
Reset. Repair short as needed. Re- place circuit breaker as needed. Defective resistor Replace. Defective heater switch Replace. Defective heater/AC relay Replace. Defective wiring Inspect connections and wires. Test circuits. Repair or replace as needed. Maintenance Manual Ottawa T2 4x2... -
Page 137: Mirrors (Heated/Motorized)
Defective mirror Replace. Defective wiring Inspect connections and wires. Test circuits. Repair or replace as needed. Inoperative motor Circuit breaker open Reset. Repair short as needed. Re- place circuit breaker as needed. Defective motor Replace. Maintenance Manual Ottawa T2 4x2... - Page 138 9.16 Accessories and Options – 9 Frame, Body, Cab and Accessories Observation Cause Action Inoperative motor Defective wiring Inspect connections and wires. Test circuits. Repair or replace as needed. Maintenance Manual Ottawa T2 4x2...
- Page 139 9.16 Accessories and Options – 9 Frame, Body, Cab and Accessories Maintenance Manual Ottawa T2 4x2...
-
Page 140: 10 Common Hydraulics
10.3 Tanks and Accumulators 10.3.1 Reservoir page – Description The standard hydraulic reservoir has a 20-gallon capacity. It is fitted with a level sight gauge and a breather. Maintenance Manual Ottawa T2 4x2... -
Page 141: Temperature Control, Cleaning And Hydraulic Oil
10.6.8 Return Filter page – Description The return filter is located in the hydraulic tank, where it is con- tinuously filtering fluid that is used in all three subsystems: boom, cab tilt and power steering. Maintenance Manual Ottawa T2 4x2... -
Page 142: 11 Common Electric
11 Common Electric 11.1 Controls and Instruments page – Description (Wiring Harness) The wiring harness can accommodate several items of optional equipment. Contact your dealer for information about any equipment installed after the vehicle left the factory. Maintenance Manual Ottawa T2 4x2... -
Page 143: Safety
– Description Fuses, Relays and Circuit Breakers — The Kalmar tractor is equipped with two power boards. One power board is located in the cab under the center panel of the dash. The second pow- er board is located in the chassis over the transmission on the left side. - Page 144 PWR_PT_BAT2 ACCY PWR_PT_BAT GAUGES_10 BATTERY_UNFUSED HIGHBEAM DRL_10 LUBE_IGN PNL/TAIL WIPE/WASH_15 HVAC_30 IGNITION_UNFUSED TRLR_LIGHTS_30 PARK_LIGHTS_10 ACCY2 EXT_LIGHTS_25 RADIO/ACCY_15 DRL1 MIRRORS_15 CAB_LIGHT_10 FOGLIGHTS_10 PARK_LPS_10 FLASHER DIAG_10 HORN HEADLIGHTS_15 HORN_10 STOPLAMPS_20 LUBE_BAT FLASHER_30 RADIO_BATT_15 MAIN_GND Cab Power Board Maintenance Manual Ottawa T2 4x2...
- Page 145 11.2 Safety – 11 Common Electric Chassis Power Board Maintenance Manual Ottawa T2 4x2...
-
Page 146: 12 Common Pneumatics
Brake Valve (treadle) • Check Valve • Double Check Valve • Front Brake Chambers • Governor • Low Pressure Indicator • Pressure Protection Valve • Pressure Relief Valve • Quick Release Valve • Rear Brake Chambers Maintenance Manual Ottawa T2 4x2... - Page 147 Test. Replace as needed. Defective governor Test. Adjust or replace as needed. Purge valve leaks Test. Replace as needed. Compressor unloader leaks Slight leakage permitted. Uncover inlet cavity and inspect piston. Repair or replace unloader as needed. Maintenance Manual Ottawa T2 4x2...
- Page 148 Fails to purge Broken, kinked, plugged or Test line — compressor unloaded. disconnected purge control line Defective purge valve Inspect. Repair or replace air dryer as needed. Refer to Medium Duty Truck Unit Repair Manual. Maintenance Manual Ottawa T2 4x2...
- Page 149 Pressure drops: engine stopped, Treadle valve leak Inspect. Repair or replace as brakes applied needed. Lines or fittings leak Inspect. Repair or replace as needed. Spring chamber leak Inspect. Repair or replace as needed. Maintenance Manual Ottawa T2 4x2...
- Page 150 Inspect. Adjust, repair or replace as needed. Air line(s) restricted Inspect. Repair or replace as needed. No brakes Air line(s) restricted or broken Inspect. Repair or replace as needed. Defective treadle valve Inspect. Repair or replace as needed. Maintenance Manual Ottawa T2 4x2...
-
Page 151: Valves
A two-way quick release valve combines the two func- tions in a single housing. Maintenance Manual Ottawa T2 4x2... -
Page 152: Air Dryer
Cause Action Inoperative heater Circuit breaker open Reset. Repair short as needed. Re- place circuit breaker as needed. Defective ignition switch Replace. Defective wiring Inspect connections and wires. Test circuits. Repair or replace as needed. Maintenance Manual Ottawa T2 4x2... - Page 153 12.5 Air Dryer – 12 Common Pneumatics Maintenance Manual Ottawa T2 4x2...
-
Page 154: Error Codes
Description – This section is not applicable for this vehicle. NOTE Error codes for the engine and transmission can be found in the Engine and Transmission manufacturer's manuals. Maintenance Manual Ottawa T2 4x2... - Page 155 – D. Error Codes Maintenance Manual Ottawa T2 4x2...
-
Page 156: Schematics
The Ottawa ABS has three air reservoirs (storage tanks); pri- mary, front and rear. The primary acts as the supply tank to both front and rear service tanks. The instrument panel dis- plays a pressure gauge for each service tank. – Maintenance Manual Ottawa T2 4x2... -
Page 157: On-Highway Air System
3/8" BK 3/8" VL 3/8" RD 3/8" VL 5/8" OE 5/8" GN 5/8" OE 3/8" GN 3/8" BK 5/8" OE 5/8" OE AIR HORN OPTION GREASE JOCKEY LUBE PUMP OPTION On-Highway Air System – Part A Maintenance Manual Ottawa T2 4x2... - Page 158 3/8" YW 3/8" VL 3/8" VL 1/4" VL CAB AIR SUSPENSION INTER AXLE LOCK DIFF LOCK OPTION OPTION SERVICE SPRING 5/8" OE 5/8" GN 3/8" GN 3/8" YW 3/8" RD On-Highway Air System – Part B Maintenance Manual Ottawa T2 4x2...
-
Page 159: On-Highway Air System Circuit
On-Highway Air System Circuit TRACTOR/TRAILER PARK BRAKE VALVE OPTION 5TH WHEEL INTERLOCK OPTION ABS FRONT BRAKES OPTION GREASE JOCKEY LUBE PUMP OPTION AIR HORN OPTION 4 PSI AIR DRYER OPTION On-Highway Air System Circuit – Part A Maintenance Manual Ottawa T2 4x2... - Page 160 TRACTION CONTROL OPTION TRAILER HAND BRAKE OPTION 7.35 CU. IN. RESERVOIR OPTION 0 - 150 PSI ABS REAR BRAKES OPTION 0 - 150 PSI DIFF LOCK OPTION On-Highway Air System Circuit – Part B – Maintenance Manual Ottawa T2 4x2...
-
Page 161: Off-Highway Air System
3/8" YW 3/8" BK 3/8" VL 3/8" VL 5/8" OE 5/8" GN 5/8" OE 5/8" GN 3/8" BK 5/8" OE 5/8" OE AIR HORN OPTION GREASE JOCKEY LUBE PUMP OPTION Off-Highway Air System – Part A Maintenance Manual Ottawa T2 4x2... - Page 162 5/8" OE 5/8" GN 3/8" YW 3/8" VL 3/8" VL 1/4" VL CAB AIR SUSPENSION INTER AXLE LOCK DIFF LOCK OPTION OPTION SERVICE SPRING 5/8" OE 5/8" GN 5/8" GN 3/8" YW Off-Highway Air System – Part B Maintenance Manual Ottawa T2 4x2...
-
Page 163: Off-Highway Air System Circuit
Off-Highway Air System Circuit TRACTOR/TRAILER PARK BRAKE VALVE OPTION 5TH WHEEL INTERLOCK OPTION GREASE JOCKEY LUBE PUMP OPTION AIR HORN OPTION 4 PSI 3RD AIR TANK OPTION AIR DRYER OPTION Off-Highway Air System Circuit – Part A Maintenance Manual Ottawa T2 4x2... - Page 164 4 PSI QUICK TRAILER AIR - R14 VALVE OPTION TRAILER HAND BRAKE OPTION 7.35 CU. IN. RESERVOIR OPTION 0 - 150 PSI 0 - 150 PSI DIFF LOCK OPTION Off-Highway Air System Circuit – Part B Maintenance Manual Ottawa T2 4x2...
-
Page 165: Cab Seating
A rubber bumper prevents the cab from striking the rails. Refer to the main air system schematics in 0.1.1 Air Brakes for cab suspension air lines. Maintenance Manual Ottawa T2 4x2... -
Page 166: Fifth-Wheel Coupling
• Air Reservoir Pressing the control valve button on the instrument panel opens the latch. The button is spring-loaded and normally closed. Once opened, the latch remains open until closed by a trailer king pin. Maintenance Manual Ottawa T2 4x2... - Page 167 0.1 Air System Circuits – E. Schematics 5TH WHEEL UNLATCH 3/8" VL 3/8" VL TR-3 3/8" BK 3/8" RD 3/8" BL 3/8" RD Air Lines — Fifth-Wheel Unlatch Maintenance Manual Ottawa T2 4x2...
-
Page 168: 5Th Wheel Interlock Option Circuit
0.1 Air System Circuits – E. Schematics 5th Wheel Interlock Option Circuit – 5TH WHEEL INTERLOCK OPTION 5th Wheel Interlock Option Maintenance Manual Ottawa T2 4x2... -
Page 169: Tractor/Trailer Park Brake
Air Lines — Tractor/Trailer Park Brake Option page – TRAILER TRACTOR PARK PARK (RED) (YELLOW) MV-3 SUP DEL 3/8" BL 3/8" RD 3/8" OE 3/8" GN 3/8" YW Air Lines — Tractor/Trailer Park Brake Option Maintenance Manual Ottawa T2 4x2... -
Page 170: Tractor/Trailer Park Brake Valve Option Circuit
0.1 Air System Circuits – E. Schematics Tractor/Trailer Park Brake Valve Option Circuit – TRACTOR/TRAILER PARK BRAKE VALVE OPTION Tractor/Trailer Park Brake Valve Option Maintenance Manual Ottawa T2 4x2... -
Page 171: Quick Trailer Air/R14 Valve
QUICK TRAILER AIR - R14 VALVE OPTION 5/8" RD 3/8" RD DC-4 3/8" RD FOOT VALVE TP-3DC 5/8" OE 5/8" GN 5/8" OE 5/8" GN 5/8" OE 5/8" GN Air Lines — Quick Trailer Air/R14 Valve Option Maintenance Manual Ottawa T2 4x2... -
Page 172: Quick Trailer Air/R14 Valve Option Circuit
Air Lines — Trailer Hand Brake Option page – FOOT VALVE TP-3DC 1/2" OE DC-4 1/2" OE 3/8" OE 3/8" VL 3/8" BL 1/2" OE TC-2 3/8" VL 3/8" OE TRAILER HAND BRAKE OPTION Air Lines — Trailer Hand Brake Option Maintenance Manual Ottawa T2 4x2... -
Page 173: Trailer Hand Brake Option Circuit
0.1 Air System Circuits – E. Schematics Trailer Hand Brake Option Circuit – TRAILER HAND BRAKE OPTION Trailer Hand Brake Option – Trailer Hose Connection Coiled Air Lines Circuit TRAILER HOSE CONNECTION Trailer Hose Connection Coiled Air Lines Maintenance Manual Ottawa T2 4x2... -
Page 174: Trailer Hose Connection Glad Hands Both Ends Coiled Air Lines Circuit
GLAD HAND CONNECTORS Trailer Hose Connection Glad Hands Both Ends Coiled Air Lines Trailer Hose Connection Straight Rubber Air Lines – Circuit TRAILER HOSE CONNECTION STRAIGHT RUBBER HOSE Trailer Hose Connection Straight Rubber Air Lines Maintenance Manual Ottawa T2 4x2... -
Page 175: Air Horn
0.1 Air System Circuits – E. Schematics 0.1.8 Air Horn Air Lines — Air Horn Option page – 3/8" VL AIR HORN OPTION Air Lines — Air Horn Option Air Horn Option Circuit – AIR HORN OPTION Air Horn Option Maintenance Manual Ottawa T2 4x2... -
Page 176: Inter Axle Lock
Air Lines — Inter Axle Option page – 3/8" VL INTER AXLE LOCK OPTION 3/8" VL Air Lines — Inter Axle Option Inter Axle Lock Option Circuit – INTER AXLE LOCK OPTION Inter Axle Lock Option Maintenance Manual Ottawa T2 4x2... -
Page 177: Grease Jockey Lube Pump
Air Lines — Grease Jockey Lube Pump Option page – GREASE JOCKEY LUBE PUMP OPTION 3/8" VL Air Lines — Grease Jockey Lube Pump Option – Grease Jockey Lube Pump Option Circuit GREASE JOCKEY LUBE PUMP OPTION Grease Jockey Lube Pump Option Maintenance Manual Ottawa T2 4x2... -
Page 178: Differential Axle Lock
Air Lines — Differential Axle Lock Option page – 3/8" VL DIFF LOCK 3/8" VL Air Lines — Differential Axle Lock Option – Differential Axle Lock Option Circuit DIFFERENTIAL AXLE LOCK OPTION Differential Axle Lock Option Maintenance Manual Ottawa T2 4x2... -
Page 179: Additional 7.35 Cu. In. Air Reservoir
Air Lines — Additional 7.35 cu. in. Air Reservoir Option Additional 7.35 cu. in. Air Reservoir Option – 7.35 CU. IN. RESERVOIR OPTION 0 - 150 PSI 7.35 cu.ft. Additional 7.35 cu. in. Air Reservoir Option Maintenance Manual Ottawa T2 4x2... -
Page 180: Air Dryer
0.1 Air System Circuits – E. Schematics 0.1.13 Air Dryer Air Lines — Air Dryer Option page – AIR DRYER OPTION 5/8" BK 1/4" BK RESV COMP. Air Lines — Air Dryer Option Maintenance Manual Ottawa T2 4x2... -
Page 181: Air Dryer Option
0.1 Air System Circuits – E. Schematics Air Dryer Option – AIR DRYER OPTION Air Dryer Option Maintenance Manual Ottawa T2 4x2... -
Page 182: Abs Brakes
ABS REAR BRAKES TRACTION CONTROL OPTION 1/2" GN 1/2" GN 3/8" YW 3/8" YW ABS REAR ABS FRONT BRAKES BRAKES 1/2" GN 1/2" OE SERVICE SPRING Air Lines — ABS Brakes Option – On-Highway Only Maintenance Manual Ottawa T2 4x2... -
Page 183: Abs Brake Option Circuit
0.1 Air System Circuits – E. Schematics ABS Brake Option Circuit – TRACTION CONTROL TRACTION CONTROL OPTION OPTION ABS FRONT BRAKES OPTION ABS REAR BRAKES OPTION 4 PSI ABS Brake Option Maintenance Manual Ottawa T2 4x2... -
Page 184: Traction Control
Air Lines — Traction Control Option for ABS Brakes page – – On-Highway Only TRACTION CONTROL OPTION 3/8" GN 3/8" GN 3/8" GN Air Lines — Traction Control Option for ABS Brakes – On-High- way Only Maintenance Manual Ottawa T2 4x2... -
Page 185: Traction Control Option For Use With Abs Brake Option Circuit
0.1 Air System Circuits – E. Schematics Traction Control Option for Use With ABS Brake – Option Circuit TRACTION CONTROL TRACTION CONTROL OPTION OPTION Traction Control Option for Use With ABS Brake Option Maintenance Manual Ottawa T2 4x2... -
Page 186: 3Rd Air Tank
– 3RD AIR TANK OPTION 5/8" BK WET TANK 5/8" BK 3/8" VL Air Lines — 3rd Air Tank Option 3rd Air Tank Option Circuit – 3RD AIR TANK OPTION 3rd Air Tank Option Maintenance Manual Ottawa T2 4x2... -
Page 187: Hydraulic System Circuits
• Solenoid For tilting the cab, the motor is controlled by a switch on the rail. A lanyard near the switch allows the operator to unlatch the safety prop prior to up or down movement. Maintenance Manual Ottawa T2 4x2... -
Page 188: Fifth-Wheel Boom
– Hydraulic Lines — Fifth-Wheel Boom Components • Boom • Control Valve • Hydraulic Cylinders • Hydraulic Relief Valve Although engine speed controls the speed of the double-acting cylinders, restrictors slow the downward motion. Maintenance Manual Ottawa T2 4x2... -
Page 189: Power Steering
Hydraulic Lines — Power Steering page – Hydraulic Lines — Power Steering System Components • Integral Steering Gear The power steering system shares the hydraulic fluid reservoir with the cab tilt and boom lift systems. Maintenance Manual Ottawa T2 4x2... -
Page 190: Optional Hydrostatic Steering
Hydraulic Lines — Hydrostatic Steering System Components • Orbital Control Valve • Power Steering Pump • Reservoir • Steering Cylinders The hydrostatic steering system shares the hydraulic fluid res- ervoir with the cab tilt and boom lift systems. Maintenance Manual Ottawa T2 4x2... -
Page 191: Electrical System Circuits
Fuse — Gauge (Cab Accessory Fuse Panel) • Ignition Relay • Ignition Switch • Neutral Start Relay • Start Cutout #1 Relay • Start Cutout #2 Relay • Start Solenoid • Starter Motor with Solenoid Maintenance Manual Ottawa T2 4x2... -
Page 192: Cab Accessory Components
PE = Purple PK = Pink RD = Red TN = Tan WE = White YW = Yellow – Anti-lock Braking System (ABS) For information on the anti-lock braking system, refer to the vendor's service manual. Maintenance Manual Ottawa T2 4x2... -
Page 193: Heater And Air Conditioning
Air Conditioner Switch • Cab Fan (Optional) • Cold Control (AC Optional) • Fan Switch • Fuse — HVAC (Cab Accessory Fuse Panel) • HVAC Fan Motor • Ignition Switch Air conditioning is optional equipment. Maintenance Manual Ottawa T2 4x2... -
Page 194: Horn
HN2001 GN/WE GD2000 WE PASS-THRU HORN STUD Horn Circuit Components • Circuit Breaker — Horn (Cab Accessory Fuse Panel) • Horn • Horn Button • Horn Relay The horn operates independently of the ignition switch. – Maintenance Manual Ottawa T2 4x2... -
Page 195: Mirrors
Circuit Breaker — Optional Accessory • Heater Switch • Left-Hand Mirror Heater • Right-Hand Mirror Heater An indicator lamp illuminates when the mirror heater is active. The ignition switch must be On to use the mirror heater. Maintenance Manual Ottawa T2 4x2... - Page 196 • Right-Hand Mirror Heater • Right-Hand Mirror Motor • Right-Hand Motor Switch An indicator lamp illuminates when the mirror heater is active. The ignition switch must be On to use the mirror heater and motor. Maintenance Manual Ottawa T2 4x2...
-
Page 197: Radio (Optional)
GD2006 WE GD2006 WE RADIO RD2002 BN/RD RD2002 BN/RD RD2002 BN/RD RD2002 BN/RD OVERHEAD RD1003 RD RD1003 RD RD1003 RD RD1003 RD REMOTE BA2004 RD POSITIVE CAB ACC STUD RADIO BATTERY FUSE RADIO BATT Radio Circuit Maintenance Manual Ottawa T2 4x2... -
Page 198: Radio Circuit Hot Wire
Circuit Breaker — Radio Battery (Cab Accessory Fuse Panel) • Fuse — Ignition Switch (Cab Accessory Fuse Panel) • Fuse — Radio (Cab Accessory Fuse Panel) • Ignition Switch The ignition switch must be On to use the radio. Maintenance Manual Ottawa T2 4x2... -
Page 199: Windshield Washer (Optional)
Windshield Washer Circuit Components • Accessory Relay #1 • Circuit Breaker — Wiper/Washer (Cab Accessory Fuse Panel) • Windshield Washer Motor • Windshield Wiper Switch The ignition switch must be On to use the windshield washer. Maintenance Manual Ottawa T2 4x2... -
Page 200: Windshield Wiper
Windshield Wiper Circuit Components • Accessory Relay #1 • Circuit Breaker — Wiper/Washer (Cab Accessory Fuse Panel) • Windshield Wiper Motor • Windshield Wiper Switch The ignition switch must be On to use the windshield wiper. Maintenance Manual Ottawa T2 4x2... -
Page 201: Cab Power Board
0.3 Electrical System Circuits – E. Schematics Cab Power Board – Cab Power Board Wiring Maintenance Manual Ottawa T2 4x2... -
Page 202: Cab Interior Engine Wiring
0.3 Electrical System Circuits – E. Schematics Cab Interior Engine Wiring – Cab Interior Engine Wiring (Cummins ISB 2013 Engine) – Cab Interior Engine Wiring (Cummins QSB 6.7 T3 Engine) Maintenance Manual Ottawa T2 4x2... - Page 203 0.3 Electrical System Circuits – E. Schematics – Cab Interior Engine Wiring (Cummins QSB T4F Engine) Maintenance Manual Ottawa T2 4x2...
-
Page 204: Cab Instrumentation
Gauge (Second Service Tank) • Gauge Lamp • Gauge Lamp (Second Service Tank) • Headlight Switch • Panel Dimmer Switch (Optional) Vehicles equipped with ABS have two service tanks and a pressure gauge for each one. Maintenance Manual Ottawa T2 4x2... -
Page 205: Engine Hourmeter
Circuit Breaker — Ignition Switch (Cab Accessory Fuse Panel) • Fuse — Gauge (Cab Accessory Fuse Panel) • Hourmeter • Ignition Relay • Oil Pressure (Hourmeter) Switch The hourmeter operates when engine oil pressure reaches the set point closing the switch. Maintenance Manual Ottawa T2 4x2... -
Page 206: Fuel Gauge
0.3 Electrical System Circuits – E. Schematics Fuel Gauge – Fuel Gauge Circuit (Cummins ISB 6.7 2013 Engine) Maintenance Manual Ottawa T2 4x2... - Page 207 Fuse — Gauge (Cab Accessory Fuse Panel) • Gauge • Gauge Lamp • Headlight Switch • Ignition Relay • Panel Dimmer Switch (Optional) • Sender (Fuel Level — Variable Resistance) The fuel level gauge displays quarter tank intervals. Maintenance Manual Ottawa T2 4x2...
- Page 208 0.3 Electrical System Circuits – E. Schematics Fuel Gauge Circuit (Cummins QSB Engines) Maintenance Manual Ottawa T2 4x2...
-
Page 209: Low Air Warning Alarm
SWITCH CAB BULKHEAD CONNECTOR Low Air Warning Alarm Circuit Components • Fuse — Gauge (Cab Accessory Fuse Panel) • Ignition Relay • Low Air Alarm Buzzer • Low Air Switch • Low Air Switch (Optional) Maintenance Manual Ottawa T2 4x2... -
Page 210: Speedometer
Ignition Relay • Panel Dimmer Switch (Optional) Some tractor speedometers may also display the total distance traveled. The speedometer is affected by DIP switch settings, tire size, gear ratios and the source of pulse generation. Maintenance Manual Ottawa T2 4x2... -
Page 211: Voltmeter
Fuse — Gauge (Cab Accessory Fuse Panel) • Gauge Lamp • Headlight Switch • Ignition Relay • Panel Dimmer Switch (Optional) • Voltmeter The voltmeter detects the voltage at the accessory terminal on the ignition switch. Maintenance Manual Ottawa T2 4x2... -
Page 212: Gauge Cluster Wiring
0.3 Electrical System Circuits – E. Schematics Gauge Cluster Wiring – Gauge Cluster Wiring (Cummins ISB 2013 Engine) – Part A Maintenance Manual Ottawa T2 4x2... - Page 213 0.3 Electrical System Circuits – E. Schematics Gauge Cluster Wiring (Cummins ISB 2013 Engine) – Part B Maintenance Manual Ottawa T2 4x2...
- Page 214 0.3 Electrical System Circuits – E. Schematics – Gauge Cluster Wiring (Cummins QSB 6.7 T3 Engine) – Part A Maintenance Manual Ottawa T2 4x2...
- Page 215 0.3 Electrical System Circuits – E. Schematics Gauge Cluster Wiring (Cummins QSB 6.7 T3 Engine) – Part B Maintenance Manual Ottawa T2 4x2...
- Page 216 0.3 Electrical System Circuits – E. Schematics – Gauge Cluster Wiring (Cummins QSB T4F Engine) – Part A Maintenance Manual Ottawa T2 4x2...
- Page 217 0.3 Electrical System Circuits – E. Schematics Gauge Cluster Wiring (Cummins QSB T4F Engine) – Part B Maintenance Manual Ottawa T2 4x2...
-
Page 218: Chassis Circuits
OUTPUT KEYSWITCH BATTERY POST ABS MODULE BATTERY ABS MODULE BATTERY SPARE BATTERY DEF LINE HEATER COMMAND LINE HEATER 1 LINE HEATER 2 LINE HEATER 3 DEF PUMP HEATER COMMAND DEF PUMP HEATER SUPPLY Chassis Power Board Wiring Maintenance Manual Ottawa T2 4x2... -
Page 219: Air Dryer (Optional)
0.3 Electrical System Circuits – E. Schematics Air Dryer (Optional) – Air Dryer Circuit Components • Air Dryer • Chassis Options Relay • Circuit Breaker — Air Dryer (Cab Accessory Fuse Panel) Maintenance Manual Ottawa T2 4x2... -
Page 220: Cab Tilt Pump
Batteries • Fuse — Tilt (Cab Accessory Fuse Panel) • Ignition Relay • Starter with Solenoid • Tilt Pump Control Switch • Tilt Pump Motor (Up) • Tilt Solenoid (Down) • Tilt Solenoid to Pump Maintenance Manual Ottawa T2 4x2... -
Page 221: Cab Exterior/Front Chassis Wiring
0.3 Electrical System Circuits – E. Schematics Cab Exterior/Front Chassis Wiring – Cab Exterior/Front Chassis Wiring (Cummins ISB 2013 Engine) Maintenance Manual Ottawa T2 4x2... - Page 222 0.3 Electrical System Circuits – E. Schematics – Cab Exterior/Front Chassis Wiring (Cummins QSB 6.7 T3 Engine) Maintenance Manual Ottawa T2 4x2...
- Page 223 0.3 Electrical System Circuits – E. Schematics – Cab Exterior/Front Chassis Wiring (Cummins QSB T4F Engine) Maintenance Manual Ottawa T2 4x2...
-
Page 224: Chassis Wiring
0.3 Electrical System Circuits – E. Schematics Chassis Wiring – Chassis Wiring (Cummins ISB 2013 Engine) Maintenance Manual Ottawa T2 4x2... - Page 225 0.3 Electrical System Circuits – E. Schematics – Chassis Wiring (Cummins QSB 6.7 T3 Engine) Maintenance Manual Ottawa T2 4x2...
- Page 226 0.3 Electrical System Circuits – E. Schematics – Chassis Wiring (Cummins QSB T4F Engine) – Maintenance Manual Ottawa T2 4x2...
-
Page 227: Air System Tank Pressure Senders
Air System Tank Pressure Senders Air System Tank Pressure Senders (Cummins ISB 2013 Engine) – Air System Tank Pressure Senders (Cummins QSB 6.7 T3 Engine) – Air System Tank Pressure Senders (Cummins QSB T4F Engine) – Maintenance Manual Ottawa T2 4x2... -
Page 228: Battery Power Distribution
0.3 Electrical System Circuits – E. Schematics Battery Power Distribution Battery Power Distribution (Cummins ISB 2013 Engine) – Battery Power Distribution (Cummins QSB 6.7 T3 Engine) Maintenance Manual Ottawa T2 4x2... - Page 229 0.3 Electrical System Circuits – E. Schematics – Battery Power Distribution (Cummins QSB T4F Engine) – Maintenance Manual Ottawa T2 4x2...
-
Page 230: Cab Tilt System Control Wiring
0.3 Electrical System Circuits – E. Schematics Cab Tilt System Control Wiring Cab Tilt System Control Wiring (Cummins ISB 2013 Engine) Maintenance Manual Ottawa T2 4x2... - Page 231 0.3 Electrical System Circuits – E. Schematics – Cab Tilt System Control Wiring (Cummins QSB 6.7 T3 Engine) Maintenance Manual Ottawa T2 4x2...
- Page 232 0.3 Electrical System Circuits – E. Schematics – Cab Tilt System Control Wiring (Cummins QSB T4F Engine) Maintenance Manual Ottawa T2 4x2...
-
Page 233: Lighting Circuits (Cab And Chassis)
Backup Lamp • Circuit Breaker — Reverse (Cab Accessory Fuse Panel) • Ignition Relay • Reverse Relay • Transmission Case Ground The backup lamp illuminates and the alarm sounds when the transmission is shifted to reverse. Maintenance Manual Ottawa T2 4x2... -
Page 234: Beacon/Strobe Light (Optional)
0.3 Electrical System Circuits – E. Schematics Beacon/Strobe Light (Optional) – Beacon/Strobe Light Circuit Components • Accessory Relay #2 • Beacon Light Switch (Optional) • Beacon/Strobe Lamp Maintenance Manual Ottawa T2 4x2... -
Page 235: Clearance Lights (Optional)
Circuit Breaker — Parking Lights (Cab Accessory Fuse Panel) • Circuit Breaker — Tail/Clearance Lights (Trailer Breakers) • Headlight Switch • Trailer Lights Relay Double-faced Turn/Marker Lights are standard equipment on vehicles that meet FMVSS and CMVSS requirements. Maintenance Manual Ottawa T2 4x2... -
Page 236: Daytime Running Lights (Optional)
HI BEAM (BE) LIGHTS CIRCUIT IGNITION DAYTIME RUNNING LIGHTS CONNECTOR Daytime Running Lights Circuit Components • Daytime Running Lights Module • Fuse — Daytime Running Lights (Cab Accessory Fuse Panel) • Head Lamps • Ignition Relay Maintenance Manual Ottawa T2 4x2... -
Page 237: Dome Light
• Accessory Relay #2 • Dome Lamp with Switch • Fuse — Cab Lighting (Cab Accessory Fuse Panel) The lamp On/Off switch is on the dome light fixture. – Fifth-Wheel Control Refer to Transmission Shifter. Maintenance Manual Ottawa T2 4x2... -
Page 238: Flood Light
0.3 Electrical System Circuits – E. Schematics Flood Light – Flood Light Circuit Components • Accessory Relay #2 • Flood Light Maintenance Manual Ottawa T2 4x2... -
Page 239: Headlights
Headlight Relay (High/Low) • Headlight Switch • Turn Signal and Dimmer Switch – Marker Lights Refer to Clearance, Marker and Tail Lights. – Panel Lighting Refer to Transmission Shifter. – Strobe Light Refer to Beacon/Strobe Light. Maintenance Manual Ottawa T2 4x2... -
Page 240: Tail Lights
Ignition Switch Jumper • Ignition Switch Jumper (ABS Harness) • Relay — B19 (Trailer Auxiliary Switch Power Relay) • Trailer Auxiliary Switch • Triaxle Switch Connector The trailer auxiliary switch is not used with ABS. Maintenance Manual Ottawa T2 4x2... -
Page 241: Transmission Shifter, Fifth-Wheel Control And Panel Lighting
Light Bar — Fan Control • Light Bar — Option Switches • Panel Dimmer Switch (Optional) The electroluminescent lamp illuminates when the ignition switch is in the Run position. It operates independently of the headlight switch. Maintenance Manual Ottawa T2 4x2... -
Page 242: Turn Signal, Tail, Brake Lights And Emergency Flasher
SL2000 BK TURN SIGNAL, TAIL, BRAKE CAB ACC FUSE STOPLIGHTS REMOTE STOP LTS LIGHTS & EMERGENCY FLASHER BA2002 RD POSITIVE STUD 20 A 1 Turn Signal, Tail, Brake Lights and Emergency Flasher Circuit — Part A Maintenance Manual Ottawa T2 4x2... - Page 243 SL2000 BK STOP LTS SL2000 BK 15 A SL2000 BK 1 2 3 4 5 6 7 SL1000 OE/RD TRAILER CONNECTOR STOP LIGHT SWITCH Turn Signal, Tail, Brake Lights and Emergency Flasher Circuit — Part B Maintenance Manual Ottawa T2 4x2...
-
Page 244: Upper Cab Harness
Turn Signal and Headlight Dimmer Switch • Turn Signal/Parking Lamps (Front, Right and Left) Double-faced Turn/Marker Lights are standard equipment on vehicles manufactured to FMVSS and CMVSS specifications. – Upper Cab Harness Upper Cab Harness (Cummins ISB 2013 Engine) Maintenance Manual Ottawa T2 4x2... -
Page 245: Headlight/Dimmer Switch Wiring
0.3 Electrical System Circuits – E. Schematics – Upper Cab Harness (Cummins QSB 6.7 T3 Engine) – Upper Cab Harness (Cummins QSB T4F Engine) Headlight/Dimmer Switch Wiring – Headlight/Dimmer Switch Wiring (Cummins ISB 2013 Engine) Maintenance Manual Ottawa T2 4x2... - Page 246 0.3 Electrical System Circuits – E. Schematics – Headlight/Dimmer Switch Wiring (Cummins QSB 6.7 T3 Engine) – Headlight/Dimmer Switch Wiring (Cummins QSB T4F Engine) Maintenance Manual Ottawa T2 4x2...
-
Page 247: Auxiliary Lighting And Air Horn
0.3 Electrical System Circuits – E. Schematics Auxiliary Lighting and Air Horn – Auxiliary Lighting and Air Horn (Cummins ISB 2013 Engine) – Auxiliary Lighting and Air Horn (Cummins QSB 6.7 T3 Engine) Maintenance Manual Ottawa T2 4x2... -
Page 248: Tail Light/Backup Light Wiring
0.3 Electrical System Circuits – E. Schematics – Auxiliary Lighting and Air Horn (Cummins QSB T4F Engine) Tail Light/Backup Light Wiring – Tail Light/Backup Light Wiring (Cummins ISB 2013 Engine) Maintenance Manual Ottawa T2 4x2... - Page 249 0.3 Electrical System Circuits – E. Schematics – Tail Light/Backup Light Wiring (Cummins QSB 6.7 T3 Engine) – Tail Light/Backup Light Wiring (Cummins QSB T4F Engine) Maintenance Manual Ottawa T2 4x2...
-
Page 250: Engine Controls
Engine Controls Throttle Pedal (TPS) Wiring page – Throttle Pedal (TPS) Wiring (Cummins ISB 2013 Engine) – Throttle Pedal (TPS) Wiring (Cummins QSB 6.7 T3 Engine) – Throttle Pedal (TPS) Wiring (Cummins QSB T4F Engine) – Maintenance Manual Ottawa T2 4x2... -
Page 251: Engine Wiring
0.3 Electrical System Circuits – E. Schematics Engine Wiring Engine Wiring (Cummins ISB 2013 Engine) Maintenance Manual Ottawa T2 4x2... - Page 252 0.3 Electrical System Circuits – E. Schematics – Engine Wiring (Cummins QSB 6.7 T3 Engine) Maintenance Manual Ottawa T2 4x2...
- Page 253 0.3 Electrical System Circuits – E. Schematics – Engine Wiring (Cummins QSB T4F Engine) Maintenance Manual Ottawa T2 4x2...
-
Page 254: Exhaust
0.3 Electrical System Circuits – E. Schematics 0.3.8 Exhaust Aftertreatment Wiring page – Aftertreatment Wiring (Cummins ISB 2013 Engine) Maintenance Manual Ottawa T2 4x2... - Page 255 0.3 Electrical System Circuits – E. Schematics – Aftertreatment Wiring (Cummins QSB T4F Engine) Maintenance Manual Ottawa T2 4x2...
-
Page 256: Technical Data
F. Technical Data Standard Vehicle Data page – Ottawa T2 Series Terminal Tractor Standard features, dimensions and performance specifications are presented below for three typical chassis configurations. Optional equipment items are available including ABS braking systems and GCW ratings up to 125,000 pounds (56,700 kg) depending on the engine, transmission and axle combinations. - Page 257 97 inch (2,464 mm) 97 inch (2,464 mm) Fifth-wheel boom lift capacity 50,000 lbs. (27,216 kg) 50,000 lbs. (27,216 kg) Fifth wheel FW 3500 FW 3500 Chassis weight 14,500 lbs. (6,577 kg) 14,500 lbs. (6,577 kg) Maintenance Manual Ottawa T2 4x2...
-
Page 258: Hydraulic System
1200 rpm Pump relief setting 2100 psi (145 bar) Cab Tilt System Components Specification Pump flow (minimum) 0.3 gallons (1.1 liter) per minute at 1200 rpm Pump relief setting 3200 psi (159 bar) Maintenance Manual Ottawa T2 4x2... -
Page 259: Fluids, Lubricants And Sealants
NLGI 0 lubricant (cold weather) Transmission fluid/lubricant (automatic) Transynd TES-295 Approved (Also, refer to transmis- sion manufacturer’s specifications.) Wheel bearings, front axle: Grease lubricated NLGI 1 or 2 Oil lubricated EPA 85-140 (Also, refer to axle manufacturer’s specifications.) Maintenance Manual Ottawa T2 4x2... -
Page 260: Fastener Torque Values
55 ft. lbs. 75 Nm Boom pump relief valve adjusting screw jam nut 15 ft. lbs. 20 Nm Steering gear mounting bolts 350 ft. lbs. 475 Nm Wheel lug nuts 450-500 ft. lbs. 610-678 Nm Maintenance Manual Ottawa T2 4x2... - Page 261 0.4 Fastener Torque Values – F. Technical Data Maintenance Manual Ottawa T2 4x2...
-
Page 262: Appendix
– G. Appendix mm mm mm mm mm mm G. Appendix page – Description This section is not applicable for this vehicle. Maintenance Manual Ottawa T2 4x2...
Need help?
Do you have a question about the Ottawa t2 and is the answer not in the manual?
Questions and answers
How do you reset the Maintenance check engine light
@steven oelhafen
@steven oelhafen get Insite and shut it off
how much freon in system
NEED PART NUMBER FOR LFT SIDE REAR WINDOW