Table of Contents
Advertisement
Quick Links
Operating Instructions
Zoom Lens
Commercial Use
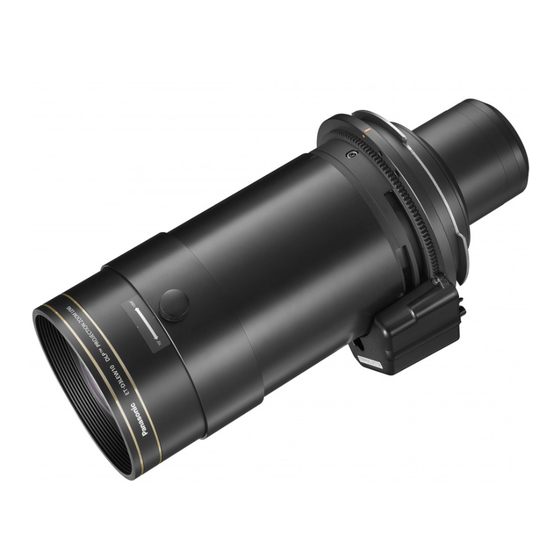
ET-D3LEW10
Model No.
ENGLISH
Thank you for purchasing this Panasonic product.
■ To ensure correct use of this lens, please read the operating instructions supplied
with the lens and the projector carefully.
■ Before using this product, be sure to read "Read this first!" (
Page 3).
■ Please save this manual for future use.
DPQX1300ZA/X1
Advertisement
Table of Contents

Related Manuals for Panasonic ET-D3LEW10


Summary of Contents for Panasonic ET-D3LEW10
- Page 1 ET-D3LEW10 Model No. ENGLISH Thank you for purchasing this Panasonic product. ■ To ensure correct use of this lens, please read the operating instructions supplied with the lens and the projector carefully. ■ Before using this product, be sure to read “Read this first!” ( Page 3).
-
Page 2: Table Of Contents
█ Contents Read this first! ..................3 Before Use.....................4 Attaching the Lens / Detaching the Lens ...........5 Before replacing the projection lens ............5 Attaching the Lens................... 5 Peripheral focus adjustment function ............7 Lens calibration ..................8 Removing the Lens ................. 9 Projection relationships..............10 Lens shift ranges ................11 Specifications ..................12... -
Page 3: Read This First
Read this first! Always follow these precautions WARNING: Do not look at or place your skin into the light emitted from the lens while the projector is being used. Doing so can cause burns or loss of sight. z Strong light is emitted from the projector’s lens. Do not look at or place your hands directly into this light. -
Page 4: Before Use
Models other than the above may also be supported. Refer to the operating instructions for your projector or the Panasonic website (https://panasonic.net/cns/projector/). z If the projector you are using is PT-RQ32K / PT-RZ31K / PT-RS30K / PT-RZ21K / PT-RS20K, you may not be able to use the projection lens depending on main version of the firmware. -
Page 5: Attaching The Lens / Detaching The Lens
Attaching the Lens / Detaching the Lens Before replacing the projection lens Return the projection lens to the home position before replacing or removing it. For details on how to return the lens to the home position, refer to the operating instructions of the projector. - Page 6 Attaching the Lens / Detaching the Lens (continued) (i) Insert the projection lens while aligning its marker (orange) with the marker on the projector ( to the left of “LOCK”), and (ii) turn it clockwise until it clicks into place. レンズ落下防止ねじ...
-
Page 7: Peripheral Focus Adjustment Function
Attaching the Lens / Detaching the Lens (continued) Peripheral focus adjustment function When using the projection lens, the focus balance between the center of the projected image and the peripheral areas differs depending on the size of the image. The projection lens is equipped with a function for adjusting the peripheral focus. The illustrations in this procedure depict ロックつまみ... -
Page 8: Lens Calibration
The [LENS CALIBRATION] screen ACTIVE FOCUS OPTIMIZER appears. LENS CALIBRATION MENU SELECT SUB MENU ENTER Use the ▲ and ▼ buttons to LENS CALIBRATION : ET-D3LEW10 select [SHIFT/FOCUS/ZOOM], SHIFT/FOCUS/ZOOM SHIFT/FOCUS and press the <ENTER> ZOOM button. MENU SELECT z The confirmation screen appears. -
Page 9: Removing The Lens
Attaching the Lens / Detaching the Lens (continued) Removing the Lens レンズ落下防止ねじ Lens drop prevention screw The illustrations in this procedure depict 目印 (オレンジ色) Marker (orange) use of the PT-RZ21K as an example. Remove the lens drop prevention screw. z Use a Phillips screwdriver to remove the screw in first hole to the right of the marker (orange) on the projection lens. -
Page 10: Projection Relationships
Projection relationships The dimensional relationship between the screen and the projector is shown below. ■ Dimensional relationship diagram 投写画面 Projected image スクリーン Screen L (LW/LT) L (LW/LT) スクリーン Screen Note z This diagram assumes that the size and position of the projected image will be adjusted so that the image fills the entire screen. -
Page 11: Lens Shift Ranges
Lens shift ranges After moving the lens to the home position according to “Lens calibration” on page 8, you can use the position of the projected image at that position (i.e., the standard projection position) as a basis, and use the lens shift adjustment function on the projector to adjust the position of the projected image within the respective lens shift ranges. -
Page 12: Specifications
Specifications F value Focal length (f) 26.6 mm (1-1/16") - 36.4 mm (1-7/16") Width 154 mm (6-1/16") Dimensions Height 154 mm (6-1/16") Depth 354 mm (13-15/16") Net Weight Approx. 6.2 kg (13.7 lb) *1: Excluding protrusions. Dimensions (Unit: mm) 354 (13-15/16") 12-ENGLISH... - Page 13 Information for users in the European Union Importer’s name and address within the European Union Panasonic Marketing Europe GmbH Panasonic Testing Centre Winsbergring 15, 22525 Hamburg, Germany Disposal of Old Equipment Only for European Union and countries with recycling systems This symbol on the products, packaging, and/or accompanying documents means that used electrical and electronic products must not be mixed with general household waste.
- Page 14 Panasonic Corporation Web Site : https://panasonic.net/cns/projector/ © Panasonic Corporation 2018 Panasonic System Solutions Company of North America Two Riverfront Plaza, Newark, NJ 07102 TEL: (877) 803 - 8492 Panasonic Canada Inc. 5770 Ambler Drive, Mississauga, Ontario L4W 2T3 TEL: (905) 624 - 5010...
- Page 15 Appendix / Annexe / 付録 (Unit / Unités / 単位 : m) z When the screen aspect ratio is 16:10 PT-RQ32K PT-RZ31K / PT-RZ21K z Lorsque le rapport d aspect de l'écran Throw ratio / Throw ratio / Rapport de projection / Rapport de projection / est 16:10 スローレシオ...
- Page 16 Appendix / Annexe / 付録 (continued / suite / つづき) (Unit / Unités / 単位 : m) z When the screen aspect ratio is 4:3 PT-RQ32K PT-RZ31K / PT-RZ21K PT-RS30K / PT-RS20K z Lorsque le rapport d aspect de l'écran Throw ratio / Throw ratio / Throw ratio /...
- Page 17 Appendix / Annexe / 付録 (continued / suite / つづき) z Projection distance formulas z Formules de distance de projection z 投写距離計算式 The dimensions of the following table contain a slight error. Periods are used to represent decimal points in the calculation formulas in the following table. Les dimensions du tableau suivant peuvent présenter un léger écart.
- Page 18 Panasonic Corporation Web Site : https://panasonic.net/cns/projector/ Panasonic System Solutions Company of North America Two Riverfront Plaza, Newark, NJ 07102 TEL: (877) 803 - 8492 Panasonic Canada Inc. 5770 Ambler Drive, Mississauga, Ontario L4W 2T3 TEL: (905) 624 - 5010 パナソニック株式会社 コネクティッドソリューションズ社...
Need help?
Do you have a question about the ET-D3LEW10 and is the answer not in the manual?
Questions and answers