Table of Contents
Advertisement
Advertisement
Table of Contents

Summary of Contents for GBF PL960M
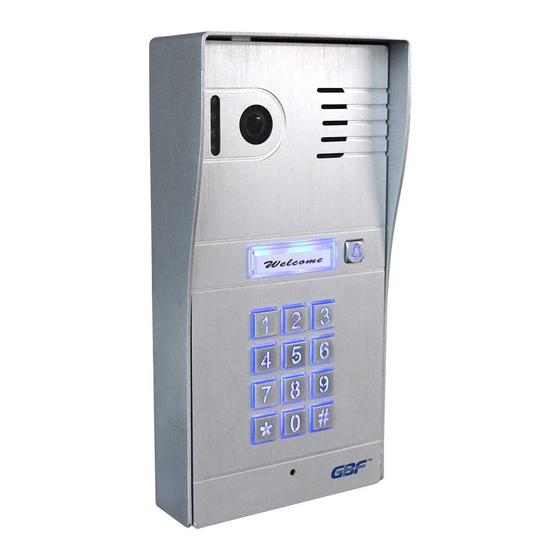
- Page 1 G B F WiFi IP Doorbell USER MANUAL...
- Page 2 Wi-Fi, but the convenience of not requiring wires from your IP Doorbell location to your router may be the determining factor in your installation. Notes: GBF IP doorbell system only works with 2.4G hz WiFi, not 5G hz WiFi.
- Page 3 CONTENTS (1) GBF PL960M/PM IP Doorbell (1) Metal Back Box (1) External Wi-Fi Antenna with 3’ Cable (1) 12VDC Power Supply (1) RJ-45 Wired Ethernet Adapter Dongle (1) Relay/Push-to-Exit Wiring Harness (1) Bell Connector Wire Set (4) Screws with Anchors...
-
Page 5: Installation
1. Installation *Note: It may be more convenient to perform the initial configuration of the IP Doorbell with it temporarily connected to power nearby your home internet router and a computer. This way testing and operation can be verified before the unit is mounted permanently. - Location: Choose a location for your new IP Doorbell, taking into consideration sightlines, shadows, and excessive back - ground lighting for the camera. - Page 6 Back case Screws Rain Cover...
- Page 9 2. Configuration Begin by performing a factory reset of the settings in your IP Doorbell. To default the settings to factory, follow these steps; - Apply power to the IP doorbell. - Within 5 seconds, press and hold the ‘Bell’ button until your hear a distinctive 1 second long buzzer sound (after approxi- mately 1 minute, it is preceded by a flash of the illuminator LED’s).
- Page 10 2. Outdoor station configuration Downloading the App To configure and receive calls from the Outdoor Station you need to download the ControlCam2 Application. Available on Google Play Store (Android) and Apple App Store (iOS). ControlCam2 Notes: The ControlCam2 app is free to use. ...
- Page 11 2.1 Adding devices to your ControlCam2 account Configuring a new device Before configuring a new device (Outdoor station or Skybox), it is necessary to perform the factory reset. 1. With the device powered on, Hold the ‘call’ button on Outdoor Stations or ‘reset’...
- Page 12 Once the Device has been added to the app, you will be able to access it by Wi-Fi or mobile data (3G/4G). 3.1.2 Configuring a new device using iOS 1. Wait 2 minutes after the factory reset, allowing the device to restart properly.
- Page 13 LAN Search 5. Press the ‘Lan Search’ button. 6. A list of all devices in the network will appear, click on the desired one. 7. On the ‘Add Device screen’ will appear the information from that device. 8. insert the password (default password is ‘1234’), change the device’s name to the desired name, and press ‘Save’.
-
Page 14: Keypad Programming
3. Keypad Programming (PL960PM Model) The PL960PM keypad can be custom programmed with up to 40 different access codes, and will trigger the same relay that is triggered through the ControlCam App. The length of the access codes and programming pass- word can be programmed to be two to six digits in length (globally). - Page 15 Add User Access Codes: 1. Enter programming mode. 2. Enter two digits (01 – 40) representing the slot in which the user code will reside, a longer beep is heard. 3. Enter the new user code (length determined through other programming);...
- Page 16 Delete All Settings (Maintains Programming Password): 1. Enter programming mode. 2. Press ‘#’, two short chirps can be heard. 3. Press’#’ again, a longer beep can be heard. 4. Press ‘#' again seven more times. After three seconds another longer beep will be heard confirming deletion of all User codes and resetting the unlock duration time back to 1 second.
- Page 17 Changing device’s name, username and password When desired you can change the device’s username and password, or after another user has changed, it is necessary to change on the other users. 1. In the ‘Device’s setting screen’ enter the new information (username and/or password, and name if desired).
-
Page 18: Motion Detection
request to the app each time it is accessed). 1. In the ‘Advanced Settings screen’ click on ‘Modify Device Password’. 2. Enter the ‘device password’ (current), then insert the ‘new password’ and the ‘password confirmation’. 3. Press ‘Save’. 4. Exit the ‘Device’s Settings Screen’. Note: It is a good feature for building managers. -
Page 19: Answering A Call
2. A popup message will appear. Then click on the ‘Ok’ to confirm. 3. Exit the ‘Device’s Settings Screen’. Reboot/Restore In case of malfunction of your device, you can try to troubleshoot it using this option. Use Reboot to force a reset on the device, and Restore to force a factory reset. -
Page 20: Image Capture
station and the ‘Push to talk’ microphone will be enabled. 2. Press and hold the ‘Press to Talk’ button to talk with the visitor. Unlocking the Door During a call or monitoring mode, click on the ‘locker’ button to activate the gate opener 1. -
Page 21: App Mode
2. Select the ‘Media’ option. 3. The first tab shows the recent files (images and videos), the second shows only videos and the third only images. 4. To delete a file, press and hold on the image then confirm the popup message. - Page 22 Change User Account Password 1. From the device ‘Account screen’, click on ‘Change Password’. Enter your ‘password’ (current), then insert the ‘new password’ and the ‘password confirmation’. 3. Click on the ‘Done’ button. 4. You will be redirected to the login screen and will need to insert username and the new password.
- Page 23 USER MANUAL...


Need help?
Do you have a question about the PL960M and is the answer not in the manual?
Questions and answers