Table of Contents
Advertisement
Quick Links
Advertisement
Table of Contents

Related Manuals for HiFiMAN Shangri-La Jr


Summary of Contents for HiFiMAN Shangri-La Jr
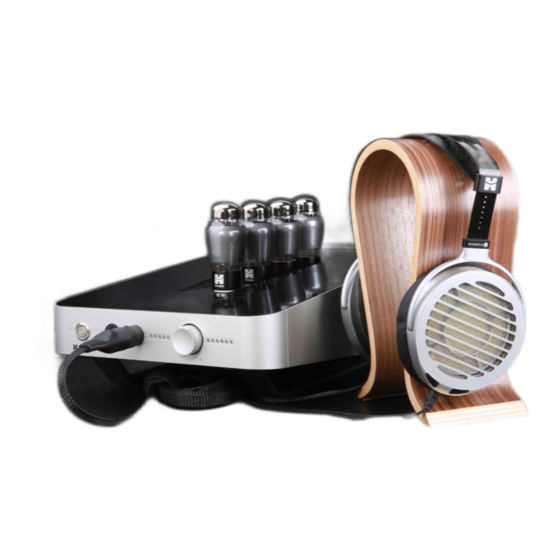
- Page 1 Electrostatic Headphone System User Guide...
- Page 2 Safety Cautions WARNING RISK OF ELECTRIC SHOCK DO NOT OPEN TO REDUCE THE RISK OF ELECTRIC SHOCK, DO NOT REMOVE COVER (OR BACK). NO USER-SERVICEABLE PARTS INSIDE. REFER SERVICING TO QUALIFIED SERVICE PERSONNEL. Warning: Non-insulated dangerous voltage within the product s enclosure may be of sufficient magnitude to constitute a risk of electric shock.
- Page 3 Do not expose the product to chemicals such as pesticides, benzene, acids or alkaline. • This product should not be disassembled or refitted by anyone other than HIFIMAN. • To avoid fire, while the amplifier is working, vacuum tubes and air vents should not be obstructed with papers, tablecloth, curtains or any other items.
- Page 4 Safety Cautions Headphone To avoid risk of electric shock and to protect the diaphragm from being damaged, nothing • should be inserted into the grill on the headphone. As with the amplifier, the headphone should be kept away from a high temperature environ- •...
-
Page 5: Table Of Contents
Table of Contents Thank you for your purchase of the SHANGRI-LA jr Electrostatic Headphone System. To ensure the correct operation, please read the operating instructions carefully. After reading, please retain for reference in the future. ……………………………… Technical Data Features ………………………………………... -
Page 6: Technical Data
Technical Data Specifications Headphone Frequency Response: 7Hz -120kHz Bias Voltage: 550V-650V Weight: 13.2oz (374g) Amplifier Weight: 11 kg (24 lb) Dimensions: 400 x 265 x 108 mm (15.7" x 10.4" x 4.2") Accessories Items Quantity Power Cable Electrostatic Headphone (in a box) Headphone Stand 6SN7 Vacuum Tube 4pcs... -
Page 7: Features
Features SHANGRI-LA jr Electrostatic Headphone • Nano-particle coated sub-micrometer thickness diaphragm provides unsurpassed high frequency response. The highly resolving audio and extremely high frequency range allows the sound- • stage to be dramatically open and expansive compared to a traditional “moving coil”... - Page 8 Relay-based attenuator with a 24-step level of volume control and a total of 23 separate resistors for a more pure listening experience • Made of aviation grade aluminum alloy, the advanced industrial design is from the HIFIMAN US design team in Boston •...
-
Page 9: Notes For Operation
Notes for Operation Warning: Please read the following instructions before connecting this product to a power source for the first time. Power voltage might vary in different countries and areas. Please make sure the rated voltage ( for instance, alternating current AC 230V 50Hz or alternat- ing current AC 115V 60Hz ) on the panel corresponds to local mains voltage. -
Page 10: Functions
Functions Front Panel 6SN7 Vacuum Tubes Volume Indicator Headphone Output Socket Power (with indicator LED) Headphone Output Socket... - Page 11 Functions Rear Panel Balanced Input ( L ) Input Selector Switch Balanced Input ( R ) CAUTION: CAUTION SELECT POWER VOLTAGE DO NOT OPEN BEFORE CONNECT THE RISK OF ELECTRIC SHOCK POWER CORD. VOLTAGE SELECTOR BALANCED AUX IN AC IN AUX Input ( R ) AUX Input ( L )
- Page 12 Functions Top Panel Seats for 6SN7 Tubes Top Panel View...
-
Page 13: Initial Setup
Initial Setup Preparatory Work Open the package box, remove the amplifier and power cable carefully. • • Put the device on a stable surface, then remove the protective film from the top panel. • Open the box, remove the vacuum tubes, headphone stand, headphone (separately packed) . -
Page 14: Basic Connection
Basic Connection Connection to Audio Input Source and Power Source L/CH Balanced Input Port Input Selector Switch R/CH Balanced Input Port CAUTION: CAUTION SELECT POWER VOLTAGE DO NOT OPEN BEFORE CONNECT THE RISK OF ELECTRIC SHOCK POWER CORD. VOLTAGE SELECTOR BALANCED AUX IN AC IN... - Page 15 Basic Connection Two pairs of electrostatic headphones can be connected to the amplifier and operated at the same time. Insert 5-PIN headphone plug into output port of amplifier (point the plug to upward side)
-
Page 16: Basic Operation
Basic Operation Intial Use When the "POWER" switch on the front panel is pushed on, the red LED on the front panel blinks for 30 seconds. When the LED lights up continuously, the unit is ready to operate. Plug the headphone into one of the sockets on the front panel. Select the connected input signal using the “INPUT”... -
Page 17: The Bias Adjustment
Place the cover back onto the amplifier and turn off the power. You may then reconnect the audio inputs and the headphones. * Should you find anything unusual or are not able to replace/adjust the 6SN7 tubes, please contact your local distributor or HIFIMAN customer service. V2-2 V2-1... -
Page 18: Troubleshooting
Are the connecting devices working properly? If the product is not operating properly, please check for the following problems. If you require assistance please contact the distributor from whom this product has been purchased or contact HIFIMAN customer service. page Possible Causes... -
Page 19: Limited Warranty And
Limited Warranty and Customer Service HIFIMAN provides a five-year warranty on the SHANGRI-LA jr system. However, both the tubes and the cable are warranted for one year only. For further support and service if needed, please contact HIFIMAN at customerservice@hifiman.com... - Page 20 Customer Service Tel: +1 201-443-4626 E-mail: customerservice@HIFIMAN.com Website:www.hifiman.com...
Need help?
Do you have a question about the Shangri-La Jr and is the answer not in the manual?
Questions and answers