
Related Manuals for Bak USA Seal


Summary of Contents for Bak USA Seal
- Page 1 Seal User Guide For Windows 10 BAK USA Technologies Corp. 425 Michigan Ave. Buffalo, New York 14203...
- Page 2 Hello there. Thanks for embracing the evolution of mobile technology with Bak USA. We hope you enjoy your Seal experience. To best use your Seal rugged tablet, please refer to this guide. Bak USA Seal User Guide Version: v3 // 2018...
- Page 3 • Report any damage or loose parts to the seller immediately. • Do not leave the Seal plugged in or powered on when enclosed in a non-ventilated container (such as a backpack) as overheating may occur. • You are encouraged to take a 5-minute break every 30 minutes of use.
-
Page 4: Table Of Contents
Power ON/OFF..........................Power your Seal........................Power ON for the first time....................Power OFF your Seal......................Using your active stylus......................Putting your Seal into sleep mode..................Waking up your Seal......................Basic touchscreen options......................Section 3 Windows Interface Desktop and virtual desktop experience................ - Page 5 Removing an app........................Wireless LAN..........................Enabling wireless connection....................Connecting to a wireless LAN....................Connecting an external device....................Connecting to the USB port....................Connecting to the HDMI port....................Section 5 Battery Charging your battery........................ Inspecting your battery status....................Section 6 Windows Help and Troubleshooting Troubleshooting..........................
-
Page 6: Getting To Know Your Seal
1. Getting to Know Your Seal Package Contents Carefully unpack your box and take out the items listed as below. If any items are missing or damaged, contact the seller immediately.* Seal Tablet Power Cord Stylus *Depending on your order, the optional add-ons might be included in a separate package. -
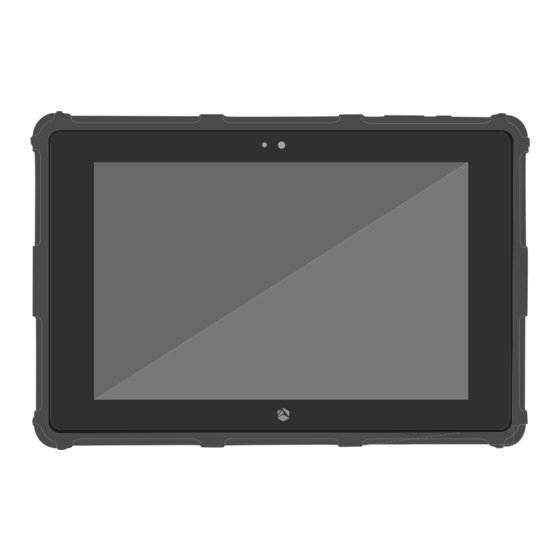
Page 7: Layout
Kensington Anti-Theft Lock Flashlight/Barcode Scanner ON/OFF Button The Hardware Volume Power Charge State Light Front Camera Micro HDMI USB-C 3.0/Charging Port Flashlight Barcode Scanner (Optional*) USB-A 3.0 Headphone Jack 10-Pin Interface Back Camera Near Field Communcation Battery Fingerprint Reader *If Barcode Scanner is added, the flashlight is not available. -
Page 8: Using Your Seal
2. Using Your Seal Powering ON/OFF Power ON Your Seal If this is the first time you power on the Seal, connect the AC adapter and fully charge the battery Press and hold the power button until the charging ... -
Page 9: Using Your Active Stylus
Lower Button: Single Click Put Your Seal into Sleep Mode When you will be away from your Seal for a short time, put the Seal to sleep. To do so, perform one of the following: • Press the power button once briefly •... -
Page 10: Basic Touchscreen Options
Basic Touchscreen Operations • Do not use sharp objects to touch the screen • Do not touch the touchscreen with a conductive material • Functions may vary based on the app you are using Gesture Name Explanation Touch an item to start an app, open a link, or perform an optional function. - Page 11 Gesture Name Explanation Pinch Touch two fingers to the screen, and then bring them together or pull them apart to zoom in and out on visual apps (such as pictures and maps). Rotate Touch your thumb and forefinger to an item, and then twist in a circular motion to rotate an object.
-
Page 12: Windows Interface
3. Windows Interface Desktop and Virtual Desktop Experience The Desktop screen is as shown below and natively provides the virtual desktop feature. To launch the feature click the app icon (pictured left). -
Page 13: Taskbar
Taskbar The black bar on the bottom of the desktop is called the Taskbar. It provides several key features: • Start menu • Search box • App shortcuts area • Notification area Start Menu To open the Start menu, click or tap the Windows icon (aka Start button) at the left end of the Taskbar. -
Page 14: Search Box-Cortana
Search box—Cortana Next to the Start menu is the search box, as shown below. When you select this box, a window will pop out, as shown below. This is the Cortana icon. Cortana is a new virtual assistant built into Windows 10. Click here to finish the setup, and then control Cortana with either your keyboard or voice commands. -
Page 15: Notification Area
Notification Area The right part of the Taskbar holds several icons that display the status of your Seal, as shown below. This is called the Notification Area. Icon Description Show more hidden status icons. Shows you the current battery status. -
Page 16: Setup And Connection
4. Setup and Connection To access to the Settings screen: Click the Windows icon in the lower left corner of the Desktop Select Settings to open the Settings screen, as shown below. -
Page 17: Activating Windows
Activating Windows To use all the features of your Windows Seal, you may need to activate your Windows system. To register and activate your Windows, perform the following: Open the Start menu and click Settings Click Update & security Select Activate... -
Page 18: Replacing Desktop With Start Screen
If you are more familiar with the interface similar to the Start screen introduced in the Windows 8 series, you can set your Seal to show the Start screen instead of the Desktop every time you power on your Seal. To do so: Open the Settings screen Select Personalization... -
Page 19: Pinning And Unpinning Your App
Airplane mode Connecting to a wireless LAN Once you have enabled the wireless connection, the Seal will automatically scan for available wireless networks and display them in the wireless LAN network list. To connect to your desired wireless network, click the network’s name in the list, and then click Connect. -
Page 20: Connecting An External Device
Connecting an External Device Your Seal comes with one USB-A 3.0 port and one USB-C 3.0 port. Connect USB devices to either of the USB ports using a USB cord. Once you plug a USB device into a USB port on your device, Windows will automatically load a driver for that device. -
Page 21: Battery
5. Battery Charging Your Battery Plug the adapter into the charging port/USB-C port, which you can find on the right side of the Seal. Plug the adapter into an electrical outlet. You will see the battery status indicator icon change as described in the next section. - Page 22 Battery is about to completely drain; stop using your Seal and charge it at once. Battery is charging. Here are a few ways you can make the most of your Seal’s battery: • Close apps and programs you aren’t actively using • Reduce your screen’s brightness •...
-
Page 23: Windows Help And Troubleshooting
IT department, the seller, or the Microsoft website. When you observe a problem, stop operating the Seal immediately; taking further action may result in data loss or damage. Take a note of what the system is doing and what actions you performed before the problem occurred. -
Page 24: Inspecting Your Battery Status
• If these items are properly set, and the screen remains blank, have the Seal serviced. My screen goes blank while the • Your Seal is in sleep mode. Do one of the following to resume from sleep mode: Seal is on - Press the power button. -
Page 25: Troubleshooting
Incorrect characters appear on • Are the operating system or programs installed correctly? If so and the issue the screen persists, have the Seal serviced. Sound Issues No sound can be heard from the • Make sure that: - The mute function is off... - Page 26 Other Issues Your Seal does not respond • To turn off your Seal, press and hold the power button for 6 seconds or more. If the Seal still does not respond, remove the AC adapter • Your Seal could lock when it enters sleep mode during a communication operation.
-
Page 27: Specification
7. Specification Basics T E C H S P E C S Basics Device Dimensions / Weight Touch Panel 9” L x 6 1/8” W x 0.9” D 10-Point Capacitance Device Dimensions / Weight Touch Panel 1.75lbs 9” L x 6 1/8” W x 0.9” D 10-Point Capacitance 1.75lbs Battery... - Page 28 Regulatory Compliance Information FCC Declaration of Conformity This device complies with Part 15 of the FCC Rules. Operation is subject to the following two conditions: (1) this device may not cause harmful interference, and (2) this device must accept any interference received, including interference that may cause undesired operation.
- Page 29 この装置は、情報処理装置等電波障害自主規制協議会=E s ` ` f F = の基準= に基づくクラス= _ = 情報技術装置です。この装置は、家庭環境で使用するこ= とを目的としていますが、この装置がラジオやテレビジョン受信機に近接= して使用されると、受信障害を引き起こすことがあります。= 取扱説明書に従って正しい取り扱いをして下さい。= Taiwan battery recycling: Translation – please recycle batteries Trademarks Windows and Microsoft are trademarks of Microsoft Corporation. SEAL is a trademark of BAK USA Technologies Corp...
Need help?
Do you have a question about the Seal and is the answer not in the manual?
Questions and answers