Hartke Acoustic Pre-Amp Owner's Manual
Acoustic pre-amp/di
Hide thumbs
Also See for Hartke Acoustic Pre-Amp:
- Owner's manual (44 pages) ,
- Owner's manual (16 pages)
Table of Contents
Advertisement
Quick Links
- 1 Table of Contents
- 2 Acoustic Attack Introduction and Features
- 3 Acoustic Attack Front Panel Layout
- 4 Setting up the Acoustic Attack
- 5 Phantom on - off / Ground Connect / Lift Switch
- 6 Operating the Acoustic Attack
- 7 Using an Ac/DC Power Adapter
- 8 Acoustic Attack Typical Set-Ups
- Download this manual
Advertisement
Table of Contents

Summary of Contents for Hartke Hartke Acoustic Pre-Amp
- Page 1 ACOUSTIC PRE-AMP/DI...
- Page 2 ‑‑ Copyright 2004 -2008, Samson Technologies Corp. Printed June, 2008 v1.1 Hartke 45 Gilpin Avenue Hauppauge, New York 11788‑8816 Phone: 1‑800‑3‑SAMSON (1‑800‑372‑6766) Fax: 631‑784‑2201 www.hartke.com...
-
Page 3: Table Of Contents
Acoustic Attack Introduction And Features Introduction Acoustic Attack Features Acoustic Attack Front Panel Layout Acoustic Attack Side Panel Layout Operating The Acoustic Attack Setting Up The Acoustic Attack Power The Acoustic Attack Phantom On ‑ Off / Ground Connect / Lift Switch Using Phantom Power Installing The Battery Using An Ac/dc Power Adapter... -
Page 4: Acoustic Attack Introduction And Features
Acoustic Attack Introduction and Features Introduction Congratulations on your purchase of the Acoustic Attack acoustic pre‑amp/ direct box by Hartke! The Acoustic Attack is a high quality preamplifier designed specifically for acoustic instruments. The Acoustic Attack is a perfect solution for applications where you need to amplify or record an acoustic guitar, mandolin or even violin. -
Page 5: Acoustic Attack Front Panel Layout
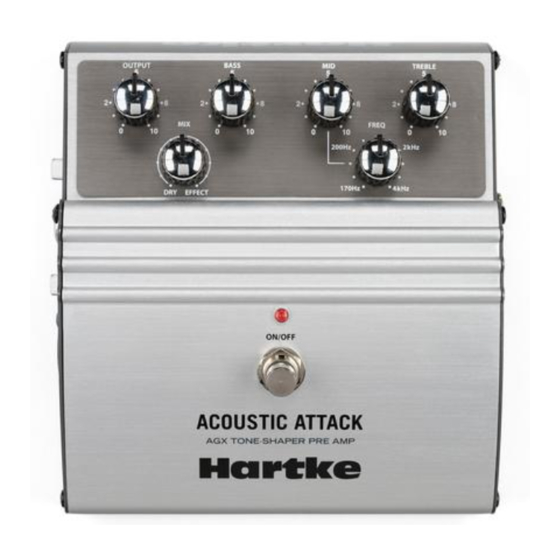
� � OUTPUT - Control knob used to adjust the overall Output volume. BASS - Control knob used to boost or cut the low frequencies. MID – Used to boost or cut the midrange frequencies. TREBLE - Control knob used to boost or cut the high frequencies. -
Page 6: Acoustic Attack Side Panel Layout
Acoustic Attack Side Panel Layout Power Inlet – Power inlet for connect- ing the optional AD006 9 Volt power adapter. PHANTOM ON / GROUND LIFT switch - Used to switch between phantom power or battery operation, and/or Ground Lift/ Connect. OUTPUT - �/�-inch jack carrying the line-level output signal, either affected or un-affected, depending on the ON/OFF... -
Page 7: Operating The Acoustic Attack
Operating the Acoustic Attack Setting Up the Acoustic Attack The basic procedure for setting up and using your Acoustic Attack is simple and takes only a few minutes. Remove all packing materials (save them in case of need for future service). Power the Acoustic Attack You can power the Acoustic Attack with a standard 9‑volt battery, a standard DC power adapter, or by applying standard 48‑volt phantom power. -
Page 8: Installing The Battery
Operating the Acoustic Attack Power the Acoustic Attack - continued Installing the Battery Install a standard 9‑volt battery by removing the battery door and attaching the battery to the terminal connector. Fit the battery into the compartment and reinstall the battery door. Using an AC/DC Power Adapter You can power the Acoustic Attack using the optional AC006 power supply available from your local Hartke dealer. - Page 9 Operating the Acoustic Attack Using the MID control to Reduce Feedback A good use of the MID control is to help reduce feedback. To do this, turn the MID control all the way down, (fully counter clock wise), raise the OUTPUT control or the volume on your amp right to right at the feedback level, then use the FREQ control and slowly sweep through the frequencies until the feedback goes way.
-
Page 10: Acoustic Attack System Diagrams
Acoustic Attack System Diagrams Acoustic Attack Typical Set-ups There are many different ways to use the Acoustic Attack, however, the basic connection is the same in most installations and applications. The following sections detail the connections for an acoustic guitar plugged into an Acoustic Attack which is feeding an on stage amplifier and the main PA mixer in a live situation, and also, using the pre‑amp with external effects feeding a con‑... -
Page 11: Using An External Effects Processor For Recording
Acoustic Attack System Diagrams Using an External Effects Processor for Recording In a recording application, you can use the Acoustic Attack’s Direct Input as a second input, with the OUTPUT to create an effects loop. This will allow you to add an additional effect like a digital multi‑effects processor for delay, chorus and reverb and have them mixed in with the Acoustic Attack pre‑amp for a killer front end for tracking your acoustic on your next recording. - Page 12 Hartke 45 Gilpin Avenue Hauppauge, New York 11788‑8816 Phone: 1‑800‑3‑SAMSON (1‑800‑372‑6766) Fax: 631‑784‑2201 www.hartke.com...


Need help?
Do you have a question about the Hartke Acoustic Pre-Amp and is the answer not in the manual?
Questions and answers