
Related Manuals for Magnavox MTFT716n


Summary of Contents for Magnavox MTFT716n
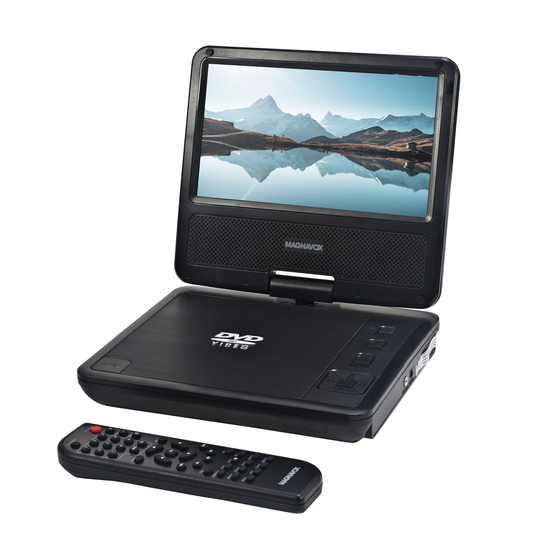
- Page 1 7 INCH PORTABLE DVD PLAYER 7 INCH PORTABLE DVD PLAYER with Swivel Screen Display with Swivel Screen Display Owner's Manual PLEASE READ BEFORE OPERATING THIS EQUIPMENT. Model: MTFT716n Size: 148.5(W) x 210(H)mm (A5)
-
Page 2: Important Safety Instruction
IMPORTANT SAFETY INSTRUCTION The lightning flash with arrowhead symbol within an equilateral triangle is intended to alert the user to the presence of uninsulated dangerous voltage within the product`s enclosure that may be of sufficient magnitude to constitute a risk of electric shock to persons. CAUTION: TO REDUCE THE RISK OF ELECTRIC SHOCK, DO NOT The exclamation point within an equilateral REMOVE COVER (OR BACK). - Page 3 Portable Cart Warning - 2 -...
- Page 4 IMPORTANT SAFETY INSTRUCTION 17) Overloading Do not overload wall outlets and extension cords as this can result in a risk of fire or electric shock. 18) Object and liquid entry Never push objects of any kind into the product through openings as they may touch dangerous voltage points or short out parts that could result in fire or electric shock.
-
Page 5: Notes On Handling
IMPORTANT SAFETY INSTRUCTION NOTES ON HANDLING: NOTES ON MOISTURE CONDENSA TION: Moisture condensation damages the DVD player When shipping the unit, always use the Please read the following carefully original shipping carton and packing materials. Moisture condensation occurs, for example, when you For maximum protection, repack the unit as it pour a cold drink into a glass on a warm day. - Page 6 - 5 -...
-
Page 7: Location Of Controls
LOCATION OF CONTROLS LCD ON/OFF MUTE SETUP TITLE MENU VOL- VOL+ REPEAT AUDIO (Saving the battery power while music playback) the screen. LCD ON/OFF: Press to turn on or turn off (On Screen Display) Press to display the information. MUTE: Press to turn off sound. - Page 8 LOCATION OF CONTROLS Right Side of the Player AV OUT POWER DC I Phone Jack 18. Power ON/OFF Switch 17. AV(Audio/Video) output Jack 19. DC IN Jack Front Side of the Player 20 21 22 20. Charging Indicator 21. Remote Sensor 22.
-
Page 9: Remote Control
LOCATION OF CONTROLS REMOTE CONTROL 1. STANDBY Button 2. VOLUME +/- Buttons MUTE Button 4. MENU Button (Dirction) Buttons STANDBY LCD ON/OFF (Next) Button (Fast Forward) Button (Play/Pause) Button 9. N/P (NTSC/PAL) Button MENU 10. TITLE Button STOP Button 12. AUDIO Button 13. -
Page 10: Battery Installation (Remote Control)
BATTERY INSTALLATION (REMOTE CONTROL) Battery installation: Install or replace the batteries as follows: 1. Press the tabs on the battery door and lift it off. 2. Install two (2) x AAA size batteries (included) into the battery compartment as the figure on the right and the polarity markings inside battery compartment. -
Page 11: Power Source
POWER SOURCE The unit has a built in Lithium-ion rechargeable battery. Recharge before use or when the battery is drained as follows: Charging by the supplied AC/DC Adaptor: 1. Connect the small plug from the supplied AC/DC Adaptor to the DC IN Jack on the right of unit. 2. - Page 12 CONNECTIONS 1. Connecting to a TV with AV connection cable AV OUT POWER DC I Video input jack ( Yellow ) A/V Cable included Audio left channel input jack ( White ) Audio right channel input jack ( Red ) Connected to the TV EARPHONE: For private listening, connect the supplied Earbuds into the...
- Page 13 SWIVEL PANEL The viewing angle of the swivel panel can be adjusted as below as desired: 180° - 12 -...
- Page 14 OPERATIONS Playback of a DVD: 1. Lift up the panel and turn to desired angle. Slide the Power ON/OFF Switch to "ON" position to power on the unit, the Green Power On Indicator on front of the player will illuminate. 2.
-
Page 15: Important Notes
CD or DVD programing: press the (Program) Button. The Program menu will appear as follows. 1. During CD or DVD playback, TT:02 CH: 01 Exit Start Next Exit Start Next 2. Using the Direction and Numeric Buttons to select and set the desired TT (Title), CH (Chapters), tracks (for CD) of the movie (music) you wants. - Page 16 CONTROLS: LCD ON/OFF Press to turn on or off (saving the battery power in music playback mode) the LCD display. STANDBY Press to turn to standby mode. Press again to turn on. VOL ( Volume +/– Press to increase or decrease volume. MUTE Press to turn off the sound, press again to resume.
- Page 17 STEP During movie playback, press the STEP Button repeatedly to play the movie frame by frame. Press the Button to resume to normal playback. TITLE Press to return to disc's title page (Function depends on the recording of the disc). ANGLE During DVD playback, press repeatedly to select the viewing angle disc).
-
Page 18: System Setup
SYSTEM SETUP Setting Menus: In no disc mode, press the SETUP Button, the setting menu will appear on the screen as below. ◄, ►, ▲, ▼ Using the Direction Buttons to select and highlight the function you need to set or reset. Press the ENTER Button on the unit or OK Button on the Remote Control to enter or confirm the selection. - Page 19 SYSTEM SETUP In Video Q uality Setup Page: 1. If Picture is selected, using the Direction and ENTER/OK Buttons to set the panel quality such like Sharpness; Brightness; Contrast; Hue or Saturation as desired. 2. If Picture Quality is selected, using the Direction and ENTER/OK Buttons to set the picture quality when the DVD Player connected through AV OUT signal.
-
Page 20: Care And Maintenance
CARE AND MAINTENANCE Caring for Discs Treat the disc carefully. Handle the disc only by its edges. Never allow your fingers to contact with the shiny, unprinted side of the disc. Do not attach adhesive tape, stickers, etc. to the disc label. Clean the disc periodically with a soft, lint-free,dry cloth, Never use detergents or abrasive cleaners to clean the disc. -
Page 21: Specifications
SPECIFICATIONS Power Source: Built-in DC 7.4V, 1200mAh (8.88WH) Lithium-ion rechargeable battery, recharge by DC 9-12V, 1A through the DC IN Jack Power Source of Remote Control: DC 3V, 2 x AAA Size Batteries (included) DVD/CD/CD-R/CD-RW/ Disc Compatibility: ± ± DVD R/DVD RW/MP3/JPEG ACCESSORIES 1 x User's Manual 1 x AC/DC Adaptor (Input: AC 100-240V~, 50/60Hz, 0.5A Max;... - Page 22 MTFT716n_WC_E0CL1_V0US Size: 148.5(W) x 210(H)mm (A5)
Need help?
Do you have a question about the MTFT716n and is the answer not in the manual?
Questions and answers