
Related Manuals for Samsung AE022MNADEH


Summary of Contents for Samsung AE022MNADEH
- Page 1 Air conditioner Installation manual AEMNADEH • Thank you for purchasing this Samsung air conditioner. • Before operating this unit, please read this Installation manual carefully and retain it for future reference.
-
Page 2: Table Of Contents
Step 2.12 Fixing the indoor unit to the installation plate Step 2.13 Assembling the cover panel Setting an indoor unit address and installation option Troubleshooting For information on Samsung’s environmental commitments and product specific regulatory obligations e.g. REACH visit: samsung.com/uk/aboutsamsung/samsungelectronics/ corporatecitizenship/data_corner.html 2 English... -
Page 3: Installation
• This manual explains how to install an indoor unit the electrical lines. Always disassemble the electric with a split system with two SAMSUNG units. The use lines before the refrigerant tubes. of other types of units with different control systems may damage the units and invalidate the warranty. - Page 4 Safety Information on Installation trucks, scaffolding or any other means of elevation • Install the indoor unit away from lighting apparatus won’t be considered in-warranty and will be charged using the ballast. to end user. - If you use the wireless remote controller, reception error may occur due to the ballast of the lighting apparatus.
-
Page 5: Preparation
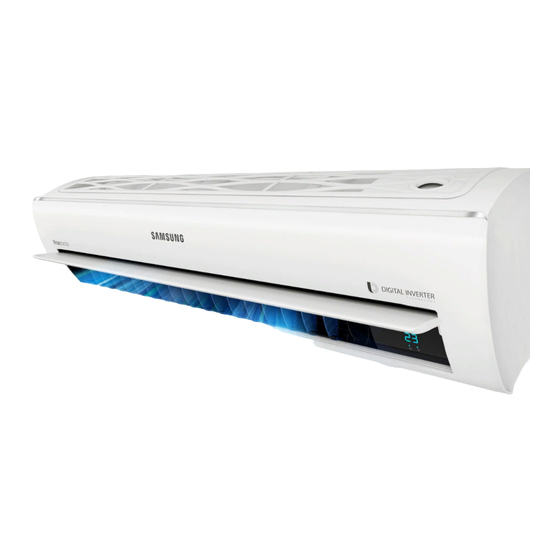
The actual units may look different from the images depicted here. (Unit : m) Installation Manual (1) Cap screw (3) Pipe length Pipe height Model Minimum Maximum Maximum AE022MNADEH AE028MNADEH AE036MNADEH AE056MNADEH M4 x 16 AE071MNADEH Remote Control Holder (1) Tapped Screws (2) Outdoor... -
Page 6: Step 1.3 Drilling A Hole Through The Wall
• Measuring tape • Reamer <Minimum distances between the hole and the installation plate> (Unit : mm) Tools for test operation Model • Thermometer AE022MNADEH • Resistance meter AE028MNADEH • Electroscope AE036MNADEH AE056MNADEH AE071MNADEH Step 1.3 Drilling a hole through the Pipe bundle hole: Ø... -
Page 7: Step 1.4 Performing Leak Test
Step 1.4 Performing leak test Wind the pipe, assembly cable and drain hose with insulation tape. Place the bundle (the pipe, assembly cable and drain Leak test hose) in the lower part of the indoor unit carefully so it doesn’t project from the rear of the indoor unit. LEAK TEST WITH NITROGEN (before opening valves) In order to detect basic refrigerant leaks, before recreating the vacuum and recirculating the R410A, it’s responsible of... -
Page 8: Indoor Unit Installation
Indoor Unit Installation Please scan this QR code for detail video of indoor unit installation. Step 2.1 Disassembling the cover panel Remove the cap screws, then the screws. Cap screw Screw Step 2.2 Disassembling the installation plate Phillips screwdriver Flat-head screwdriver Unlock the side hooks ( , ), then centre hooks ( ). -
Page 9: Step 2.3 Connecting The Power And Communication Cables
Step 2.3 Connecting the power and Cut the cable as like the following picture. The earth cable need to be longer than the power cable (1(L), communication cables 2(N)) by 100 mm. Before wiring work, you must turn off all power source. - Page 10 Indoor Unit Installation Ring terminal selection Silver solder Norminal Norminal dimensions dimensions Standard Standard Standard Standard for cable for screw Allowance Allowance Allowance Allowance dimension dimension dimension Min. Min. Max. dimension Min. (mm2) (mm) (mm) (mm) (mm) (mm) (mm) (mm) (mm) (mm) +0.3...
- Page 11 Coef×35.6×Lk×ik – coef: 1.55 10% of input ) < ∑ ( voltage[V] – Lk: Distance among each indoor unit[m], 1000×Ak Ak: Power cable specification[mm2] ik: Running current of each unit[A] Example of Installation – Total power cable length L = 100(m), Running current of each units 1[A] –...
-
Page 12: Step 2.4 Optional: Extending The Power Cable
Indoor Unit Installation • You must keep the cable in a protection tube. CAUTION • Keep distances of 50mm or more between power cable • For information about the power cable and communication cable. specifications for indoor and outdoor units, refer • Maximum length of power cables are decided within to the installation manual. - Page 13 Method 1 Method 2 Compress it 4 times Compress it 4 times 5 mm 5 mm Wrap it with the insulation tape twice or more and Step 2.5 Installing and connecting the position your contraction tube in the middle of the drain hose insulation tape.
-
Page 14: Step 2.6 Optional: Extending The Drain Hose
Indoor Unit Installation Step 2.7 Optional: Changing the CAUTION direction of the drain hose • Make sure that the indoor unit is in upright position when you pour water to check for leakage. Make sure that the water does not overflow onto the electrical part. -
Page 15: Step 2.10 Cutting Or Flaring The Pipes
NOTE • To prevent dirt or foreign substances from getting into the pipes during installation, do NOT remove the caps completely until you are ready to connect the pipes. CAUTION • The remaining air in the Refrigeration cycle, which Cut out the appropriate knock-out piece (A, B, C) on contains moisture, may cause malfunction on the the rear of the indoor unit unless you connect the pipe compressor. -
Page 16: Step 2.10 Cutting Or Flaring The Pipes
Indoor Unit Installation Cut off the remaining foam insulation. Step 2.10 Cutting or flaring the pipes If necessary, bend the pipe to fit along the bottom Make sure that you prepared the required tools. of the indoor unit. Then pull it out through the (pipe cutter, reamer, flaring tool and pipe holder) appropriate hole. -
Page 17: Step 2.11 Fixing The Installation Plate
Surface Thickness Align the pipes and tighten the flare nuts first (Unit : mm) manually and then with a torque wrench, applying the following torque. Model AE022MNADEH AE028MNADEH AE036MNADEH R 0.4~0.8 AE056MNADEH AE071MNADEH Pipe bundle hole: Ø 65 mm NOTE • If you mount the plate to a concrete wall using plastic... -
Page 18: Step 2.12 Fixing The Indoor Unit To The Installation Plate
Indoor Unit Installation Use stud finder to find out locations of the studs. Fix the plate hanger on two studs. CAUTION • If you fix the indoor unit on a gypsum board, use only specified anchor bolts on reference positions. Otherwise, the gypsum surrounding the joints may crumble over time and cause the screws to be loosened and stripped. -
Page 19: Setting An Indoor Unit Address And Installation Option
Setting an indoor unit address and installation option Set the indoor unit address and installation option with remote CAUTION control option. Set the each option separately since you cannot set the ADDRESS setting and indoor unit installation setting • Option setting is available from SEG1 to SEG 24 option at the same time. - Page 20 Setting an indoor unit address and installation option Option setting Status Setting SEG2, SEG3 option Press Low Fan button( ) to enter SEG2 value. Press High Fan button( ) to enter SEG3 value. SEG2 SEG3 Each time you press the button, will be selected in rotation.
- Page 21 Option setting Status Setting Heat mode Press Mode button to be changed to Heat mode in the ON status. Setting SEG11, SEG12 option Press Low Fan button( ) to enter SEG11 value. Press High Fan button( ) to enter SEG12 value. SEG11 SEG12 Each time you press the button,...
- Page 22 Setting an indoor unit address and installation option Option setting Status 15 Setting SEG18, SEG20 option Press Low Fan button( ) to enter SEG18 value. Press High Fan button( ) to enter SEG20 value. SEG18 SEG20 Each time you press the button, will be selected in rotation.
- Page 23 Setting an indoor unit address (MAIN/RMC) Check whether power is supplied or not. – When the indoor unit is not plugged in, there should be additional power supply in the indoor unit. Before installing the indoor unit, assign an address to the indoor unit according to the air conditioning system plan. Assign an indoor unit address by wireless remote control.
- Page 24 Setting an indoor unit address and installation option Check whether power is supplied or not. – When the indoor unit is not plugged in, there should be additional power supply in the indoor unit. Set the installation option according to the installation condition of an air conditioner. –...
- Page 25 02 series installation option(Detailed) Option No. : 02XXXX-1XXXXX-2XXXXX-3XXXXX Option SEG1 SEG2 SEG3 SEG4 SEG5 SEG6 Use of external room temperature Explanation PAGE Mode Use of robot cleaning sensor / Minimizing fan operation when Use of central control FAN RPM compensation thermostat is off Details Minimizing...
- Page 26 Setting an indoor unit address and installation option Option SEG19 SEG20 SEG21 SEG22 SEG23 SEG24 Individual control of a Heating setting compensation / Removing EEV Step of stopped unit during oil Explanation PAGE remote control condensated water in heating mode return/defrost mode Details Removing...
- Page 27 Please refer to the EEV step table below for the system (for heating) at stop. Indication 100 110 Step Wall MountedWith EEV Stopped 160 160 160 Unit's Step EEV step Other Indoor Units except for wall Default No Function mounted with EEV (*4) When the following 2 or 3 is used as external heater On/Off signal, the signal for monitoring external contact control will not be output.
- Page 28 Setting an indoor unit address and installation option 05 series installation option SEG1 SEG2 SEG3 SEG4 SEG5 SEG6 Use of Auto Change (When setting SEG3) (When setting SEG3) (When setting SEG3) Over for HR only in Standard heating Standard cooling Standard for mode change Heating →...
- Page 29 Option SEG7 SEG8 SEG9 SEG10 SEG11 SEG12 (When setting SEG3) (When setting SEG3) Compensation option for Long Standard for mode Explanation PAGE Time required for mode pipe or height diffference MTFC changing Cooling → change between indoor units Heating mode Indication Details Indication Details Indication...
- Page 30 Setting an indoor unit address and installation option (*1) Height difference : The difference of the height between the corresponding indoor uint and the indoor unit installed at the lowest place. For example, When the indoor unit is installed 40m higher than the indoor unit installed at the lowest place, select the option "1".
- Page 31 Changing a particular option You can change each digit of set option. Option SEG1 SEG2 SEG3 SEG4 SEG5 SEG6 The tens’ digit of an The unit digit of an The option mode Explanation PAGE MODE option SEG you will option SEG you will Changed value you want to change change...
- Page 32 Setting an indoor unit address and installation option Performing the final check Providing information for user To complete the installation, perform the following checks After finishing the installation of the air conditioner, and tests to ensure that the air conditioner operates you should explain the following to the user.
-
Page 33: Troubleshooting
Troubleshooting Detection of errors If an error occurs during the operation, an LED flickers and the operation is stopped except the LED. If you re-operate the air conditioner, it operates normally at first, then detect an error again. LED Display on the receiver &... - Page 34 Troubleshooting LED Display Error Abnormal condition code 1. COND mid sensor is detached E241 2. Refrigerant leakage (2nd detection) E554 3. Abnomally high temperature on Cond (2nd detection) E450 4. Low pressure s/w (2nd detection) E451 5. Abnomally high temperature on discharged air on outdoor unit E416 (2nd detection) 6.
- Page 35 Memo English...
Need help?
Do you have a question about the AE022MNADEH and is the answer not in the manual?
Questions and answers