Advertisement
Quick Links
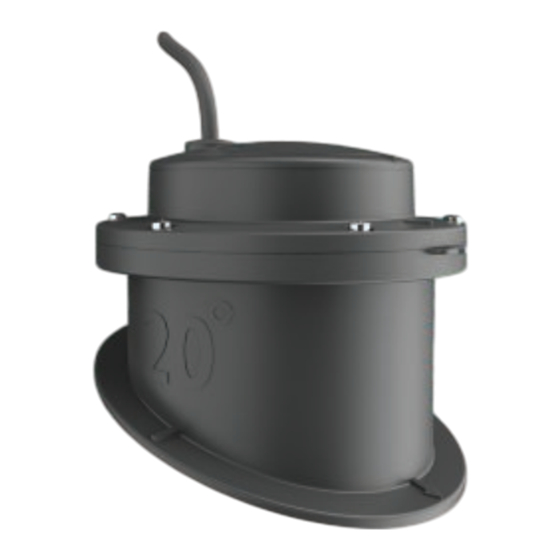
GT15M-IH Transducer
Installation Instructions
Mounting Considerations
• On single thickness fiberglass hulls, the transducer should be
mounted in the bilge area near the keel and transom.
• The transducer should not be mounted aft of the water pickup
and other protrusions.
• The transducer should not be mounted over a strake.
• The transducer should be mounted over solid fiberglass, with
no dead air space or coring in the boat hull.
• The transducer should be mounted as flat as possible in the
boat hull.
TIP: You can search the Internet for marine electronics forums
and videos that can help you to select the best mounting
location.
Tools Needed
• #1 Phillips screwdriver
• 220 grit sandpaper
• marine grade adhesive
• RV/marine antifreeze fluid or mineral oil
• Rubbing alcohol
Deadrise Angle
Deadrise is the angle formed between a horizontal line and a
boat hull at a single point. You can measure the deadrise angle
with a smartphone application, an angle finder, a protractor, or a
digital level. You can also ask your boat manufacturer for the
deadrise angle of the specific point on your boat hull.
NOTE: A boat may have several deadrise angles depending on
the shape of the hull. Measure the deadrise angle only at the
location where you plan to install the transducer.
In-Hull Tank Considerations
• On a boat hull with a deadrise angle between 0 and 3
degrees, you must install the tank labeled 0°.
• On a boat hull with a deadrise angle between 4 and 8
degrees, you must install the tank labeled 5°.
• On a boat hull with a deadrise angle between 9 and 16
degrees, you must install the tank labeled 12°.
• On a boat hull with a deadrise angle between 17 and 25
degrees, you must install the tank labeled 20°.
Testing the Mounting Location
Before you permanently mount the transducer, you should test
the transducer feedback at your mounting location with the boat
in the water.
1
Place the transducer inside a thin plastic bag.
2
Fill the bag with enough water to cover the bottom of the
transducer, and secure the bag with a zip tie.
3
Wet the surface of the hull.
4
Place the bagged transducer on the mounting location.
5
Observe the feedback of the transducer on your chartplotter
or fishfinder.
6
If the transducer does not function as expected, select a new
mounting location and repeat steps 3 through 5.
Installing the In-Hull Tank and Transducer
Before you install the in-hull tank and transducer, you must
figure the deadrise angle
(Deadrise Angle, page
the tank that provides the most-level installation of the
transducer.
1
Sand the tested mounting location
Location, page
1) with 220-grit sandpaper.
2
Clean the tested mounting location with alcohol.
3
Apply marine-grade adhesive
4
Place the tank in the boat hull with the top of the tank level
with the water line, and with the arrow
keel.
5
When the adhesive is dry, insert the O-ring
the tank.
6
Fill the tank with RV/marine antifreeze fluid or mineral oil.
7
Insert the transducer into the tank, aligning the arrow on the
transducer and the notch on the tank
8
Using the enclosed screws, secure the transducer
tank.
NOTE: Do not overtighten the screws.
9
Route the cable, and connect the transducer to your
chartplotter or fishfinder.
Software Update
You may need to update the device software when you install
the device or add an accessory to the device.
Loading the New Software on a Memory Card
You must copy the software update to a memory card using a
computer that is running Windows
NOTE: You can contact Garmin
preloaded software update card if you do not have a computer
with Windows software.
1
Insert a memory card into the card slot on the computer.
2
Select Download next to the software bundle that
corresponds with your device.
3
Read and agree to the terms.
4
Select Download.
5
If necessary, select Run.
6
If necessary, select the drive associated with the memory
card, and select Next > Finish.
1), and select
(Testing the Mounting
to the bottom of the tank.
pointing to the boat
in the groove of
to the
®
software.
®
customer support to order a
Advertisement

Related Manuals for Garmin GT15M-IH


Summary of Contents for Garmin GT15M-IH
-
Page 1: Mounting Considerations
Windows ® software. • On a boat hull with a deadrise angle between 4 and 8 NOTE: You can contact Garmin ® customer support to order a degrees, you must install the tank labeled 5°. preloaded software update card if you do not have a computer with Windows software. - Page 2 Remove the memory card. NOTE: If the memory card is removed before the device restarts fully, the software update is not complete. Looking for dependable marine electronics & navigation? Rely on Garmin for quality and long-lasting products.
Need help?
Do you have a question about the GT15M-IH and is the answer not in the manual?
Questions and answers