Baby Jogger City Elite Instructions For Use Manual
Hide thumbs
Also See for City Elite:
- Assembly instructions manual (19 pages) ,
- Instruction manual (3 pages) ,
- Assembly instructions manual (9 pages)

Related Manuals for Baby Jogger City Elite


Summary of Contents for Baby Jogger City Elite
- Page 1 • STROLLER INSTRUCTIONS FOR USE ©2017 BABY JOGGER NWL0000673979A 9/17 IMPORTANT - KEEP THESE INSTRUCTIONS FOR FUTURE REFERENCE. READ THESE INSTRUCTIONS CAREFULLY BEFORE USE. YOUR CHILD’S SAFETY MAY BE AFFECTED IF YOU DO NOT FOLLOW THESE INSTRUCTIONS.
-
Page 2: Table Of Contents
TABLE OF CONTENTS • Warning • Features • Frame • Front Wheel • Rear Wheels • Brake • Canopy • Safety Harness • Raised Kicker • Seat • Basket Removal • Quick Fold Technology • Care & Maintenance • Limited Warranty... -
Page 3: Warning
WARNING IMPORTANT - Keep these instructions for • The passenger shall remain seated (no future reference standing in the stroller) Read these instructions carefully before • This stroller is designed for use on flat or use Your child’ s safety may be affected if gently sloping surfaces Be aware that you do not follow these instructions the possibility for tipping occurs if this... -
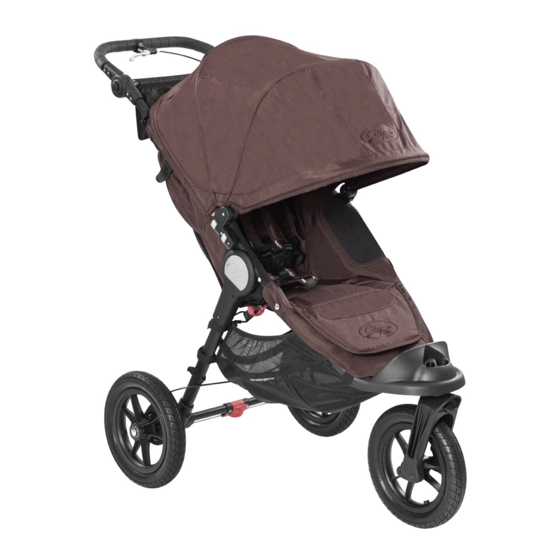
Page 4: Features
Handlebar Storage Basket Wrist Tether Front Wheel Parking Brake Swivel/Lock Auto-lock Raised Kicker Accessory Mounting Bracket Fold Handle Frame Harness Buckle Safety Strap Harness Pads Rear Wheel Release Button Canopy Rear Wheel... -
Page 5: Frame
FRAME 1 Unpack the stroller frame from the box and set the wheels aside 2 Unfold the stroller by pulling the Auto-lock Lever and lifting the handlebar away from the lower frame The stroller will click into place 3 Place the stroller in the upright position 4 Snap the red Safety Strap to the frame under the fold mechanism... -
Page 6: Front Wheel
FRONT WHEEL 1 Installation • Lay stroller on its back so the Handlebar is resting on the floor • Attach the Front Wheel by sliding it into the front wheel mount until it clicks Gently pull on the Front Wheel to make sure it is properly attached 2 Removal •... -
Page 7: Rear Wheels
REAR WHEELS 1 Installation • Align the Rear Wheel axle with the wheel mount on the stroller frame and insert it into the wheel mount until it clicks into place • Gently pull on the Rear Wheel to make sure it is properly attached 2 Removal •... -
Page 8: Brake
BRAKE 1 Engage the Brake • Gently pull on the Brake Lever into upright position until it clicks into place WARNING: Always apply the brakes whenever the stroller is stationary 2 Release the Brake • Pinch the gray tabs and pull the lever towards you •... - Page 9 WRIST STRAP 3 Always use the wrist strap when stroller is in use WARNING: Use this strap to stop the stroller rolling away...
-
Page 10: Canopy
CANOPY 1 Attach the canopy to the frame: Slide the canopy peg into the top hole of the Accessory Mounting Bracket until it clicks into place 2 At the top and on the side of the Canopy, snap the webbing together around the top of the frame on both sides... - Page 11 3 Secure the canopy by aligning the Velcro® strips on the console and canopy 4 Remove the canopy: Press the top gray button on the Accessory Mounting Bracket to release the canopy peg and unfasten snaps and Velcro® at the top of the canopy...
-
Page 12: Safety Harness
SAFETY HARNESS 1 From the back of the seat, open Velcro pocket and locate the plastic square stopper Turn stopper and pass through the openings in the PE board and seat fabric 2 Reinsert stopper at seat opening closest to child’ s shoulders Pass back through seat fabric and PE board Tug on strap to ensure stopper is engaged Repeat on both sides... - Page 13 3 Slide the Harness Pads up to access plastic guide on strap 4 Hold the plastic guide and pull strap to tighten or loosen...
- Page 14 5 Insert side strap buckle into harness buckle on both sides 6 Insert connected harness and side strap buckles into the sides of the crotch buckle 7 Press button on crotch buckle to release...
-
Page 15: Raised Kicker
RAISED KICKER 1 To use the Raised Kicker, pull up on the seat flap above the footplate and remove the kicker stand from the storage pocket 2 Attach the kicker stand to the seat with the hooks provided under seat flap 3 Attach the kicker stand by wrapping both sides of the Velcro®... - Page 16 4 Thread one side of the webbing through the D-ring of the other side, and secure the Velcro® together 5 When not using the Raised Kicker, tuck the kicker stand and the webbing straps into the pocket provided under the seat...
-
Page 17: Seat
SEAT - RECLINE 1 Pinch the clamp behind the seat, and slide it down to desired recline 2 Pull seat down on both sides to match recline position of clamp Reverse steps to return to the upright position WEATHER COVER 3 If desired, pull the weather cover down and over the seat back mesh Secure firmly over both sides of the... - Page 18 SEAT - REMOVAL 4 Remove the canopy Starting with the top snap closest to the handle and working your way down the entire frame, unsnap seat from frame 5 Unfasten seat straps from around the bottom/back of the frame, located behind the Front Wheel 6 Locate the fold strap rings connected to the stroller frame underneath the stroller seat...
-
Page 19: Basket Removal
BASKET REMOVAL 1 From the rear of the stroller: Unsnap the top snaps of the Basket from around the frame tubing above the middle crossbar Unsnap the bottom snaps of the basket from around the frame tubing below the middle crossbar 2 From the front of the stroller: Unsnap lower seat fabric to expose... -
Page 20: Quick Fold Technology
QUICK FOLD TECHNOLOGY 1 Remove the child from the seat Unsnap the red Safety Straps from the Frame 2 Pull upwards on the “Pull to Fold” Fold Handle with a gentle tug and your stroller will fold in half WARNING: Always be sure the safety strap is securely snapped onto the frame before using stroller! -
Page 21: Care & Maintenance
CARE AND MAINTENANCE To preserve the longevity of your STORING stroller, it is important to perform • Sunshine can fade seat fabric and simple, regular maintenance From time dry out tires, so storing your stroller to time, make sure that the joints and indoors will prolong its good looks folding areas are still in good condition •... -
Page 22: Limited Warranty
BABY JOGGER LIMITED WARRANTY Baby Jogger’ s Limited Warranty: Baby Jogger warrants that the frame is free of manufacturer defects for one year from date of purchase Manufacturer’ s defects include but are not limited to the breaking of welds and frame tube damage Textile or soft side materials and all... - Page 24 Baby Jogger, LLC 6655 Peachtree-Dunwoody Rd. NE, Atlanta, GA 30328 1.800.241.1848 • www.babyjogger.com Distributed in Australia By: The Amazing Baby Company 11 Maurice Court • Nunawading VIC 3131 • Australia T: 1300.661.885 • F: 03.9873.1433 www.theamazingbabycompany.com.au Distributed in New Zealand By: Baby First Limited 10 Moncur Place •...
Need help?
Do you have a question about the City Elite and is the answer not in the manual?
Questions and answers