Table of Contents
Advertisement
Advertisement
Table of Contents

Related Manuals for ERA ERA-DOORCAM-W


Summary of Contents for ERA ERA-DOORCAM-W
- Page 1 THE SMART WAY TO ANSWER YOUR DOOR INSTALLATION & OPERATING MANUAL...
- Page 2 EN 300 328 V2.1.1.1 (2016-11); EN 301 489-1 V2 1.1 (2017-02) EN 301 489-17 V3.1.1 (2017-02); EN 55032:2012/AC:2013 (Class B) EN 55024:2010+A1:2015; IEC 60950-1:2005 (2nd Edition)+Am 2:2013 EN 60950-1:2006 (2nd Edition)+A11:2009+A1:2010+A12:2011+A2:2013 Signed for and on behalf of ERA Home Security Ltd: Ben Penson: Technical & Quality Director 02/02/2018...
- Page 3 Telecommunications Terminal Equipment Directive, 1999/5/EC. Additional Accessories This system can easily be extended at any time with the range of ERA Wireless Alarm Accessories, for details visit www.eraeverywhere.com or call our Customer Support team on 0345 257 2500 (local call rate).
-
Page 4: Table Of Contents
TABLE OF CONTENT What’s inside the box Get to Know Your Doorbell 1.1. WiFi Video Doorbell 1.2. System Architecture Prepare for installation 2.1. WiFi Signal Check 2.2. Power Supply Requirement Installing the Diode in Chime box 3.1. Wiring DoorCam without Chime Box 3.2. -
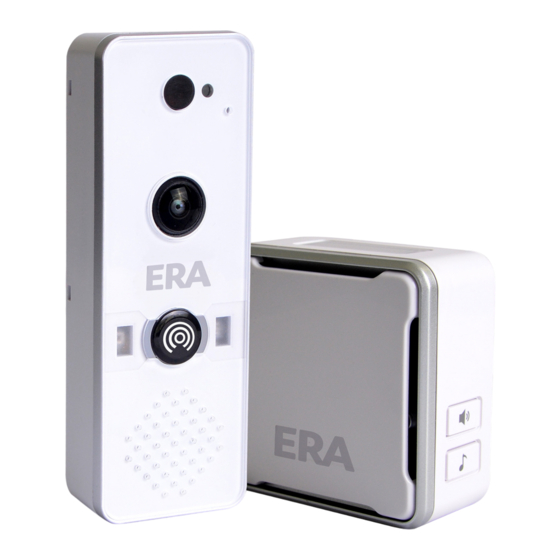
Page 5: What's Inside The Box
WHAT’S INSIDE THE WiFi Video Doorbell WiFi Door Chime Wall Mount Plate Fixing Kit 1. GET TO KNOW YOUR DOORBELL 1.1. WiFi Video Doorbell Light Sensor Microphone Camera Indicator IR LED Speaker Button Page 4... -
Page 6: System Architecture
1.2. System Architecture 3G/ 4G Network Home Cloud Server WiFi Router Chime Box Smartphone Smartphone 16VAC Cloud Video Transformer Doorbell 2. PREPARE FOR INSTALLATION 2.1. WiFi Signal Check Go to the location of the existing doorbell button. Connect your Smartphone to the WiFi router to confirm that you have a strong WiFi signal. -
Page 7: Installing The Diode In Chime Box
3. WIRING IN THE DOORCAM 3.1. Wiring to Include Existing DoorChime Step 1: Turn off the mains power supply which will be located at your electrical fuse board usually marked up as 'Doorbell'. Step 2: Open Chime box Step 3: Install Diode between the Front and TRANS terminals. (The direction of diode does not matter) Transformer DoorCam... - Page 8 Connect the two wires on the Transformer terminal. Transformer DoorCam Blue LED is ON for 5 seconds, and then red LED is ON for around 30 Result 1: seconds. Finally the red and green LED will flash. This means the doorbell is working correctly.
-
Page 9: Removing The Existing Doorbell Pushbutton
4. REMOVING THE EXISTING DOORBELL PUSH-BUTTON Step 1: Remove the existing doorbell push-button from the surface Step 2: Detach the 2 wires from the back of the unit itself as seen in the diagram below. Page 8... -
Page 10: Mounting Wall Mount Plate
5. MOUNTING WALL MOUNT PLATE Step 1: Use the wall mount plate as a guide to mark the mounting holes on the surface. Step 2: Screw the wall mount to the wall using one of the two options below. Screws only. Screws and Screw Plugs - Drill and insert screw plugs for the screws on a masonry surface. -
Page 11: Wiring Doorcam
5.1. WIRING DOORCAM Connect DoorCam wires using the wire connectors (included). It is not required to match the colours of the cables when connecting the unit to the existing doorbell push cables. Step 1: Twist together the two wires, and then push the wires into the short end of the connector. -
Page 12: Fitting Doorcam To Wall Mount Plate
5.2 FITTING DOORCAM TO WALL MOUNT PLATE Step 1: If required push extra wires into the mounting plate slot. Step 2: Position the DoorCam on the mounting plate located. Step 3: Using the screw driver provided, tighten the locking screw located at the bottom of the wall mount to secure the doorbell. -
Page 13: Check The Result
6. CHECK THE RESULT Step 1: Turn on the power Step 2: The Blue LED will flash once Step 3: Proceed to check the results Result 1: The DoorCam LED will be solid Red for around 30 seconds, and then it should flash green/red. The DoorCam works well, press the doorbell button to verify chime box rings, you can now go to ‘SETUP OPERATION’. -
Page 14: Setup Operation
Open the App, select ‘Create Account’. Enter a name, valid email address and password, and then select ‘Create Account’. You will receive an email from ERA. If you do not receive the certificate, please check in your mailbox under the spam email folder. Enter the authentication code into the App, then login. -
Page 15: Led Indicator Status
8. LED INDICATOR STATUS Power status indicator (Blue LED) Status Colour Note Indication Power ON Flashing Blue Cold Start at low Flashing Blue temperature (slow) Connect to 16V Solid Blue 1. Occurs after power is on, or push the button transformer 5 seconds 2. -
Page 16: Wifi Chime Quick Installation Guide
9. WiFi CHIME QUICK INSTALLATION GUIDE Requirements AC 220V ~ 240V power outlet Apple iOS version 10.0 or Android version 5.0 Smartphone or above WiFi router (2.4GHz) connected to internet DoorCam App installed on Smartphone and registered to an active DoorCam Prepare Step 1: Check your WiFi signal on your smartphone in the room you intend to install the Chime... - Page 17 Use DoorCam App to add WiFi Chime 3.1. Android Users Click on Select your Click on Click on the menu ‘System Settings’ Doorbell ‘Add WiFi Chime’ in the upper right corner WiFi_Chime_xxx ERA_WIFI ERA_WIFI ERA_WIFI Next Click on Select WiFi Chime Click on ‘Next’...
- Page 18 ERA_WIFI WiFi_Chime_106 Click on ‘OK’ Select Home WiFi router Your Chime is SSID, then click back key to now installed return to the app 3.2. Apple iOS Users Click on ‘Add Click on the menu Click on Select your WiFi Chime’ in the upper right ‘System Settings’...
- Page 19 DoorCam Click iPhone home Click on Settings Select WiFi Select WiFi Chime button to go back to SSID,then click iPhone Home Screen home button to go back to Home Screen DoorCam Click on Select ‘Same as Click ‘OK’ Your Chime is ‘DoorCam’...
- Page 20 WiFi Chime Test Ensure that the LED indicator on the WiFi Chime is green. (It means that the WiFi Chime is paired with the DoorCam) Press the doorbell call button to check if the WiFi Chime rings and your Smartphone receives the call and video image in the DoorCam App.
- Page 21 LED Indicator Status Colour Status Flashing Green/Red Discovery Mode (AP Mode) Flashing Green (Fast) Pairing with Doorbell Solid Green Paired with Doorbell Flashing Green (Slow) for 10 Sec. Doorbell Call Button is pressed, ringtone is playing Flashing Red (Slow) Getting IP from WiFi router Flashing Red (Fast) Firmware Updating Functions...
- Page 22 Ringtone There are 16 Built-in Melodies to select from Ringtone Number Melodies 1 (Default) Ding Dong Westminster Ding Dong Ding Tubular 1 Orchestra Tubular 2 Trumpet Dog Barking Bird Mirage ‘Pang’ from Cymbals SO ME DO Knock Cuckoo Old Phone Buzzer Page 21...
-
Page 23: Troubleshooting
Step 1: Please ensure that the protective film is removed from the faceplate. Step 2: Check the volume setting of DoorCam. Open ERA DoorCam App, select ‘Menu’ -> ‘System Settings’ -> ‘Doorbell Settings’ -> ‘Audio Settings’. Increase the Speaker volume if too low. - Page 24 Customer Helpline: 0345 257 2500 www.erahomesecurity.com ERA Home Security Ltd Valiant Way, Wolverhampton, West Midlands, WV9 5GB email: support@eraeverywhere.com...
Need help?
Do you have a question about the ERA-DOORCAM-W and is the answer not in the manual?
Questions and answers