
Related Manuals for WoodFast PT310X

Summary of Contents for WoodFast PT310X
- Page 1 Instruction Planer & Thicknesser Manual PT310X IMPORTANT For your safety read instructions carefully before assembling or using this product. Original Instruction Save this manual for V.3-201506 future reference.
-
Page 2: Table Of Contents
Index GENERAL INFORMATION 1.1 Foreword MACHINE DESCRIPTION Machine identification Getting to know your machine Technical specification Recommended protective clothing Noise emission Prescribed use of the machine Hazards Safety instructions for planer/thicknesser INSTALLATION Lifting and unloading Position of the machine Identifying shipping boxes Installations of loose parts 3.4.1 Fence installation 3.4.2 Switch installation... -
Page 3: General Information
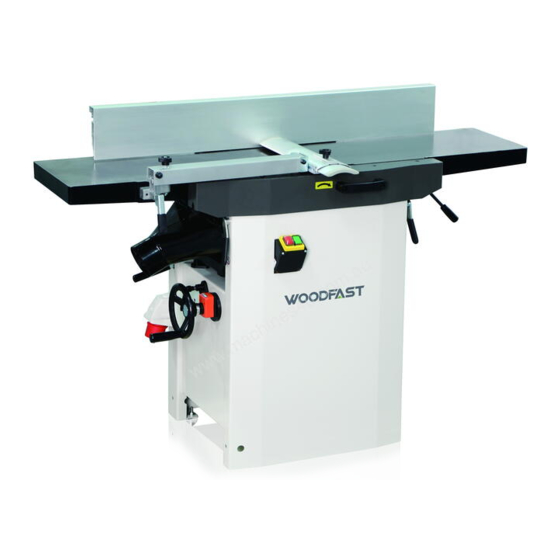
1. General Information FOREWORD This manual must be read and understood before operating the machine. This will provide a better working knowledge of the machine, for increased safety and to obtain the best results. 2. Machine Description MACHINE IDENTIFICATION There is a metallic identification plate fixed to the machine, containing the manufacturer's data, year of construction, serial number. GETTING TO KNOW YOUR MACHINE Jointer fence 5 On/off switch... -
Page 4: Technical Specification
2.3 TECHNICAL SPECIFICATION SPECIFICATION PT310 Feed speed m/min Cutterblock speed rpm 5300 Cutterblock diameter mm Max thicknesser capacity mm 305x200 Max planing width mm Max depth of cut thicknesser mm Max depth of cut planer mm Knives pcs Fence tilting degree 0-45 Motor power output 2.75kW... - Page 5 2.8 SAFETY INSTRUCTIONS FOR PLANER.THICKNESSER A planer/thicknesser is a tool which can, due to operator carelessness, cause serious personal injury. It is therefore strongly recommended you read and observe: · these instructions, particularly the special safety information in the respective chapters; ·...
-
Page 6: Installation
3. Installation 3.1. LIFTING AND UNLOADING The machine can be transported by two means: - with a forklift truck. To do so, the machine is secured on a pallet with four hex bolts. - by several persons. Here, the machine is carried by means of carrying straps or two battens (A, Fig.1) placed underneath the thicknesser bed. -
Page 7: Installations Of Loose Parts
3.4. INSTALLATIONS OF LOOSE PARTS 3.4.1 SWITCH - INSTALLATION - Fit the switch (G, Fig.4) onto the bracket with two hex nuts (H, Fig.7) FIG. 4 3.4.2 Cutterblock guard - INSTALLATION - Take off both of the hex socket screws (A, Fig.5). Install the cutterblock guard assembly (B, Fig.5) using two of hex socket screws. -
Page 8: Dust Chute - Installation
3.6. DUST CHUTE - INSTALLATION The dust chute complete with suction connector must be installed for thickness planing. CAUTION: The contact pins on the shaft of the dust chute (A, Fig. 6) must engage properly in the limit switch. Incorrectly installed dust chute the machine will not start. -
Page 9: Operating Procedures
5. Operating Procedures 5.1. ON/OFF SWITCH (Fig.10) · To switch ON = press green switch button. · To switch OFF = close cover or press red switch button. · To unlock the switch cover push the pin on the stop cover. FIG. -
Page 10: Thickness Planer Mode
- Planing the face of a plank or workpieces up to 75 mm thick: lower cutterblock cover from top onto workpiece. Adjust cutterblock cover so that the undermentioned distances are not exceeded in any position: rear edge (A, Fig.14) – workpiece max. 3 mm; front edge (B, Fig.14) –... -
Page 11: Maintenance
5. To thickness plane stock which surfaces are not parallel, use suitable feeding aids (make fitting templates). 6. Set planing thickness. 7. Start motor. 8. Feed workpiece slowly and straight into the thicknesser. It will FIG. 16 then be automatically fed through the thicknesser. 9. -
Page 12: Drive Belt Check
6.2 Drive Belt Check The cutterblock drive belt and the feedgear drive belt need to be checked periodically and retightened if necessary. Both drive belts are located behind the machine's side panel. Checking the drive belt: 1. Unplug power cable. 2. - Page 13 -13-...
- Page 14 -14-...
- Page 15 -15-...
- Page 16 -16-...
- Page 17 -17-...
- Page 18 -18-...
- Page 19 -19-...
Need help?
Do you have a question about the PT310X and is the answer not in the manual?
Questions and answers