Table of Contents
Advertisement
OPERATOR'S MANUAL
Expand-it
™
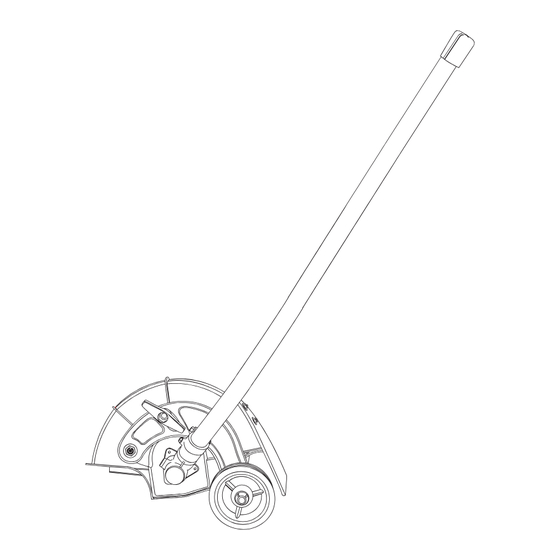
Edger Attachment
UT15518F
Your Expand-it
Edger Attachment has been engineered and manufactured to a high standard for dependability, ease of
™
operation, and operator safety. When properly cared for, it will give you years of rugged, trouble-free performance.
WARNING:
using this product.
Thank you for buying an Expand-it
SAVE THIS MANUAL FOR FUTURE REFERENCE
To reduce the risk of injury, the user must read and understand the operator's manual before
Product.
™
Advertisement
Table of Contents

Subscribe to Our Youtube Channel
Summary of Contents for Expand-it Expand-it UT15518F
- Page 1 ™ Edger Attachment UT15518F Your Expand-it Edger Attachment has been engineered and manufactured to a high standard for dependability, ease of ™ operation, and operator safety. When properly cared for, it will give you years of rugged, trouble-free performance. WARNING: To reduce the risk of injury, the user must read and understand the operator’s manual before...
-
Page 2: Table Of Contents
TABLE OF CONTENTS Introduction ... 2 General Safety Rules ... 3 Specific Safety Rules ... 4 Symbols ... 5 Features ... 6 Assembly ... 7 Operation ... 8-9 Maintenance ... 10-11 Exploded View/Parts List ... 12-13 ... -
Page 3: General Safety Rules
Keep the extension cord clear of the working area. Posi- tion the cord so that it will not come in contact with the edger attachment when in use. Failure to do so can result in serious personal injury. Check extension cords before each use. If damaged replace them immediately. -
Page 4: Specific Safety Rules
Be thoroughly familiar with the controls. Know how to stop the unit and disengage the controls quickly. Do not use the edger on or near graveled surfaces. If the edger strikes any type of foreign object: a) Stop the edger and remove the spark plug wire or disconnect from the power supply. -
Page 5: Symbols
SYMBOLS Some of the following symbols may be used on this tool. Please study them and learn their meaning. Proper interpretation of these symbols will allow you to operate the tool better and safer. SYMBOL NAME Safety Alert Symbol Read The Operator’s Manual Eye and Hearing Protection Keep Bystanders Away Ricochet... -
Page 6: Features
HOLDING GUIDE WHEEL Fig. 1 KNOW YOUR EDGER ATTACHMENT See Figure 1. The safe use of this product requires an understanding of the information on the tool and in this operator’s manual as well as a knowledge of the project you are attempting. Before use of this product, familiarize yourself with all operating features... -
Page 7: Assembly
EDGER ATTACHMENT SHAFT Push in the button located on the edger attachment. Align the button with the guide recess on the power head cou- pler and slide the two shafts together. Rotate attachment shaft until button locks into the positioning hole. -
Page 8: Operation
Keep a firm grip with both hands while in operation. The edger should be held at a comfortable position with the rear handle about hip height. -
Page 9: Operation
OPERATION ADJUSTING DEPTH OF CUT See Figures 4 - 5. The depth of cut is determined by the distance from the bottom of the wheel to the tip of blade. To adjust the blade depth: Stop the engine and remove the spark plug wire or dis- connect from the power source. -
Page 10: Maintenance
Using a 1/2 in. socket wrench, turn the blade nut clock- wise to loosen. Remove the old blade from the edger shaft. Clean debris from the edger shaft and flange washers. Center the new blade on the upper flange washer, mak- ing sure the blade sits flat. - Page 11 The secondary hole in the attachment shaft can be used for hang ing pur pos es as well. STORING THE EDGER ATTACHMENT Store the edger attachment in a well-ventilated place that is inaccessible to children. Keep away from corrosive agents such as garden chemicals and de-icing salts.
-
Page 12: Exploded View/Parts List
EXPLODED VIEW/PARTS LIST... -
Page 13: Exploded View/Parts List
EXPLODED VIEW/PARTS LIST Part Number 678018001 638017001 638006005 678011001 660887001 678263001 678262001 940657011 940726004 308734001 561382001 678260001 678017001 308485001 308484001 678258001 308730001 678259001 660737001 638245001 518377001 308483001 660641001 660642001 308210001 308735001 940657007 940654019 518019001 678020001 983000931 * STANDARD HARDWARE ITEM — MAY BE PURCHASED LOCALLY Description Blade Nut (M8) ...1 Cupped Washer ...1... - Page 14 NOTES...
-
Page 15: Warranty
WARRANTY LIMITED WARRANTY STATEMENT Techtronic Industries North America, Inc., warrants to the original retail purchaser that this EXPAND-IT brand product is free from defect in material and workmanship and agrees to repair or replace, at Techtronic Industries North America, Inc.’s discretion, any defective product free of charge within these time periods from the date of purchase. -
Page 16: Repair Parts
OPERATOR’S MANUAL Expand-it ™ Edger Attachment UT15518F SERVICE For parts or service, contact your nearest Expand-it relevant information when you call or visit. For the location of the authorized service center nearest you, please call 1-800-242-4672 or visit us online at www.homelite.com.

Need help?
Do you have a question about the Expand-it UT15518F and is the answer not in the manual?
Questions and answers