
Subscribe to Our Youtube Channel
Related Manuals for The Flying Culinary Circus FCC-G-18300


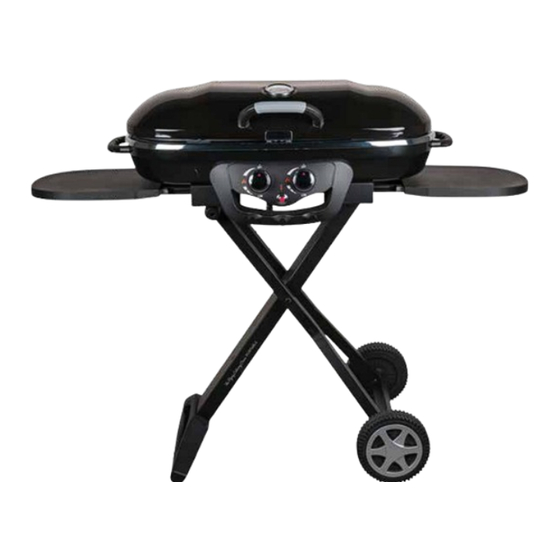
Summary of Contents for The Flying Culinary Circus FCC-G-18300
- Page 1 PORTABLE GAS BBQ INSTRUCTION MANUAL & MAINTENANCE FCC-G-18300 / BG01-200A OUTDOOR USE ONLY READ THE OPERATING INSTRUCTIONS BEFORE USING THE APPLIANCE.
-
Page 2: Table Of Contents
Contents Warnings......................3 Technical data Portable................4 Gas category ....................4 Exploded drawing ..................5 Parts list ......................6 Assembly instructions ................7 How to unfold and fold the BBQ ............11 Regulator and hose ...................14 Connecting the gas ................15 Gas leak test ....................16 Last Check ....................17 Lighting instructions................. -
Page 3: Warnings
Read carefully WARNINGS • FAILURE TO FOLLOW THE INSTRUCTIONS PROVIDED CAN IMPLY A RISK OF SERIOUS INJURY TO PERSONNEL AND FIXED INSTALLATIONS. • THE BBQ IS INTENDED FOR OUTDOOR USE ONLY IN WELL- VENTILATED AREAS. NEVER BBQ IN ENCLOSED SPACES OR UNDER A ROOF, DUE TO THE DANGER OF THE LACK OF OXYGEN. -
Page 4: Technical Data Portable
Technical information H: 100 cm W: 150 cm Heat input: 5,8 kW Gas consumption: 422 gram/hour Gasbottle (not included): Use standard bottle approved for use in the Nordic Region. Even though butane and propane gas can be used, we recommend propane for use in the Nordic Region. Approved hoses and regulators are available from most outlets selling gas equipment. -
Page 5: Exploded Drawing
Exploded drawing... -
Page 6: Parts List
Parts List CODE DESCRIPTION CAST IRON COOKING GRATE HARD WARE COOKING GRATE (M5) FLAME TAMER STOVE BODY ASSY: LID, HANDLE, IGNITOR, SIDETABLE, THERMOMETER, BURNER AND KNOBS (PRE ASSEMBLED) HANDLE GREASE CUP TROLLEY ASSEMBLY TROLLEY HANDLE WHEEL CAP WHEEL HARDWARE LIST CODE DESCRIPTION CODE... -
Page 7: Assembly Instructions
Assembly Fix the wheels and wheel axle as directed in the drawing. Fix the trolley handle/foot as directed in the drawing. - Page 8 Assembly 1 PC 1 PC 1 PC Slide the slots under the BBQ and lock as directed in the drawing. Attach the BBQ body to the stand with bolt B and nut A. Step 4: 1 PC Place the flame tamer as directed in the drawing. P O R TA B L E...
- Page 9 Assembly Step 5: 2 PCS Unscrew the pre-assembled fixing screws from the stove body. Place the cooking grid in place and tighten them with the screws. Assemble the side handles.
- Page 10 Assembly The side tables should always be folded out when using the BBQ, to avoid damaging the paintwork. Fasten the magnetic fat cup as directed in the drawing. P O R TA B L E...
- Page 11 Fold and unfold the BBQ Ready for use Folded for travel UNFOLD FOR USE Close the hood (1). Unfasten the leg latch (3). With one foot gently on the trolley handle, pull up on the body handle, and fit the round tubes of the top of the legs into their receptacles.
- Page 12 Fold and unfold the BBQ FOLD DOWN FOR TRAVEL Step 1: Unfasten the leg latch, step carefully on the trolley handle, pull up on the body handle and disengage the legs from their receptacles. Step 2: Lower the BBQ body down until it is lying on the legs.
- Page 13 Fold and unfold the BBQ TRAVELLING WITH THE PORTABLE BBQ Always make sure to lock the transport security when ever the BBQ is trasnported, Step 3: Fasten the leg latch (4), place the wire canister basket back into the body and latch the lid shut. Then hang regulator hose onto hook on left side of trolley assembly.
-
Page 14: Regulator And Hose
Regulator and gas hose Regulator and gas hose not included. Purchase an approved regulator and hose from your local dealer. Installation of regulator and hose. • Insert the hose to the BBQ as directed on drawing A • Screw the hose clamp and check that the hose is firmly attached. •... - Page 15 Regulator and gas hose HOSE Connect the gas hose to the gas rail inlet on the left hand side of the barbecue. Do not overtighten. Do not use any sealing tape, paste or liquid on the connection. Connect the regulator to the gas bottle according to your regulator and bottle dealer’s instructions.
-
Page 16: Connecting The Gas
Gas Leak Testing WARNING ALL JOINTS AND CONNECTIONS MUST NOW BE LEAK TESTED BEFORE USING THE BBQ. LEAK TEST ANNUALLY, AND WHENEVER THE GAS BOTTLE IS REMOVED OR REPLACED. ALWAYS PERFORM A LEAK TEST IN A WELL-VENTILATED AREA. Make a mixed solution ( water and liquid detergent / soap). WARNING! NEVER USE AN OPEN Ensure that there are no naked flames, heat sources and... -
Page 17: Last Check
Final Check LOCATION Ensure that the BBQ is placed at least 150cm in all directions from house walls, trees, plants and other flammable materials or liquids when in use. Do not place the BBQ under a roof or overhang Ensure the BBQ is placed where there is plenty of ventilation. Do not BBQ below normal ground level. -
Page 18: Lighting Instructions
Lighting Ignition LIGHTING INSTRUCTION MANUAL IGNITION 1. Turn all gas control knobs to OFF (O), You can light the burner manually if then open the tank valve slowly. Always the electronic ignition fails. Wearing keep your face and body as far from the a protective glove, hold a long kitchen BBQ as possible when lighting. -
Page 19: Warnings
Read Carefully WARNING • ALWAYS KEEP AN EYE ON THE BBQ WHEN IN USE. NEVER ALLOW CHILDREN OR OTHERS WHO REQUIRE SUPERVISION NEAR THE BBQ WHEN IN USE. • THIS BBQ IS ONLY INTENDED FOR OUTDOOR USE AND MUST NOT BE USED UNDER A ROOF. -
Page 20: Maintenance
Maintenance MAINTENANCE INSECTS AND VERMIN After long-term storage, insects and other vermin can Check that the burners are burning correctly regu- be found in the BBQ. If you experience problems with larly. lighting or irregular flames, it can be due to unwanted Remove the BBQ grate and flame guards. -
Page 21: Fat Fire
Fat Fire Lack of maintenance may result in a fat fire because old fat and grease takes fire when it reaches high temperatures. PREVENT FAT FIRE • Clean the BBQ regularly to avoid fat fires. Always, remove residues of grease and food after the BBQ has been used. IN CASE OF FAT FIRE In case of fat fire, close the gas supply and disconnect the controller. -
Page 22: Quesedilla With Taco Meat, Salsa And Guacamole
Recipe QUESEDILLA QUESEDILLA WITH MINCED MEAT, CHUNKY SALSA AND GUACAMOLE Directions: Ingredients: Fry the beef mince with the adobo taco spice. 4 corn or wheat tortillas Spread a layer of guacamole on one half of the tortillas. Add the meat 500 g beef mince and sprinkle the cheese on top. -
Page 23: Troubleshooting
Trouble Shooting PROBLEM POSSIBLE CAUSE SOLUTION Empty gas bottle Replace gas bottle Damaged regulator Check/replace the regulator Burner is blocked Clean the burner Gas supply is blocked Clean gas ventury or hose BURNER WILL NOT LIGHT Electrode is broken or dirty Clean the electrode Ignition knob is broken Contact your dealer... -
Page 24: Consumer Contact
Consumer contact This product is covered by a warranty in accordance with consumer legislation. It has undergone strict quality controls and testing at the factory. If there are any parts missing or the product has been damaged, please contact your dealer or the consumer contact below for help.
Need help?
Do you have a question about the FCC-G-18300 and is the answer not in the manual?
Questions and answers