Table of Contents
Advertisement
Advertisement
Table of Contents

Related Manuals for Ger Detect Titan Ger 1000


Summary of Contents for Ger Detect Titan Ger 1000
- Page 3 Overview Dear customer, thank you for choosing TITAN GER – 1000. This device enables you to detect underground gold &Treasures. TITAN GER – 1000 designed to reach 45 meters under the ground and 2500 meters front range. In addition, it contain five systems to confirm your target and identify the target underground.
- Page 4 Long Range System : Operation Steps 1 - The Long Range System This system specializes to cover vast areas and locate the target with in meter Square up to depths of meters below the surface of the ground and Front Range up to 2,500 meters.
- Page 5 Long Range System : Operation Steps Connect The Dispatcher Antenna Connect The Signal Transmitter...
- Page 6 Long Range System : Operation Steps Connect The Signal Recipient Connect The Recipient Antenna...
- Page 7 Long Range System : Operation Steps - Connect The Battery To The Device - Open The Device Screen And Start The Device Through ON / OFF switch - Click on the screen to display the language list - The Device work on four languages : Dautch - English - French - Arabic...
- Page 8 Long Range System : Operation Steps - After selecting the language you want to work in ( English for example ) - The search system menu will appear - Select long Range search system - After Selecting This system, the metals that this system can detect will appear - Choose the metal to be searched for from a list of metals through pressing on the metal names (Buried Gold for example)
- Page 9 Long Range System : Operation Steps - After selecting the metal to be searched for , the front range options will appear - Choose the front range according to the area you want to reach - You can select between (0500 M - 1000 M - 1500 M - 2000 M - 2500 M) Choose 2500 M for example - After selecting the front range , the search screen will appear...
- Page 10 Long Range System : Operation Steps - Increase the length of the signal recipients To receive stronger signal even to 2500 meters Start the search by holding the device as follow : if the target on the right side the indicator will point to the right side and the same to the left side as follow :...
- Page 11 Long Range System : Operation Steps After detecting the target , confirm the target from four directionv North to South South to North East to West West to East...
- Page 12 Long Range System : Operation Steps To determine the depth of the discovered target above target and turn degrees Walk straight ahead until the antenna reverse to the back Measure the distance between the antennas reversing back and target center point The distance between the antennas reversing back and the center point is equal the target depth For example if the distance is...
- Page 13 Ionic Search System : Operation Steps 2 - The Ionic Search System This system specializes to cover vast areas and locate the target with in meter Square up to depths of meters below the surface of the ground and Front Range up to 500 meters vertical The Ionic search system parts:...
- Page 14 Ionic Search System : Operation Steps Connect The Dispatcher Antenna Connect The Ionic Sensor...
- Page 15 Ionic Search System : Operation Steps - Connect The Battery To The Device - Open The Device Screen And Start The Device Through ON / OFF switch - Click on the screen to display the language list - The Device work on four languages : Dautch - English - French - Arabic...
- Page 16 Ionic Search System : Operation Steps - After selecting the language you want to work in ( English for example ) - The search system menu will appear - Select Ionic search system - After selecting the ionic system, the search screen will appear. - Point the device to the ground if the device start to make a sound you must calibrate The device with the ground by pressing on the calibrationbutton as follow...
- Page 17 Ionic Search System : Operation Steps - After you finish the calibration, start the search by moving the device 180 degrees right and left When the device detect a target, it will start to make a sound. In addition, the indicator will start to move to alert you that the device find the target.
- Page 18 Ionic Search System : Operation Steps - YOU CAN ALSO USE THE IONIC SEARCH SYSTEM DURING THE DRIVING IN A MOVING VEHICLE... AS FOLLOW:...
- Page 19 Ionic Search System : Operation Steps In the event of lack of vision, you can turn on the laser to locate the target place by pressing the laser ON OFF, button After detecting a target, conform the target from four directions. NORTH TO SOUTH SOUTH TO NORTH EAST TO WEST...
- Page 20 3D Imaging System : Operation Steps 3 - 3D Imaging System This system specializes to show you the area scanned on the tablet screen in three-dimensional photo and through which you can specify the target size, shape and depth of the target underground up to 45 meters. The long range system parts:...
- Page 21 3D Imaging System : Operation Steps Connect The Dispatcher Antenna Connect The 3D Imaging Sensor...
- Page 22 3D Imaging System : Operation Steps Install The Tablet Holder To The Device Fix the tablet that supplied with The device on the tablet holder which contains analysis program to display the photo...
- Page 23 3D Imaging System : Operation Steps Go to the tablet to make a Bluetooth connection between the device and the analysis program. - Click on the Desktop option The desktop screen will appear. 1- Touch the arrow to revel the hidden icons. 2- Click on the Bluetooth icon.
- Page 24 3D Imaging System : Operation Steps The tablet will start to search for any devices with Bluetooth in the area. When the device name appear click on pair. NOTE : The Bluetooth Password is : 1000 Now select the 3D IMAGING system from the systems menu in the device.
- Page 25 3D Imaging System : Operation Steps After selecting the 3D imaging system, the search screen will appear. Open the 3D GER Analyzer that installed on the tablet...
- Page 26 3D Imaging System : Operation Steps Start a new project to scan the ground by clicking on new scan THE CONNECTION SETTINGS WINDOW WILL APPEAR ON THE SCREEN.
- Page 27 3D Imaging System : Operation Steps Enter The Setting as Follow : 1- Choose The Device ( Titan Ger ) 2- Inter Face : Open the bluetooth setting and enter the com number ( Out going ) for example ( com 17 ) 3- Transmission Method ( Bluetooth ) 4- Operating Mode...
- Page 28 3D Imaging System : Operation Steps After you enter the sittings, click on connect and go to the device screen. Therefore, you will start taking pictures as follow: Hold the device like this…...
- Page 29 Magnetometer System : Operation Steps 4 - The MagnetoMeter System This system specializes to detect magnetic metals (iron) up to depths of 45 meters below the surface of the ground. The magnetometer system parts:...
- Page 30 Magnetometer System : Operation Steps Connect The Sensor To The Device - Click on the screen to display the language list - The Device work on four languages : Dautch - English - French - Arabic...
- Page 31 Magnetometer System : Operation Steps - After selecting the language you want to work in ( English for example ) - The search system menu will appear - Select Magnetometer Search system - After Selecting This system, the search screen will appear - Point the device to the ground if the device start to make a sound you must calibrate the device with the ground by pressing on the...
- Page 32 Magnetometer System : Operation Steps - After you finish the calibration , start the search by moving the device forward and back against the ground When the device detect a target, it will start to make a sound. In addition, the indicator will start to move to alert you that the device find the target.
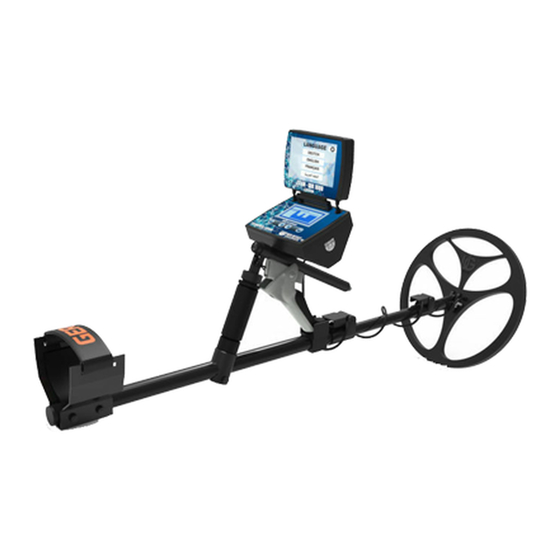
- Page 33 Ionic Search System : Operation Steps Pulse Indection System : Operation Steps 5 - The Pulse Indection System This system specializes to cover the area under the coil directly and locate the target up to depths of 12 meters below the surface of the ground This system allow you to discriminate between metals and you can see the target in 3D shapes on the tablet...
- Page 34 Ionic Search System : Operation Steps Pulse Indection System : Operation Steps Connect The Pulse Indection Parts To The Device 1 - Connect The Coil Cable To The Device. 2 - Start The Device By Pressing On The Power Switch (on - off) 3 - Press on start button under the screen Note : before turning on the device...
- Page 35 Pulse Indection System : Operation Steps - Select the device language from the list of languages - Move between languages through the navigation keys (up and down) - After selecting the language the device will open to the normal search mode - First you have to calibrate the device with the ground when the letters appear on the screen which means ground Balance - You can calibrate by pressing the...
- Page 36 Pulse Indection System : Operation Steps Hold the device as follow And start calibration Start the search by moving the device right and left in stable movement and close to the ground. The coil should be above the ground between 5 TO 10 CM...
- Page 37 Pulse Indection System : Operation Steps The device work on three modes 1- Normal search mode : This mode can detect all kind of metals 2- Discrimination search mode : This mode can discriminate between ferrous metal and non-ferrous metals 3- Cavity search mode : This mode can detect all cavities under the ground (Natural cavities –...
- Page 38 Pulse Indection System : Operation Steps 1- Start with the normal search mode İn case the device detect any metal an indicator will appear on the screen and you will start to hear sound conforming the target is exist After detecting a target, conform the target from for direction. NORTH TO SOUTH SOUTH TO NORTH EAST TO WEST...
- Page 39 Pulse Indection System : Operation Steps 2- The descremination mode : it can Separatebetween metals as follow Ferrous for : Iron and its derivatives Non ferrous for : Gold – silver – bronze – copper–Aluminum – tin ..etc To conform the target type scan the target from four directions NORTH TO SOUTH SOUTH TO NORTH EAST TO WEST...
- Page 40 Pulse Indection System : Operation Steps In the cavity search mode start your scan in stable motion to determine the shape of the cavity..Thanks for choosing our products ..We wish you the best of luck in your searching ..
Need help?
Do you have a question about the Titan Ger 1000 and is the answer not in the manual?
Questions and answers